Cirkit Designer Logo
Cirkit Designer
Your all-in-one circuit design IDE
Home / 
Component Documentation

How to Use antenna: Examples, Pinouts, and Specs

Image of antenna
Cirkit Designer LogoDesign with antenna in Cirkit Designer

Introduction

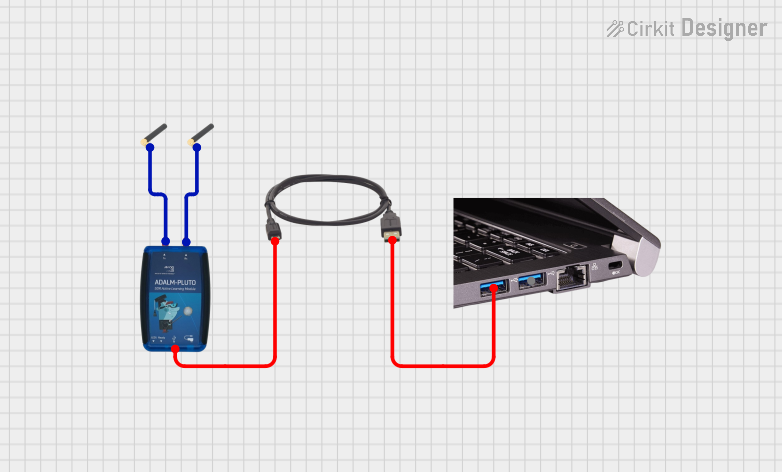
An antenna is a device that converts electrical energy into radio waves and vice versa. It is a critical component in wireless communication systems, enabling the transmission and reception of signals over the air. Antennas are used in a wide range of applications, including radio broadcasting, television, mobile communication, Wi-Fi, satellite communication, and radar systems. Their design and functionality vary depending on the frequency range, application, and desired performance.

Explore Projects Built with antenna

Use Cirkit Designer to design, explore, and prototype these projects online. Some projects support real-time simulation. Click "Open Project" to start designing instantly!
Arduino-Based Wireless Power Transmission System with Copper Coils
Image of nagesh: A project utilizing antenna in a practical application
This circuit consists of multiple copper coils connected to transmitters and a receiver, likely forming a wireless power transfer or communication system. The transmitters are connected to individual coils, and the receiver is connected to another coil, facilitating the transmission and reception of signals or power wirelessly.
Cirkit Designer LogoOpen Project in Cirkit Designer
Satellite Compass and Network-Integrated GPS Data Processing System
Image of GPS 시스템 측정 구성도_241016: A project utilizing antenna in a practical application
This circuit comprises a satellite compass, a mini PC, two GPS antennas, power supplies, a network switch, media converters, and an atomic rubidium clock. The satellite compass is powered by a triple output DC power supply and interfaces with an RS232 splitter for 1PPS signals. The mini PCs are connected to the USRP B200 devices via USB for data and power, and to media converters via Ethernet, which in turn connect to a network switch using fiber optic links. The antennas are connected to the USRP B200s through RF directional couplers, and the atomic clock provides a 1PPS input to the RS232 splitter.
Cirkit Designer LogoOpen Project in Cirkit Designer
Laptop-Connected Adalm Pluto SDR with Dual Antennas
Image of Zidan Project: A project utilizing antenna in a practical application
This circuit connects an Adalm Pluto Software Defined Radio (SDR) to a laptop via a Type-B to USB cable, allowing the laptop to control the SDR and process signals. Additionally, two antennas are connected to the Adalm Pluto SDR, which are likely used for transmitting and receiving radio signals as part of the SDR's functionality.
Cirkit Designer LogoOpen Project in Cirkit Designer
Satellite-Based Timing and Navigation System with SDR and Atomic Clock Synchronization
Image of GPS 시스템 측정 구성도_Confirm: A project utilizing antenna in a practical application
This circuit appears to be a complex system involving power supply management, GPS and timing synchronization, and data communication. It includes a SI-TEX G1 Satellite Compass for GPS data, an XHTF1021 Atomic Rubidium Clock for precise timing, and Ettus USRP B200 units for software-defined radio communication. Power is supplied through various SMPS units and distributed via terminal blocks and DC jacks. Data communication is facilitated by Beelink MINI S12 N95 computers, RS232 splitters, and a 1000BASE-T Media Converter for network connectivity. RF Directional Couplers are used to interface antennas with the USRP units, and the entire system is likely contained within cases for protection and organization.
Cirkit Designer LogoOpen Project in Cirkit Designer

Explore Projects Built with antenna

Use Cirkit Designer to design, explore, and prototype these projects online. Some projects support real-time simulation. Click "Open Project" to start designing instantly!
Image of nagesh: A project utilizing antenna in a practical application
Arduino-Based Wireless Power Transmission System with Copper Coils
This circuit consists of multiple copper coils connected to transmitters and a receiver, likely forming a wireless power transfer or communication system. The transmitters are connected to individual coils, and the receiver is connected to another coil, facilitating the transmission and reception of signals or power wirelessly.
Cirkit Designer LogoOpen Project in Cirkit Designer
Image of GPS 시스템 측정 구성도_241016: A project utilizing antenna in a practical application
Satellite Compass and Network-Integrated GPS Data Processing System
This circuit comprises a satellite compass, a mini PC, two GPS antennas, power supplies, a network switch, media converters, and an atomic rubidium clock. The satellite compass is powered by a triple output DC power supply and interfaces with an RS232 splitter for 1PPS signals. The mini PCs are connected to the USRP B200 devices via USB for data and power, and to media converters via Ethernet, which in turn connect to a network switch using fiber optic links. The antennas are connected to the USRP B200s through RF directional couplers, and the atomic clock provides a 1PPS input to the RS232 splitter.
Cirkit Designer LogoOpen Project in Cirkit Designer
Image of Zidan Project: A project utilizing antenna in a practical application
Laptop-Connected Adalm Pluto SDR with Dual Antennas
This circuit connects an Adalm Pluto Software Defined Radio (SDR) to a laptop via a Type-B to USB cable, allowing the laptop to control the SDR and process signals. Additionally, two antennas are connected to the Adalm Pluto SDR, which are likely used for transmitting and receiving radio signals as part of the SDR's functionality.
Cirkit Designer LogoOpen Project in Cirkit Designer
Image of GPS 시스템 측정 구성도_Confirm: A project utilizing antenna in a practical application
Satellite-Based Timing and Navigation System with SDR and Atomic Clock Synchronization
This circuit appears to be a complex system involving power supply management, GPS and timing synchronization, and data communication. It includes a SI-TEX G1 Satellite Compass for GPS data, an XHTF1021 Atomic Rubidium Clock for precise timing, and Ettus USRP B200 units for software-defined radio communication. Power is supplied through various SMPS units and distributed via terminal blocks and DC jacks. Data communication is facilitated by Beelink MINI S12 N95 computers, RS232 splitters, and a 1000BASE-T Media Converter for network connectivity. RF Directional Couplers are used to interface antennas with the USRP units, and the entire system is likely contained within cases for protection and organization.
Cirkit Designer LogoOpen Project in Cirkit Designer

Technical Specifications

The technical specifications of an antenna depend on its type and intended use. Below are general parameters that define an antenna's performance:

  • Frequency Range: The range of frequencies the antenna is designed to operate within.
  • Gain: A measure of the antenna's ability to direct radio waves in a specific direction, expressed in dBi.
  • Impedance: Typically 50 ohms or 75 ohms, matching the transmission line or device.
  • Polarization: The orientation of the electric field of the radio wave (e.g., linear, circular).
  • VSWR (Voltage Standing Wave Ratio): Indicates how efficiently power is transmitted between the antenna and the connected device.
  • Radiation Pattern: The spatial distribution of radiated energy.
  • Power Handling: The maximum power the antenna can handle without damage.

Example Pin Configuration (for antennas with connectors)

Some antennas come with connectors for interfacing with devices. Below is an example table for an SMA connector:

Pin/Connector Description
Center Pin Signal (RF input/output)
Outer Shield Ground (reference for RF signal)

For PCB antennas or integrated antennas, the pin configuration may include solder pads for RF signal and ground.

Usage Instructions

How to Use the Antenna in a Circuit

  1. Select the Appropriate Antenna: Choose an antenna that matches the frequency range and impedance of your system.
  2. Connect the Antenna:
    • For external antennas, use a compatible connector (e.g., SMA, U.FL).
    • For PCB antennas, solder the RF signal and ground pads to the circuit board.
  3. Match Impedance: Ensure the antenna's impedance matches the transmission line or device (e.g., 50 ohms). Use a matching network if necessary.
  4. Position the Antenna:
    • Place the antenna in a location with minimal obstructions for optimal performance.
    • Maintain a safe distance from metal objects to avoid interference.
  5. Test the System: Verify the antenna's performance using tools like a network analyzer or spectrum analyzer.

Important Considerations and Best Practices

  • Avoid Physical Obstructions: Keep the antenna away from large metal objects or enclosures that can block or reflect signals.
  • Use Proper Grounding: Ensure the antenna is properly grounded to reduce noise and improve signal quality.
  • Follow Regulatory Guidelines: Adhere to local regulations regarding antenna power and frequency usage.
  • Minimize Cable Loss: Use high-quality, low-loss cables for connecting the antenna to the device.

Example: Using an Antenna with an Arduino UNO

If you are using an antenna with a wireless module (e.g., ESP8266 or NRF24L01) connected to an Arduino UNO, follow these steps:

  1. Connect the wireless module to the Arduino UNO as per the module's pinout.
  2. Attach the antenna to the module's antenna connector.
  3. Upload the following example code to the Arduino UNO to send or receive data:
#include <SPI.h>
#include <nRF24L01.h>
#include <RF24.h>

// Define the CE and CSN pins for the NRF24L01 module
#define CE_PIN 9
#define CSN_PIN 10

// Create an RF24 object
RF24 radio(CE_PIN, CSN_PIN);

// Define the address for communication
const byte address[6] = "00001";

void setup() {
  Serial.begin(9600); // Initialize serial communication
  radio.begin();      // Initialize the RF24 module
  radio.openWritingPipe(address); // Set the address for transmission
  radio.setPALevel(RF24_PA_HIGH); // Set power level
  radio.stopListening();          // Set module to transmit mode
}

void loop() {
  const char text[] = "Hello, World!"; // Message to send
  bool success = radio.write(&text, sizeof(text)); // Send the message

  if (success) {
    Serial.println("Message sent successfully!");
  } else {
    Serial.println("Message failed to send.");
  }

  delay(1000); // Wait 1 second before sending the next message
}

Note: Replace the NRF24L01 module with the appropriate wireless module for your application. Ensure the antenna is securely connected to the module.

Troubleshooting and FAQs

Common Issues

  1. Weak Signal or No Signal:

    • Cause: Poor antenna placement or obstructions.
    • Solution: Reposition the antenna to a higher or more open location.
  2. High VSWR:

    • Cause: Impedance mismatch between the antenna and the device.
    • Solution: Use a matching network or adjust the antenna length.
  3. Interference:

    • Cause: Nearby devices operating on the same frequency.
    • Solution: Change the operating frequency or use shielding.
  4. Antenna Not Detected:

    • Cause: Loose or improper connection.
    • Solution: Check and secure all connections.

FAQs

  • Q: Can I use any antenna with my device?
    A: No, the antenna must match the frequency range and impedance of your device.

  • Q: How do I test an antenna's performance?
    A: Use a network analyzer to measure parameters like VSWR, gain, and radiation pattern.

  • Q: Can I extend the antenna cable?
    A: Yes, but use low-loss cables to minimize signal degradation.

  • Q: What is the difference between omnidirectional and directional antennas?
    A: Omnidirectional antennas radiate signals in all directions, while directional antennas focus signals in a specific direction for greater range.

By following this documentation, you can effectively integrate and troubleshoot antennas in your wireless communication projects.