How to Use Humidifier: Examples, Pinouts, and Specs
Introduction
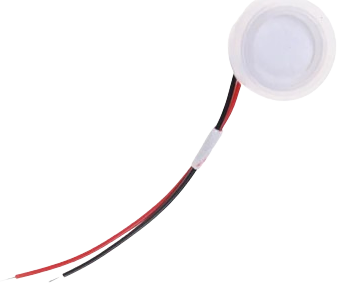
A humidifier module is an electronic component designed to increase the humidity levels in the air. This device is commonly used in residential and commercial settings to alleviate dry air symptoms, which can include dry skin, irritation in the respiratory tract, and discomfort during breathing. It's also used to preserve materials that require a certain level of humidity, such as wooden musical instruments and paper products.
Explore Projects Built with Humidifier
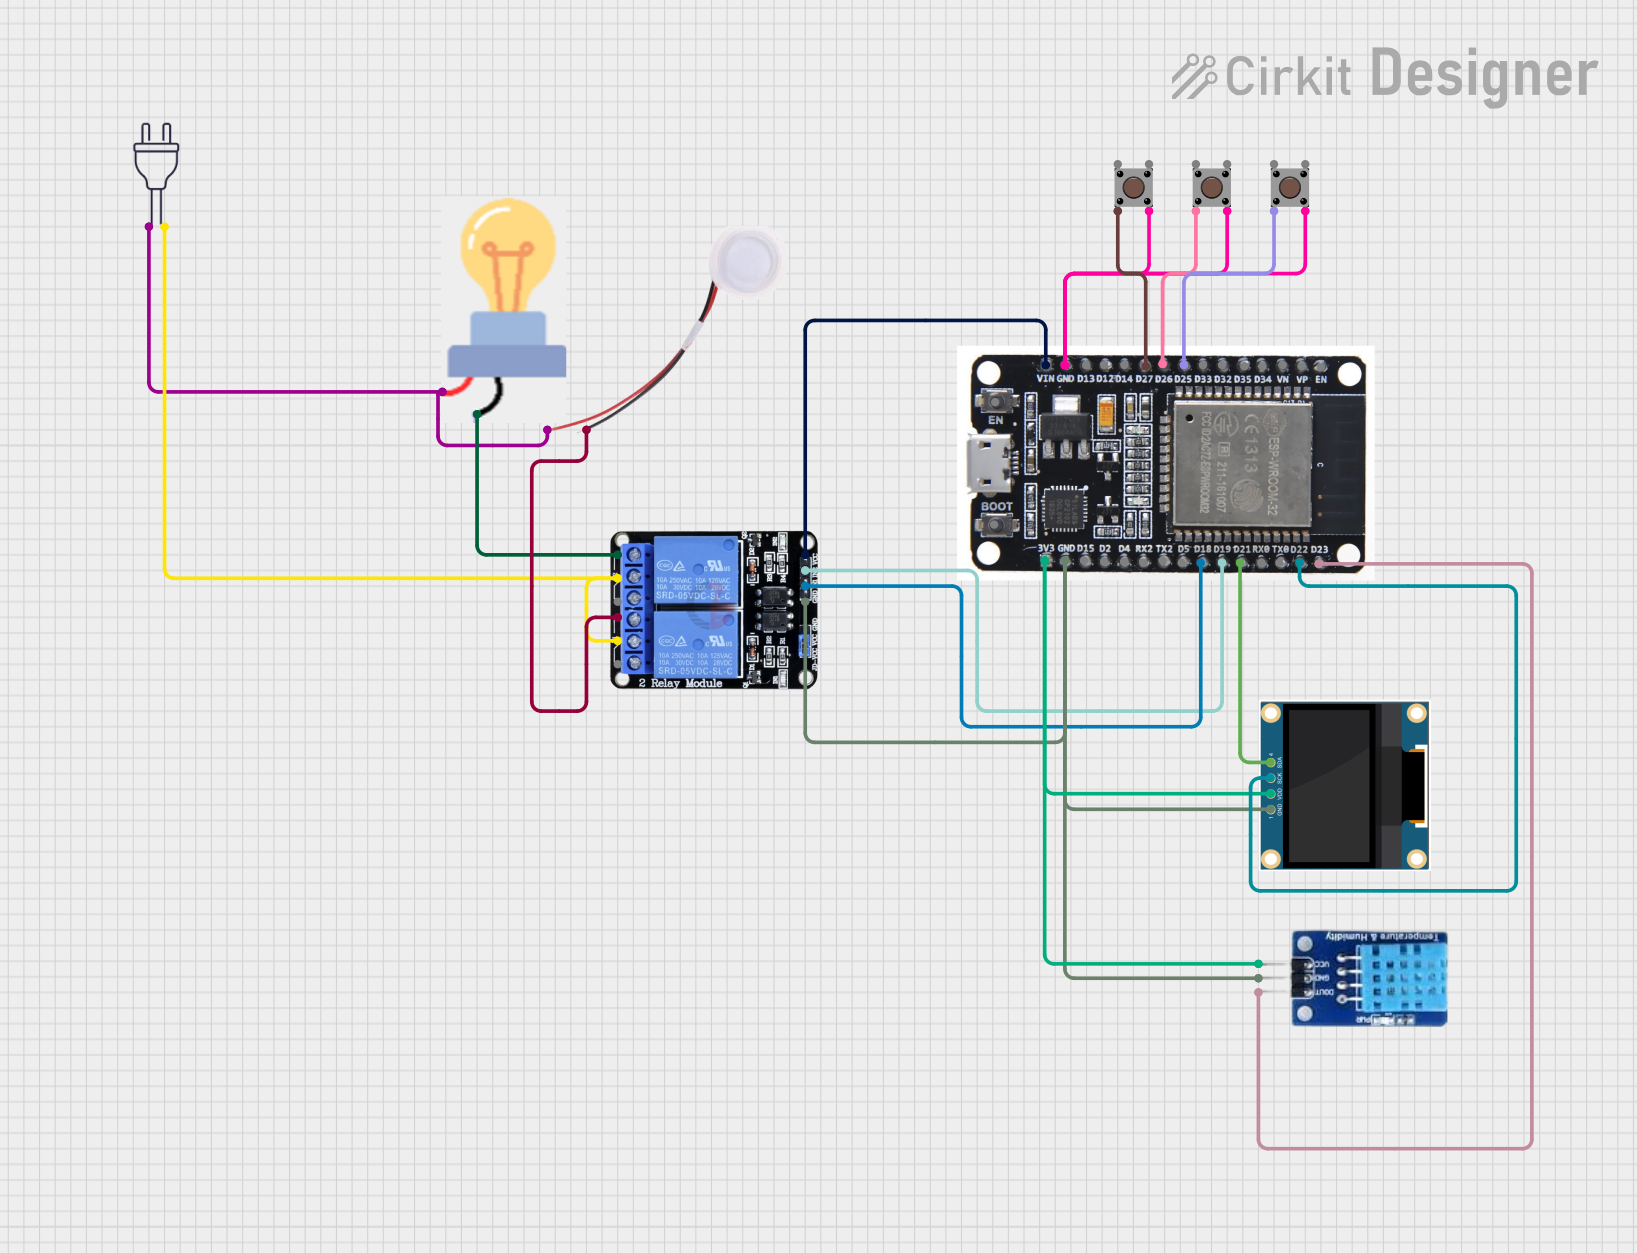
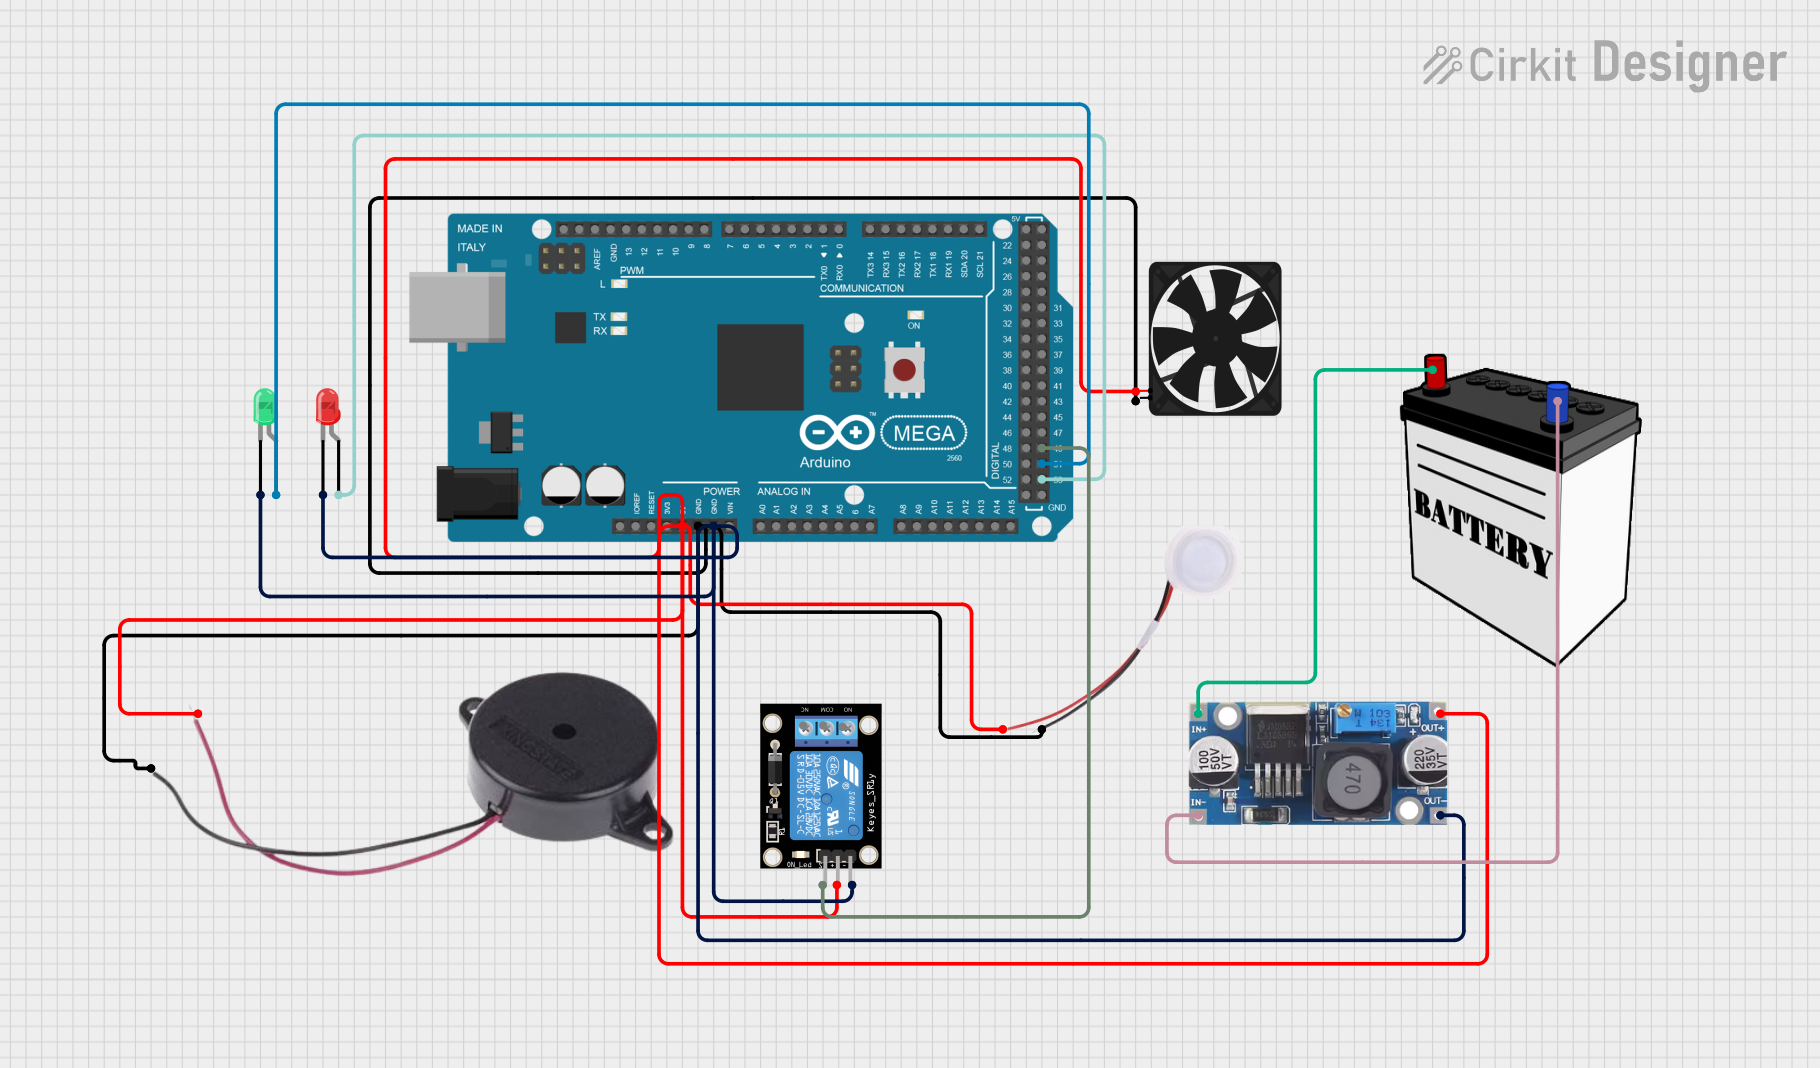
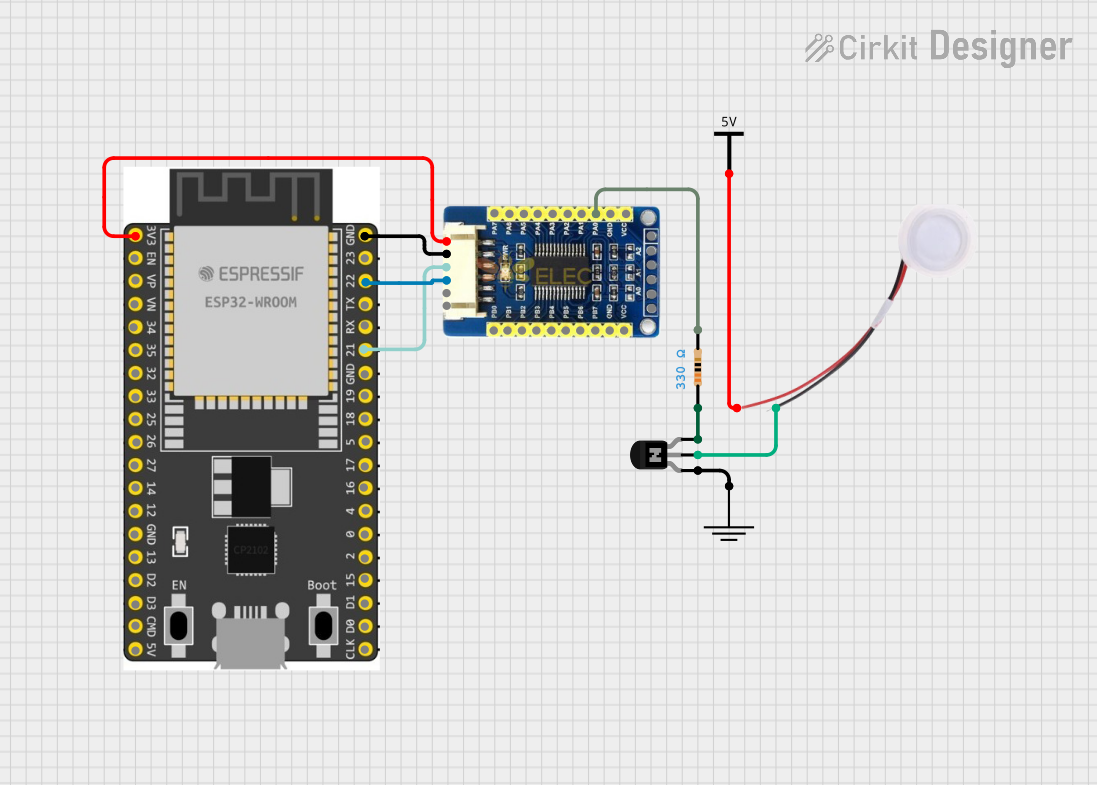
Explore Projects Built with Humidifier
Common Applications and Use Cases
- Healthcare: Improving air quality for patients with respiratory issues.
- Home Use: Maintaining comfortable humidity levels, especially in dry climates or during winter.
- Industrial: Preserving the integrity of humidity-sensitive products during manufacturing and storage.
- Agriculture: Ensuring optimal humidity for plant growth in greenhouses.
Technical Specifications
Key Technical Details
| Specification | Value/Description |
|---|---|
| Operating Voltage | 5V - 12V DC |
| Power Consumption | 2W - 10W |
| Humidity Range | 20% - 90% RH |
| Operating Temperature | 0°C - 40°C |
| Output | Analog/Digital (depending on model) |
Pin Configuration and Descriptions
| Pin Number | Name | Description |
|---|---|---|
| 1 | VCC | Connect to positive voltage supply (5V - 12V DC) |
| 2 | GND | Connect to ground |
| 3 | SIG | Signal output (analog or digital) |
| 4 | NC | No connection (reserved for future use) |
Usage Instructions
How to Use the Component in a Circuit
- Power Supply: Connect the VCC pin to a power supply within the specified voltage range and the GND pin to the common ground in your circuit.
- Signal Output: Connect the SIG pin to an analog or digital input on your control system (e.g., Arduino, Raspberry Pi) to monitor the humidity levels.
- Mounting: Place the humidifier module in the area where humidity control is needed, ensuring it has adequate space for air circulation.
Important Considerations and Best Practices
- Voltage Compliance: Ensure that the power supply does not exceed the maximum voltage rating to prevent damage.
- Waterproofing: If the module is not waterproof, take precautions to prevent direct contact with water.
- Cleaning: Regularly clean the humidifier to prevent mold and bacteria growth.
- Calibration: Calibrate the sensor as needed to maintain accurate humidity readings.
Example Code for Arduino UNO
// Humidifier control example for Arduino UNO
int humidifierPin = 2; // Digital pin connected to the humidifier module

void setup() {
  pinMode(humidifierPin, OUTPUT); // Set the humidifier pin as an output
  Serial.begin(9600); // Start serial communication at 9600 baud
}

void loop() {
  // Example: Turn on the humidifier when the room is too dry
  int humidity = readHumidity(); // Replace with actual humidity reading function
  if (humidity < 40) { // Assuming 40% is the minimum desired humidity
    digitalWrite(humidifierPin, HIGH); // Turn on the humidifier
    Serial.println("Humidifier ON");
  } else {
    digitalWrite(humidifierPin, LOW); // Turn off the humidifier
    Serial.println("Humidifier OFF");
  }
  delay(1000); // Wait for 1 second before checking again
}

int readHumidity() {
  // Placeholder function for reading humidity
  // Replace with actual code to read humidity from a sensor
  return analogRead(A0); // Reading from analog pin A0
}
Troubleshooting and FAQs
Common Issues Users Might Face
- Humidifier Not Turning On: Check the power supply and connections to ensure they are secure and within the specified voltage range.
- Inaccurate Humidity Readings: Verify the calibration of the humidity sensor and replace it if necessary.
- No Mist Output: Ensure there is enough water in the humidifier and that the water tank is not blocked.
Solutions and Tips for Troubleshooting
- Power Issues: Use a multimeter to check the voltage at the VCC and GND pins.
- Sensor Calibration: Follow the manufacturer's instructions to recalibrate the humidity sensor.
- Regular Maintenance: Clean the humidifier regularly and replace any consumable parts as recommended by the manufacturer.
FAQs
Q: Can I use the humidifier module with a 5V USB power supply? A: Yes, if the module's operating voltage starts at 5V, it can be powered by a standard USB power supply.
Q: How often should I clean the humidifier module? A: It's recommended to clean the module at least once every two weeks, or more frequently if used continuously.
Q: What should I do if the humidifier module is not increasing the humidity as expected? A: Check for leaks, ensure the water tank is full, and verify that the module is functioning correctly. If the issue persists, consider using a larger capacity humidifier or multiple modules for larger spaces.