Cirkit Designer Logo
Cirkit Designer
Your all-in-one circuit design IDE
Home / 
Component Documentation

How to Use 12978-alligator_clip_cable_half-green: Examples, Pinouts, and Specs

Image of 12978-alligator_clip_cable_half-green
Cirkit Designer LogoDesign with 12978-alligator_clip_cable_half-green in Cirkit Designer

Introduction

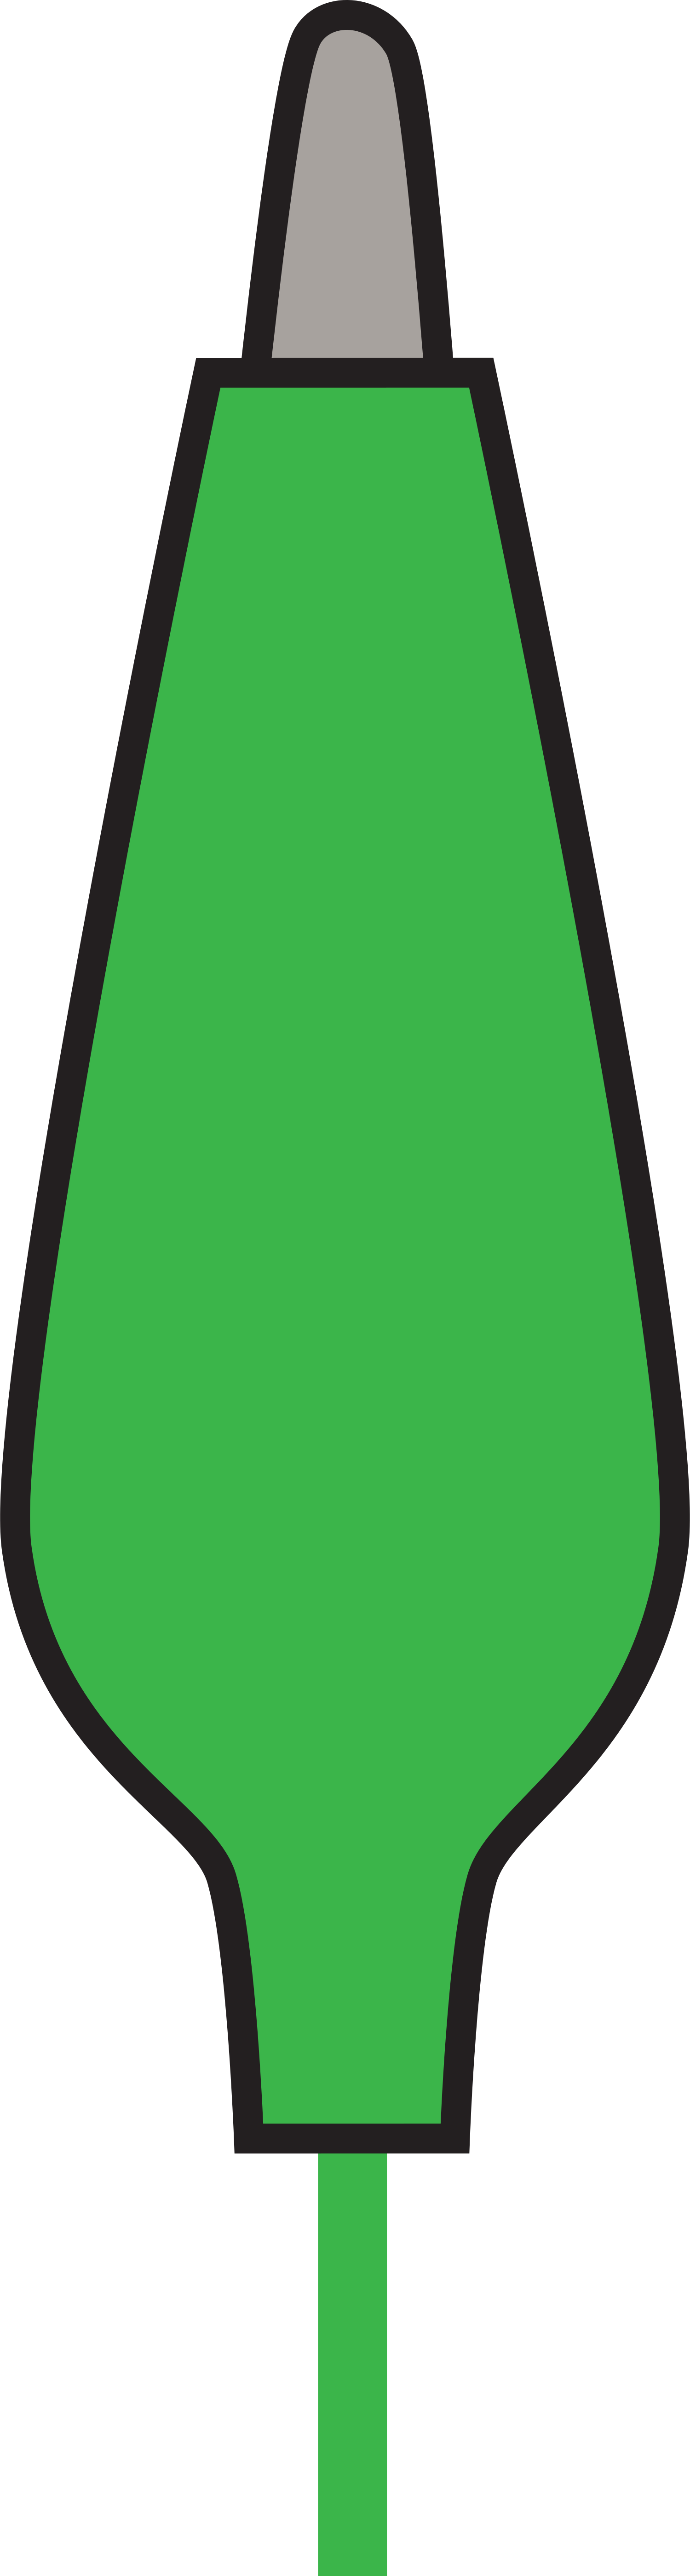
The 12978-alligator_clip_cable_half-green is a versatile and easy-to-use component for making temporary electrical connections. This half-length alligator clip cable is encased in a green sheath, indicating its color-coding for easy identification in multi-wire setups. It is commonly used in prototyping, testing, and educational settings where quick and reliable connections are required.

Explore Projects Built with 12978-alligator_clip_cable_half-green

Use Cirkit Designer to design, explore, and prototype these projects online. Some projects support real-time simulation. Click "Open Project" to start designing instantly!
Battery-Powered ESP32 Data Logger with Oscilloscope Monitoring
Image of electromiografia: A project utilizing 12978-alligator_clip_cable_half-green in a practical application
This circuit features an ESP32 microcontroller powered by a 7V battery, with its ground connected to a common ground. The ESP32's D35 pin is monitored by a mixed signal oscilloscope, and an alligator clip cable is used to connect the oscilloscope's second channel to the common ground.
Cirkit Designer LogoOpen Project in Cirkit Designer
Arduino UNO Controlled LED and Servo Circuit
Image of Project 1: A project utilizing 12978-alligator_clip_cable_half-green in a practical application
This circuit features an Arduino UNO controlling two green LEDs and a servo motor. The LEDs are connected through 220-ohm resistors to digital pins for control, and the servo is powered by the Arduino's 5V output with control via pin D8. A pushbutton is also included, likely for user interaction, but the Arduino code provided does not yet define the interactions or control logic.
Cirkit Designer LogoOpen Project in Cirkit Designer
ESP32 and Logic Level Converter-Based Wi-Fi Controlled Interface
Image of Toshiba AC ESP32 devkit v1: A project utilizing 12978-alligator_clip_cable_half-green in a practical application
This circuit features an ESP32 Devkit V1 microcontroller connected to a Bi-Directional Logic Level Converter, which facilitates voltage level shifting between the ESP32 and external components. The ESP32 is powered through its VIN pin via an alligator clip cable, and the logic level converter is connected to various pins on the ESP32 to manage different voltage levels for communication.
Cirkit Designer LogoOpen Project in Cirkit Designer
Arduino UNO Based Bioamplifier with LED Indicator
Image of BCI: A project utilizing 12978-alligator_clip_cable_half-green in a practical application
This circuit is designed to interface a bioamplifier (bioampexgpill) with an Arduino UNO for biopotential signal acquisition. The bioamplifier's output is connected to the Arduino's analog input A0 for signal processing, while the electrodes are connected via alligator clip cables for capturing biopotential signals. Additionally, there is a green LED connected to digital pin D7 of the Arduino, with its cathode grounded, which could be used for status indication or debugging purposes.
Cirkit Designer LogoOpen Project in Cirkit Designer

Explore Projects Built with 12978-alligator_clip_cable_half-green

Use Cirkit Designer to design, explore, and prototype these projects online. Some projects support real-time simulation. Click "Open Project" to start designing instantly!
Image of electromiografia: A project utilizing 12978-alligator_clip_cable_half-green in a practical application
Battery-Powered ESP32 Data Logger with Oscilloscope Monitoring
This circuit features an ESP32 microcontroller powered by a 7V battery, with its ground connected to a common ground. The ESP32's D35 pin is monitored by a mixed signal oscilloscope, and an alligator clip cable is used to connect the oscilloscope's second channel to the common ground.
Cirkit Designer LogoOpen Project in Cirkit Designer
Image of Project 1: A project utilizing 12978-alligator_clip_cable_half-green in a practical application
Arduino UNO Controlled LED and Servo Circuit
This circuit features an Arduino UNO controlling two green LEDs and a servo motor. The LEDs are connected through 220-ohm resistors to digital pins for control, and the servo is powered by the Arduino's 5V output with control via pin D8. A pushbutton is also included, likely for user interaction, but the Arduino code provided does not yet define the interactions or control logic.
Cirkit Designer LogoOpen Project in Cirkit Designer
Image of Toshiba AC ESP32 devkit v1: A project utilizing 12978-alligator_clip_cable_half-green in a practical application
ESP32 and Logic Level Converter-Based Wi-Fi Controlled Interface
This circuit features an ESP32 Devkit V1 microcontroller connected to a Bi-Directional Logic Level Converter, which facilitates voltage level shifting between the ESP32 and external components. The ESP32 is powered through its VIN pin via an alligator clip cable, and the logic level converter is connected to various pins on the ESP32 to manage different voltage levels for communication.
Cirkit Designer LogoOpen Project in Cirkit Designer
Image of BCI: A project utilizing 12978-alligator_clip_cable_half-green in a practical application
Arduino UNO Based Bioamplifier with LED Indicator
This circuit is designed to interface a bioamplifier (bioampexgpill) with an Arduino UNO for biopotential signal acquisition. The bioamplifier's output is connected to the Arduino's analog input A0 for signal processing, while the electrodes are connected via alligator clip cables for capturing biopotential signals. Additionally, there is a green LED connected to digital pin D7 of the Arduino, with its cathode grounded, which could be used for status indication or debugging purposes.
Cirkit Designer LogoOpen Project in Cirkit Designer

Common Applications and Use Cases

  • Prototyping circuits on breadboards or other temporary setups
  • Connecting components during electrical testing
  • Educational purposes in classrooms and labs
  • Quick repairs or temporary fixes in electronic devices

Technical Specifications

The 12978-alligator_clip_cable_half-green is designed for low voltage and current applications. Below are the key technical details:

Specification Detail
Cable Length Half-length (specifics needed)
Voltage Rating Low voltage (specifics needed)
Current Rating Low current (specifics needed)
Connection Type Alligator clip
Insulation Material PVC
Insulation Color Green
Jaw Opening Approx. 8mm

Note: Exact voltage and current ratings, as well as the precise length of the cable, should be specified by the manufacturer.

Usage Instructions

How to Use the Component in a Circuit

  1. Ensure that the power supply to the circuit is turned off before making connections.
  2. Open the alligator clip by pressing the tail to separate the jaws.
  3. Attach the alligator clip to the desired component lead, wire, or terminal. Ensure a firm grip for a stable connection.
  4. Connect the other end of the cable to another alligator clip or a terminal in your circuit.
  5. Once all connections are made, power can be safely applied to the circuit.

Important Considerations and Best Practices

  • Do not exceed the voltage and current ratings of the alligator clip cable to prevent damage or unsafe conditions.
  • Use color-coding to your advantage; green cables can be designated for specific signals or ground connections to avoid confusion.
  • Inspect the alligator clips for any damage or corrosion before use. Damaged clips may result in poor connections or short circuits.
  • When working with sensitive electronics, ensure that you are grounded to prevent electrostatic discharge (ESD) damage.

Troubleshooting and FAQs

Common Issues Users Might Face

  • Intermittent Connections: If the connection is unreliable, check that the alligator clip is firmly attached and that there is no dirt or oxidation on the contact surfaces.
  • Short Circuits: Ensure that the alligator clips are not touching each other or any unintended parts of the circuit.

Solutions and Tips for Troubleshooting

  • Clean the alligator clip jaws with a mild solvent if oxidation or dirt is present.
  • If the cable does not hold its connection well, inspect the spring tension in the clip. If it's too loose, the clip may need to be replaced.
  • For insulation wear or damage, use electrical tape to cover exposed areas as a temporary fix.

FAQs

Q: Can I use the 12978-alligator_clip_cable_half-green for high-power applications?

A: No, this alligator clip cable is designed for low voltage and current applications. Check the manufacturer's specifications for exact ratings.

Q: How do I prevent the alligator clips from slipping off the terminals?

A: Ensure that the clip's jaws are clean and have adequate spring tension. Place the jaws squarely onto the terminal for a secure grip.

Q: Is it safe to use multiple alligator clip cables in close proximity?

A: Yes, but ensure that the clips do not touch each other to prevent short circuits. Use the color-coding to help maintain clear connections.

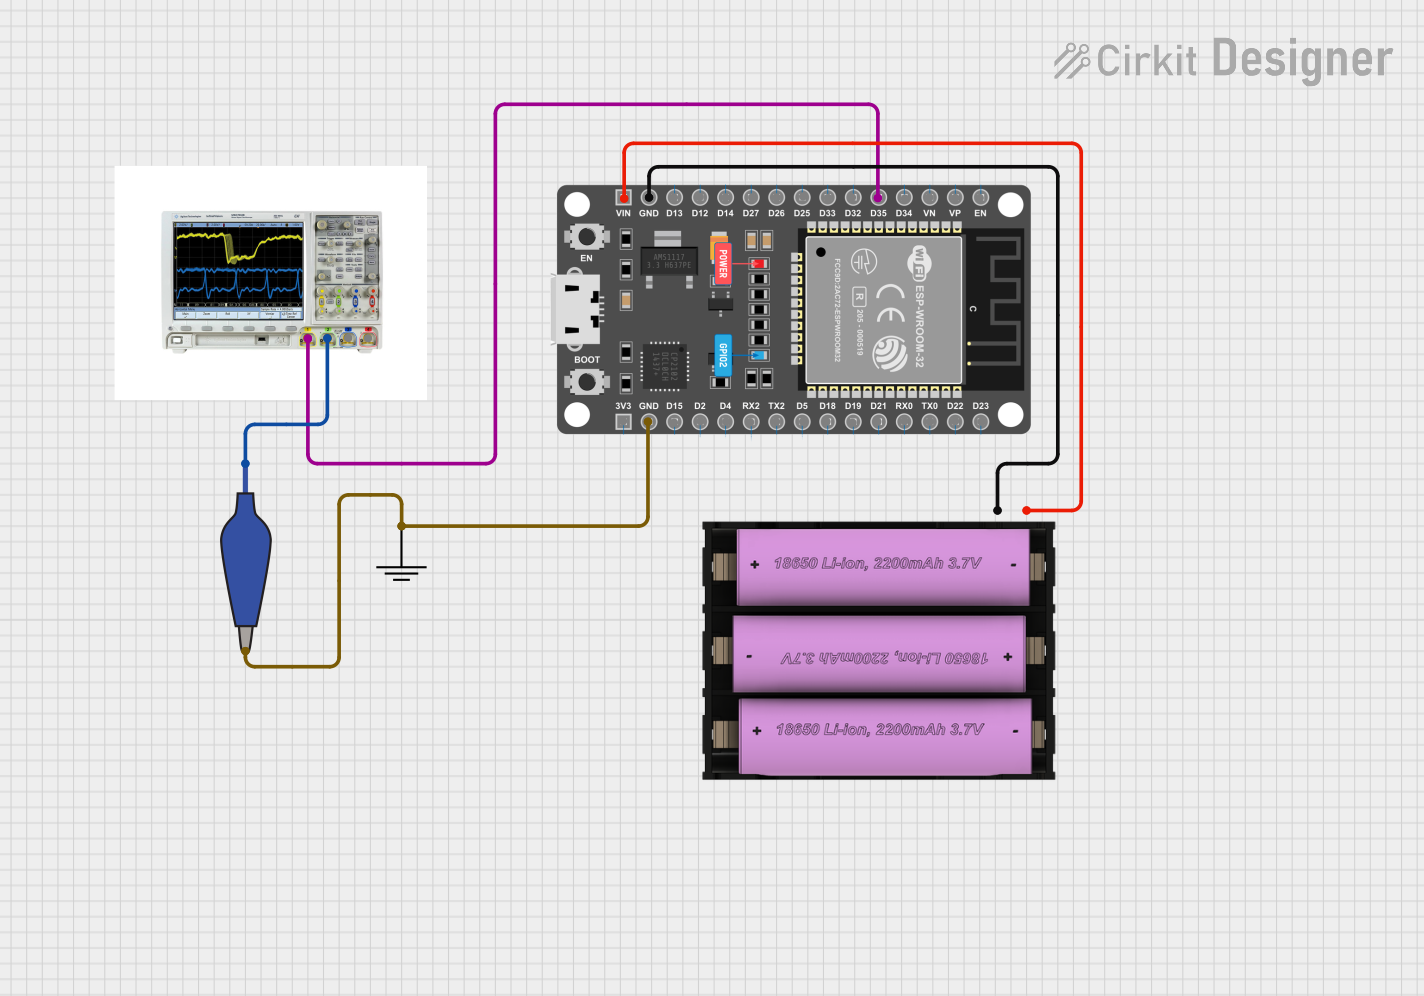
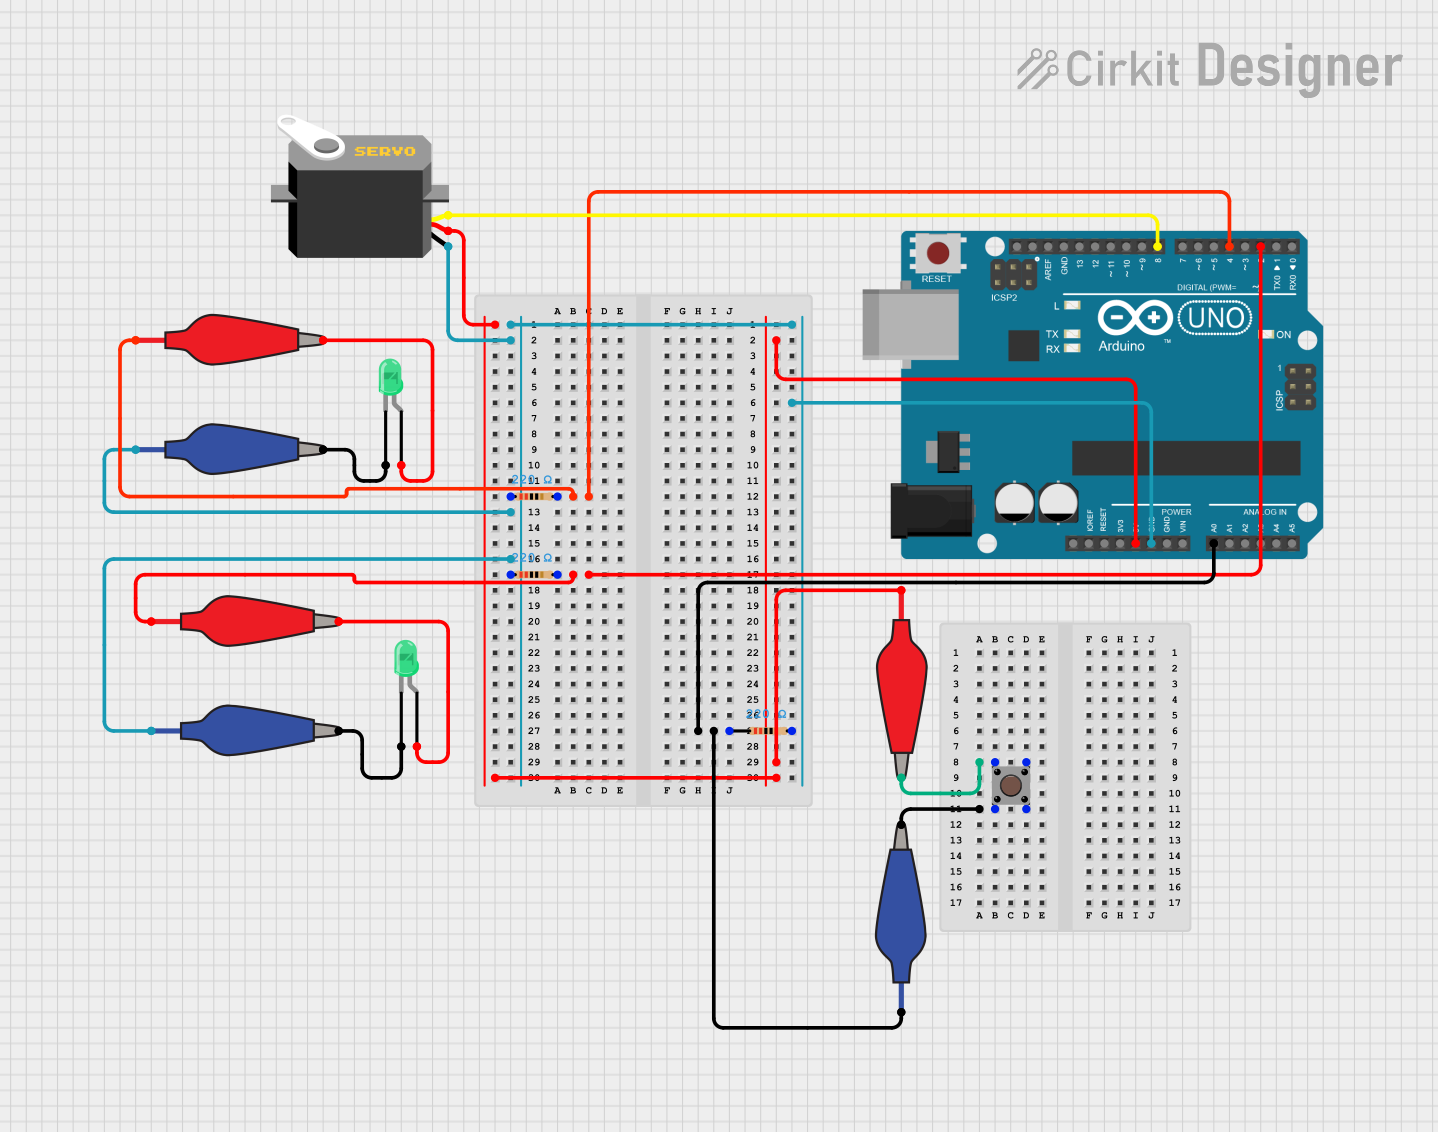
Example Code for Arduino UNO Connection

// Example code to demonstrate the use of 12978-alligator_clip_cable_half-green
// with an Arduino UNO. This code assumes the alligator clip is connected to a
// pushbutton that is used to turn on an LED.

const int buttonPin = 2; // Pin connected to the button via alligator clip
const int ledPin = 13;   // Built-in LED pin on Arduino UNO

void setup() {
  pinMode(buttonPin, INPUT_PULLUP); // Set button pin as input with internal pull-up
  pinMode(ledPin, OUTPUT);         // Set LED pin as output
}

void loop() {
  int buttonState = digitalRead(buttonPin); // Read the button state
  if (buttonState == LOW) {                // If button is pressed (LOW is due to pull-up)
    digitalWrite(ledPin, HIGH);            // Turn on the LED
  } else {
    digitalWrite(ledPin, LOW);             // Turn off the LED
  }
}

Note: The above code is a simple example to illustrate the use of the alligator clip cable with an Arduino UNO. The actual implementation may vary based on the specific application and circuit design.