Cirkit Designer Logo
Cirkit Designer
Your all-in-one circuit design IDE
Home / 
Component Documentation

How to Use Adafruit 1.2 Inch 8x8 LED Matrix Backpack - Pure Green: Examples, Pinouts, and Specs
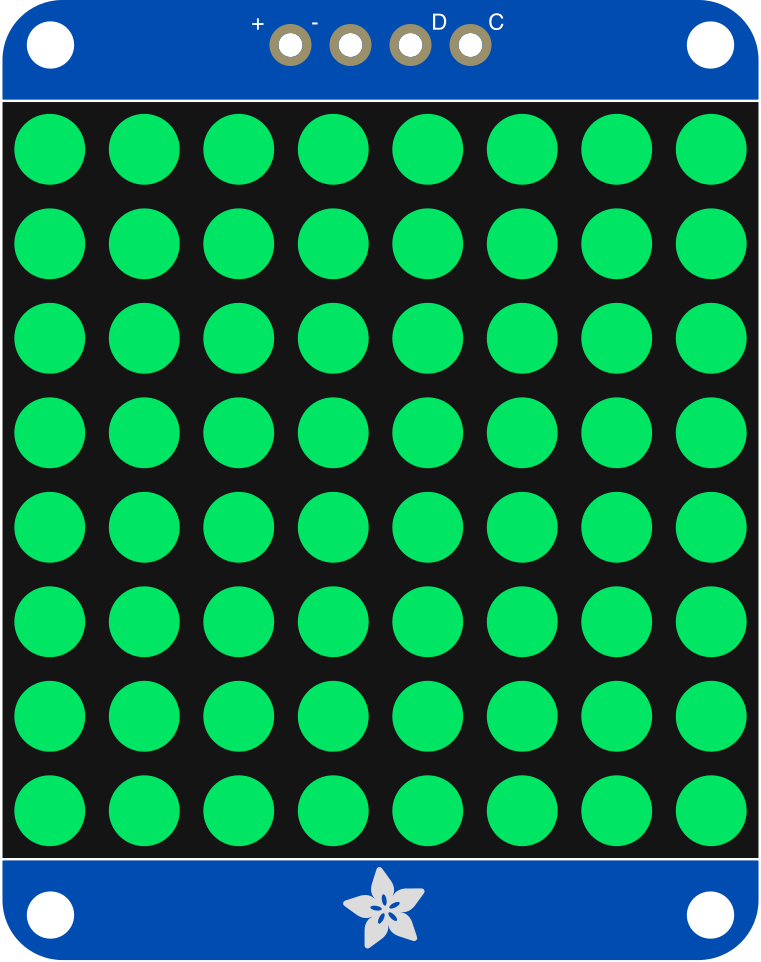

Image of Adafruit 1.2 Inch 8x8 LED Matrix Backpack - Pure Green
Cirkit Designer LogoDesign with Adafruit 1.2 Inch 8x8 LED Matrix Backpack - Pure Green in Cirkit Designer

Introduction

The Adafruit 1.2 Inch 8x8 LED Matrix Backpack (Part ID: 1632) is a compact display module featuring an 8x8 grid of pure green LEDs. This module is designed for easy integration with microcontrollers, thanks to its built-in backpack that simplifies wiring and control. The matrix is ideal for projects requiring visual output, such as displaying text, animations, or status indicators.

Explore Projects Built with Adafruit 1.2 Inch 8x8 LED Matrix Backpack - Pure Green
Use Cirkit Designer to design, explore, and prototype these projects online. Some projects support real-time simulation. Click "Open Project" to start designing instantly!
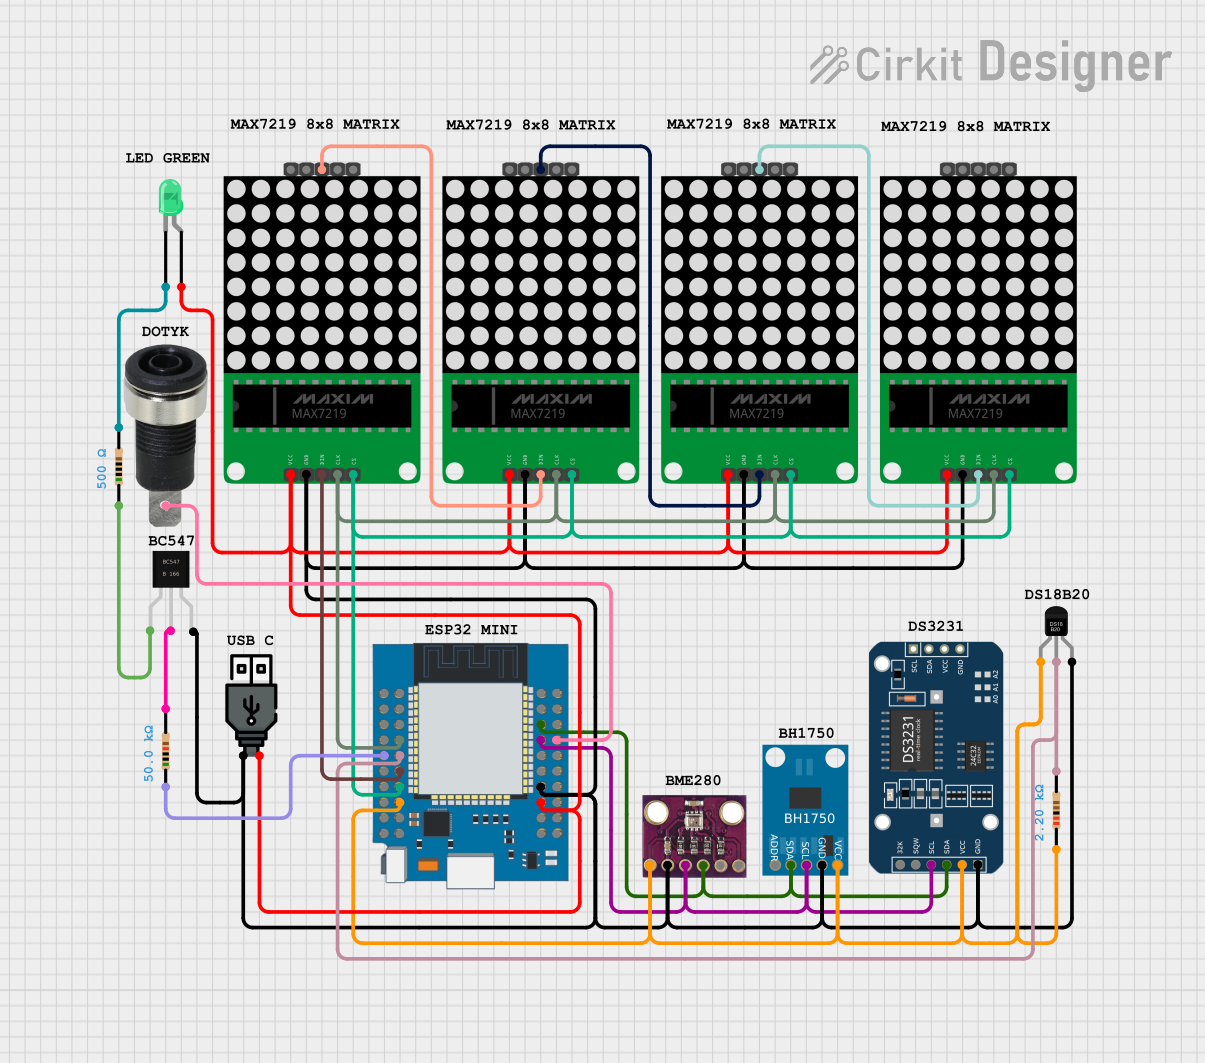
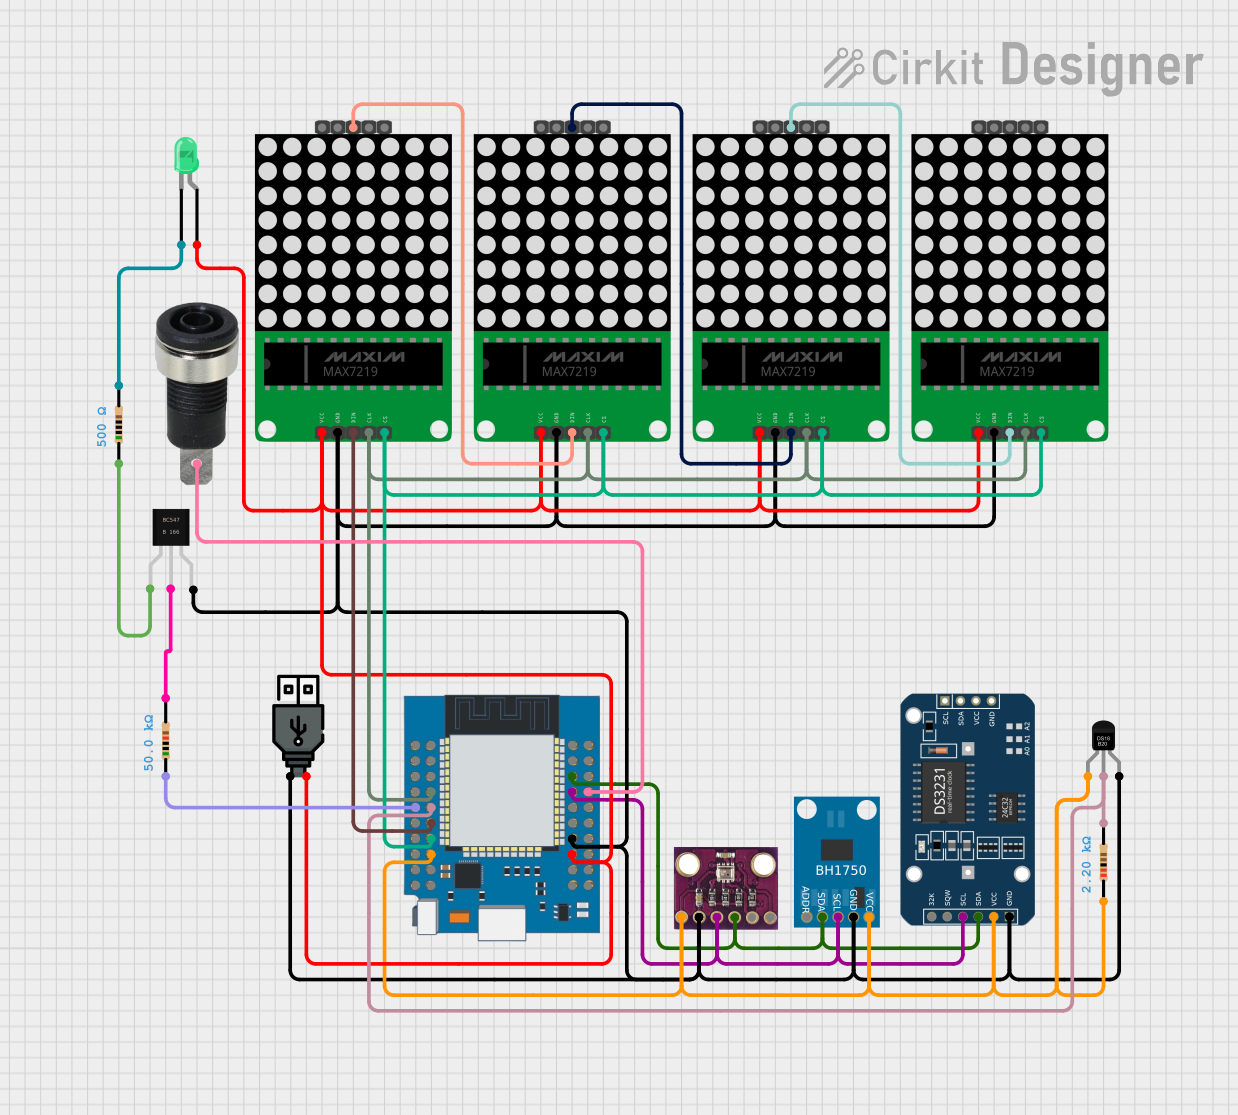
ESP32-Based Smart Weather Station with LED Display and Multiple Sensors
Image of Copy of Zegarek: A project utilizing Adafruit 1.2 Inch 8x8 LED Matrix Backpack - Pure Green in a practical application
This circuit is a multi-sensor data acquisition system using an ESP32 microcontroller. It integrates various sensors including a BH1750 light sensor, BMP280 pressure sensor, DS3231 RTC, and DS18B20 temperature sensor, and displays data on a series of MAX7219 8x8 LED matrices. The system is powered via USB and includes a green LED indicator.
Cirkit Designer LogoOpen Project in Cirkit Designer
ESP32-Based Smart Weather Station with LED Display and Multiple Sensors
Image of Copy of Zegarek (1): A project utilizing Adafruit 1.2 Inch 8x8 LED Matrix Backpack - Pure Green in a practical application
This circuit is a sensor and display system powered by an ESP32 microcontroller. It integrates multiple sensors (BH1750 light sensor, BMP280 pressure sensor, DS3231 RTC, and DS18B20 temperature sensor) and drives a series of MAX7219 8x8 LED matrices for visual output. The ESP32 communicates with the sensors via I2C and controls the LED matrices to display data.
Cirkit Designer LogoOpen Project in Cirkit Designer
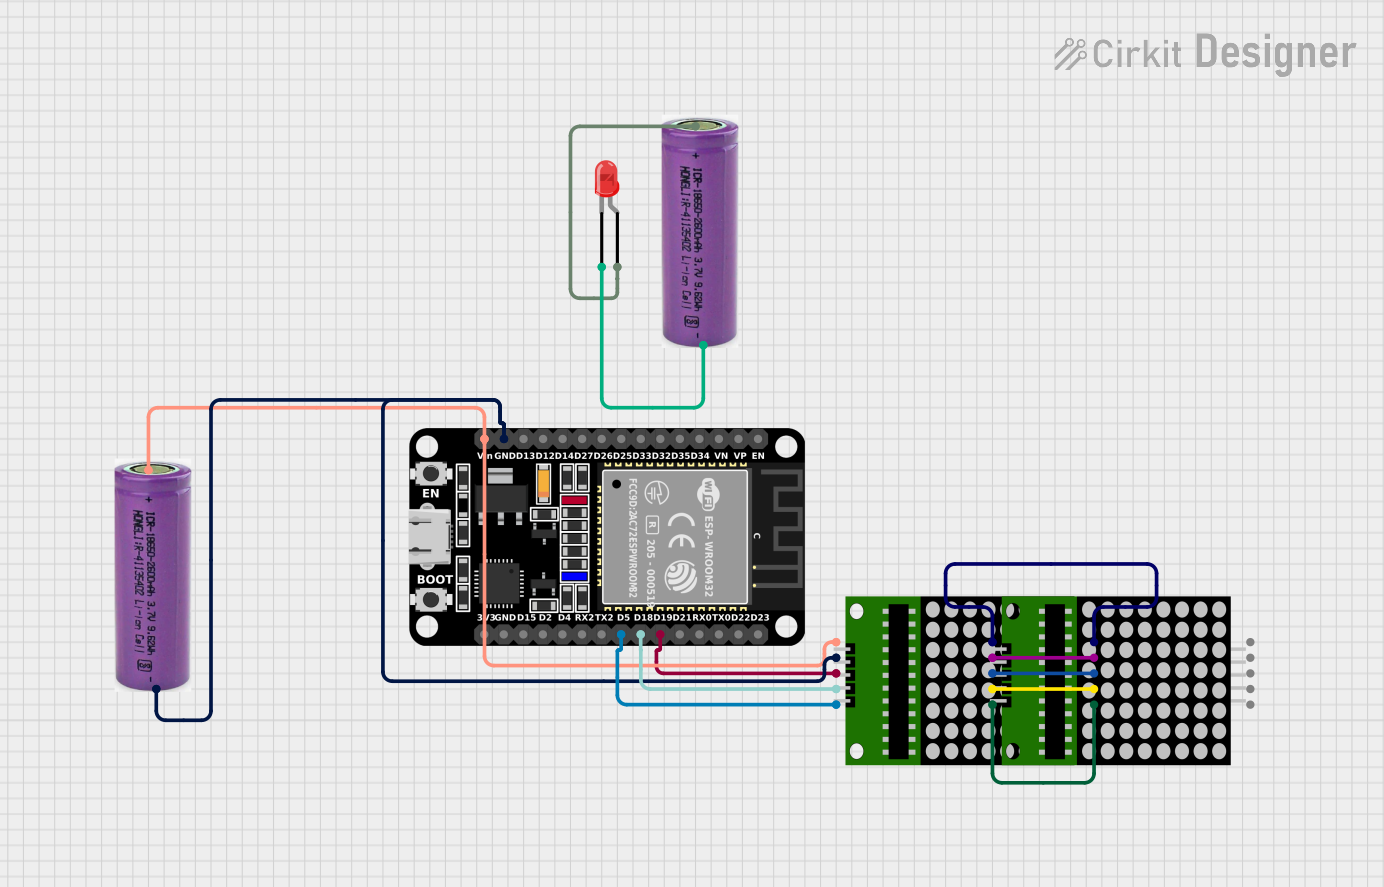
ESP32-Controlled Dual 8x8 LED Matrix Display with NTP Time Synchronization
Image of time: A project utilizing Adafruit 1.2 Inch 8x8 LED Matrix Backpack - Pure Green in a practical application
This circuit features an ESP32 microcontroller connected to two cascaded 8x8 LED matrix displays, powered by a 3.3V battery. The ESP32 drives the displays to show time and other information, with the code indicating functionality for connecting to WiFi, synchronizing time via NTP, and displaying data on the matrices using custom fonts. Additionally, there is a separate 3.3V battery powering a red LED, which appears to function as a simple indicator light.
Cirkit Designer LogoOpen Project in Cirkit Designer
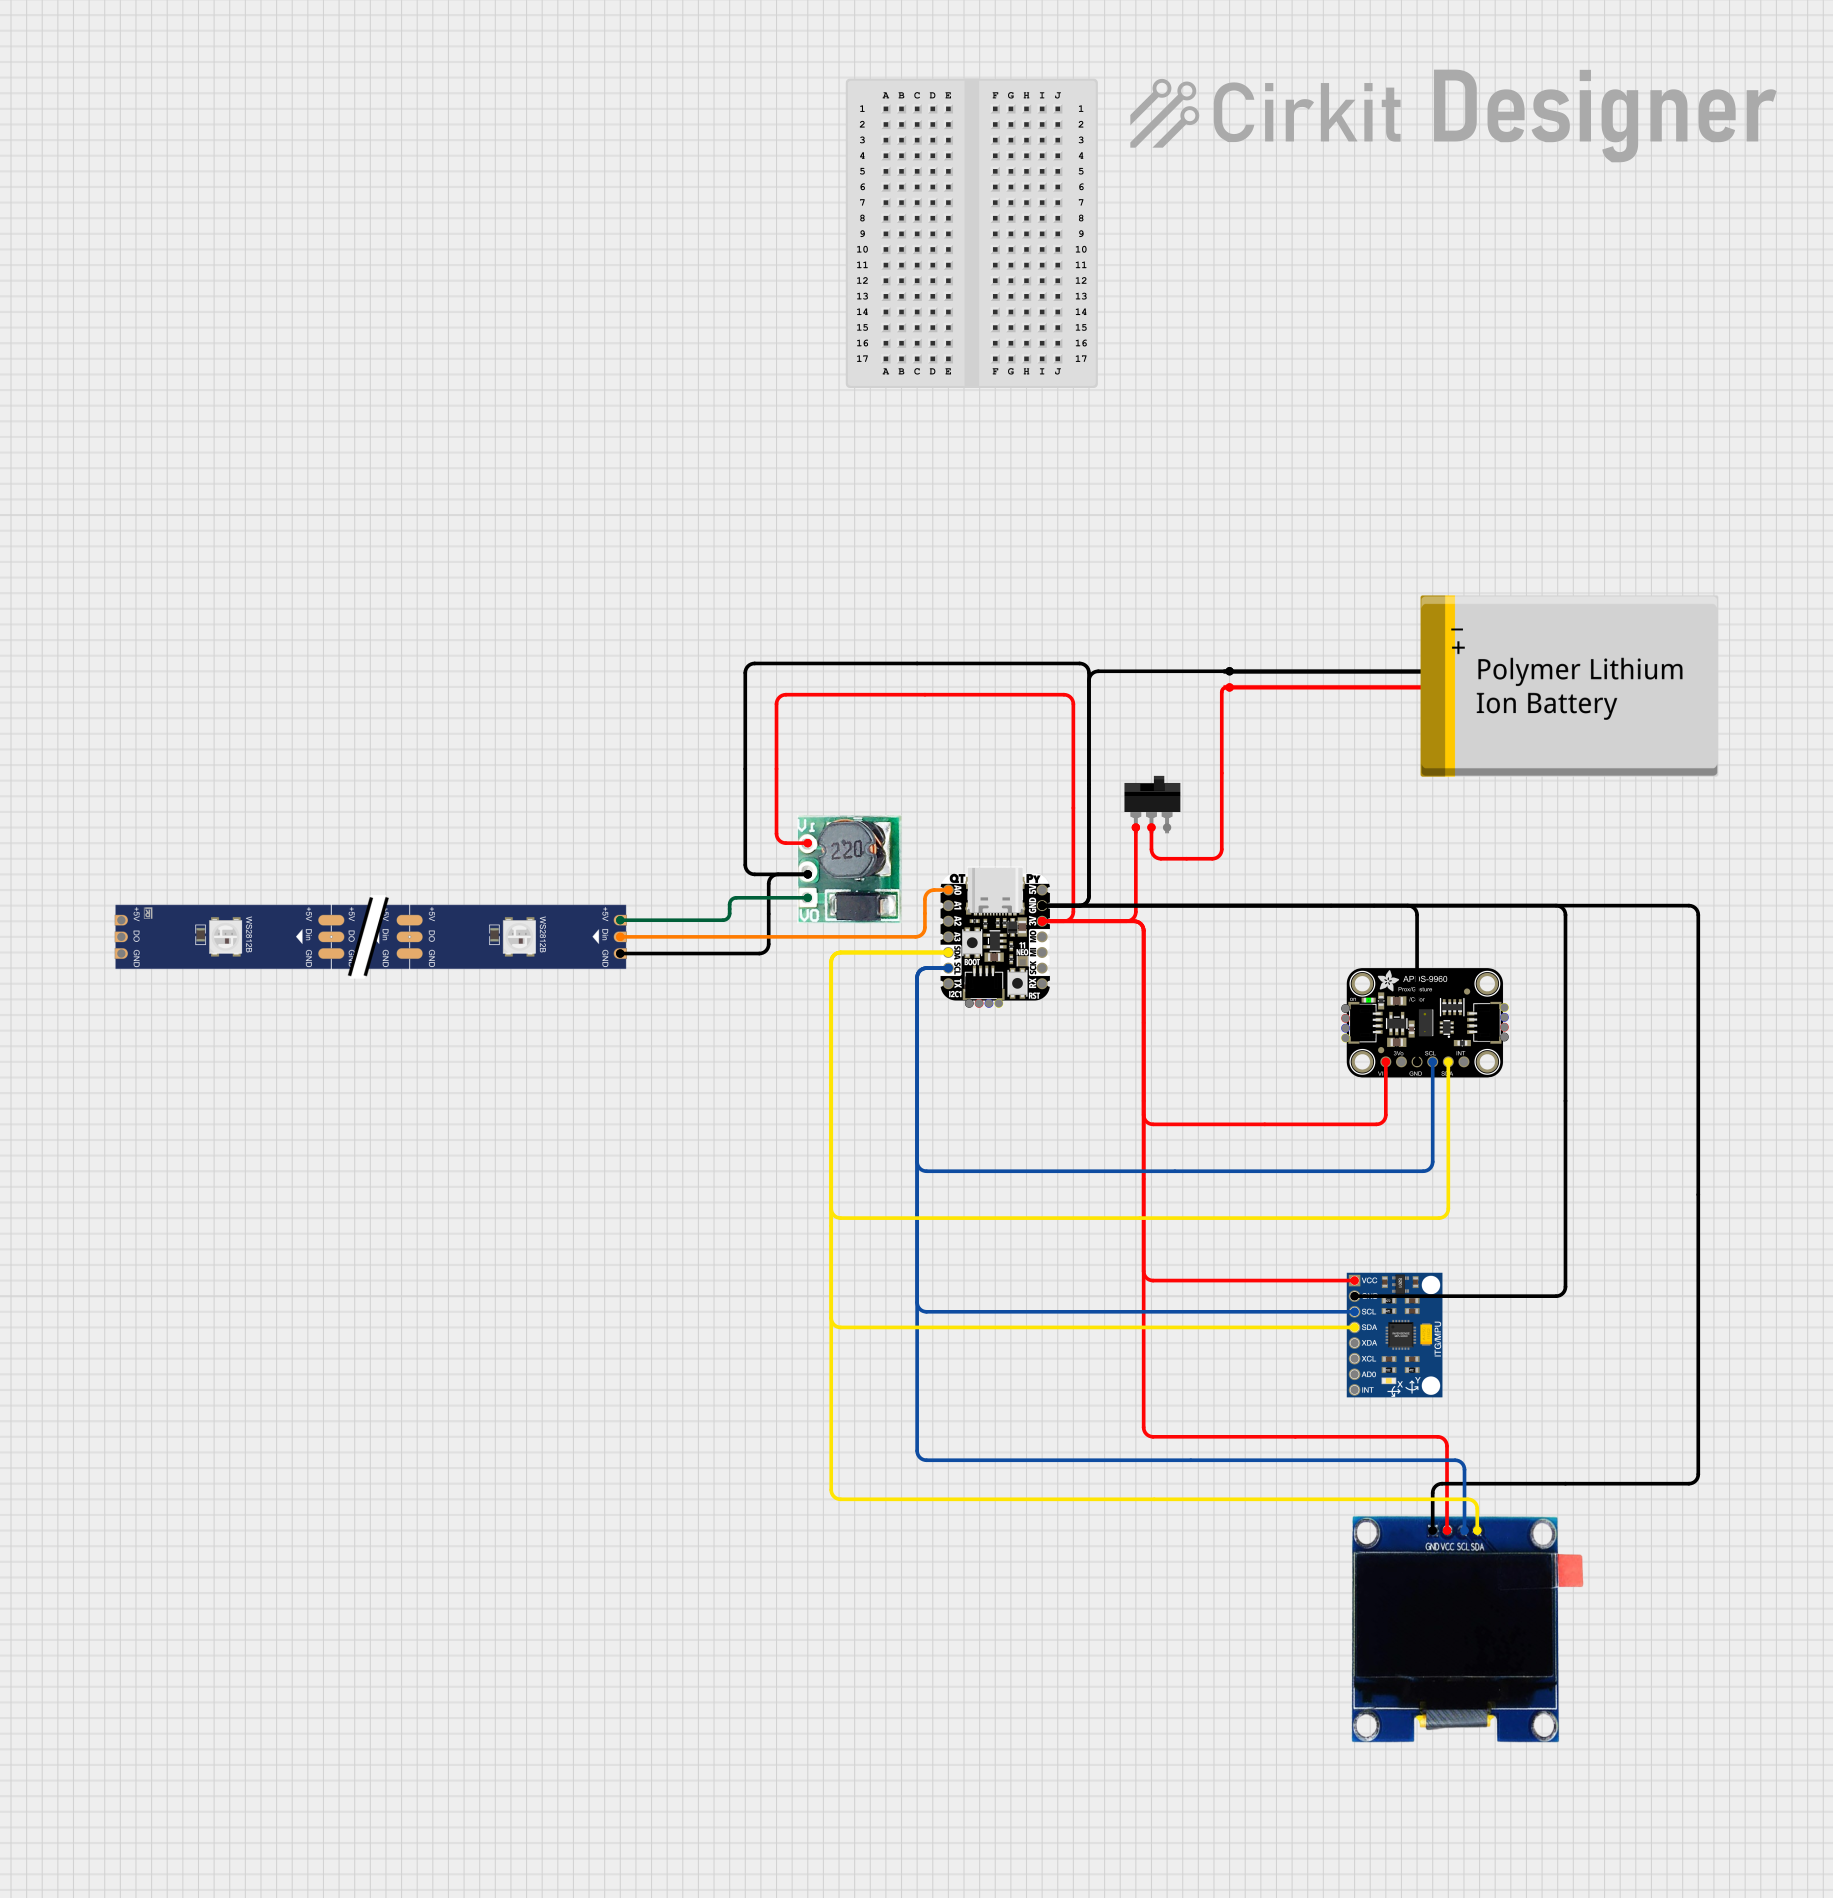
Battery-Powered Smart Light with Proximity Sensor and OLED Display using Adafruit QT Py RP2040
Image of lab: A project utilizing Adafruit 1.2 Inch 8x8 LED Matrix Backpack - Pure Green in a practical application
This circuit is a portable, battery-powered system featuring an Adafruit QT Py RP2040 microcontroller that interfaces with an OLED display, a proximity sensor, an accelerometer, and an RGB LED strip. The system is powered by a lithium-ion battery with a step-up boost converter to provide 5V for the LED strip, and it includes a toggle switch for power control. The microcontroller communicates with the sensors and display via I2C.
Cirkit Designer LogoOpen Project in Cirkit Designer

Explore Projects Built with Adafruit 1.2 Inch 8x8 LED Matrix Backpack - Pure Green

Use Cirkit Designer to design, explore, and prototype these projects online. Some projects support real-time simulation. Click "Open Project" to start designing instantly!
Image of Copy of Zegarek: A project utilizing Adafruit 1.2 Inch 8x8 LED Matrix Backpack - Pure Green in a practical application
ESP32-Based Smart Weather Station with LED Display and Multiple Sensors
This circuit is a multi-sensor data acquisition system using an ESP32 microcontroller. It integrates various sensors including a BH1750 light sensor, BMP280 pressure sensor, DS3231 RTC, and DS18B20 temperature sensor, and displays data on a series of MAX7219 8x8 LED matrices. The system is powered via USB and includes a green LED indicator.
Cirkit Designer LogoOpen Project in Cirkit Designer
Image of Copy of Zegarek (1): A project utilizing Adafruit 1.2 Inch 8x8 LED Matrix Backpack - Pure Green in a practical application
ESP32-Based Smart Weather Station with LED Display and Multiple Sensors
This circuit is a sensor and display system powered by an ESP32 microcontroller. It integrates multiple sensors (BH1750 light sensor, BMP280 pressure sensor, DS3231 RTC, and DS18B20 temperature sensor) and drives a series of MAX7219 8x8 LED matrices for visual output. The ESP32 communicates with the sensors via I2C and controls the LED matrices to display data.
Cirkit Designer LogoOpen Project in Cirkit Designer
Image of time: A project utilizing Adafruit 1.2 Inch 8x8 LED Matrix Backpack - Pure Green in a practical application
ESP32-Controlled Dual 8x8 LED Matrix Display with NTP Time Synchronization
This circuit features an ESP32 microcontroller connected to two cascaded 8x8 LED matrix displays, powered by a 3.3V battery. The ESP32 drives the displays to show time and other information, with the code indicating functionality for connecting to WiFi, synchronizing time via NTP, and displaying data on the matrices using custom fonts. Additionally, there is a separate 3.3V battery powering a red LED, which appears to function as a simple indicator light.
Cirkit Designer LogoOpen Project in Cirkit Designer
Image of lab: A project utilizing Adafruit 1.2 Inch 8x8 LED Matrix Backpack - Pure Green in a practical application
Battery-Powered Smart Light with Proximity Sensor and OLED Display using Adafruit QT Py RP2040
This circuit is a portable, battery-powered system featuring an Adafruit QT Py RP2040 microcontroller that interfaces with an OLED display, a proximity sensor, an accelerometer, and an RGB LED strip. The system is powered by a lithium-ion battery with a step-up boost converter to provide 5V for the LED strip, and it includes a toggle switch for power control. The microcontroller communicates with the sensors and display via I2C.
Cirkit Designer LogoOpen Project in Cirkit Designer

Common Applications

  • Digital clocks and timers
  • Scrolling text displays
  • Visual indicators for IoT devices
  • Educational and hobbyist projects
  • Simple animations or graphical displays

Technical Specifications

Key Specifications

Parameter Value
LED Color Pure Green
LED Matrix Size 8x8 (64 LEDs)
Matrix Dimensions 1.2 inches (30.5 mm)
Operating Voltage 5V DC
Communication Protocol I2C
Current Consumption ~20mA (typical, varies by usage)
Backpack Chipset HT16K33

Pin Configuration

The backpack simplifies wiring by using a 4-pin header for I2C communication. Below is the pin configuration:

Pin Name Description
VIN Power input (5V DC)
GND Ground
SDA I2C data line
SCL I2C clock line

Usage Instructions

Connecting the Matrix to a Microcontroller

  1. Power the Matrix: Connect the VIN pin to a 5V power source and the GND pin to ground.
  2. I2C Communication: Connect the SDA pin to the microcontroller's I2C data line and the SCL pin to the I2C clock line.
  3. Address Configuration: The default I2C address is 0x70. If using multiple matrices, you can change the address by soldering the address jumpers on the back of the module.

Example with Arduino UNO

Below is an example of how to use the Adafruit 1.2 Inch 8x8 LED Matrix Backpack with an Arduino UNO. This example uses the Adafruit LED Backpack library.

Wiring Diagram

Matrix Pin Arduino Pin
VIN 5V
GND GND
SDA A4
SCL A5

Arduino Code

#include <Wire.h>
#include <Adafruit_GFX.h>
#include <Adafruit_LED_Backpack.h>

// Create an instance of the LED matrix
Adafruit_8x8matrix matrix = Adafruit_8x8matrix();

void setup() {
  // Initialize the matrix
  matrix.begin(0x70); // Default I2C address is 0x70

  // Display a simple pattern on the matrix
  matrix.clear();
  matrix.drawPixel(0, 0, LED_ON); // Turn on the top-left LED
  matrix.drawPixel(7, 7, LED_ON); // Turn on the bottom-right LED
  matrix.writeDisplay();          // Update the display
}

void loop() {
  // Scroll a message across the matrix
  matrix.clear();
  matrix.setCursor(0, 0);
  matrix.print("Hi!");
  matrix.writeDisplay();
  delay(500);
}

Best Practices

  • Use a regulated 5V power supply to avoid damaging the module.
  • Avoid drawing excessive current by limiting the number of LEDs turned on simultaneously.
  • Use pull-up resistors on the I2C lines if your microcontroller does not have internal pull-ups enabled.

Troubleshooting and FAQs

Common Issues

  1. Matrix Not Lighting Up

    • Ensure the VIN and GND pins are properly connected to a 5V power source and ground.
    • Verify the I2C connections (SDA and SCL) are correct.
    • Check the I2C address in your code matches the module's address.
  2. Incorrect or No Display Output

    • Confirm the Adafruit LED Backpack library is installed in your Arduino IDE.
    • Ensure the matrix is initialized with the correct I2C address in your code.
    • Check for soldering issues on the address jumpers if you modified the I2C address.
  3. Flickering LEDs

    • Verify that your power supply can provide sufficient current.
    • Check for loose or faulty connections in the circuit.

FAQs

Q: Can I use this matrix with a 3.3V microcontroller?
A: Yes, the matrix is compatible with 3.3V logic levels for I2C communication, but you must still provide 5V to the VIN pin for powering the LEDs.

Q: How do I chain multiple matrices together?
A: Connect the VIN, GND, SDA, and SCL pins of all matrices in parallel. Assign a unique I2C address to each matrix by modifying the address jumpers on the back of each module.

Q: Can I display custom animations?
A: Yes, you can use the Adafruit GFX library to create custom animations by updating the matrix display in the loop() function.

This concludes the documentation for the Adafruit 1.2 Inch 8x8 LED Matrix Backpack - Pure Green.