The ENC28J60 Ethernet Module is a versatile network module that enables Ethernet connectivity for microcontrollers and embedded systems. Utilizing the ENC28J60, a standalone Ethernet controller with an industry-standard Serial Peripheral Interface (SPI), it is particularly suitable for applications where network connection is required for data exchange, remote control, or monitoring purposes. Common applications include home automation systems, IoT devices, and networked sensors.
Explore Projects Built with ENC28J60 Ethernet Module
Use Cirkit Designer to design, explore, and prototype these projects online. Some projects support real-time simulation. Click "Open Project" to start designing instantly!
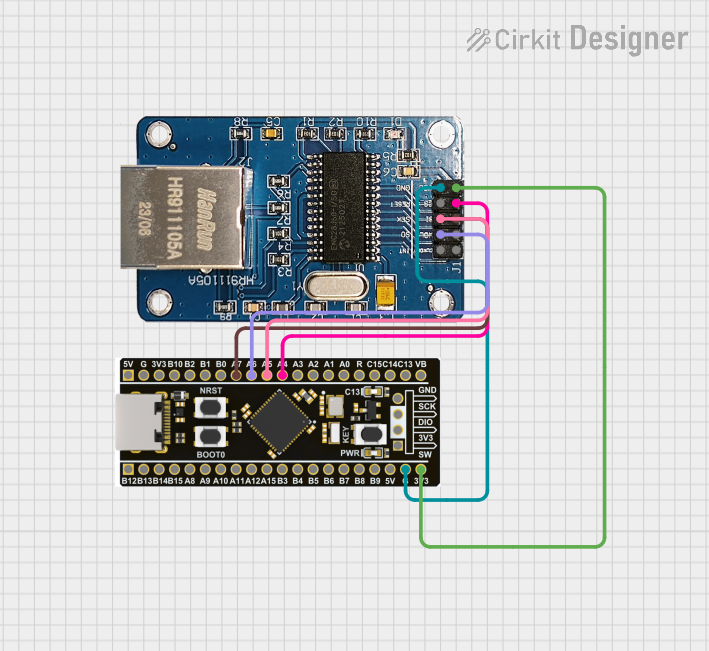
This circuit integrates an STM32F4 BlackPill microcontroller with an ENC28J60 Ethernet Board to enable Ethernet connectivity. The microcontroller communicates with the Ethernet board via SPI, with connections for power, ground, and SPI signals (SI, SO, SCK, and CS). The provided code is a basic template for further development.
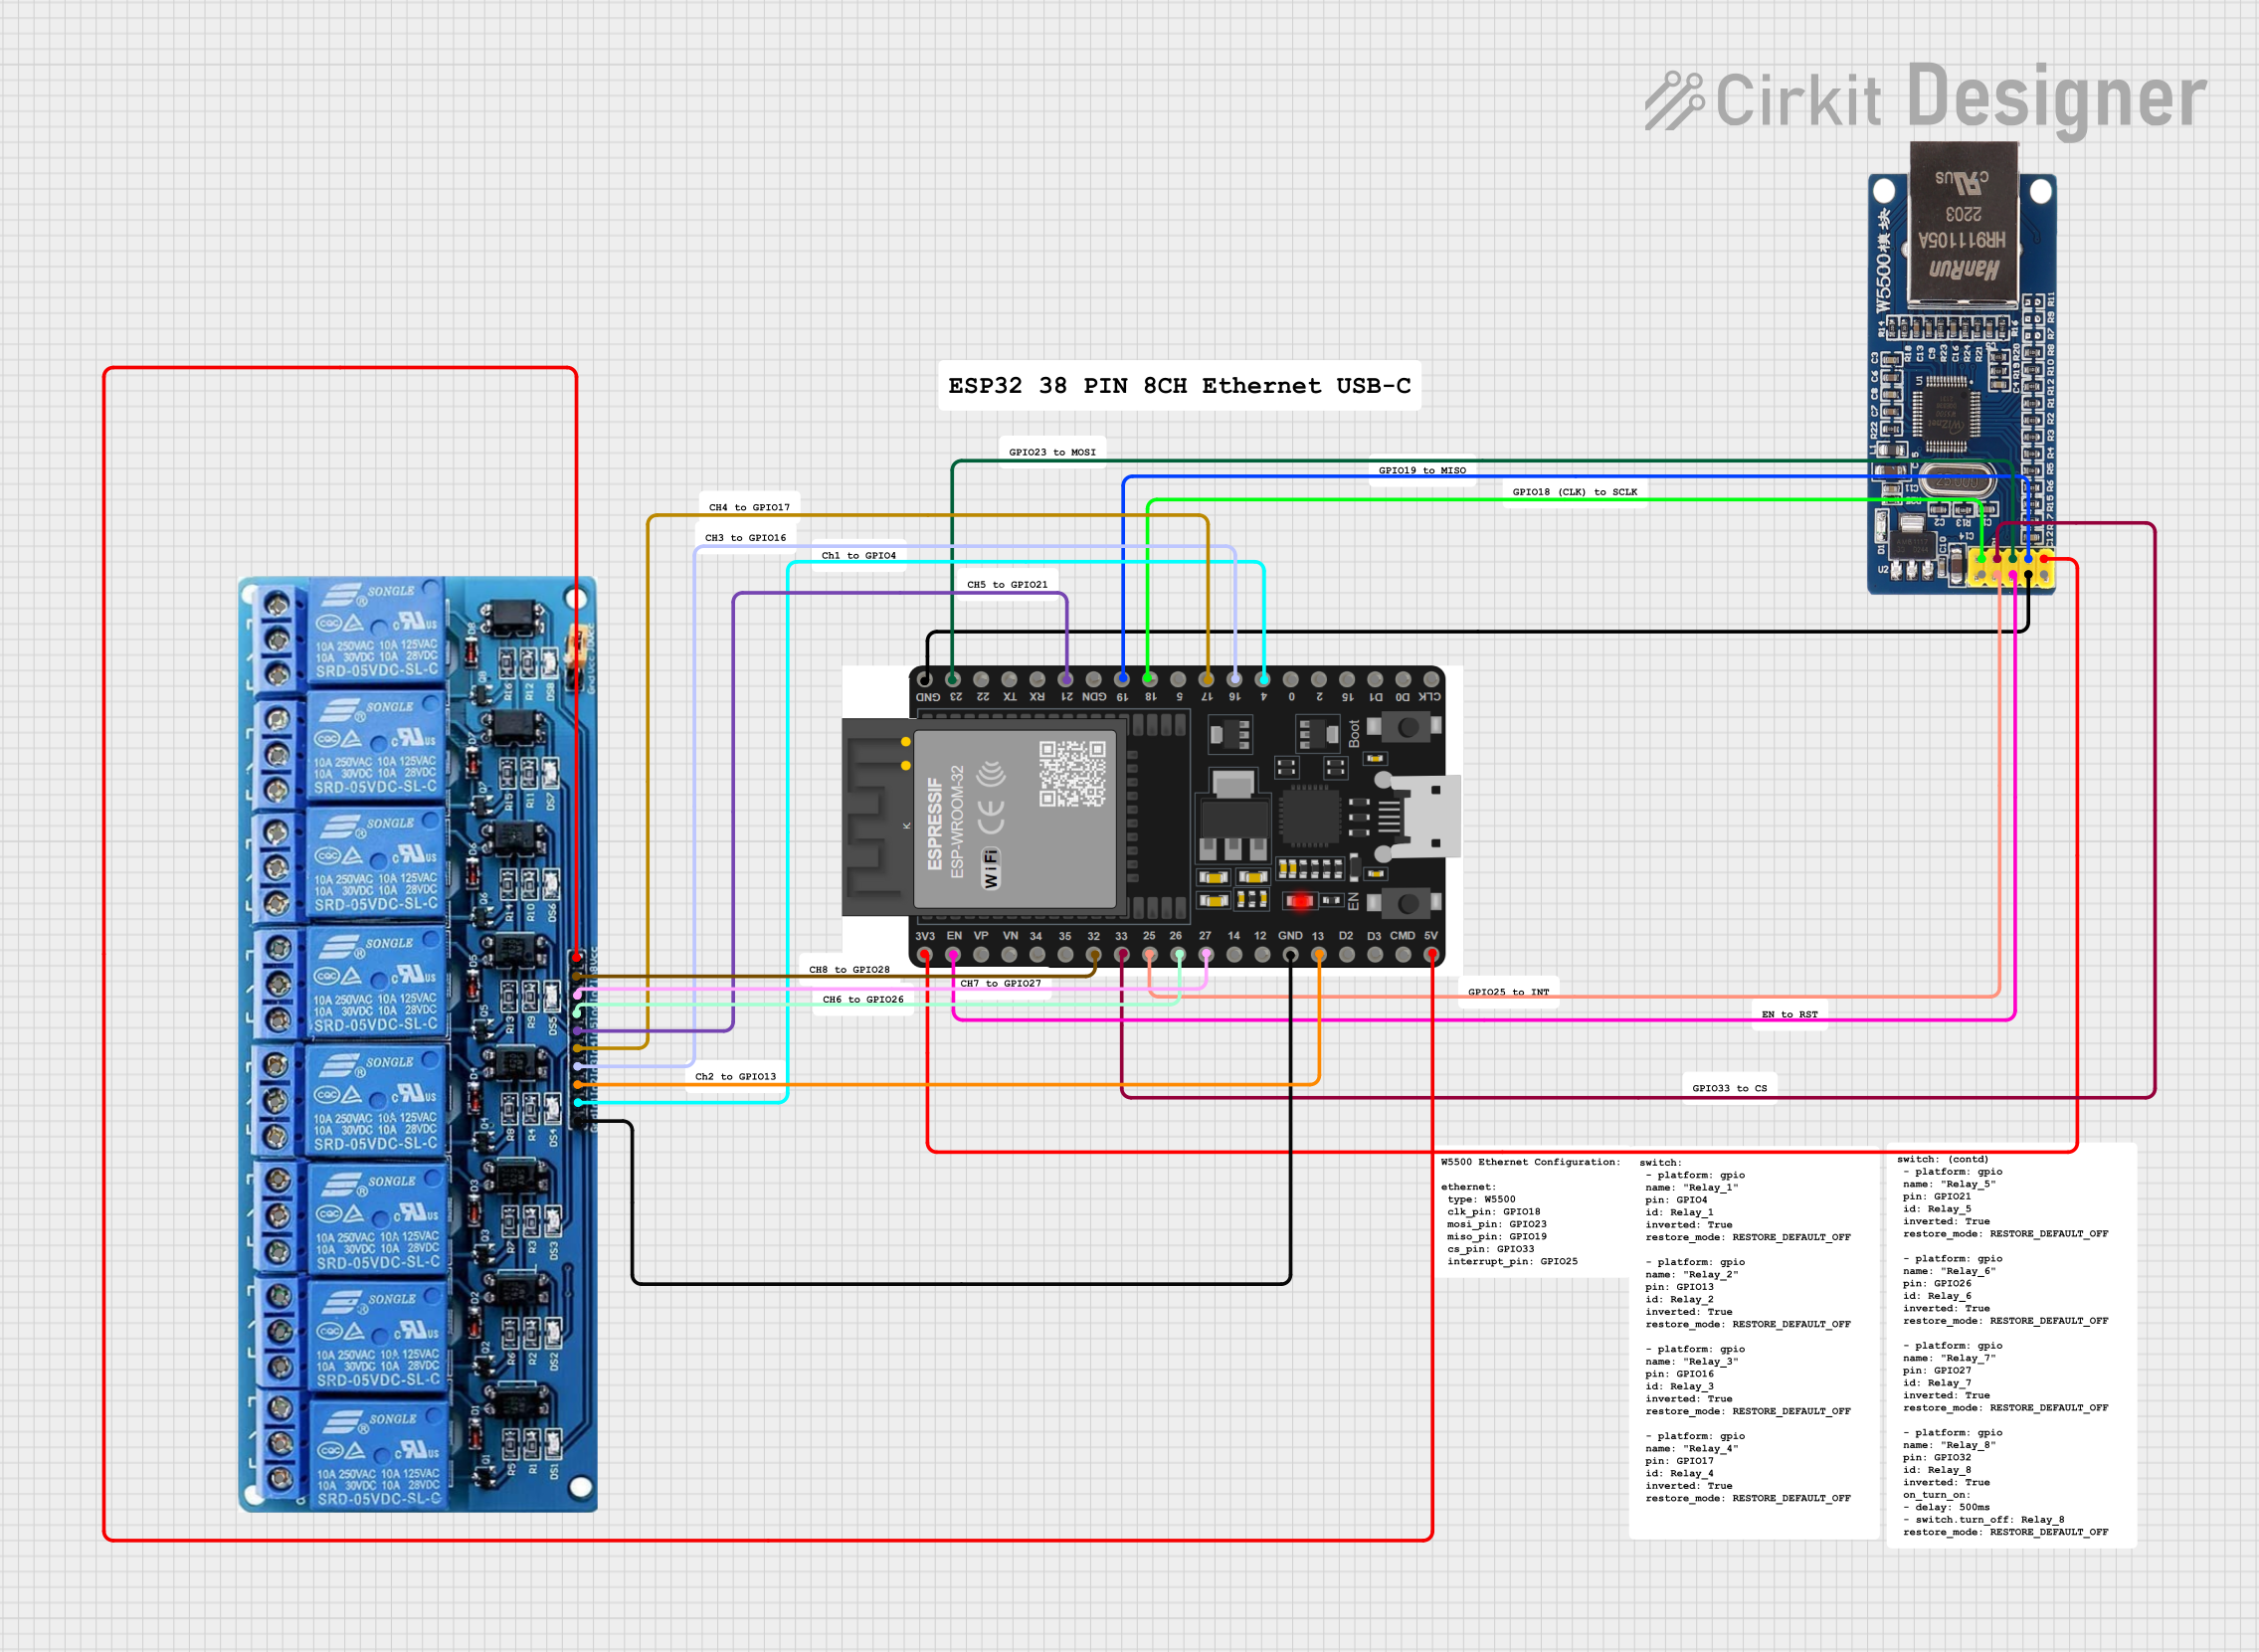
This circuit enables Ethernet connectivity and device control through an ESP32 microcontroller. It uses the W5500 Ethernet module for network communication and controls an 8-channel relay module for switching external devices or loads.
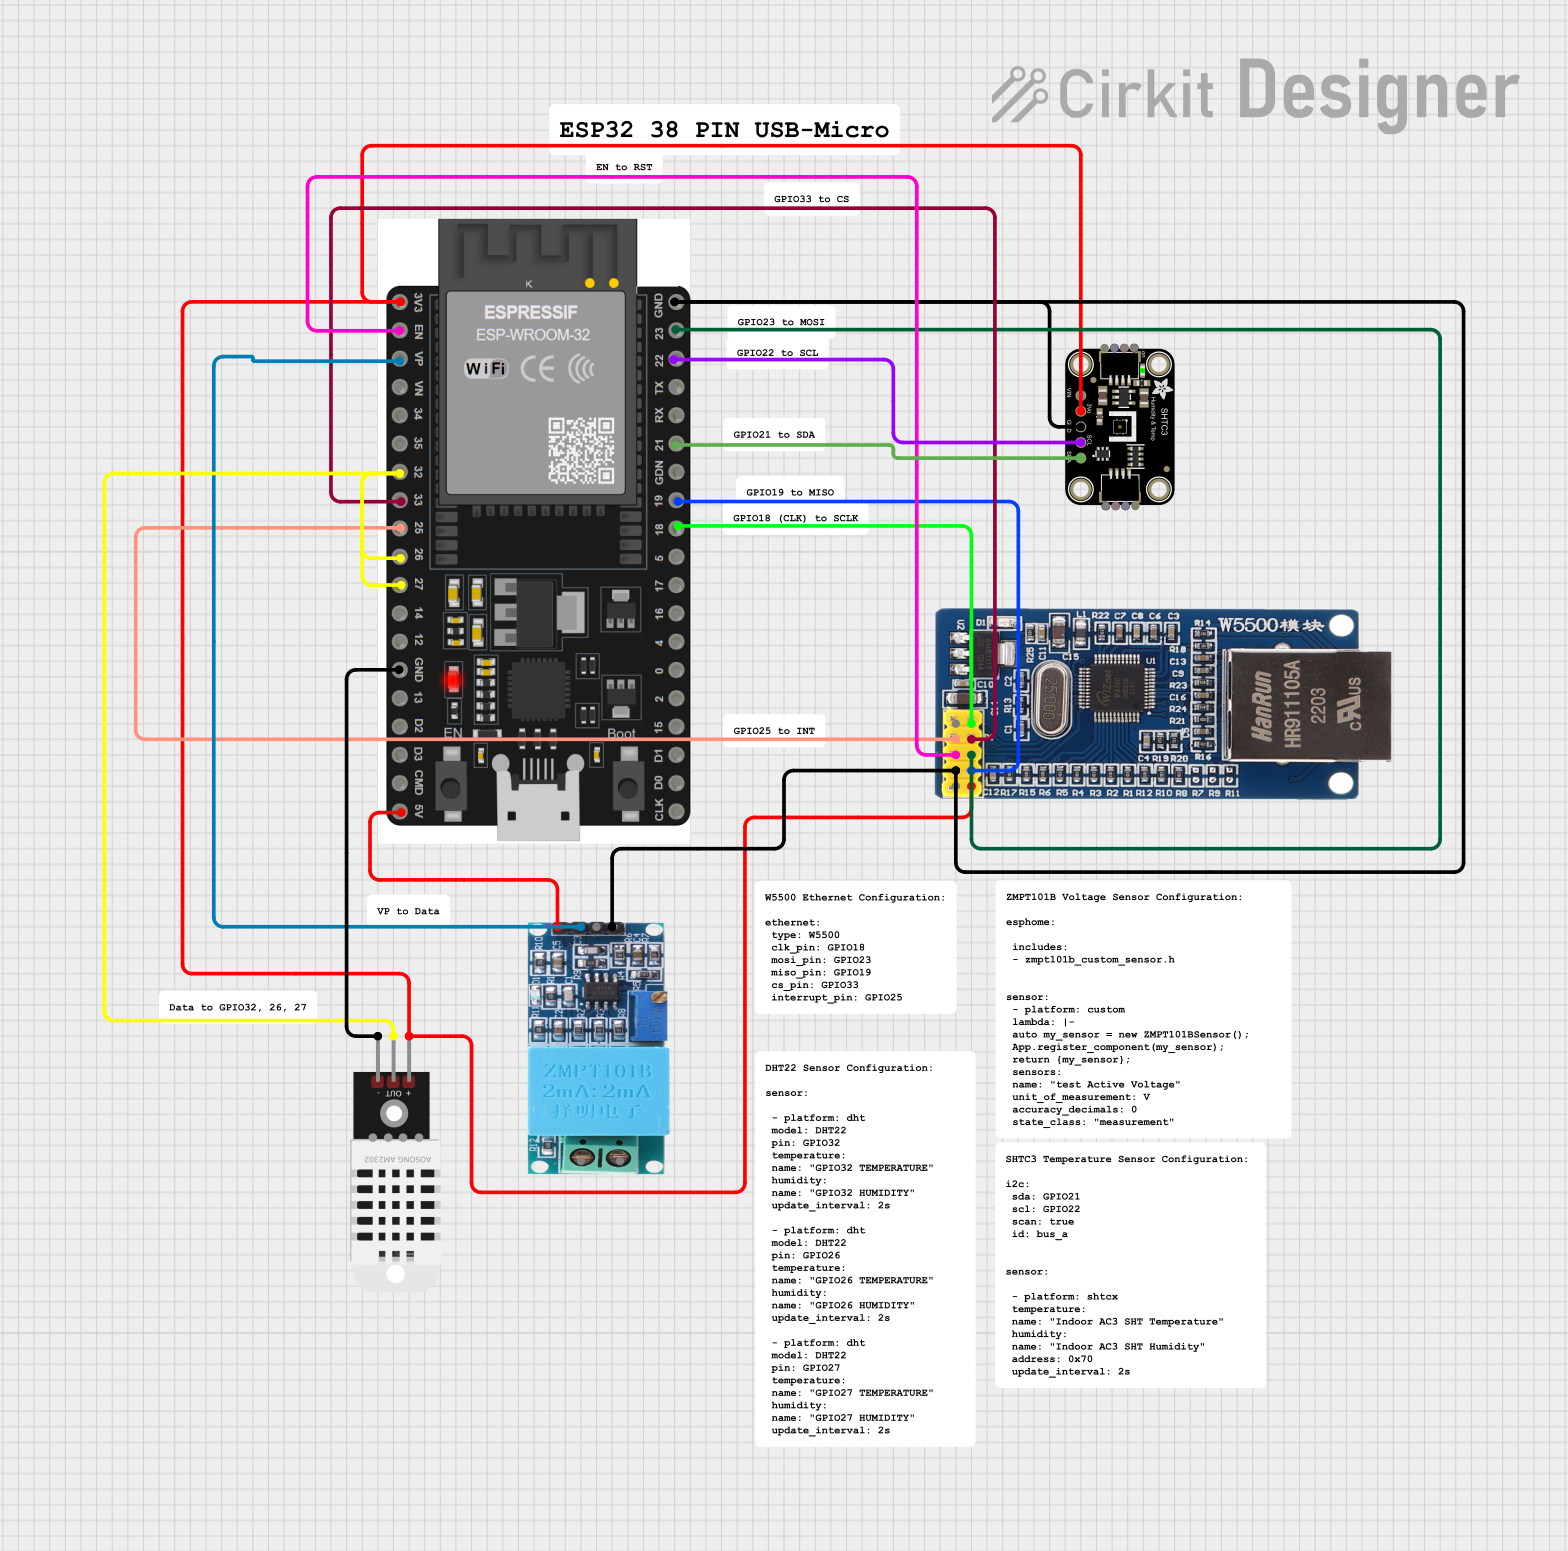
This circuit features an ESP32 microcontroller interfaced with a W5500 Ethernet module for network connectivity, a DHT22 sensor for measuring temperature and humidity, and an Adafruit SHTC3 sensor for additional temperature and humidity readings. The ZMPT101B module is connected to the ESP32 for voltage measurement in an AC power line. The ESP32 manages data collection from the sensors and communicates with the Ethernet module, likely for data logging or remote monitoring purposes.
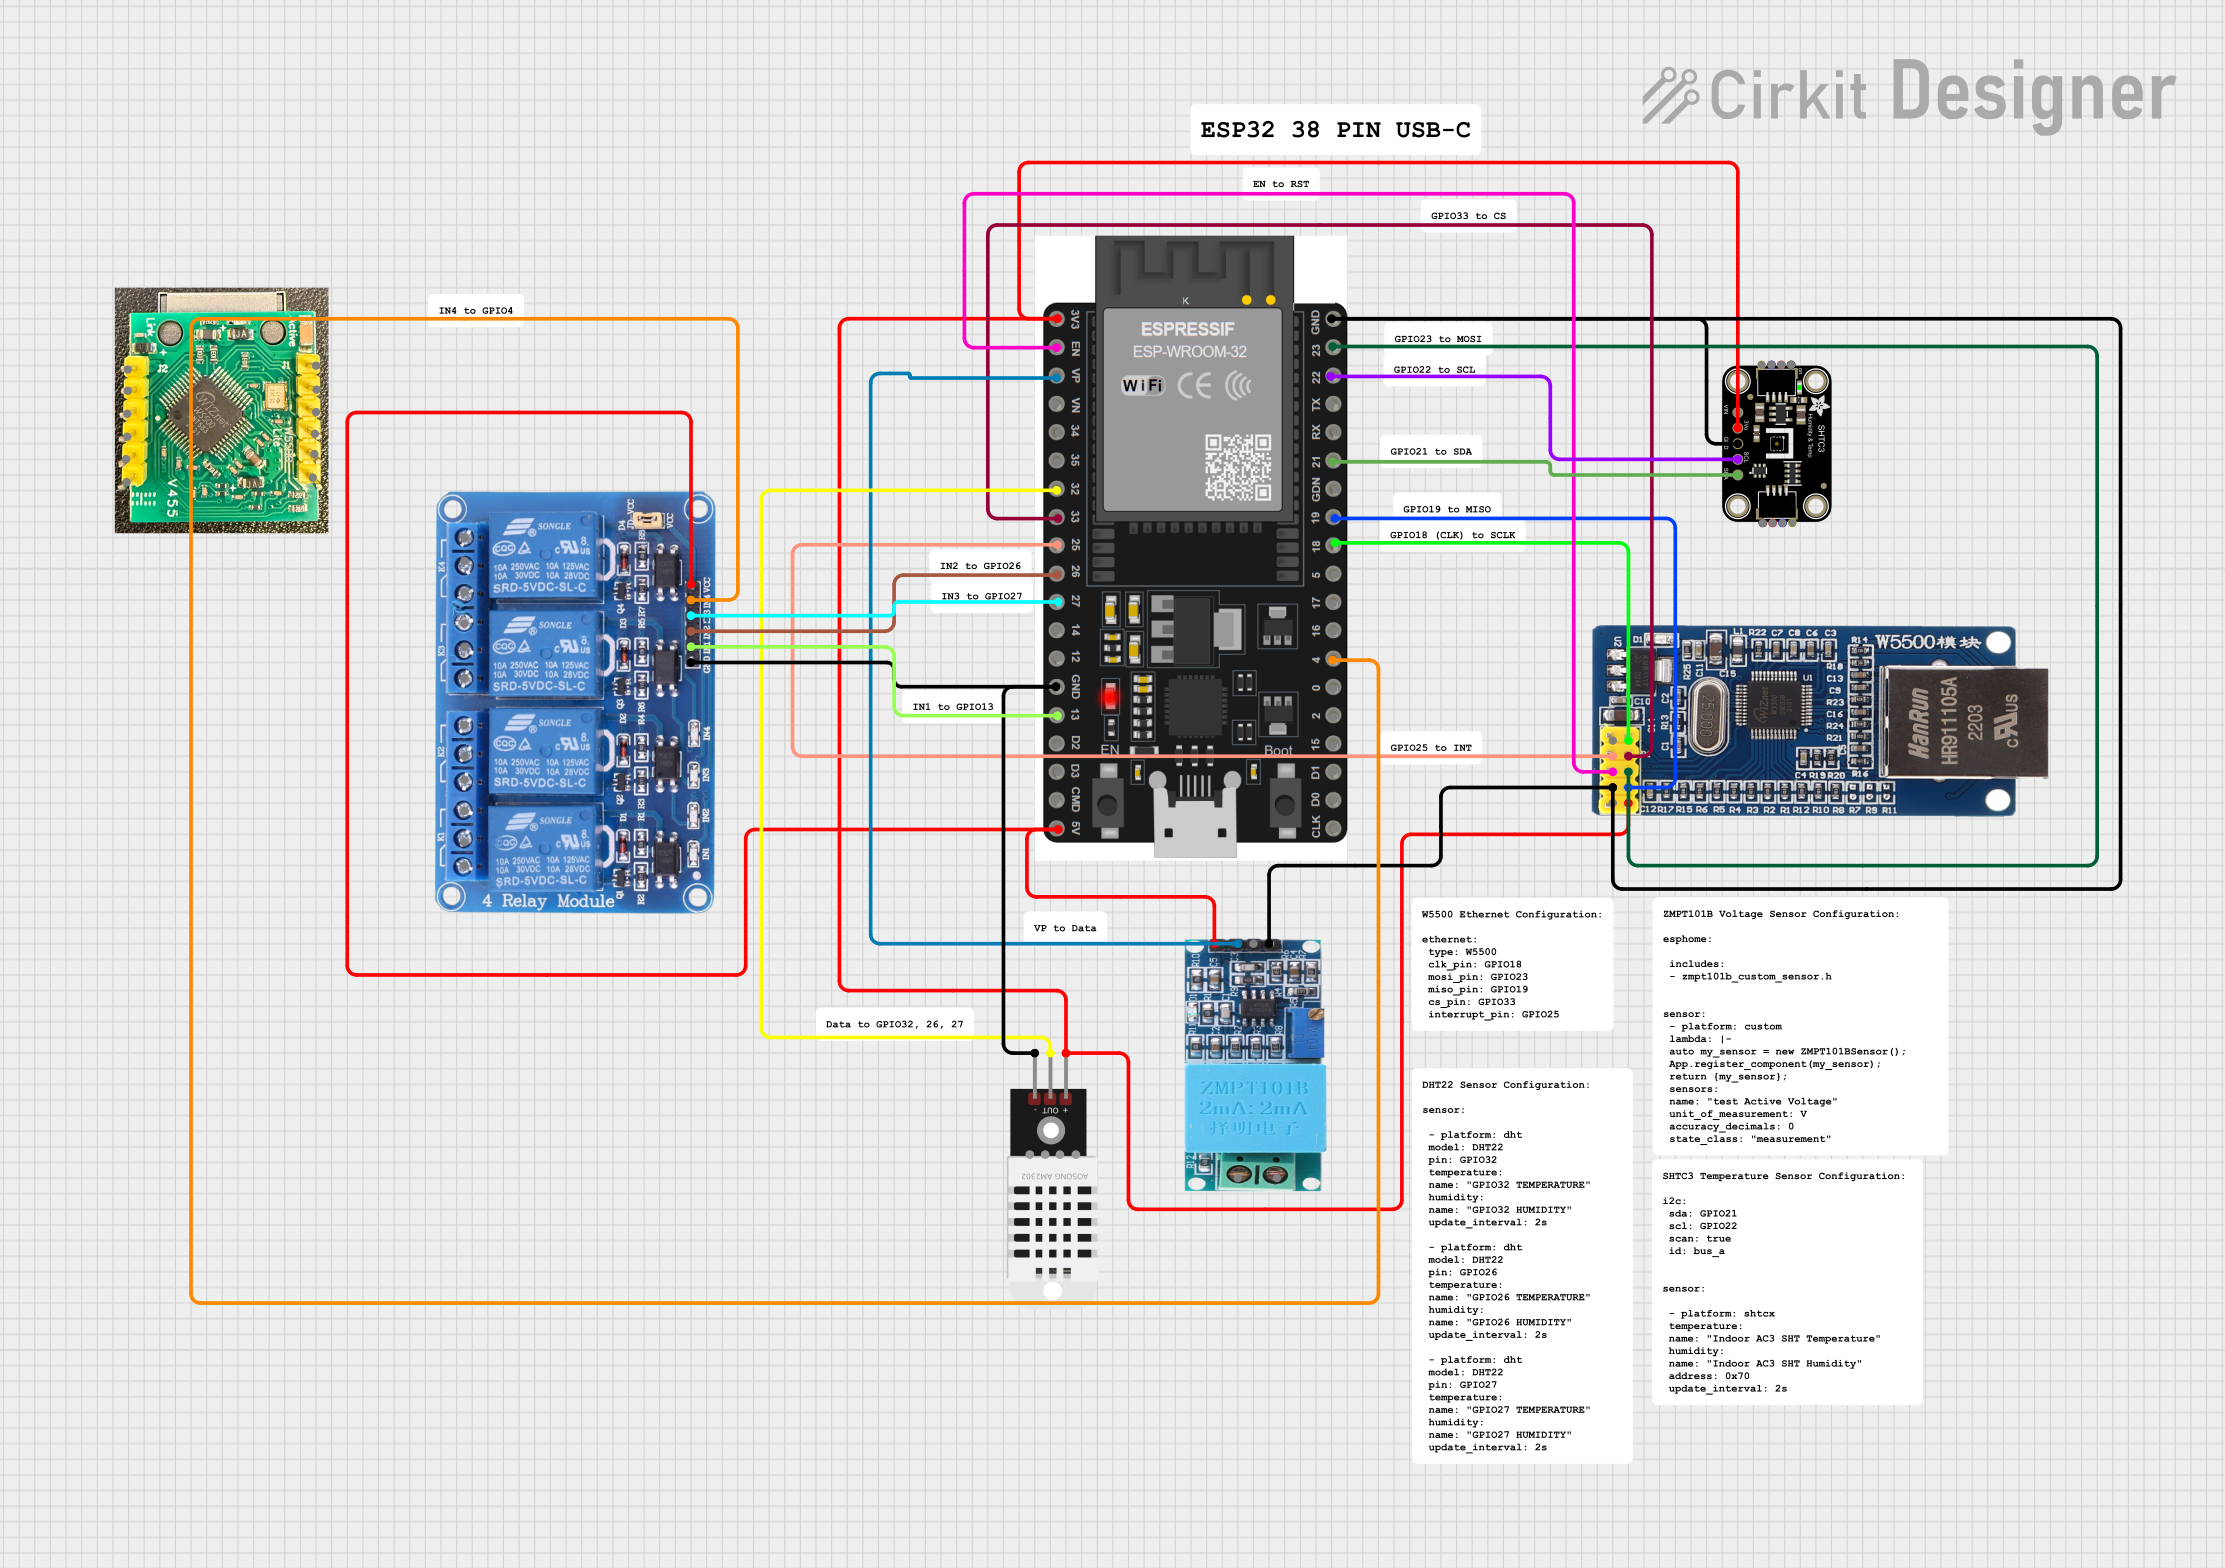
This circuit is designed for environmental monitoring and home automation, featuring an ESP32 microcontroller connected to a W5500 Ethernet module, DHT22 and Adafruit SHTC3 sensors for temperature and humidity readings, a ZMPT101B module for voltage sensing, and a 4-channel relay for controlling external devices. Network connectivity enables remote data access and control functions.
Temperature Range: -40°C to +85°C (industrial grade)
Speed: 10 Mbps (Ethernet speed)
Package: 28-pin QFN/SSOP
Pin Configuration and Descriptions
Pin Number
Pin Name
Description
1
VCC
3.3V power supply input
2
GND
Ground connection
3
CLKOUT
Clock output (can be left unconnected)
4
INT
Interrupt output (active low)
5
WOL
Wake on LAN input (active low)
6
SO
SPI Serial Output (MISO)
7
SI
SPI Serial Input (MOSI)
8
SCK
SPI Clock Input
9
CS
SPI Chip Select (active low)
10
RESET
Reset input (active low)
11-28
NC
No Connection (reserved for internal use)
Usage Instructions
Integration with a Microcontroller Circuit
Power Supply: Connect the VCC pin to a 3.3V source and the GND pin to the ground.
SPI Interface: Connect the SO, SI, SCK, and CS pins to the corresponding SPI pins on the microcontroller.
Reset: Connect the RESET pin to a digital output pin on the microcontroller for hardware reset control.
Interrupts (Optional): Connect the INT pin to an interrupt-capable pin on the microcontroller if interrupt-driven operation is desired.
Important Considerations and Best Practices
Ensure that the power supply is stable and clean, as fluctuations can cause the module to malfunction.
Use proper decoupling capacitors close to the VCC and GND pins to minimize noise.
Keep the SPI clock speed within the limits specified by the ENC28J60 datasheet.
Implement proper SPI handling in software to manage the communication effectively.
Use shielded Ethernet cables to reduce electromagnetic interference in noisy environments.
Troubleshooting and FAQs
Common Issues
No Network Connectivity: Check the Ethernet cable and connections, verify the power supply, and ensure correct SPI configuration.
SPI Communication Errors: Double-check the wiring, ensure that the SPI clock speed is within the acceptable range, and verify that the chip select (CS) is being managed correctly.
Solutions and Tips
If the module is not responding, perform a hardware reset by toggling the RESET pin.
Use network diagnostic tools to check for proper IP addressing and network presence.
Ensure that the microcontroller's firmware includes the necessary drivers and stack for the ENC28J60.
FAQs
Q: Can the ENC28J60 be used with a 5V microcontroller?
A: Yes, but level shifters should be used for SPI lines, and the VCC must be supplied with 3.3V.
Q: Is it possible to connect multiple ENC28J60 modules to a single microcontroller?
A: Yes, by using separate chip select (CS) lines for each module.
Q: Does the ENC28J60 support full-duplex Ethernet communication?
A: No, it supports half-duplex 10 Mbps Ethernet.
Example Code for Arduino UNO
#include <SPI.h>
#include <Ethernet.h>

// MAC address for the Ethernet shield
byte mac[] = { 0xDE, 0xAD, 0xBE, 0xEF, 0xFE, 0xED };

// Initialize the Ethernet client
EthernetClient client;

void setup() {
  // Start the Ethernet connection
  Ethernet.begin(mac);
  Serial.begin(9600);
  while (!Serial) {
    ; // Wait for serial port to connect
  }
  Serial.println("Ethernet ready");
  // Print the IP address
  Serial.println(Ethernet.localIP());
}

void loop() {
  // Your code here to handle Ethernet communication
}
Note: This example assumes the use of the standard Ethernet library compatible with the ENC28J60 module. Make sure to include the correct library for the ENC28J60 if you're not using a standard Ethernet shield.


 Open Project in Cirkit Designer