How to Use Cnc Shield V3: Examples, Pinouts, and Specs
Introduction
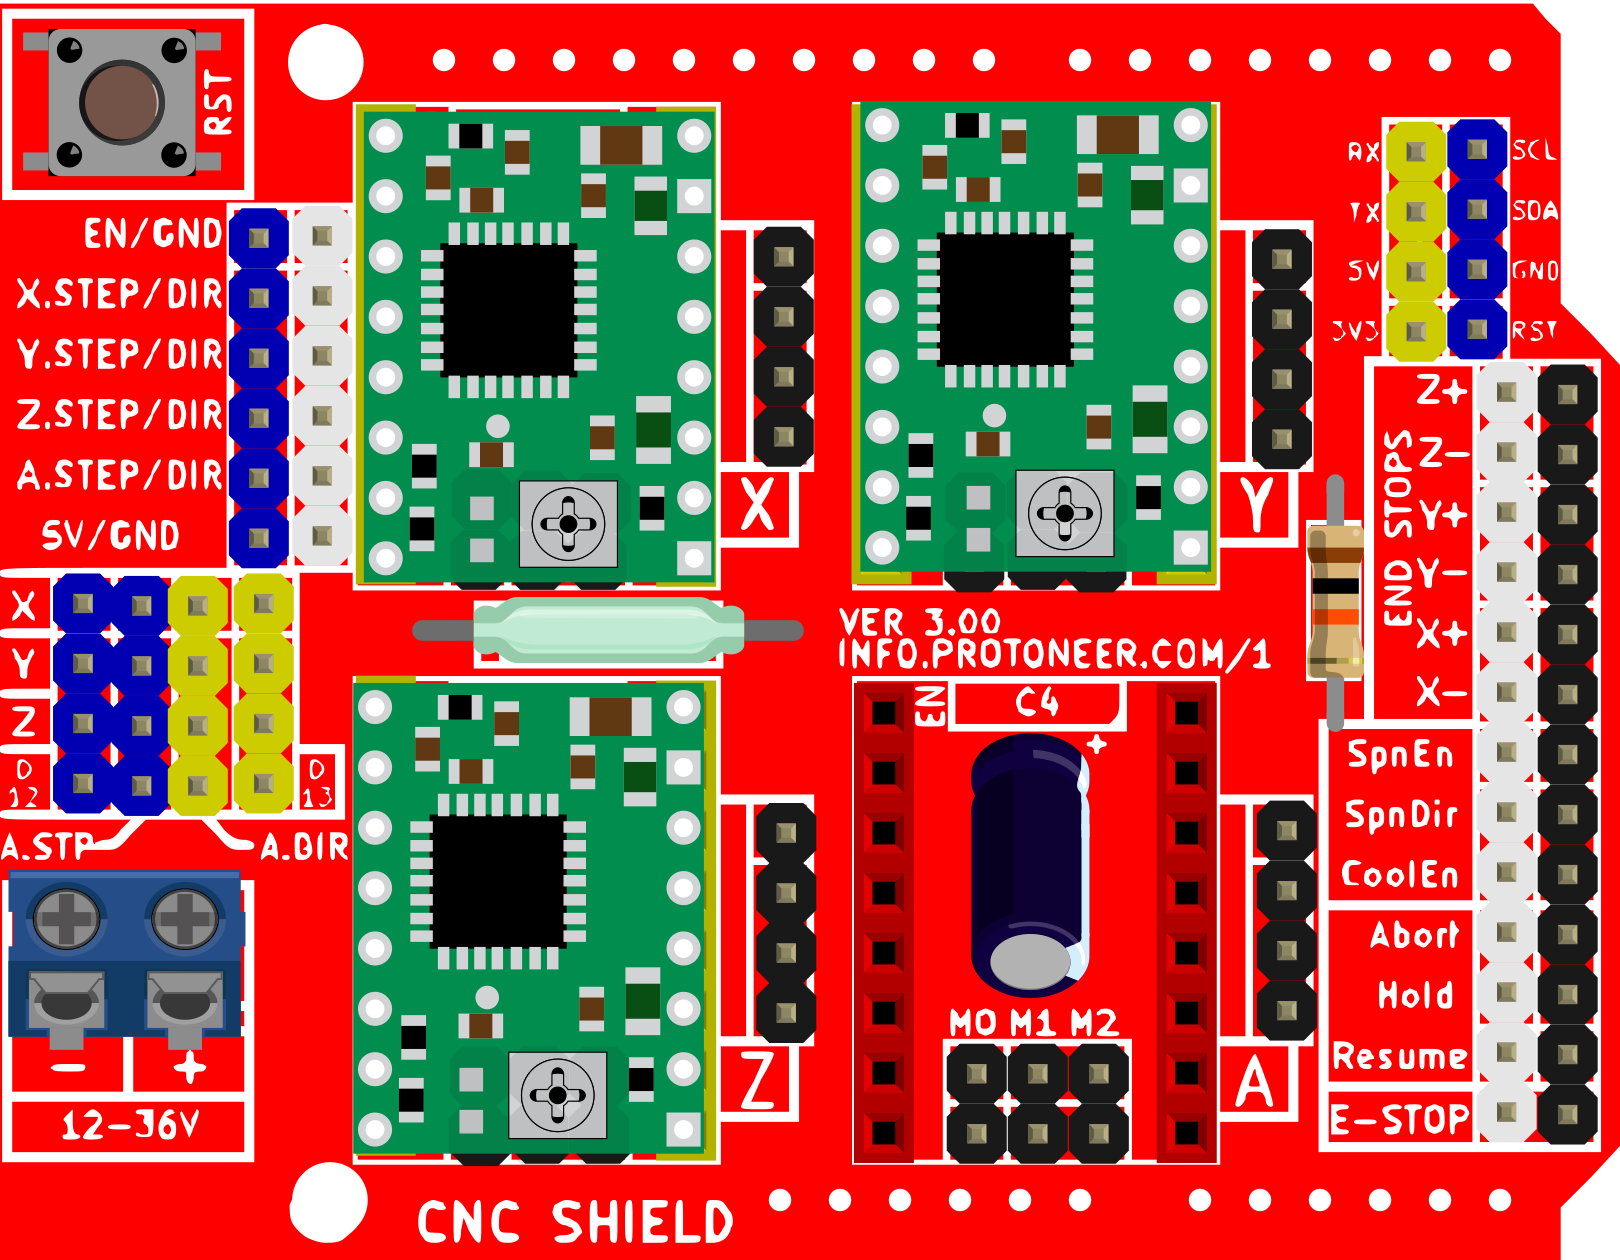
The CNC Shield V3 is a compact and versatile control board designed for driving stepper motors in CNC machines, 3D printers, and other motion control applications. It is compatible with Arduino boards, making it an excellent choice for DIY projects and prototyping. The shield supports up to four stepper motor drivers (such as A4988 or DRV8825) and provides precise control over motor movements. With its modular design and ease of use, the CNC Shield V3 is widely used in hobbyist and professional CNC setups.
Explore Projects Built with Cnc Shield V3

Explore Projects Built with Cnc Shield V3
Common Applications and Use Cases
- CNC milling machines
- 3D printers
- Laser engravers
- Plotters
- Robotics and automation projects
Technical Specifications
The CNC Shield V3 is designed to interface with an Arduino board (e.g., Arduino UNO) and stepper motor drivers. Below are its key technical details:
Key Technical Details
- Voltage Input: 12V to 36V (via external power supply for motors)
- Stepper Driver Support: A4988, DRV8825, or compatible drivers
- Number of Axes Supported: 3 (X, Y, Z) + 1 optional (A axis for dual Y or Z motors)
- Microstepping Support: Configurable via jumpers (up to 1/16 or 1/32 depending on driver)
- Endstop Support: 6 endstop connections (2 per axis)
- Compatible Arduino Boards: Arduino UNO (most common), Arduino Nano (with adapter)
- Communication Interface: Arduino communicates via USB or serial connection
- Dimensions: 68mm x 53mm
Pin Configuration and Descriptions
The CNC Shield V3 has multiple pin headers for connecting stepper drivers, endstops, and other peripherals. Below is a detailed pinout:
Stepper Motor Driver Pins
| Pin Name | Description |
|---|---|
| DIR | Direction control for the stepper motor |
| STEP | Step pulse signal for motor movement |
| EN | Enable/disable the stepper driver |
| VMOT | Motor power supply (12V-36V) |
| GND | Ground connection for motor power |
Endstop Pins
| Pin Name | Description |
|---|---|
| X+, X- | Endstop inputs for the X-axis |
| Y+, Y- | Endstop inputs for the Y-axis |
| Z+, Z- | Endstop inputs for the Z-axis |
Arduino Pin Mapping
| CNC Shield Pin | Arduino Pin |
|---|---|
| X DIR | D5 |
| X STEP | D2 |
| Y DIR | D6 |
| Y STEP | D3 |
| Z DIR | D7 |
| Z STEP | D4 |
| EN | D8 |
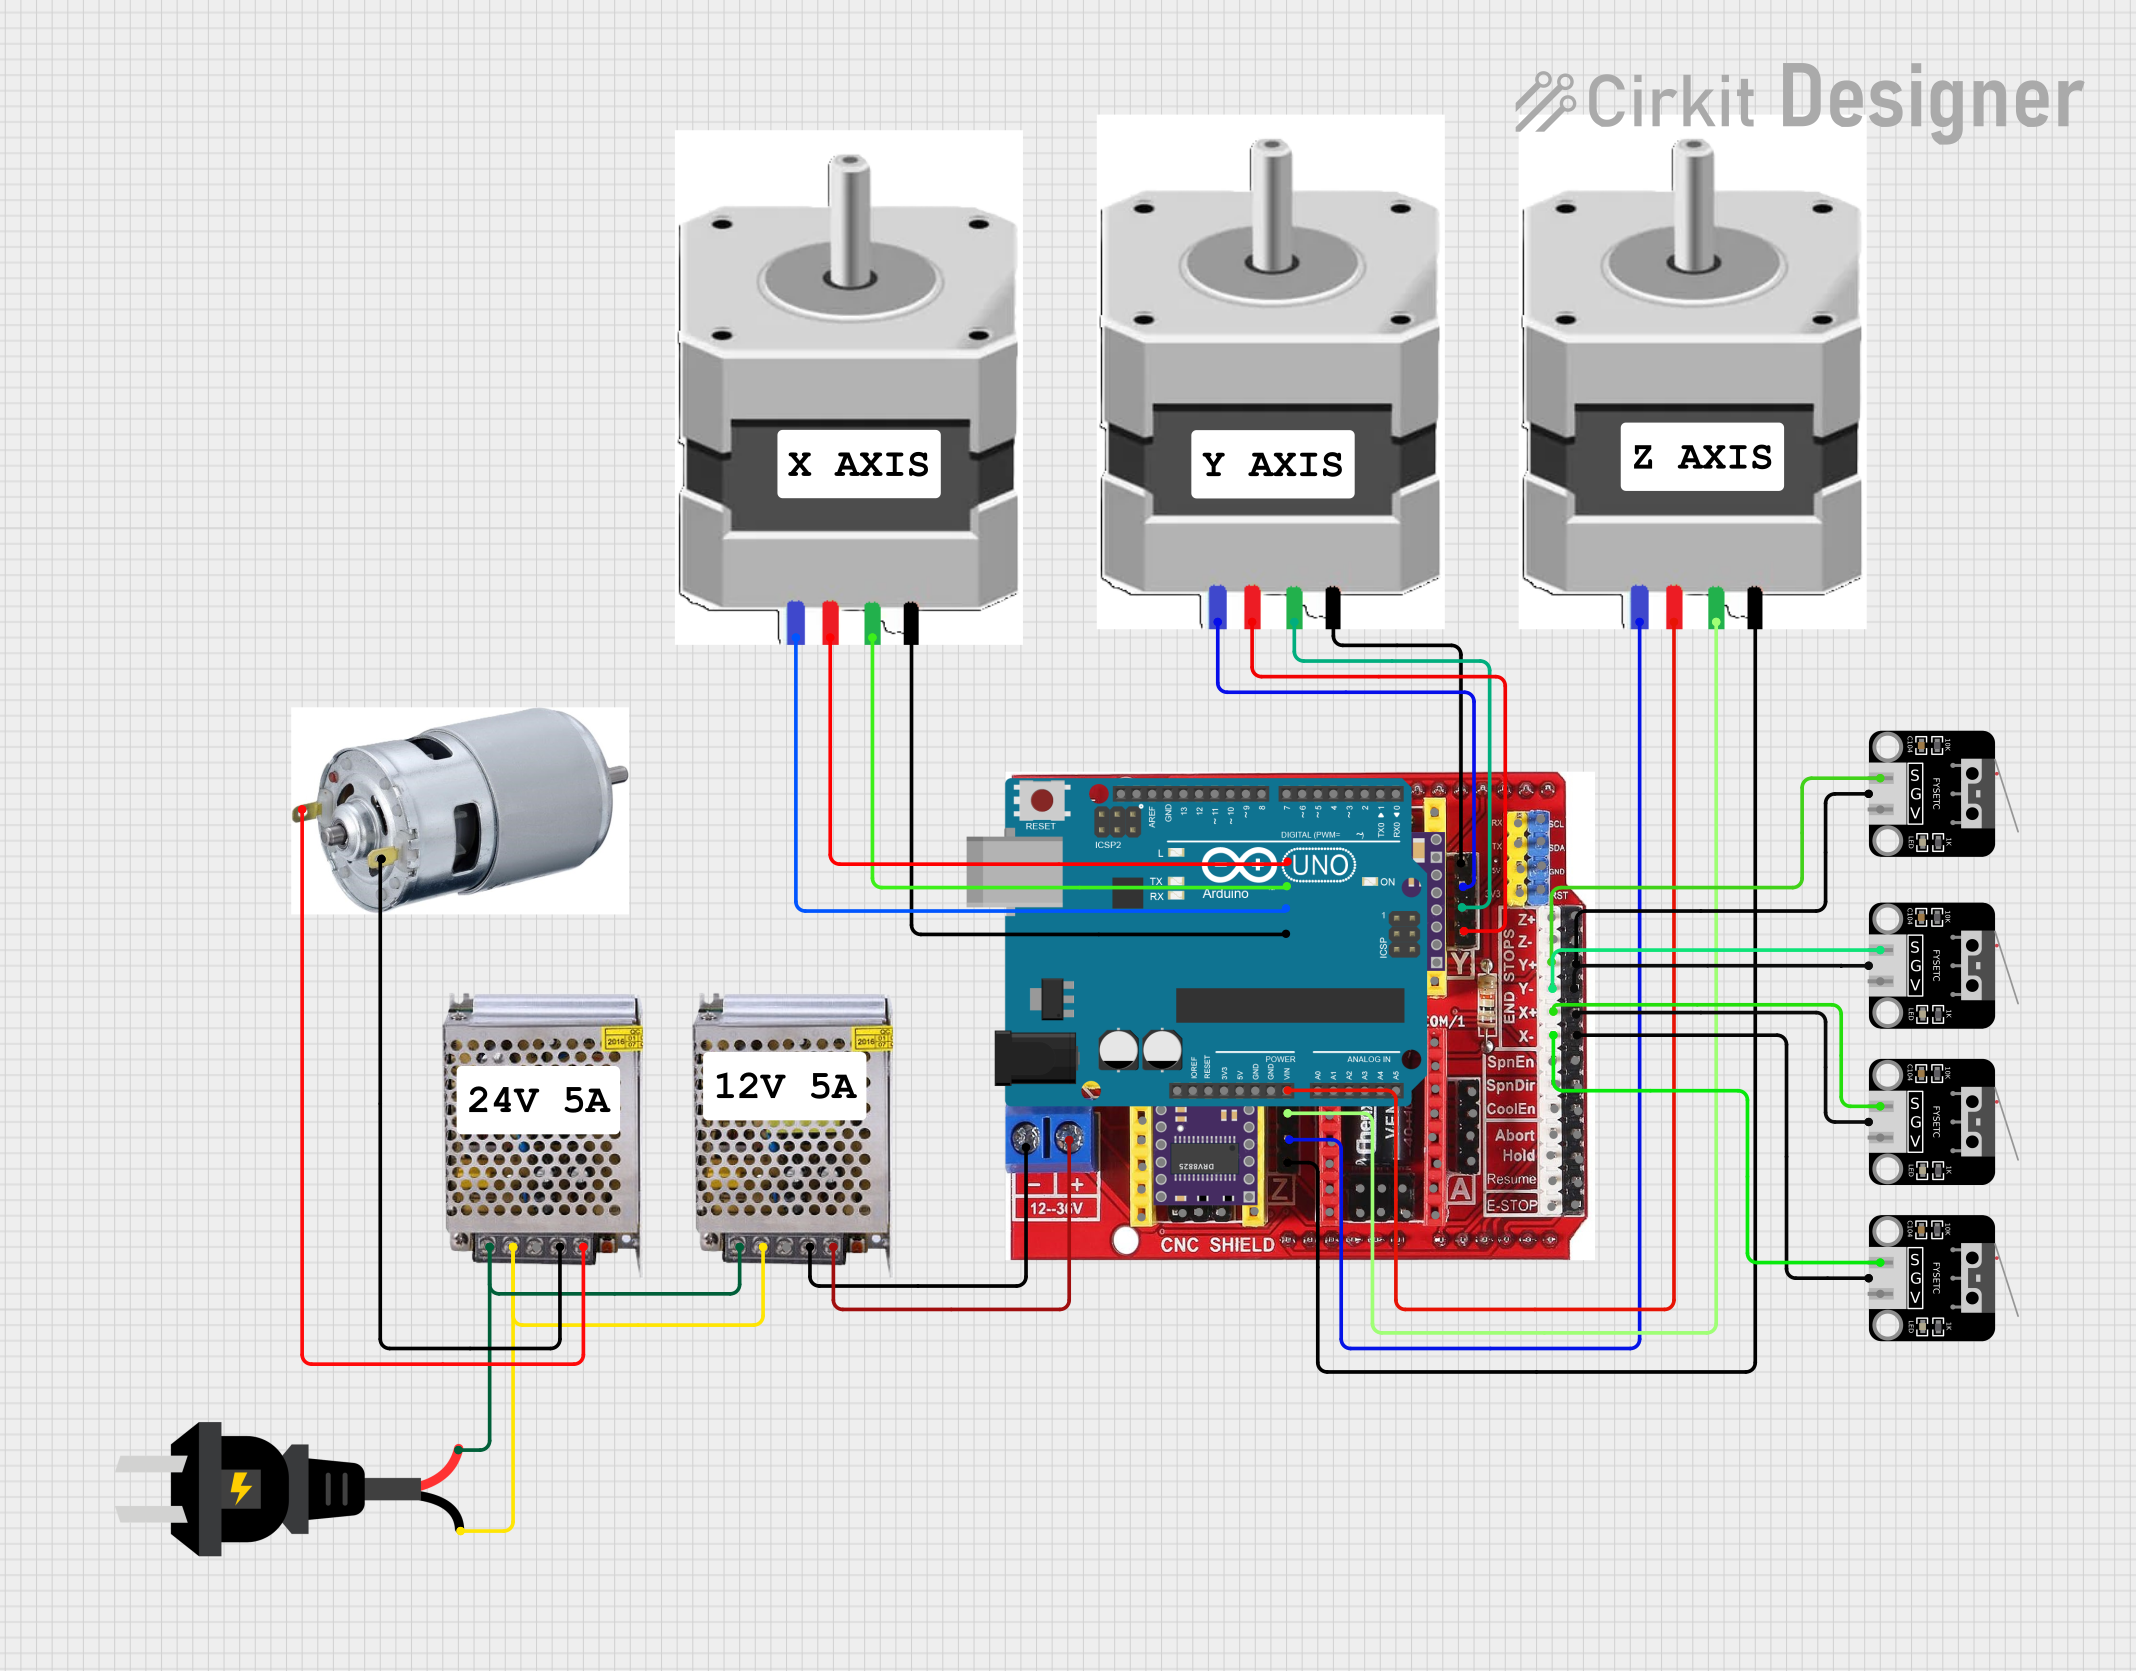
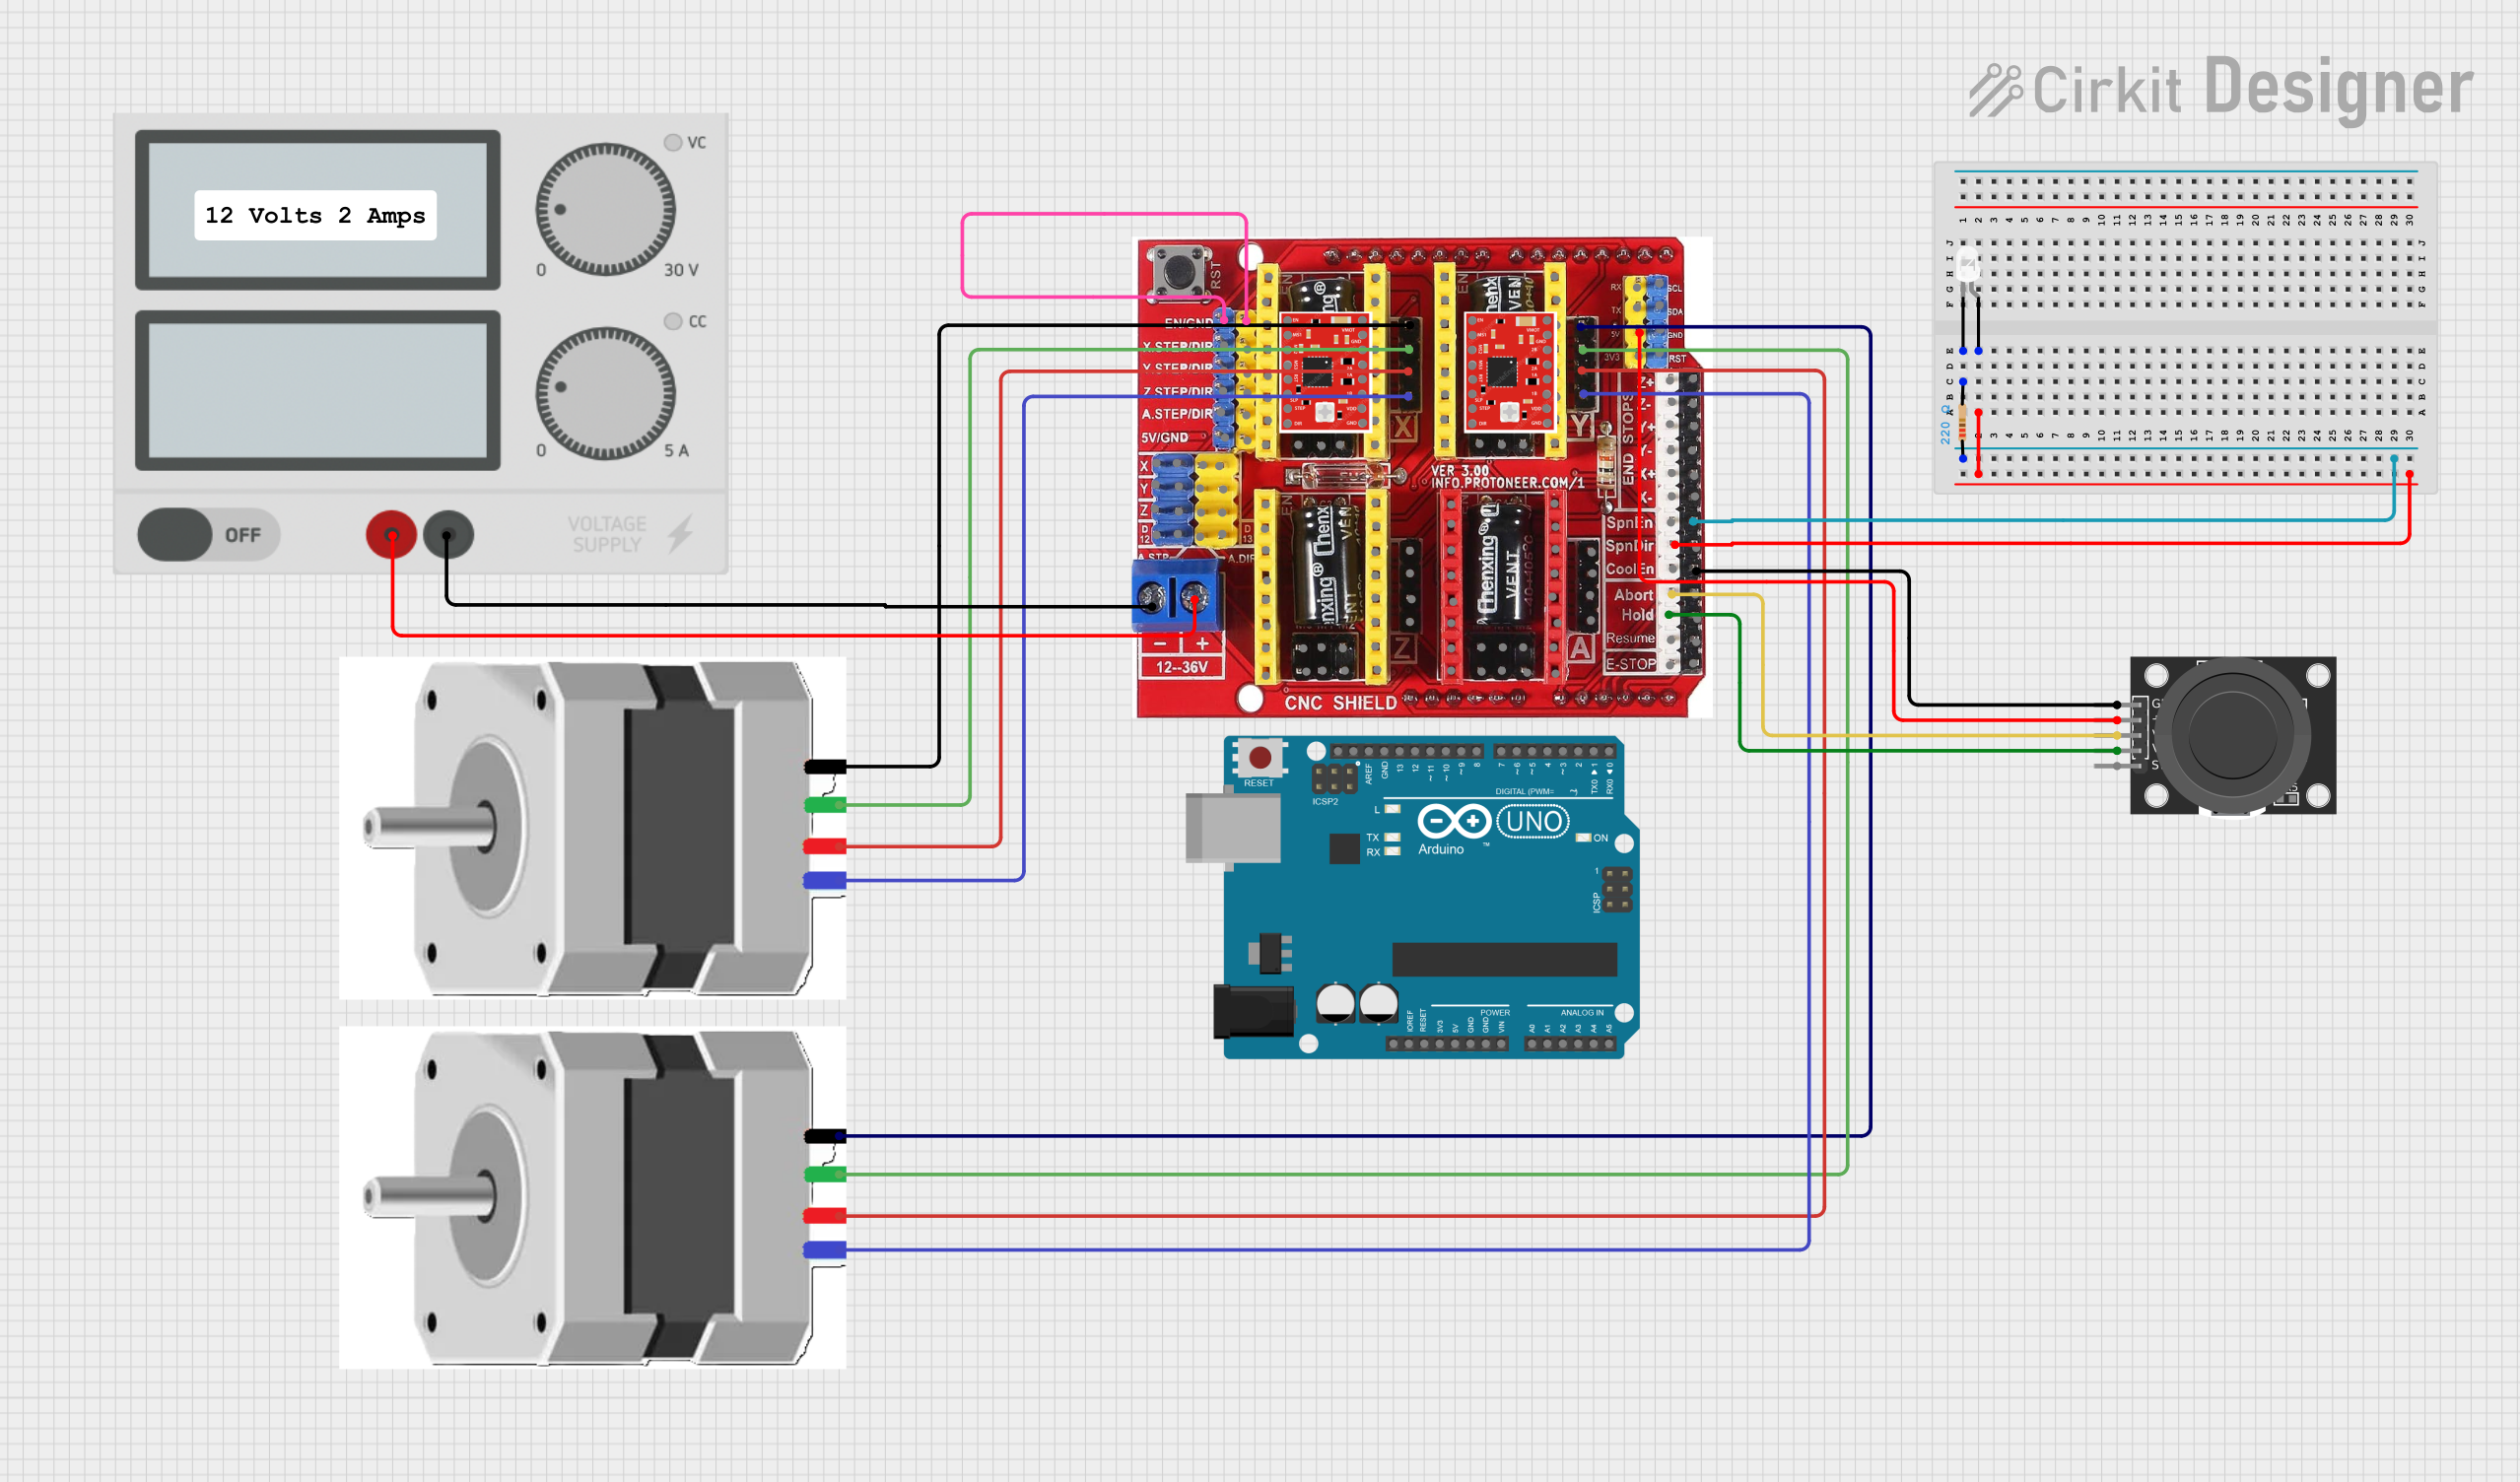
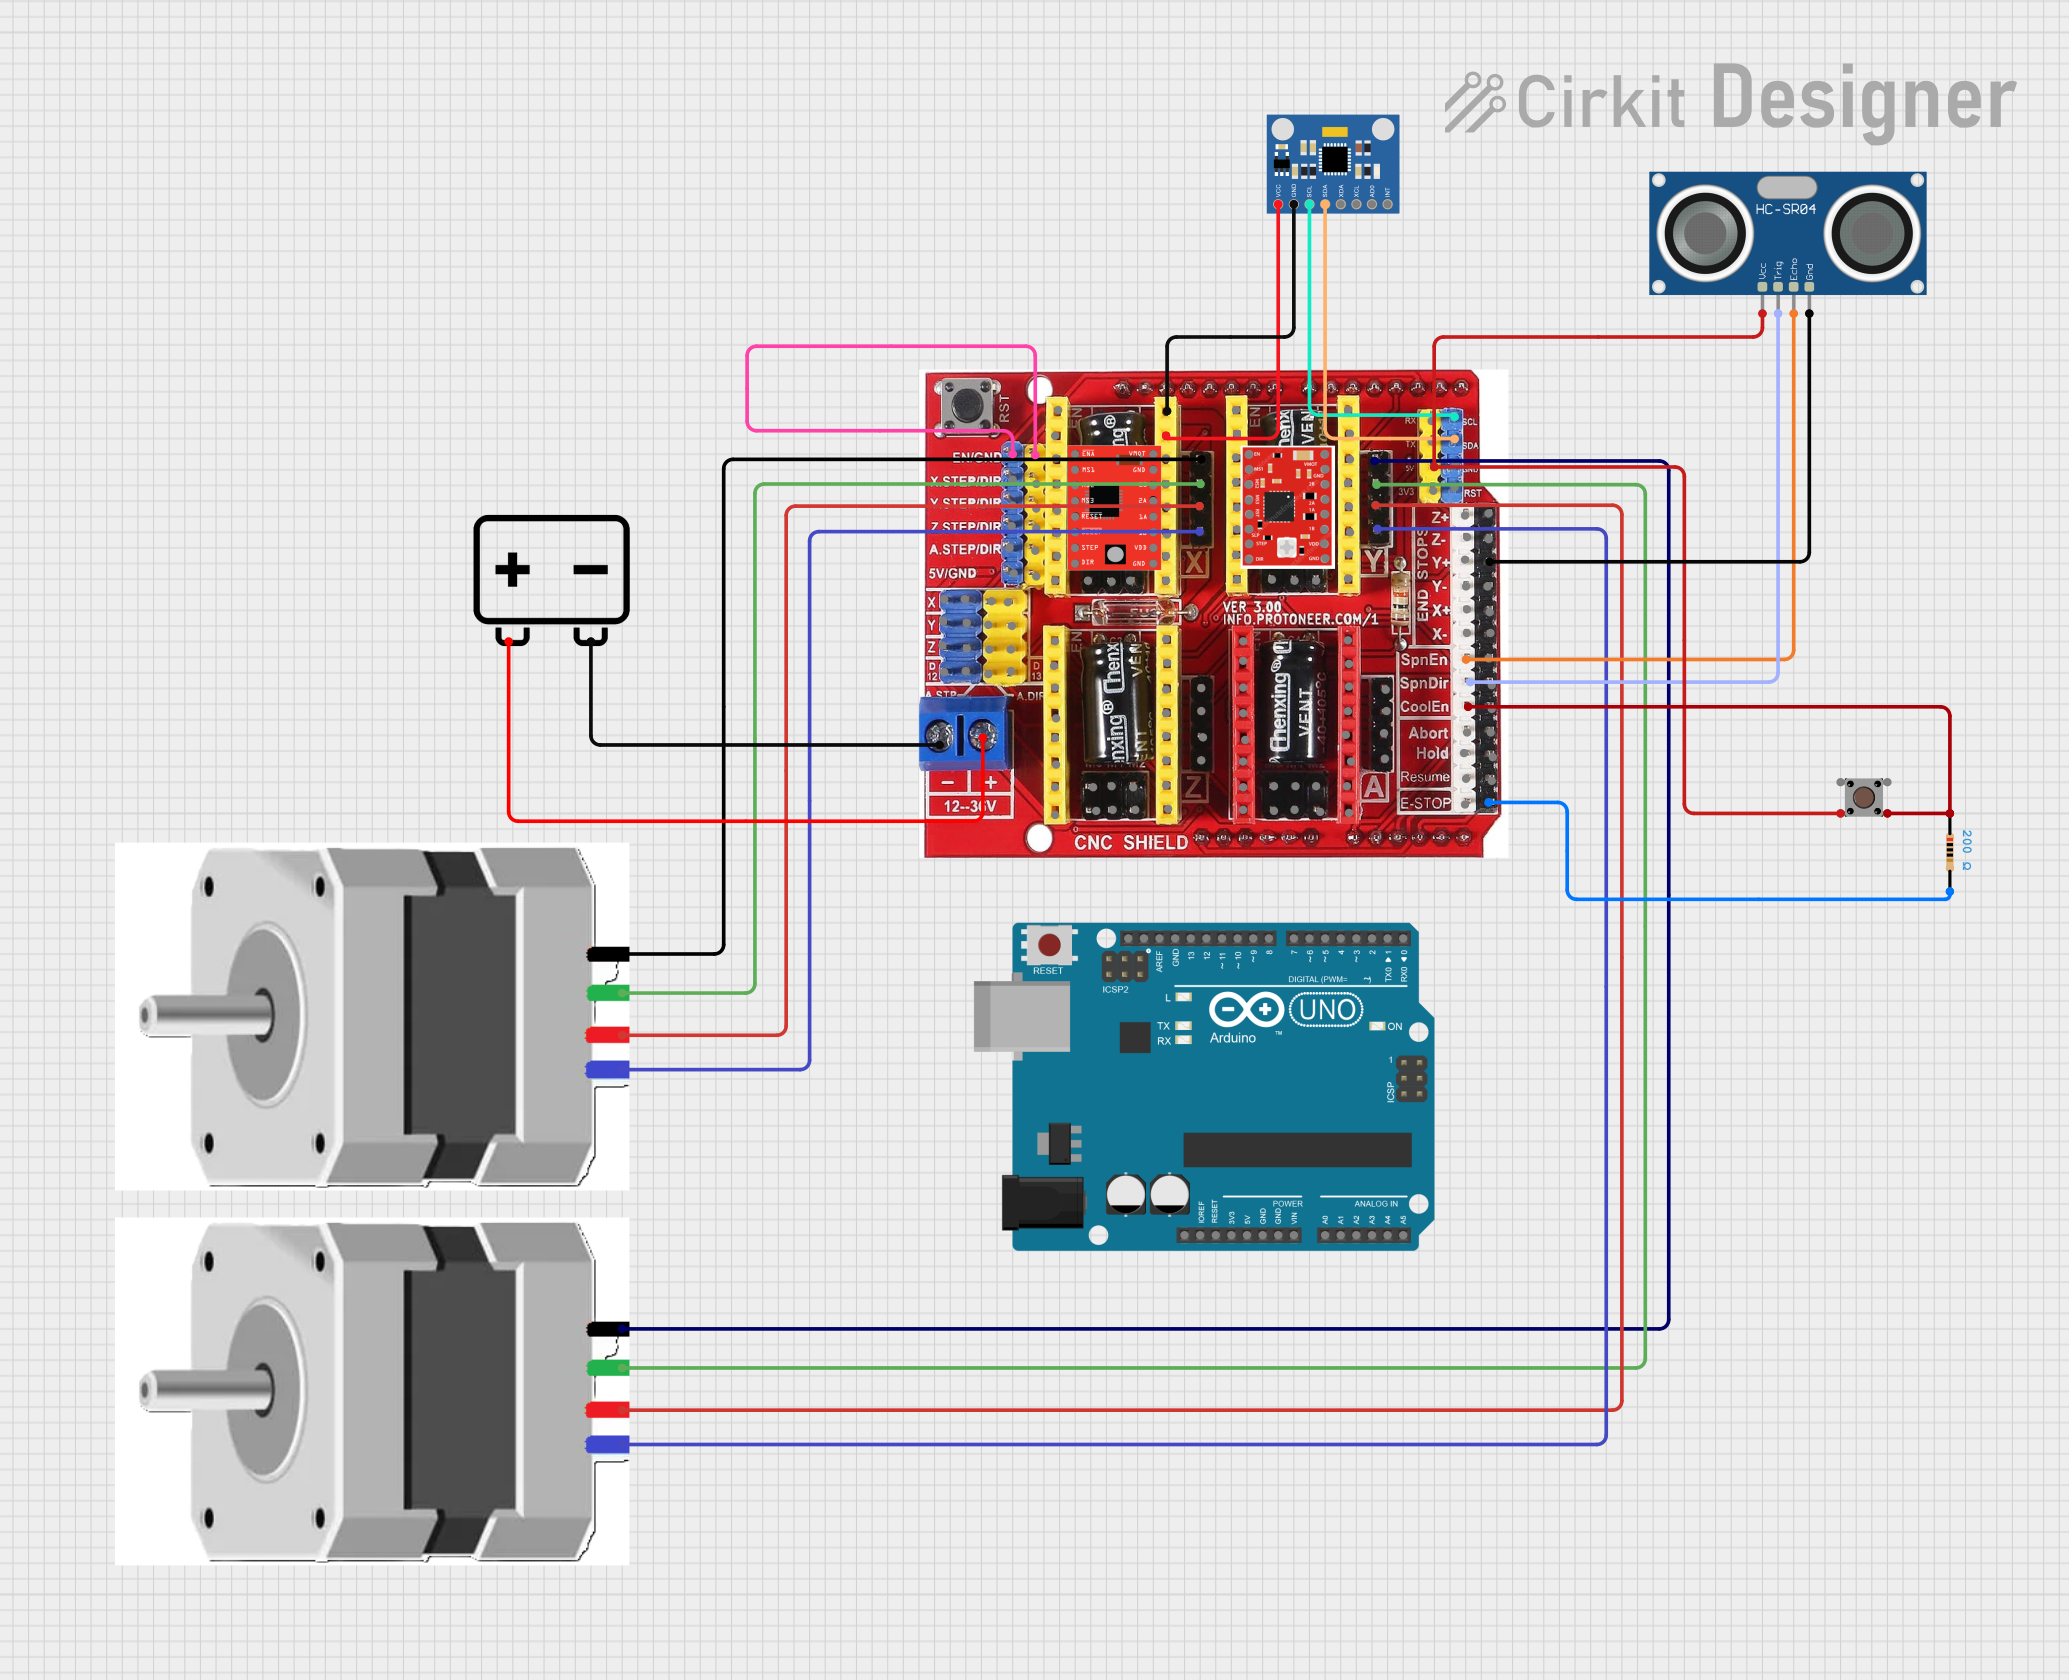
Usage Instructions
How to Use the CNC Shield V3 in a Circuit
Install Stepper Drivers:
- Insert stepper motor drivers (e.g., A4988 or DRV8825) into the corresponding sockets on the CNC Shield V3. Ensure the orientation matches the markings on the board.
- Set the microstepping configuration using the jumpers beneath each driver.
Connect Stepper Motors:
- Connect the stepper motors to the motor output terminals (X, Y, Z, and A if needed).
Connect Endstops:
- Attach endstop switches to the corresponding pins (X+, X-, Y+, Y-, Z+, Z-).
Power the Shield:
- Provide external power (12V-36V) to the VMOT and GND terminals for the motors. Ensure the power supply matches the voltage and current requirements of your motors.
Connect to Arduino:
- Mount the CNC Shield V3 onto an Arduino UNO. The shield will use the Arduino's pins for communication and control.
Upload Firmware:
- Install GRBL firmware on the Arduino using the Arduino IDE. GRBL is an open-source motion control firmware compatible with the CNC Shield V3.
Control the CNC Machine:
- Use G-code sender software (e.g., Universal Gcode Sender) to send commands to the Arduino and control the CNC machine.
Important Considerations and Best Practices
- Cooling: Stepper drivers can overheat during operation. Use heatsinks and/or a cooling fan to prevent thermal shutdown.
- Current Limiting: Adjust the current limit on each stepper driver to match the motor's rated current. This prevents overheating and damage.
- Microstepping: Configure microstepping settings using jumpers to achieve the desired resolution.
- Firmware Configuration: Customize GRBL settings (e.g., steps/mm, max speed) to match your machine's specifications.
Example Code for Arduino UNO
Below is an example of how to upload GRBL firmware to the Arduino UNO:
// Install the GRBL library in the Arduino IDE before uploading this code.
// GRBL is a precompiled firmware, so no modifications are needed here.

#include <grbl.h> // Include the GRBL library

void setup() {
  // GRBL initializes automatically when the Arduino is powered on.
}

void loop() {
  // GRBL handles all motion control in the background.
  // No additional code is required in the main loop.
}
Troubleshooting and FAQs
Common Issues and Solutions
Stepper Motors Not Moving:
- Cause: Incorrect wiring or loose connections.
- Solution: Double-check motor connections and ensure the stepper drivers are properly seated.
Overheating Stepper Drivers:
- Cause: Current limit set too high or insufficient cooling.
- Solution: Adjust the current limit on the driver and add heatsinks or a cooling fan.
Endstops Not Working:
- Cause: Misconfigured wiring or firmware settings.
- Solution: Verify endstop connections and ensure they are enabled in the GRBL configuration.
Arduino Not Responding:
- Cause: Incorrect firmware upload or communication issue.
- Solution: Re-upload GRBL firmware and check the USB connection.
FAQs
Q: Can I use the CNC Shield V3 with an Arduino Mega?
A: The CNC Shield V3 is designed for the Arduino UNO. Using it with an Arduino Mega requires custom wiring.Q: What stepper motors are compatible with the CNC Shield V3?
A: The shield supports bipolar stepper motors with a current rating compatible with the installed drivers (e.g., NEMA 17 motors).Q: How do I reset the GRBL settings?
A: Send the$RST=*command via a G-code sender to reset all GRBL settings to default.Q: Can I control a laser engraver with this shield?
A: Yes, the CNC Shield V3 can control a laser engraver. Configure the GRBL firmware for laser mode.
By following this documentation, you can effectively set up and use the CNC Shield V3 for your CNC or 3D printing projects.