Cirkit Designer Logo
Cirkit Designer
Your all-in-one circuit design IDE
Home / 
Component Documentation

How to Use SparkFun LilPad Protoboard Large: Examples, Pinouts, and Specs
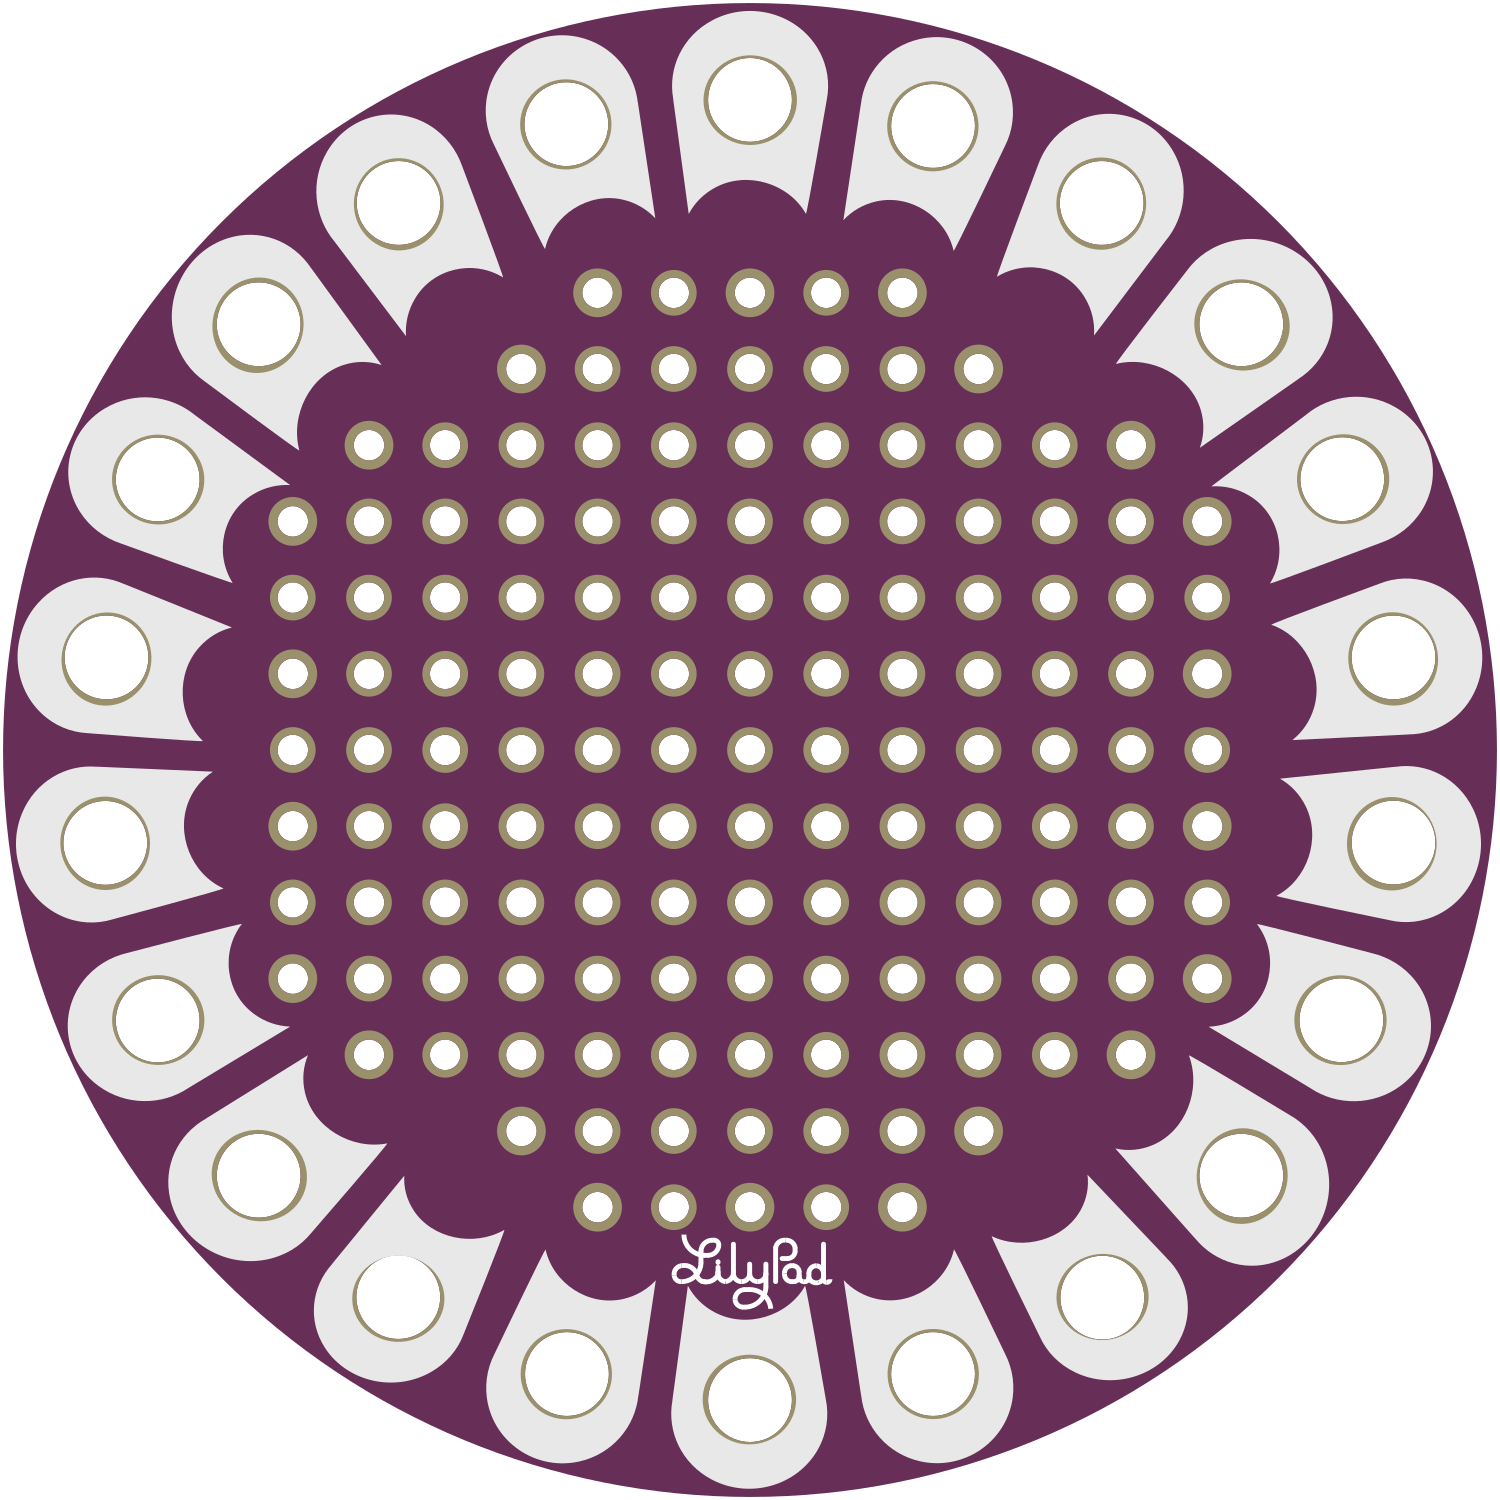
Image of SparkFun LilPad Protoboard Large
Cirkit Designer LogoDesign with SparkFun LilPad Protoboard Large in Cirkit Designer

Introduction

The SparkFun LilyPad Protoboard Large is a versatile and user-friendly prototyping board tailored for the LilyPad Arduino platform. This board is ideal for hobbyists, designers, and engineers who are interested in creating wearable electronics and e-textiles. With its large prototyping surface, the LilyPad Protoboard allows for the integration of various electronic components, enabling the development of complex projects.

Explore Projects Built with SparkFun LilPad Protoboard Large
Use Cirkit Designer to design, explore, and prototype these projects online. Some projects support real-time simulation. Click "Open Project" to start designing instantly!
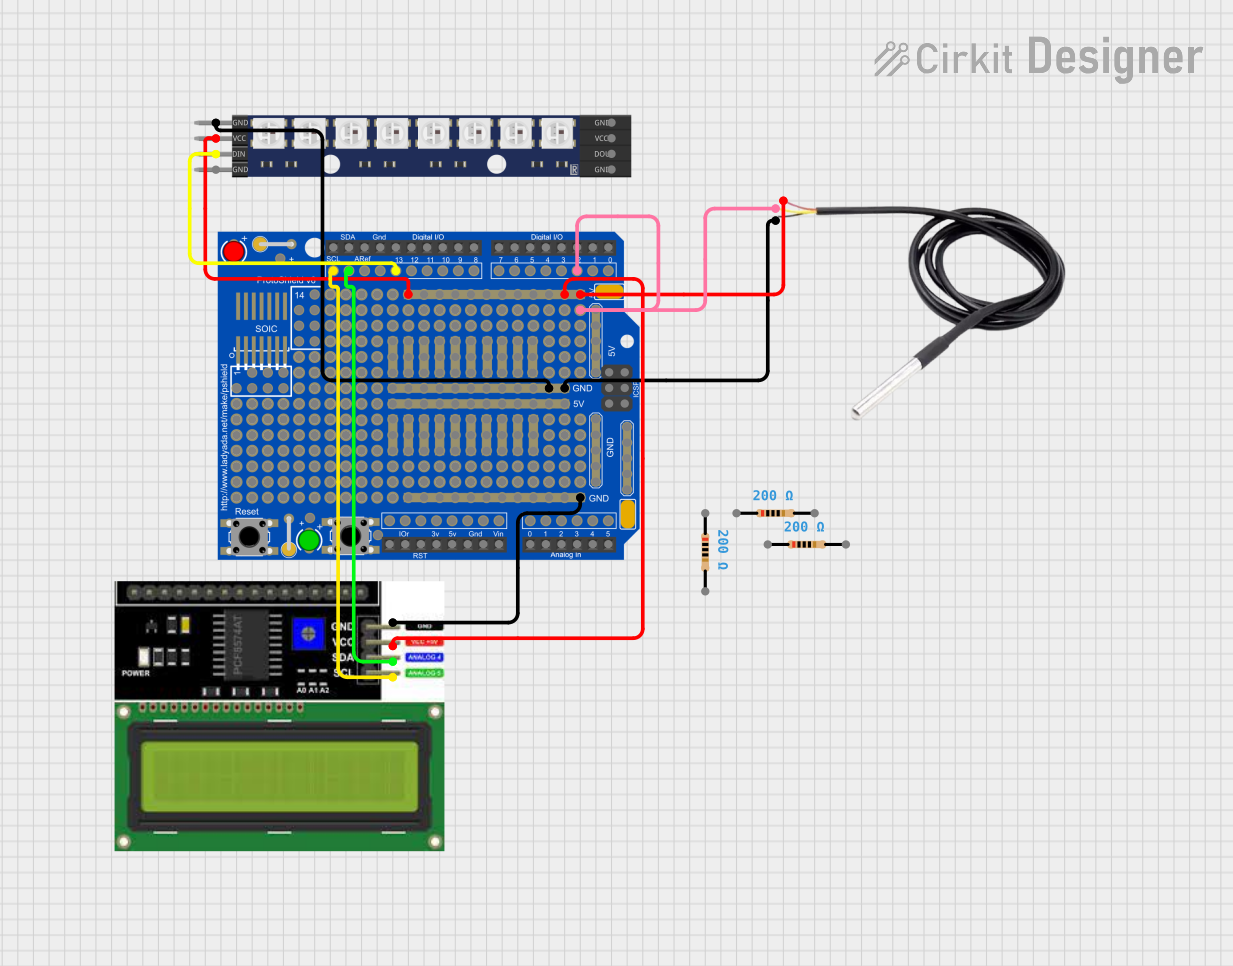
Arduino-Based Temperature Monitoring System with RGB LED Feedback and I2C LCD Display
Image of wemos custom shield: A project utilizing SparkFun LilPad Protoboard Large in a practical application
This circuit features an Adafruit Proto Shield R3 configured with a DS18B20 temperature sensor, a WS2812 RGB LED matrix, and an LCD I2C display. The microcontroller on the Proto Shield reads the temperature from the DS18B20 sensor and displays it on the LCD. It also controls the LED matrix to show random colors and indicates temperature status with onboard LEDs.
Cirkit Designer LogoOpen Project in Cirkit Designer
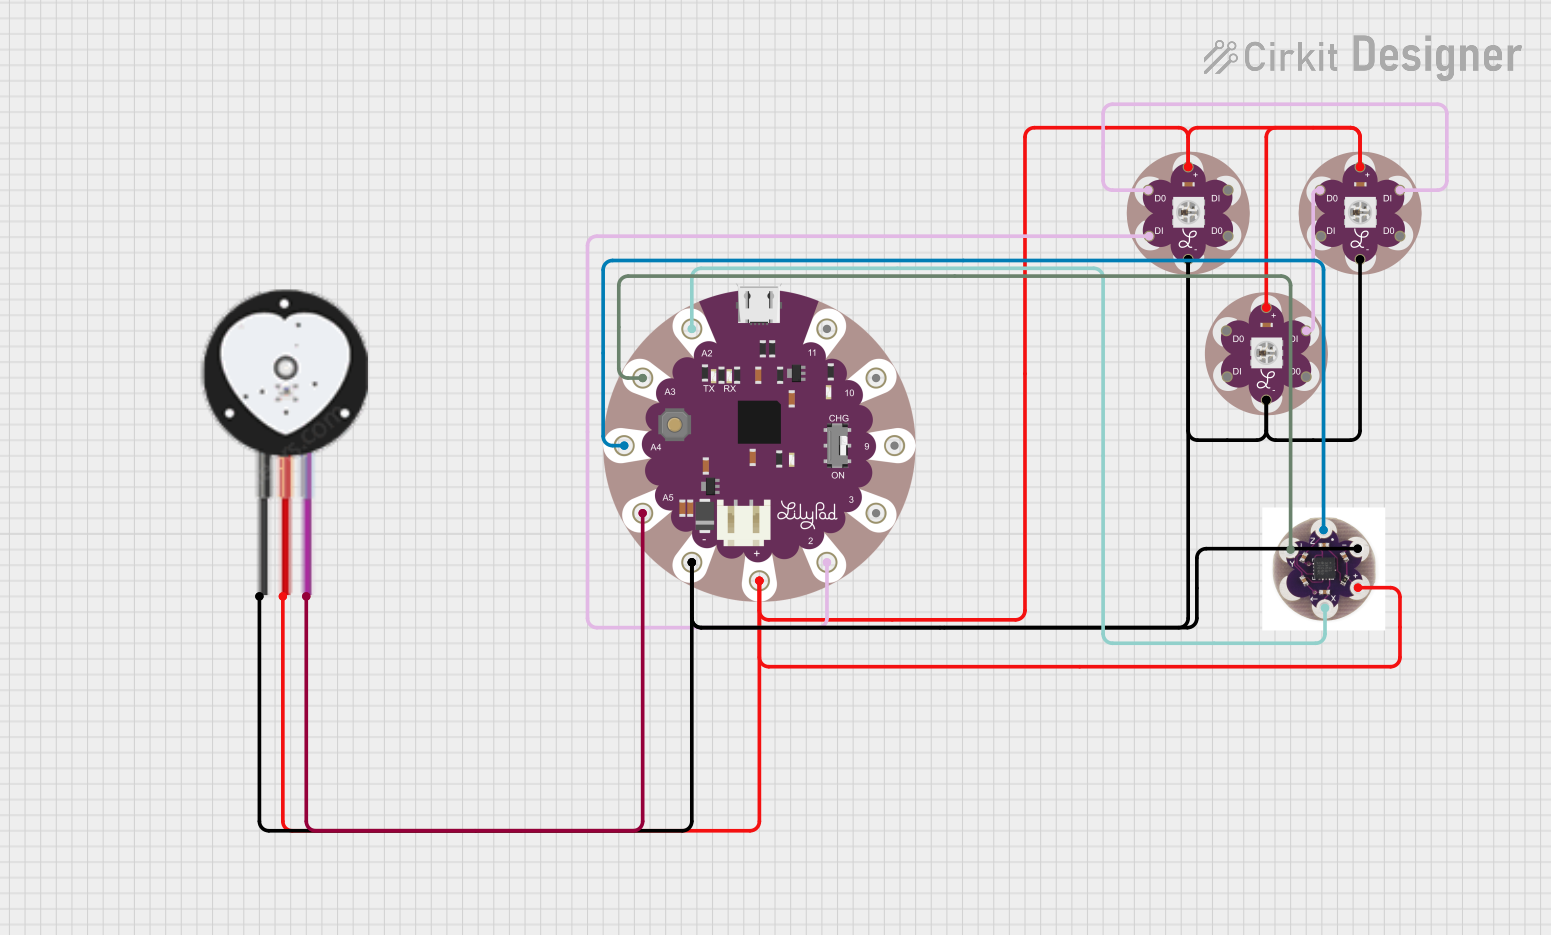
LilyPad Arduino and Accelerometer-Based Wearable Fitness Tracker with Heart Rate Monitoring
Image of proj2: A project utilizing SparkFun LilPad Protoboard Large in a practical application
This circuit is designed for wearable applications, featuring a LilyPad Arduino USB microcontroller that controls a chain of LED Pixel Boards and reads data from a Heart Pulse Sensor and a three-axis Accelerometer. It is capable of interactive LED displays synchronized with motion and heart rate data, suitable for dynamic wearable projects.
Cirkit Designer LogoOpen Project in Cirkit Designer
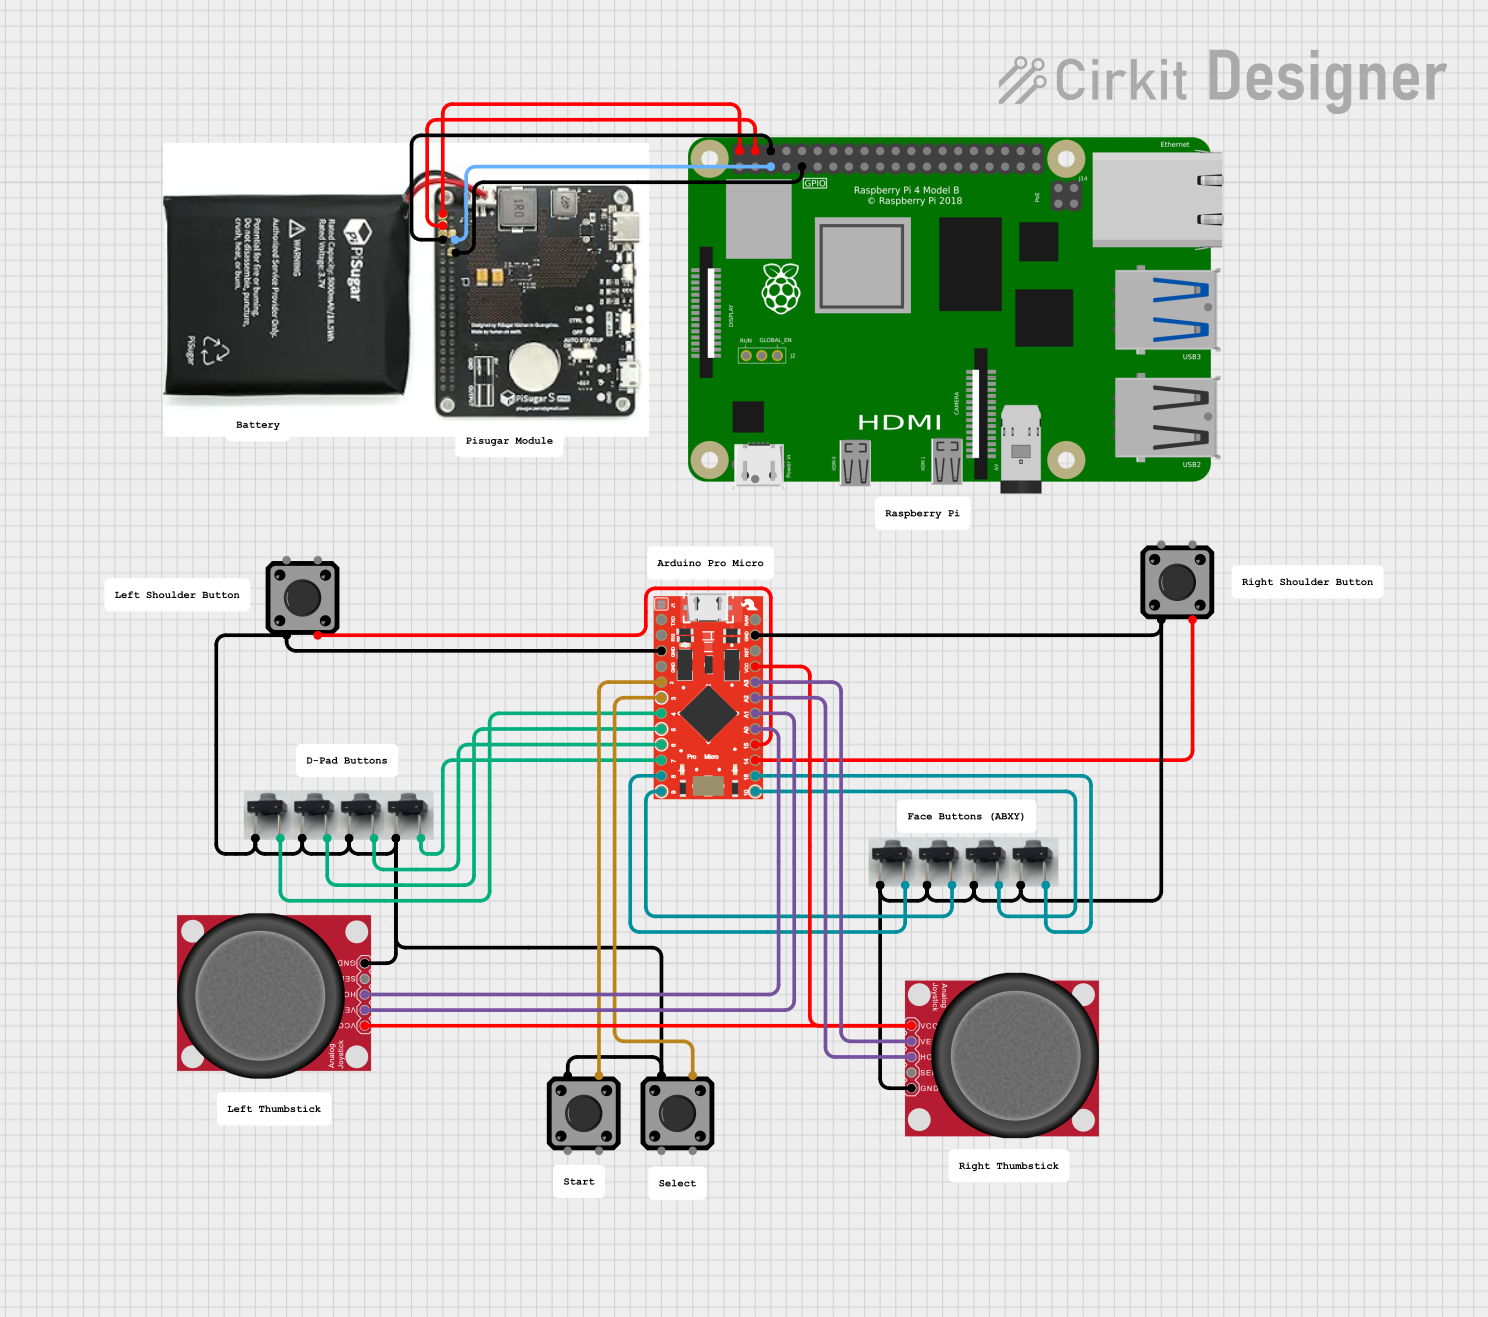
Battery-Powered Game Controller with SparkFun Pro Micro and Raspberry Pi 4B
Image of Raspberry Pi handheld: A project utilizing SparkFun LilPad Protoboard Large in a practical application
This circuit is a custom game controller featuring a SparkFun Pro Micro microcontroller, multiple tactile pushbuttons, and two analog joysticks. The Pro Micro reads inputs from the buttons and joysticks, processes them, and sends the corresponding gamepad signals. Additionally, a Raspberry Pi 4B is powered by a Pisugar S Pro battery module.
Cirkit Designer LogoOpen Project in Cirkit Designer
ATmega328P-Based Sensor Hub with OLED Display and LIDAR
Image of TILTPCB: A project utilizing SparkFun LilPad Protoboard Large in a practical application
This circuit features an Mtiny Uno ATmega328P microcontroller as its central processing unit, interfacing with a variety of sensors and peripherals. It includes a 0.96" OLED display and an MPU6050 accelerometer/gyroscope for user interface and motion sensing, respectively. The circuit also integrates a TF LUNA LIDAR for distance measurement, a DHT11 sensor for temperature and humidity readings, and uses a 9V battery with a 7805 voltage regulator for power management. Communication with a computer for programming and data exchange is facilitated by an Adafruit FTDI Friend module.
Cirkit Designer LogoOpen Project in Cirkit Designer

Explore Projects Built with SparkFun LilPad Protoboard Large

Use Cirkit Designer to design, explore, and prototype these projects online. Some projects support real-time simulation. Click "Open Project" to start designing instantly!
Image of wemos custom shield: A project utilizing SparkFun LilPad Protoboard Large in a practical application
Arduino-Based Temperature Monitoring System with RGB LED Feedback and I2C LCD Display
This circuit features an Adafruit Proto Shield R3 configured with a DS18B20 temperature sensor, a WS2812 RGB LED matrix, and an LCD I2C display. The microcontroller on the Proto Shield reads the temperature from the DS18B20 sensor and displays it on the LCD. It also controls the LED matrix to show random colors and indicates temperature status with onboard LEDs.
Cirkit Designer LogoOpen Project in Cirkit Designer
Image of proj2: A project utilizing SparkFun LilPad Protoboard Large in a practical application
LilyPad Arduino and Accelerometer-Based Wearable Fitness Tracker with Heart Rate Monitoring
This circuit is designed for wearable applications, featuring a LilyPad Arduino USB microcontroller that controls a chain of LED Pixel Boards and reads data from a Heart Pulse Sensor and a three-axis Accelerometer. It is capable of interactive LED displays synchronized with motion and heart rate data, suitable for dynamic wearable projects.
Cirkit Designer LogoOpen Project in Cirkit Designer
Image of Raspberry Pi handheld: A project utilizing SparkFun LilPad Protoboard Large in a practical application
Battery-Powered Game Controller with SparkFun Pro Micro and Raspberry Pi 4B
This circuit is a custom game controller featuring a SparkFun Pro Micro microcontroller, multiple tactile pushbuttons, and two analog joysticks. The Pro Micro reads inputs from the buttons and joysticks, processes them, and sends the corresponding gamepad signals. Additionally, a Raspberry Pi 4B is powered by a Pisugar S Pro battery module.
Cirkit Designer LogoOpen Project in Cirkit Designer
Image of TILTPCB: A project utilizing SparkFun LilPad Protoboard Large in a practical application
ATmega328P-Based Sensor Hub with OLED Display and LIDAR
This circuit features an Mtiny Uno ATmega328P microcontroller as its central processing unit, interfacing with a variety of sensors and peripherals. It includes a 0.96" OLED display and an MPU6050 accelerometer/gyroscope for user interface and motion sensing, respectively. The circuit also integrates a TF LUNA LIDAR for distance measurement, a DHT11 sensor for temperature and humidity readings, and uses a 9V battery with a 7805 voltage regulator for power management. Communication with a computer for programming and data exchange is facilitated by an Adafruit FTDI Friend module.
Cirkit Designer LogoOpen Project in Cirkit Designer

Common Applications and Use Cases

  • Wearable electronics
  • E-textile projects
  • Educational purposes for learning electronics and circuit design
  • Rapid prototyping of LilyPad-based designs

Technical Specifications

The LilyPad Protoboard Large is designed to accommodate a wide range of electronic components and interconnections. Below are the key technical details:

  • Dimensions: 50mm outer diameter
  • Material: High-quality, flexible PCB material
  • Connection Points: Multiple sew tabs for easy connection to LilyPad components

Pin Configuration and Descriptions

Pin Name Description
VCC Power supply input, typically +3.3V or +5V
GND Ground connection
A0-A5 Analog input pins
D2-D13 Digital I/O pins
SDA/SCL I2C communication pins
RX/TX Serial communication pins

Note: The pin names correspond to the typical LilyPad Arduino pinout.

Usage Instructions

Integrating with LilyPad Arduino

  1. Powering the Protoboard:

    • Connect a power source to the VCC and GND sew tabs.
    • Ensure the power source matches the voltage requirements of the LilyPad Arduino.
  2. Connecting Components:

    • Use conductive thread to sew electronic components to the protoboard's sew tabs.
    • Ensure that the connections are secure and that there are no short circuits.
  3. Programming:

    • Connect the LilyPad Arduino to your computer using an appropriate USB cable.
    • Use the Arduino IDE to upload your code to the LilyPad Arduino.

Important Considerations and Best Practices

  • Always disconnect the power source before sewing or unsoldering components.
  • Avoid overlapping conductive thread paths to prevent short circuits.
  • Test each connection with a multimeter before powering up the circuit.
  • Use a needle designed for conductive thread to ensure strong connections.

Troubleshooting and FAQs

Common Issues

  • Loose Connections: Ensure all sewn connections are tight and secure.
  • Short Circuits: Check for overlapping conductive threads or exposed component leads.
  • Power Issues: Verify that the power source is correctly connected and providing the appropriate voltage.

Solutions and Tips

  • Strengthening Connections: Apply a small amount of clear nail polish over sewn connections to reinforce them.
  • Isolating Threads: Use heat-shrink tubing or fabric patches to insulate areas where conductive threads may cross.
  • Testing Components: Use a multimeter to test each component individually before integrating it into the circuit.

FAQs

Q: Can I wash my LilyPad Protoboard project? A: Yes, but you should remove the power source and ensure that the project is completely dry before repowering.

Q: What type of power source should I use? A: A coin cell battery or a rechargeable LiPo battery designed for wearables is recommended.

Q: How do I connect non-LilyPad components to the protoboard? A: Non-LilyPad components can be sewn or soldered to the protoboard if they are compatible with the power specifications and pinout.

Example Code for LilyPad Arduino

Here's a simple example of how to blink an LED using the LilyPad Arduino connected to the LilyPad Protoboard Large. This code assumes you have an LED connected to pin D13.

// Define the LED pin
const int ledPin = 13;

void setup() {
  // Initialize the LED pin as an output
  pinMode(ledPin, OUTPUT);
}

void loop() {
  // Turn the LED on
  digitalWrite(ledPin, HIGH);
  // Wait for one second
  delay(1000);
  // Turn the LED off
  digitalWrite(ledPin, LOW);
  // Wait for one second
  delay(1000);
}

Note: Ensure that the LED is connected with the correct polarity, with the positive side to D13 and the negative side to GND.

Remember to adhere to the 80-character line length limit for code comments, wrapping text as necessary. This example demonstrates proper comment wrapping and clear, concise instructions for a simple operation.