How to Use Nema 6 Stepper Motor: Examples, Pinouts, and Specs
Introduction
The Nema 6 stepper motor is a high-precision motor designed for applications requiring accurate control of angular position, speed, and torque. With a frame size of 6 inches, it is suitable for heavy-duty tasks and is commonly used in industrial automation, robotics, CNC machinery, and 3D printing. Its ability to divide a full rotation into a large number of steps makes it ideal for applications where precision is critical.
Explore Projects Built with Nema 6 Stepper Motor

Explore Projects Built with Nema 6 Stepper Motor
Common Applications
- CNC machines for precise cutting and engraving
- Robotics for controlled movement and positioning
- 3D printers for accurate layer deposition
- Conveyor systems in industrial automation
- Medical devices requiring precise motion control
Technical Specifications
Below are the key technical details of the Nema 6 stepper motor:
| Parameter | Value |
|---|---|
| Frame Size | 6 inches (152.4 mm) |
| Step Angle | 1.8° (200 steps per revolution) |
| Holding Torque | Up to 12 Nm (varies by model) |
| Rated Voltage | 12V to 48V (model-dependent) |
| Rated Current | 2A to 6A per phase |
| Number of Phases | 2 |
| Shaft Diameter | 12 mm |
| Insulation Resistance | ≥ 100 MΩ |
| Operating Temperature | -20°C to +50°C |
| Weight | Approximately 4.5 kg |
Pin Configuration and Descriptions
The Nema 6 stepper motor typically has four or six wires, depending on whether it is a bipolar or unipolar motor. Below is the pin configuration for a standard 4-wire bipolar stepper motor:
| Wire Color | Function | Description |
|---|---|---|
| Red | Coil A+ | Positive terminal of Coil A |
| Blue | Coil A- | Negative terminal of Coil A |
| Green | Coil B+ | Positive terminal of Coil B |
| Black | Coil B- | Negative terminal of Coil B |
For a 6-wire unipolar motor, two additional wires (commonly yellow and white) are used as center taps for each coil.
Usage Instructions
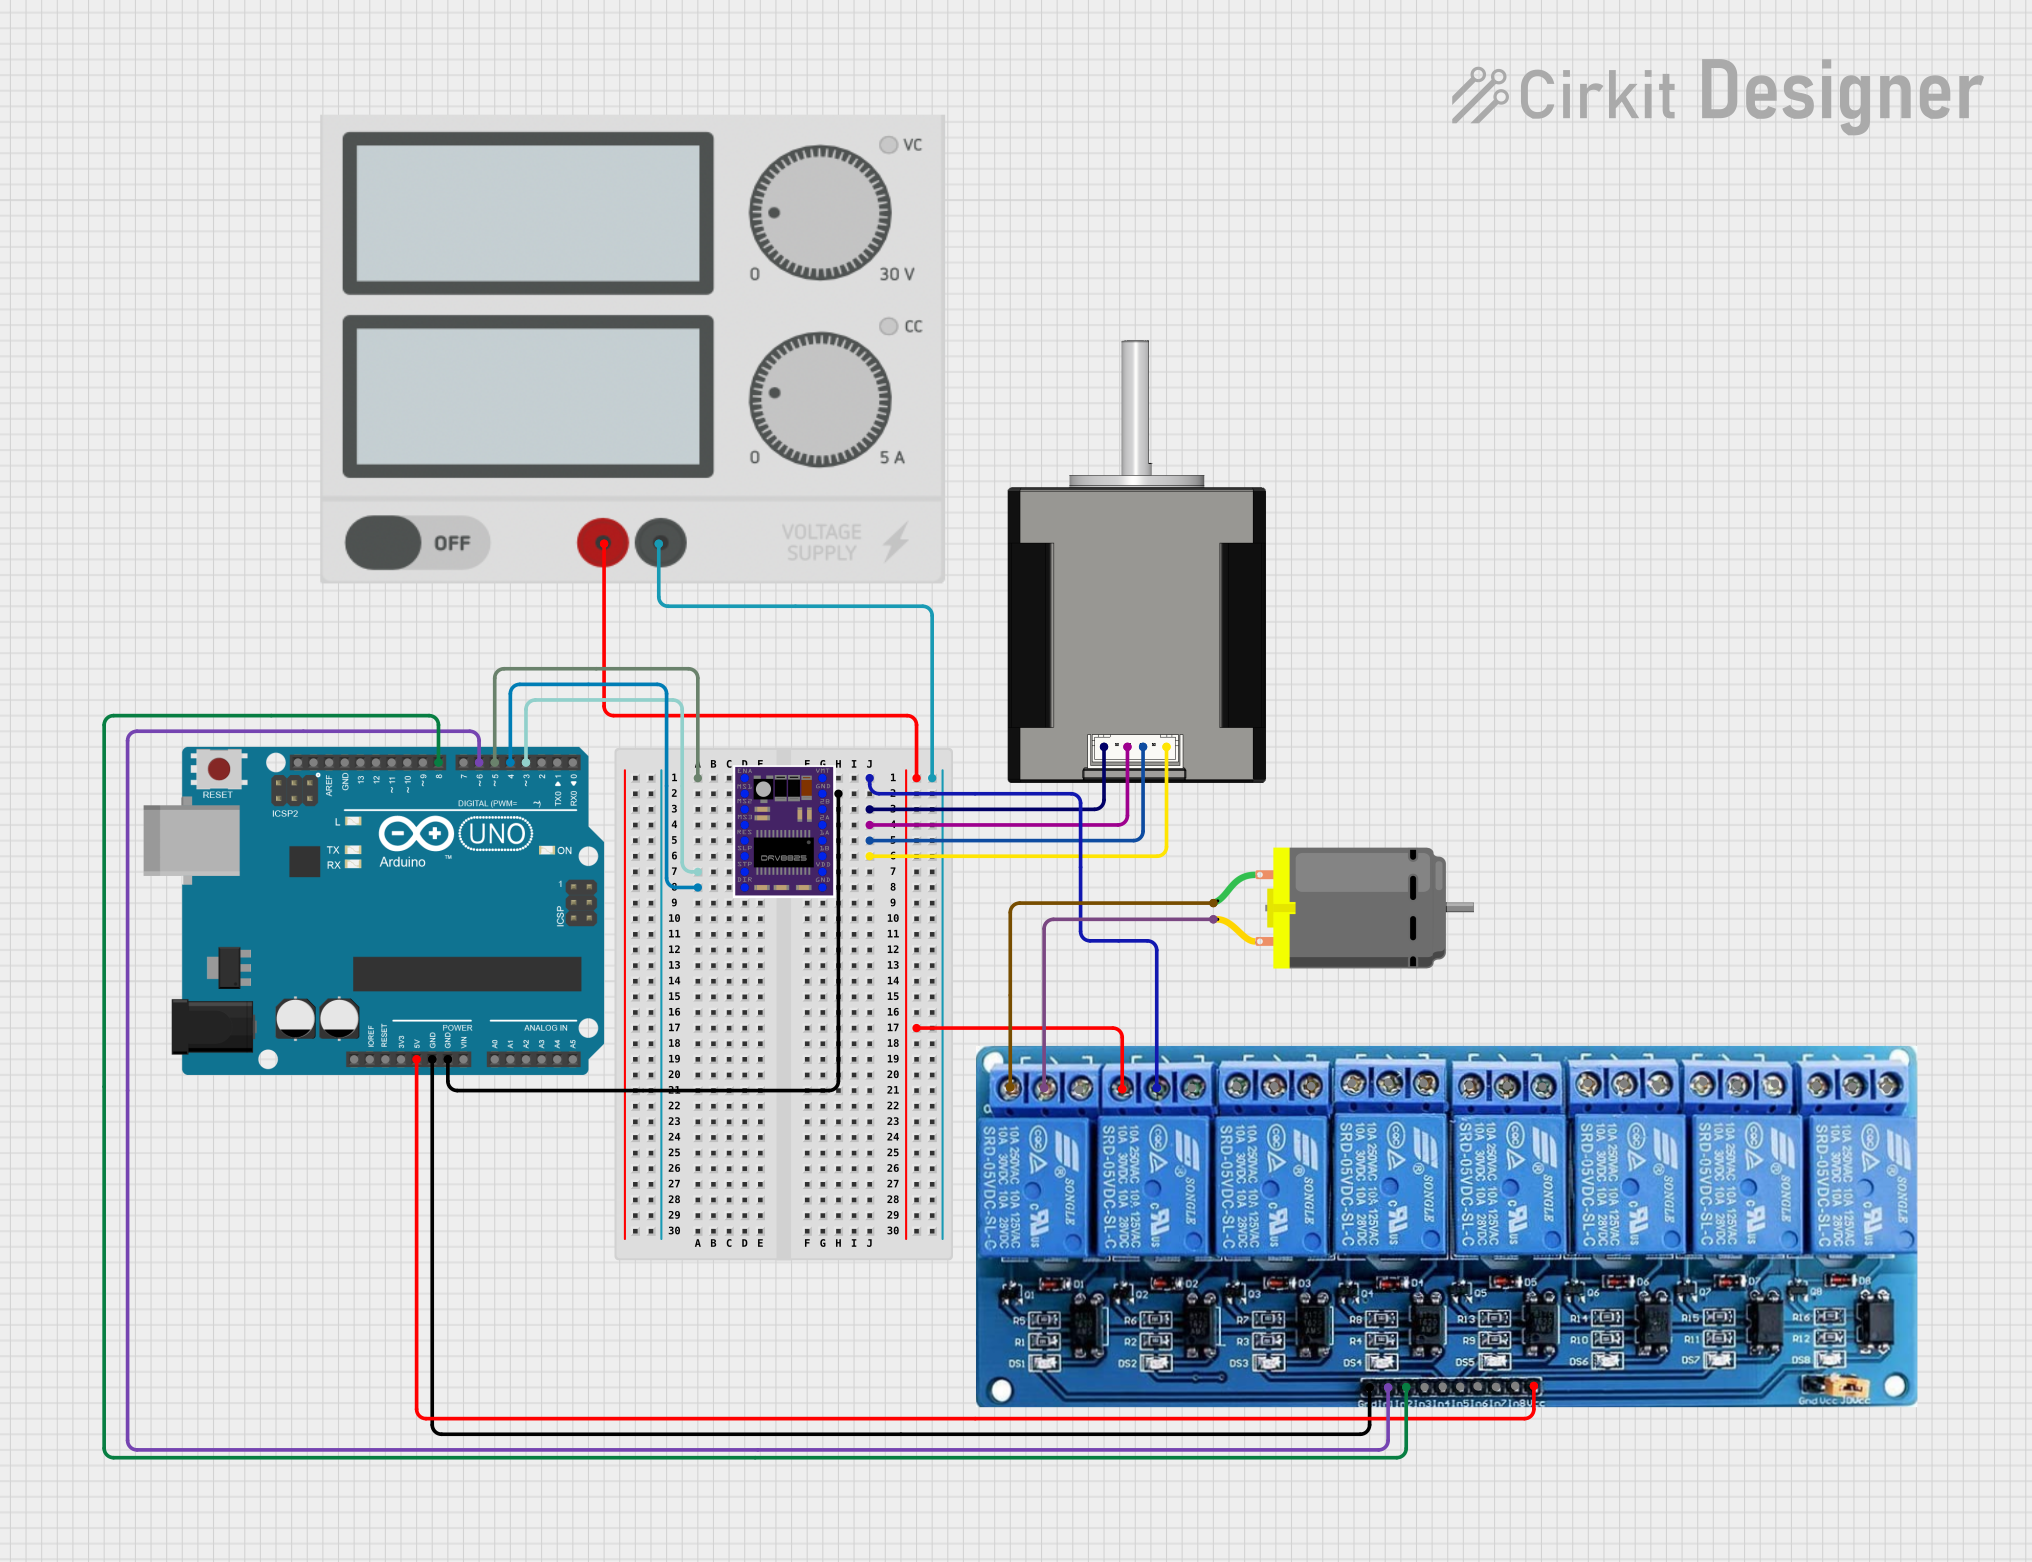
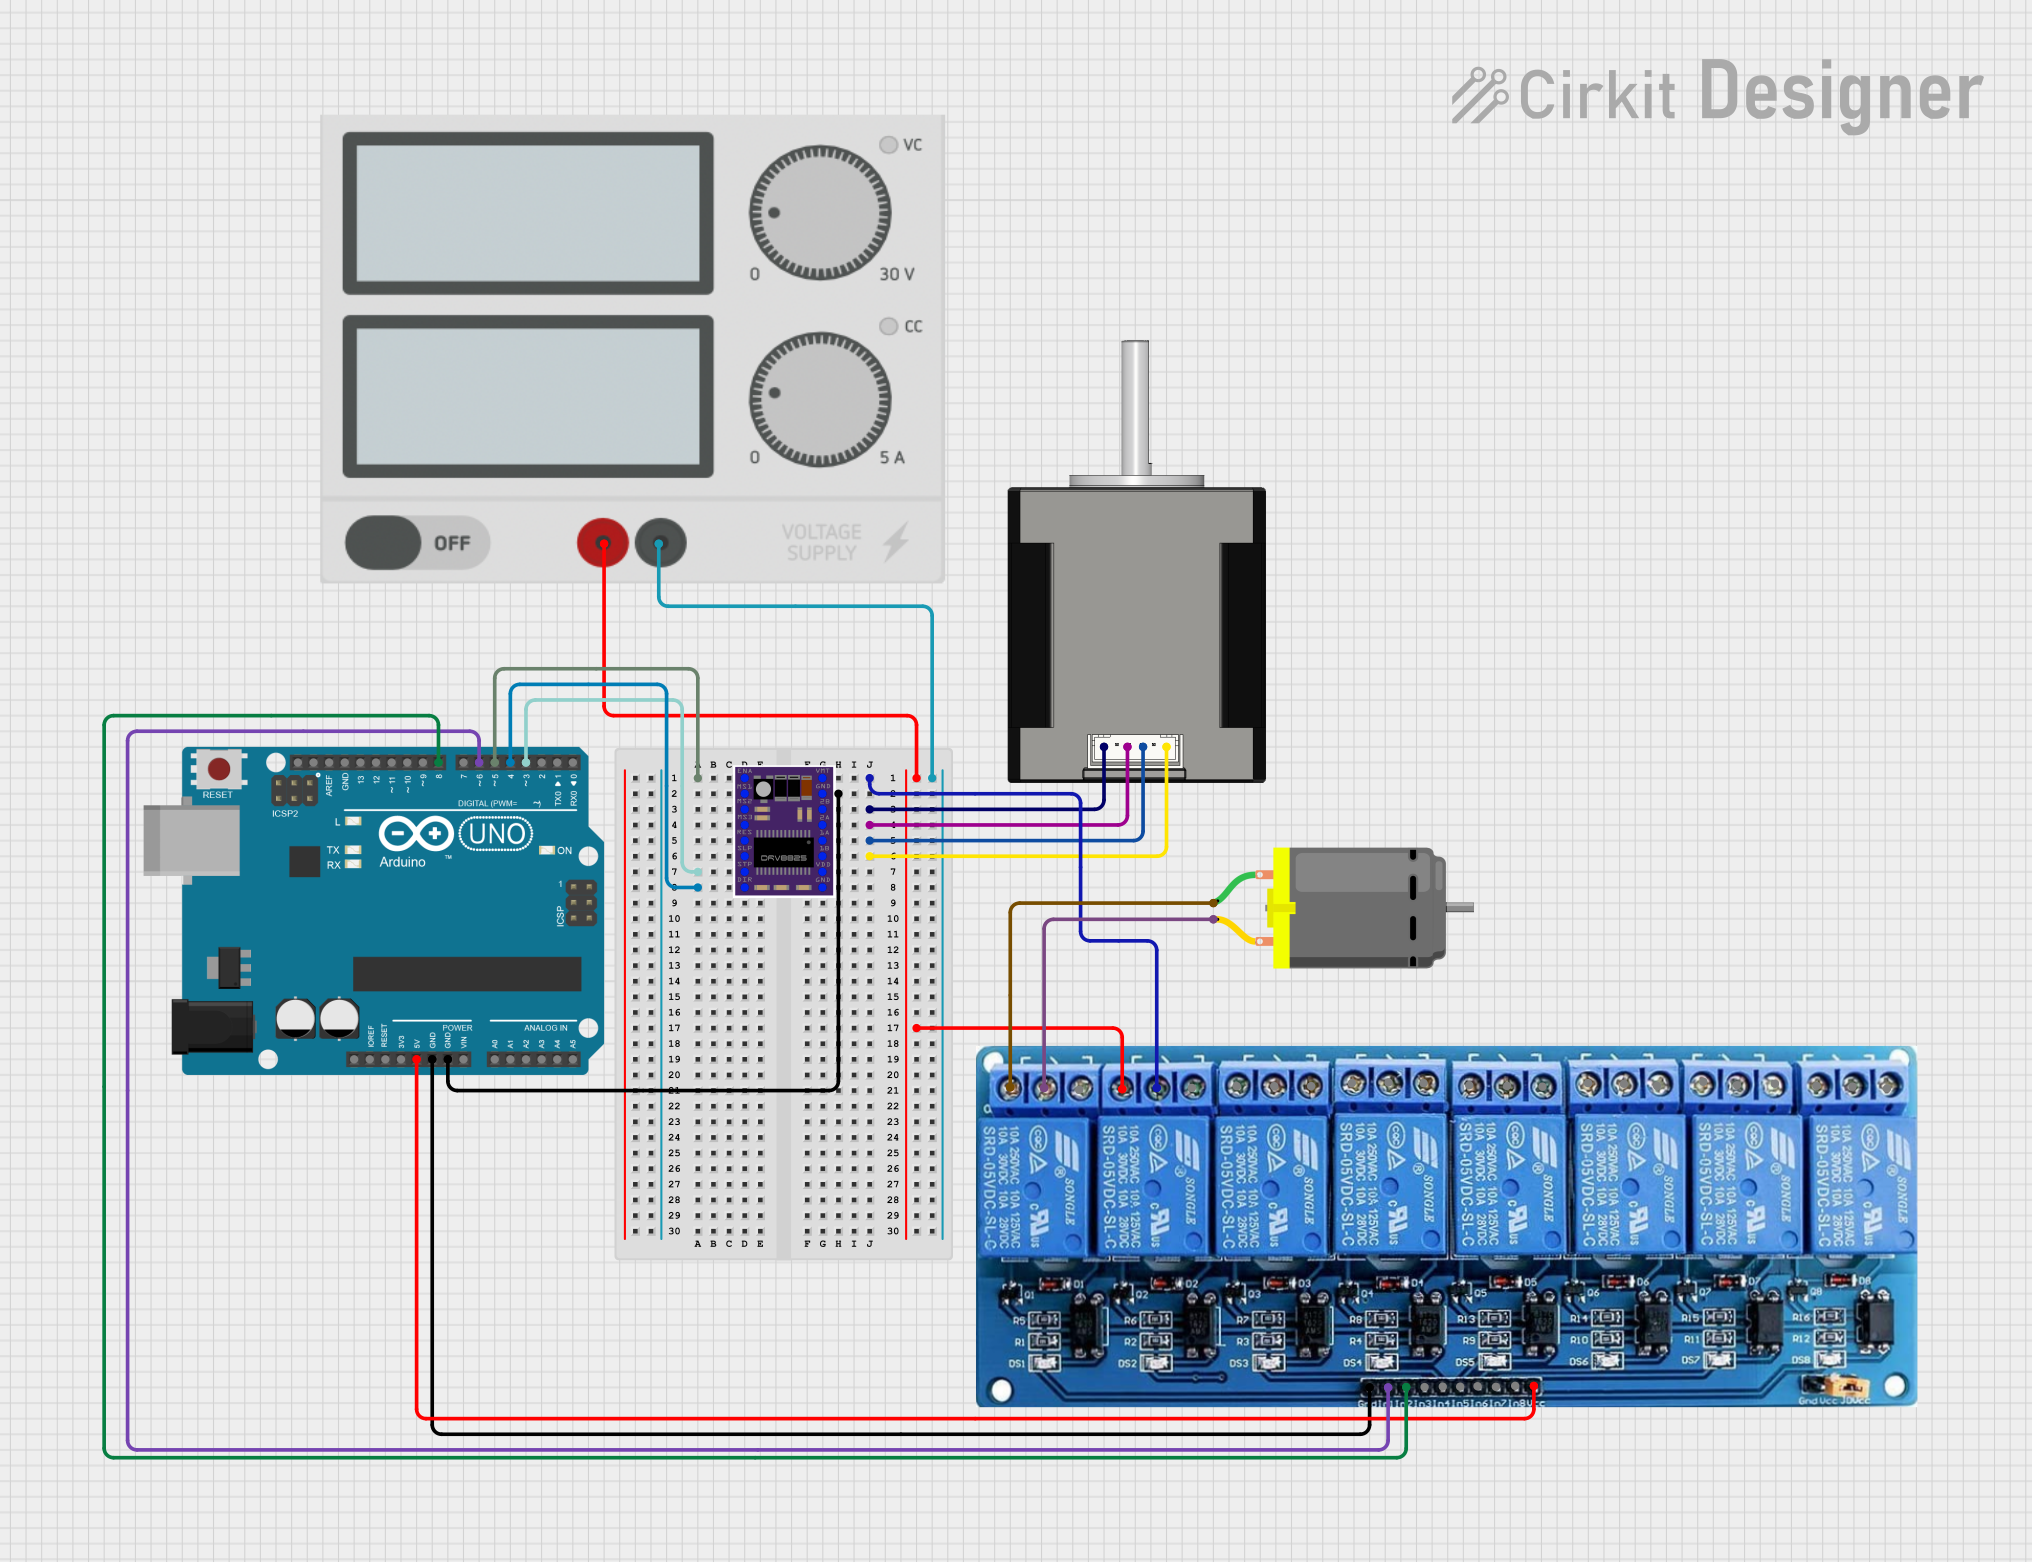
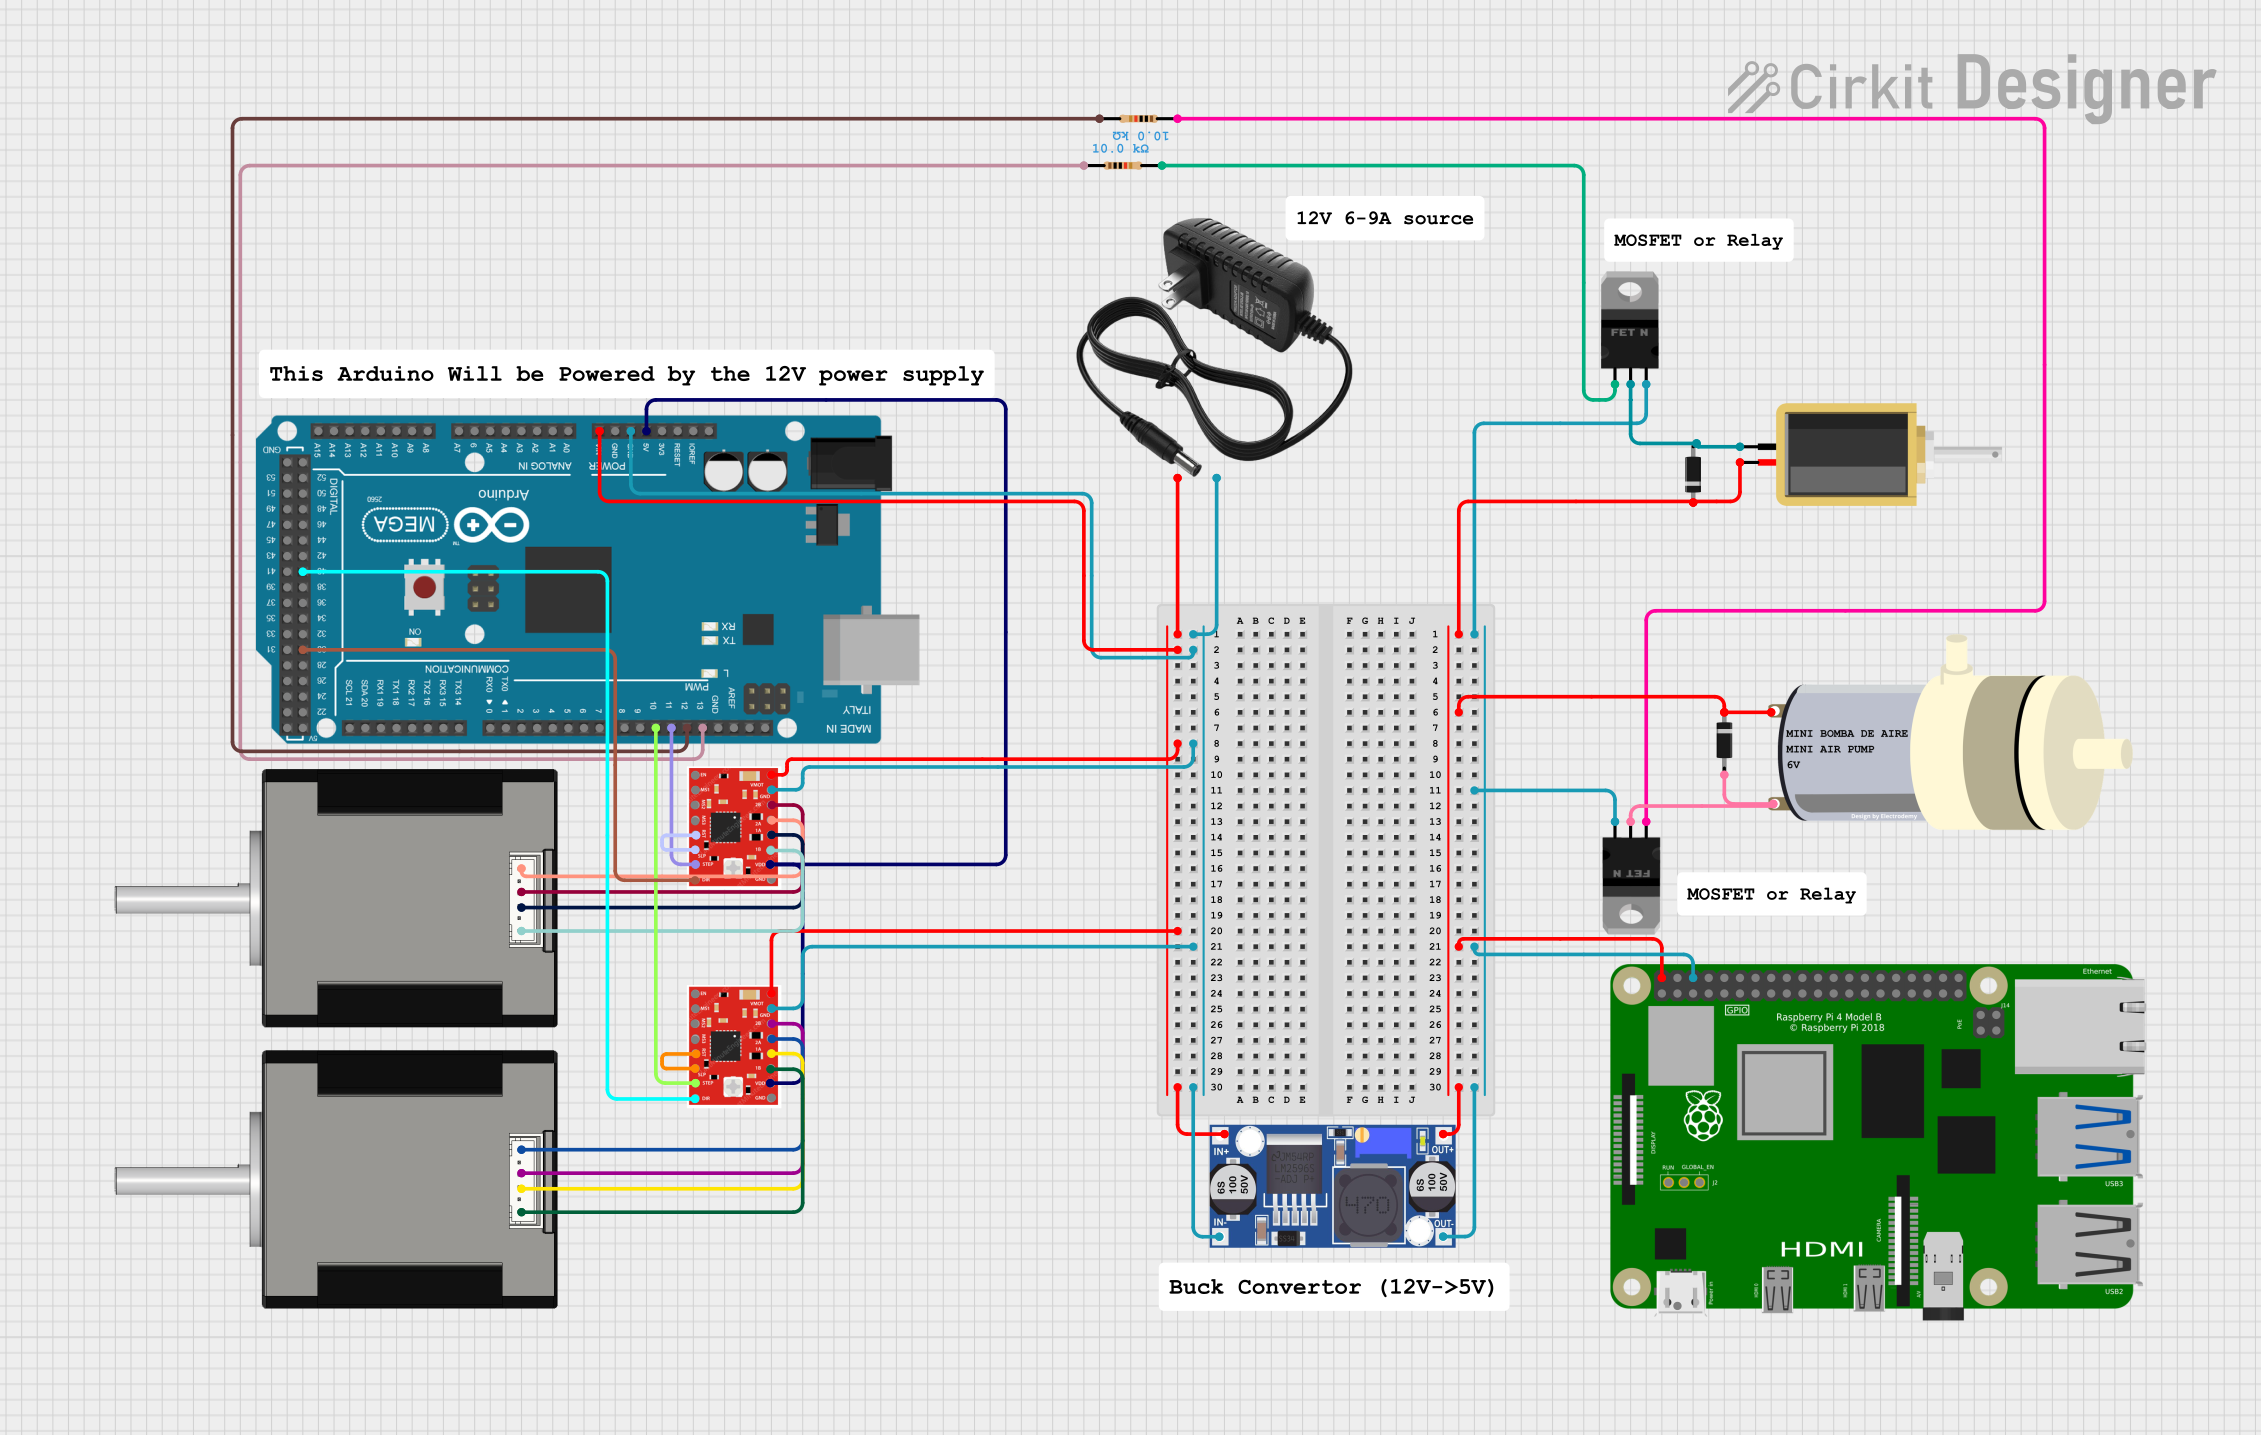
How to Use the Nema 6 Stepper Motor in a Circuit
- Power Supply: Ensure the power supply matches the motor's rated voltage and current. Use a stepper motor driver to regulate power and control the motor.
- Driver Connection: Connect the motor to a compatible stepper motor driver. For a 4-wire motor, connect the wires to the driver as per the pin configuration.
- Microcontroller Interface: Use a microcontroller (e.g., Arduino UNO) to send control signals to the driver. The driver will interpret these signals to control the motor's steps and direction.
- Programming: Write a program to control the motor's speed, direction, and number of steps. Use libraries like the Arduino
AccelStepperlibrary for easier implementation.
Important Considerations
- Current Limiting: Set the current limit on the driver to prevent overheating and damage to the motor.
- Cooling: Use a heat sink or cooling fan if the motor operates at high currents for extended periods.
- Step Resolution: Adjust the microstepping settings on the driver for smoother motion and higher resolution.
- Wiring: Double-check the wiring to avoid short circuits or incorrect connections.
Example Code for Arduino UNO
Below is an example code to control a Nema 6 stepper motor using an Arduino UNO and a stepper motor driver:
#include <AccelStepper.h>

// Define motor interface type. Use 1 for a driver with STEP and DIR pins.
#define MOTOR_INTERFACE_TYPE 1

// Define pin connections
const int stepPin = 2;  // Pin connected to the STEP input on the driver
const int dirPin = 3;   // Pin connected to the DIR input on the driver

// Create an instance of the AccelStepper class
AccelStepper stepper(MOTOR_INTERFACE_TYPE, stepPin, dirPin);

void setup() {
  // Set the maximum speed and acceleration
  stepper.setMaxSpeed(1000);  // Maximum speed in steps per second
  stepper.setAcceleration(500);  // Acceleration in steps per second^2

  // Set initial direction
  stepper.setSpeed(500);  // Speed in steps per second
}

void loop() {
  // Move the motor forward 200 steps (1 full revolution for 1.8° step angle)
  stepper.moveTo(200);
  while (stepper.distanceToGo() != 0) {
    stepper.run();  // Run the motor to the target position
  }

  delay(1000);  // Wait for 1 second

  // Move the motor backward 200 steps
  stepper.moveTo(-200);
  while (stepper.distanceToGo() != 0) {
    stepper.run();  // Run the motor to the target position
  }

  delay(1000);  // Wait for 1 second
}
Notes:
- Replace
stepPinanddirPinwith the actual pins connected to your driver. - Adjust
setMaxSpeedandsetAccelerationvalues based on your application.
Troubleshooting and FAQs
Common Issues and Solutions
Motor Not Moving:
- Cause: Incorrect wiring or loose connections.
- Solution: Verify the wiring and ensure all connections are secure.
Motor Vibrates but Does Not Rotate:
- Cause: Incorrect step sequence or insufficient current.
- Solution: Check the driver settings and ensure the current limit is properly configured.
Overheating:
- Cause: Excessive current or poor ventilation.
- Solution: Reduce the current limit on the driver and improve cooling.
Skipping Steps:
- Cause: Excessive load or incorrect microstepping settings.
- Solution: Reduce the load or adjust the microstepping settings for smoother operation.
FAQs
Can I run the Nema 6 stepper motor without a driver?
- No, a stepper motor driver is required to control the motor's steps and direction.
What is the advantage of microstepping?
- Microstepping provides smoother motion, reduces noise, and increases positional accuracy.
How do I determine the correct power supply for my motor?
- Check the motor's rated voltage and current, and select a power supply that meets or exceeds these requirements.
Can I use the Nema 6 stepper motor for high-speed applications?
- Stepper motors are not ideal for high-speed applications due to torque drop-off at higher speeds. Use a servo motor for such cases.
By following this documentation, you can effectively integrate the Nema 6 stepper motor into your projects and troubleshoot common issues.