How to Use Jetson: Examples, Pinouts, and Specs
Introduction
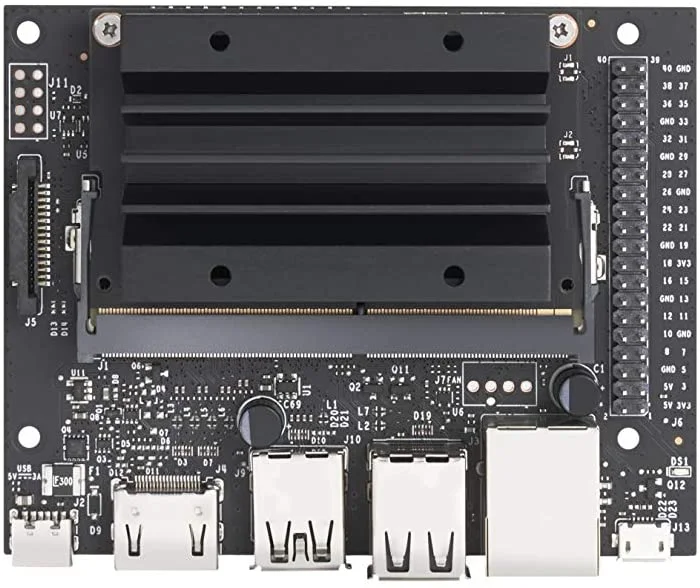
The NVIDIA Jetson Nano is a series of embedded computing boards designed for AI and machine learning applications. It provides powerful computing capabilities in a compact form factor, making it ideal for a wide range of applications, including robotics, IoT, and edge computing.
Explore Projects Built with Jetson

Explore Projects Built with Jetson
Common Applications and Use Cases
- Robotics: Autonomous navigation, object detection, and manipulation.
- IoT Devices: Smart cameras, home automation, and industrial IoT.
- Edge Computing: Real-time data processing and analytics at the edge.
- AI and Machine Learning: Model training and inference for various AI applications.
Technical Specifications
Key Technical Details
| Specification | Details |
|---|---|
| CPU | Quad-core ARM Cortex-A57 MPCore processor |
| GPU | 128-core Maxwell GPU |
| Memory | 4GB LPDDR4 |
| Storage | microSD (supports up to 128GB) |
| Power Input | 5V/4A DC |
| Connectivity | Gigabit Ethernet, M.2 Key E, USB 3.0, HDMI |
| Operating System | Linux (Ubuntu-based JetPack SDK) |
| Dimensions | 100mm x 80mm x 29mm |
Pin Configuration and Descriptions
GPIO Header Pinout
| Pin Number | Pin Name | Description |
|---|---|---|
| 1 | 3.3V | Power Supply (3.3V) |
| 2 | 5V | Power Supply (5V) |
| 3 | GPIO2 | General Purpose I/O |
| 4 | 5V | Power Supply (5V) |
| 5 | GPIO3 | General Purpose I/O |
| 6 | GND | Ground |
| 7 | GPIO4 | General Purpose I/O |
| 8 | GPIO14 | UART TX |
| 9 | GND | Ground |
| 10 | GPIO15 | UART RX |
| 11 | GPIO17 | General Purpose I/O |
| 12 | GPIO18 | General Purpose I/O |
| 13 | GPIO27 | General Purpose I/O |
| 14 | GND | Ground |
| 15 | GPIO22 | General Purpose I/O |
| 16 | GPIO23 | General Purpose I/O |
| 17 | 3.3V | Power Supply (3.3V) |
| 18 | GPIO24 | General Purpose I/O |
| 19 | GPIO10 | SPI MOSI |
| 20 | GND | Ground |
| 21 | GPIO9 | SPI MISO |
| 22 | GPIO25 | General Purpose I/O |
| 23 | GPIO11 | SPI CLK |
| 24 | GPIO8 | SPI CS0 |
| 25 | GND | Ground |
| 26 | GPIO7 | SPI CS1 |
| 27 | ID_SD | I2C ID EEPROM |
| 28 | ID_SC | I2C ID EEPROM |
| 29 | GPIO5 | General Purpose I/O |
| 30 | GND | Ground |
| 31 | GPIO6 | General Purpose I/O |
| 32 | GPIO12 | General Purpose I/O |
| 33 | GPIO13 | General Purpose I/O |
| 34 | GND | Ground |
| 35 | GPIO19 | General Purpose I/O |
| 36 | GPIO16 | General Purpose I/O |
| 37 | GPIO26 | General Purpose I/O |
| 38 | GPIO20 | General Purpose I/O |
| 39 | GND | Ground |
| 40 | GPIO21 | General Purpose I/O |
Usage Instructions
How to Use the Jetson Nano in a Circuit
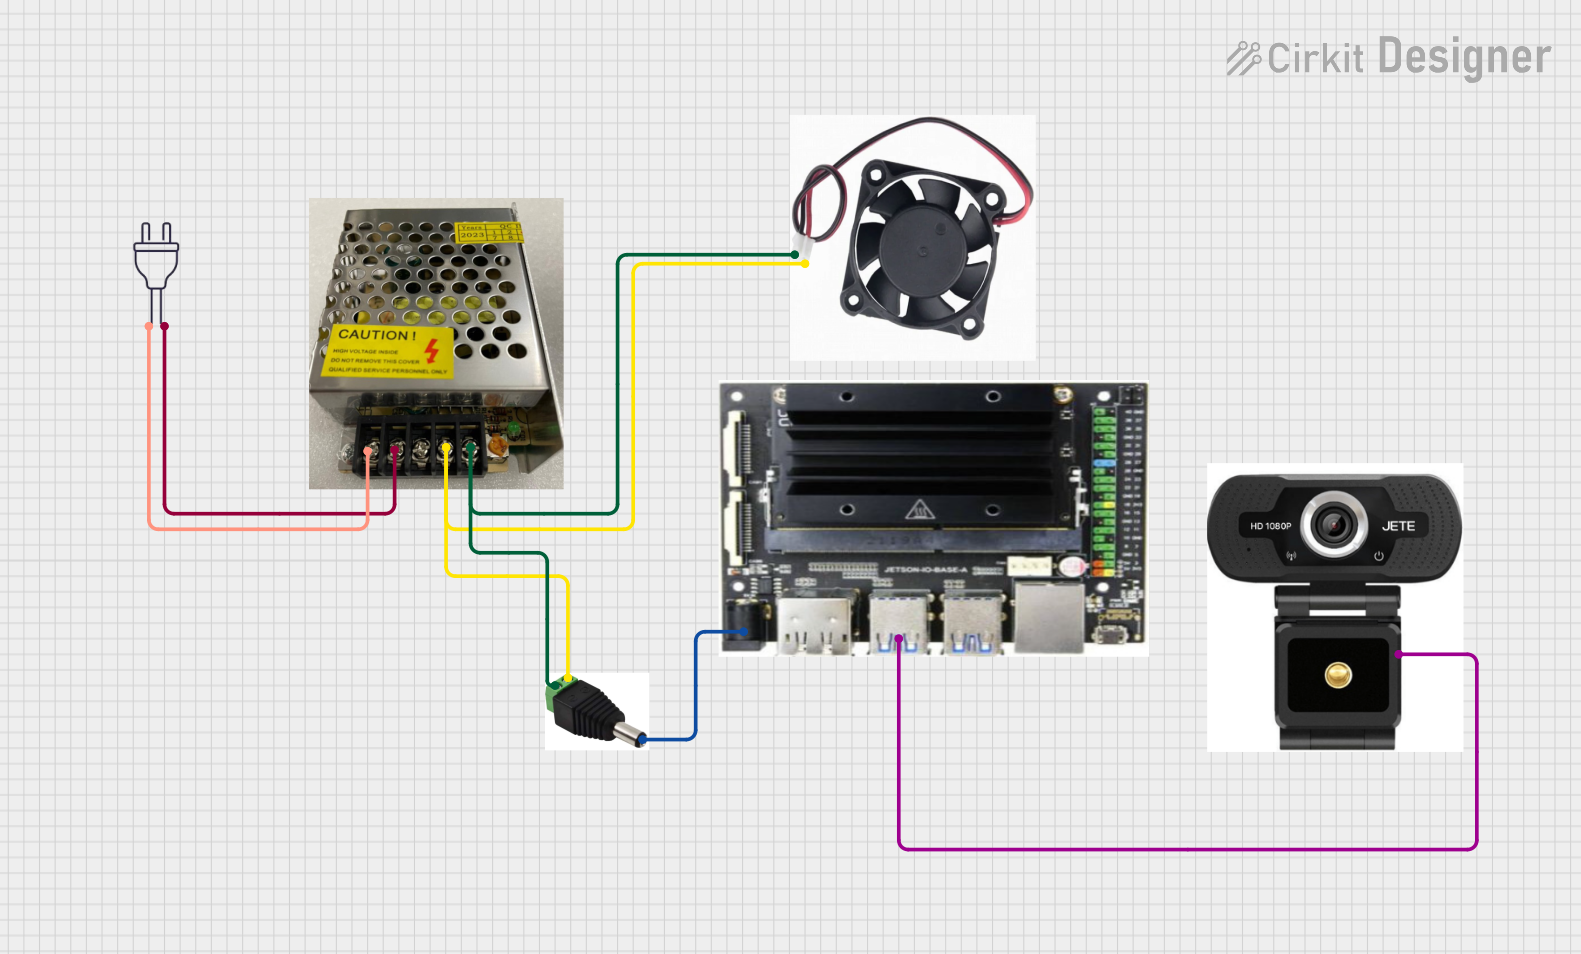
Power Supply:
- Connect a 5V/4A DC power supply to the power input jack.
- Alternatively, you can power the board via the micro-USB port, but this is not recommended for power-intensive applications.
MicroSD Card:
- Insert a microSD card with the JetPack SDK image into the microSD card slot.
Peripherals:
- Connect a monitor via the HDMI port.
- Connect a keyboard and mouse via the USB ports.
- Optionally, connect to a network using the Gigabit Ethernet port.
Booting Up:
- Power on the Jetson Nano by connecting the power supply.
- Follow the on-screen instructions to complete the initial setup.
Important Considerations and Best Practices
- Cooling: Ensure adequate cooling for the Jetson Nano, especially when running intensive AI workloads. Use a heatsink and/or fan if necessary.
- Power Supply: Use a reliable 5V/4A power supply to avoid power-related issues.
- Software Updates: Regularly update the JetPack SDK to benefit from the latest features and security patches.
- GPIO Usage: Be cautious when interfacing with GPIO pins to avoid damaging the board. Use level shifters if interfacing with 5V logic.
Troubleshooting and FAQs
Common Issues and Solutions
Board Not Powering On:
- Ensure the power supply is properly connected and providing the correct voltage and current.
- Check the micro-USB or DC power jack for any loose connections.
No Display Output:
- Verify that the HDMI cable is securely connected to both the Jetson Nano and the monitor.
- Ensure the monitor is set to the correct input source.
Peripheral Devices Not Working:
- Check that the USB devices are properly connected.
- Try connecting the devices to different USB ports.
Overheating:
- Ensure adequate cooling with a heatsink and/or fan.
- Monitor the temperature using software tools and reduce workload if necessary.
FAQs
Q: Can I use a different operating system on the Jetson Nano? A: While the Jetson Nano is optimized for the Ubuntu-based JetPack SDK, it is possible to use other Linux distributions. However, compatibility and performance may vary.
Q: How do I update the JetPack SDK? A: You can update the JetPack SDK using the NVIDIA SDK Manager. Follow the instructions provided in the official NVIDIA documentation.
Q: Can I use the Jetson Nano for real-time applications? A: Yes, the Jetson Nano is capable of real-time processing, but ensure that your application is optimized for low latency and high performance.
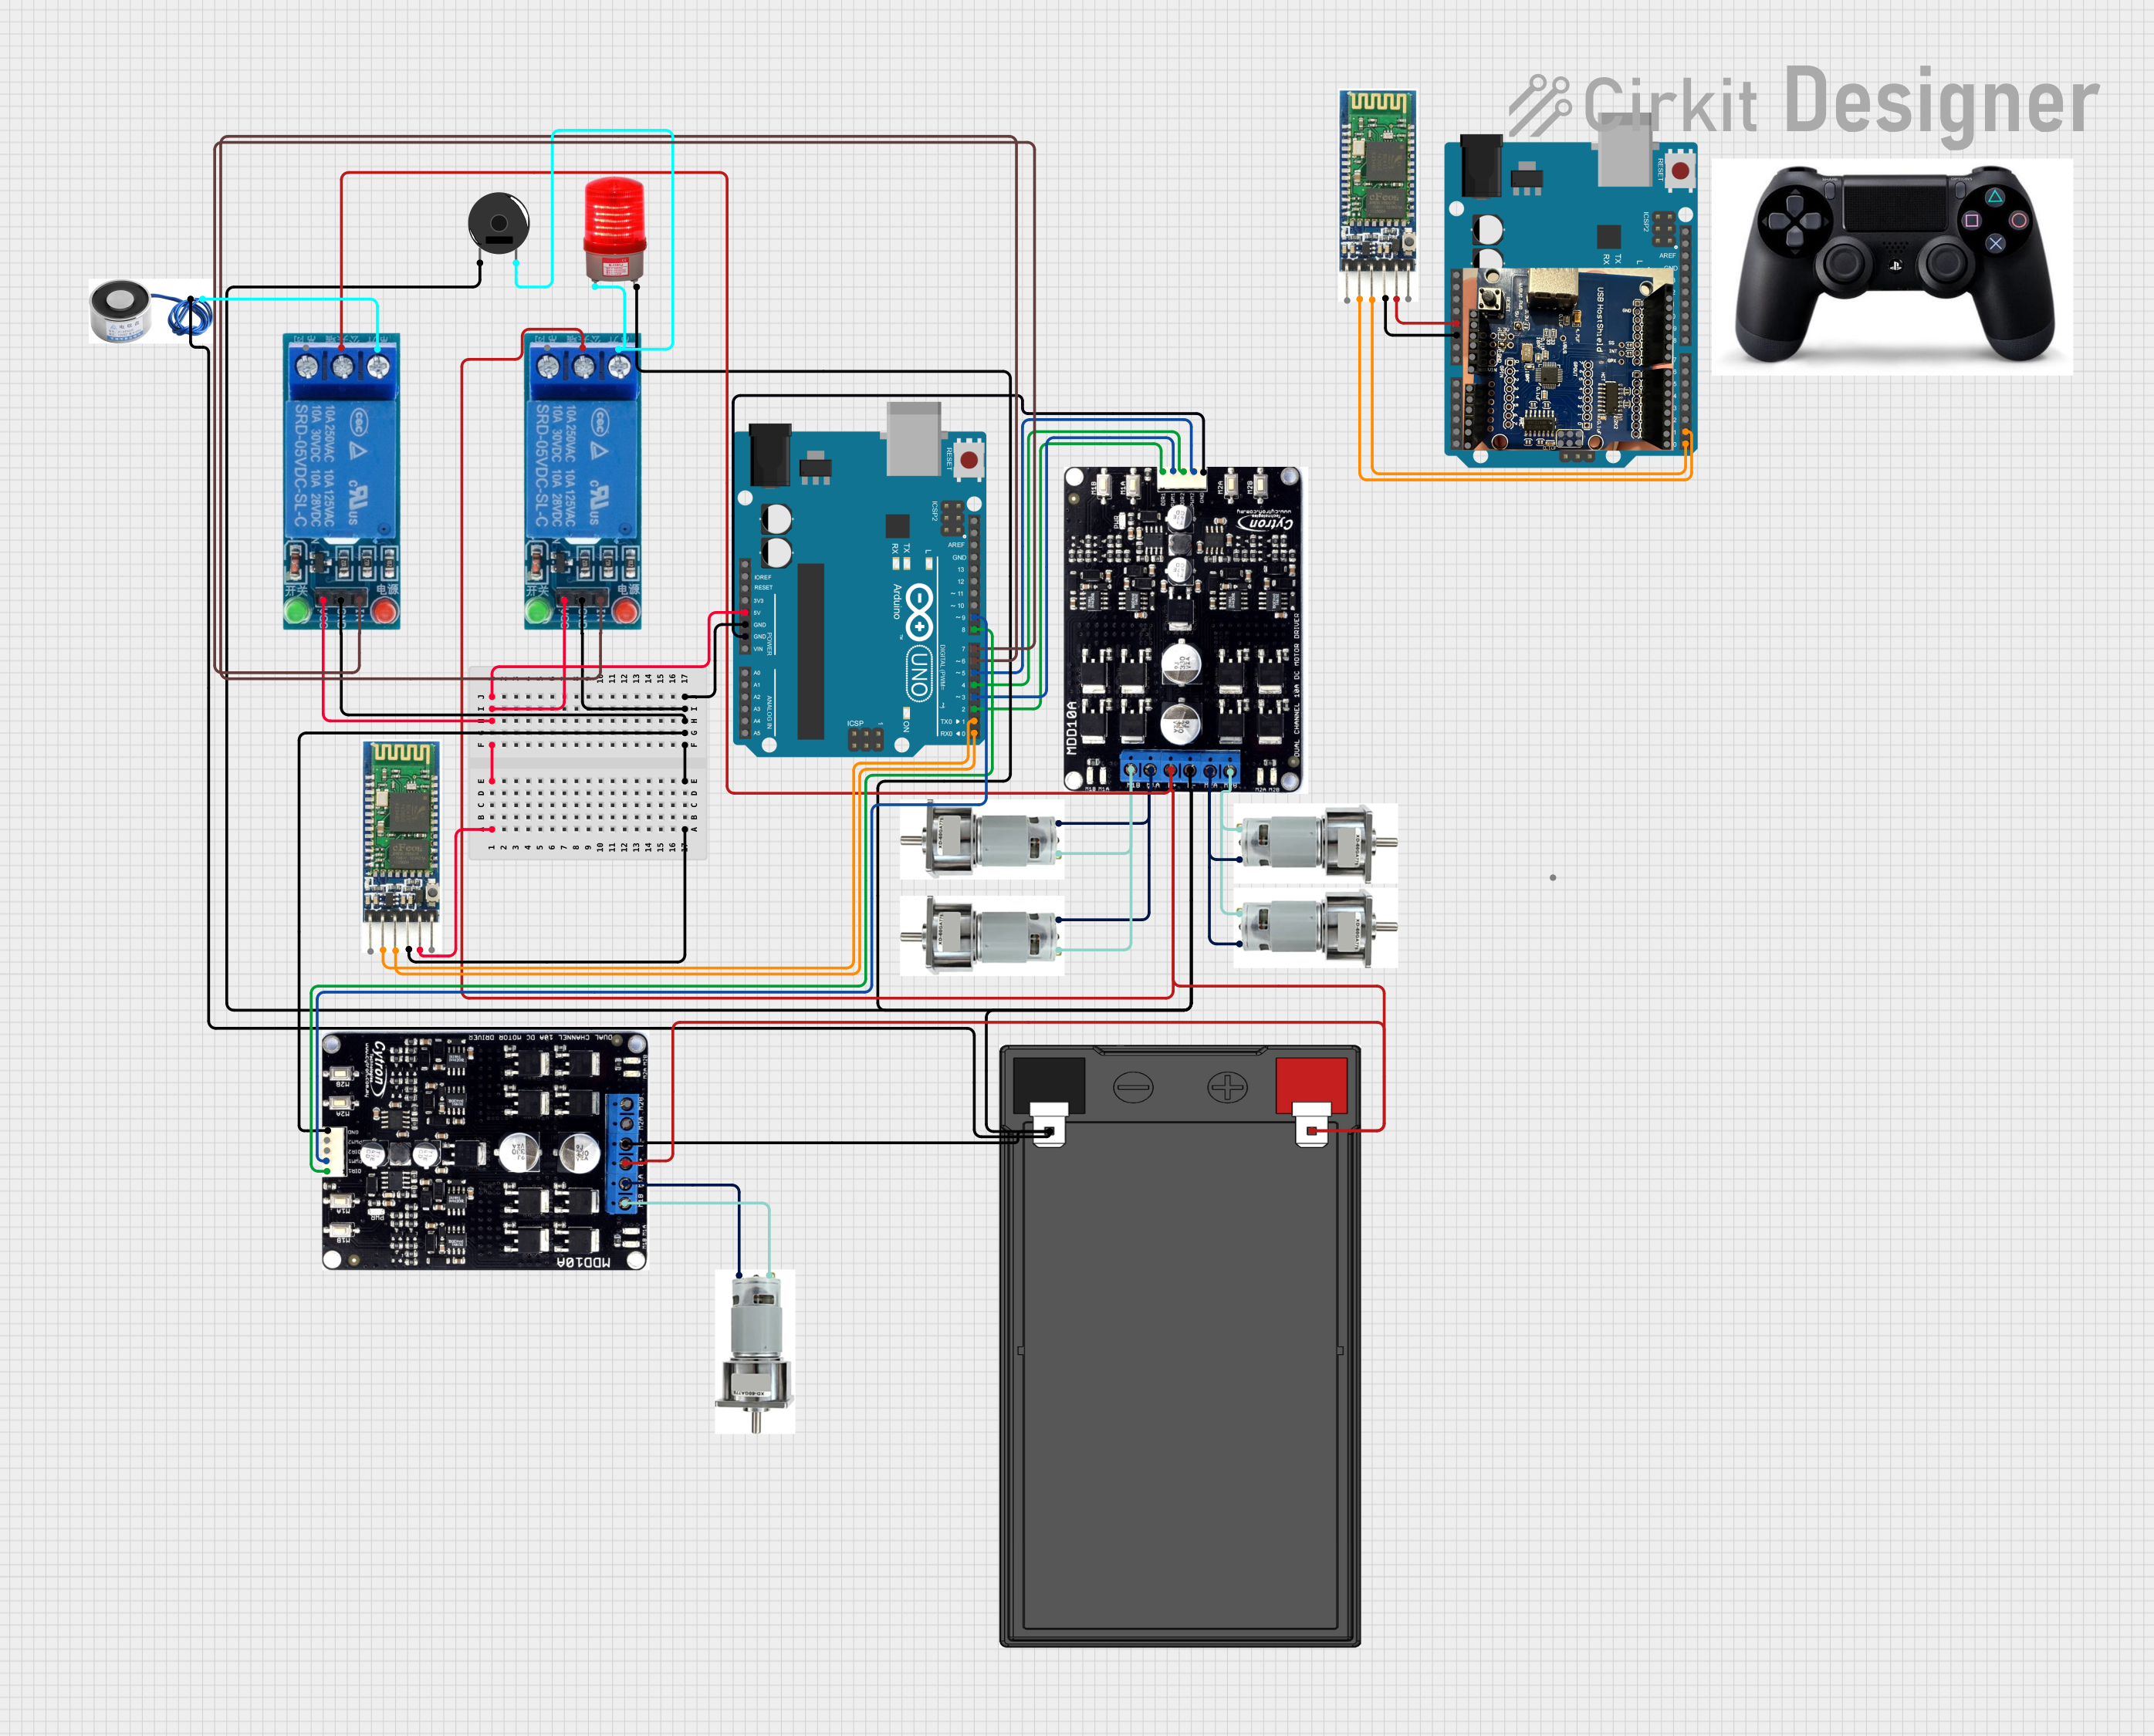
Example Code for Arduino UNO Integration
// Example code to interface an Arduino UNO with the Jetson Nano
// This example demonstrates basic UART communication

#include <SoftwareSerial.h>

// Define RX and TX pins for SoftwareSerial
const int rxPin = 10;
const int txPin = 11;

// Create a SoftwareSerial object
SoftwareSerial mySerial(rxPin, txPin);

void setup() {
  // Start the hardware serial communication
  Serial.begin(9600);
  // Start the software serial communication
  mySerial.begin(9600);
}

void loop() {
  // Check if data is available on the hardware serial port
  if (Serial.available()) {
    // Read the data and send it to the software serial port
    char data = Serial.read();
    mySerial.write(data);
  }

  // Check if data is available on the software serial port
  if (mySerial.available()) {
    // Read the data and send it to the hardware serial port
    char data = mySerial.read();
    Serial.write(data);
  }
}
This example demonstrates how to set up basic UART communication between an Arduino UNO and the Jetson Nano using the SoftwareSerial library. Ensure that the RX and TX pins are correctly connected between the two devices.
By following this documentation, users can effectively utilize the NVIDIA Jetson Nano for their AI and machine learning projects, while also troubleshooting common issues and integrating with other devices like the Arduino UNO.