
How to Use 18650 12V 3S Li-ion Battery: Examples, Pinouts, and Specs
 Design with 18650 12V 3S Li-ion Battery in Cirkit Designer
Introduction
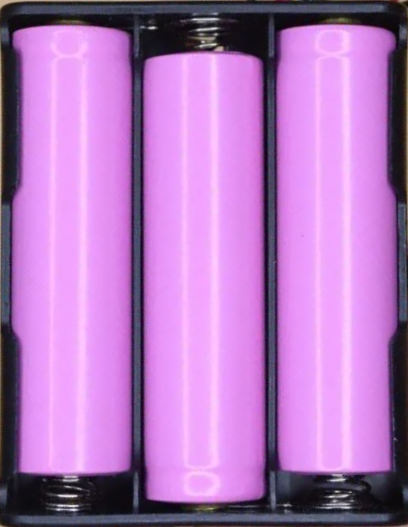
The 18650 12V 3S Li-ion Battery is a rechargeable lithium-ion battery pack composed of three 18650 cells connected in series. This configuration provides a nominal voltage of 12V, making it suitable for a wide range of applications. Known for its high energy density, lightweight design, and long cycle life, this battery pack is commonly used in portable electronics, electric vehicles, robotics, and backup power systems.
Explore Projects Built with 18650 12V 3S Li-ion Battery
 Open Project in Cirkit Designer
 Open Project in Cirkit Designer
 Open Project in Cirkit Designer
 Open Project in Cirkit Designer
Explore Projects Built with 18650 12V 3S Li-ion Battery
Open Project in Cirkit DesignerOpen Project in Cirkit DesignerOpen Project in Cirkit DesignerOpen Project in Cirkit DesignerCommon Applications
- Portable electronic devices (e.g., LED lights, power banks)
- Electric vehicles and e-bikes
- DIY electronics and robotics projects
- Uninterruptible Power Supplies (UPS)
- Solar energy storage systems
Technical Specifications
Below are the key technical details of the 18650 12V 3S Li-ion Battery:
| Parameter | Specification |
|---|---|
| Nominal Voltage | 12.6V (fully charged) |
| Nominal Capacity | Typically 2000–3000mAh per cell |
| Configuration | 3 cells in series (3S) |
| Maximum Charging Voltage | 12.6V |
| Minimum Discharge Voltage | 9.0V (3.0V per cell) |
| Standard Charge Current | 0.5C (e.g., 1A for a 2000mAh pack) |
| Maximum Discharge Current | Typically 10A (varies by cells used) |
| Protection Circuit | Built-in Battery Management System (BMS) |
| Dimensions | Varies based on cell arrangement |
| Weight | ~150–200g (depending on cells used) |
Pin Configuration and Descriptions
The battery pack typically has two or three terminals for connection. Below is a description of the pins:
| Pin | Label | Description |
|---|---|---|
| 1 | + (Positive) | Positive terminal for power output |
| 2 | - (Negative) | Negative terminal for power output |
| 3 | BMS (Optional) | Optional terminal for monitoring or balancing |
Note: The exact pin configuration may vary depending on the manufacturer. Always refer to the specific datasheet or labeling on the battery pack.
Usage Instructions
How to Use the 18650 12V 3S Li-ion Battery in a Circuit
- Connection: Connect the positive terminal (
+) to the positive rail of your circuit and the negative terminal (-) to the ground rail. - Charging: Use a compatible Li-ion battery charger designed for 3S (12.6V) configurations. Ensure the charger has overcharge protection.
- Load Compatibility: Verify that the load does not exceed the maximum discharge current of the battery pack.
- Protection Circuit: Ensure the built-in Battery Management System (BMS) is functional to prevent overcharging, over-discharging, and short circuits.
Important Considerations and Best Practices
- Charging Voltage: Never exceed 12.6V when charging the battery pack.
- Discharge Limits: Avoid discharging below 9.0V to prevent damage to the cells.
- Heat Management: Ensure proper ventilation to prevent overheating during charging or discharging.
- Storage: Store the battery in a cool, dry place at ~50% charge for long-term storage.
- Polarity: Double-check the polarity before connecting the battery to a circuit to avoid damage.
Example: Using the Battery with an Arduino UNO
The 18650 12V 3S Li-ion Battery can power an Arduino UNO via its barrel jack or VIN pin. Below is an example of connecting the battery to an Arduino UNO to power an LED:
Circuit Diagram
- Connect the positive terminal of the battery to the Arduino's VIN pin.
- Connect the negative terminal of the battery to the Arduino's GND pin.
Arduino Code Example
// This code blinks an LED connected to pin 13 of the Arduino UNO.
// Ensure the battery voltage is within the Arduino's operating range (7-12V).

void setup() {
  pinMode(13, OUTPUT); // Set pin 13 as an output pin
}

void loop() {
  digitalWrite(13, HIGH); // Turn the LED on
  delay(1000);            // Wait for 1 second
  digitalWrite(13, LOW);  // Turn the LED off
  delay(1000);            // Wait for 1 second
}
Warning: Ensure the battery voltage does not exceed the Arduino's maximum input voltage (12V) to avoid damage.
Troubleshooting and FAQs
Common Issues and Solutions
Battery Not Charging
- Cause: Faulty charger or damaged BMS.
- Solution: Verify the charger output voltage and ensure it matches the battery's charging requirements. Check the BMS for any visible damage.
Battery Drains Quickly
- Cause: Excessive load or aging cells.
- Solution: Reduce the load current or replace the battery pack if the cells are degraded.
Battery Overheats
- Cause: Overcharging, excessive discharge current, or poor ventilation.
- Solution: Use a charger with overcharge protection and ensure proper ventilation during operation.
No Output Voltage
- Cause: BMS protection triggered due to over-discharge or short circuit.
- Solution: Recharge the battery to reset the BMS or check for short circuits in the connected circuit.
FAQs
Q1: Can I use this battery pack without a BMS?
A1: It is not recommended to use the battery pack without a BMS, as it protects the cells from overcharging, over-discharging, and short circuits.
Q2: How do I know when the battery is fully charged?
A2: The battery is fully charged when the voltage reaches 12.6V. Most chargers have an indicator light to signal full charge.
Q3: Can I connect multiple 18650 12V 3S packs in parallel?
A3: Yes, you can connect multiple packs in parallel to increase capacity, but ensure all packs are at the same voltage level before connecting.
Q4: What is the lifespan of this battery pack?
A4: The lifespan depends on usage and charging cycles. Typically, it lasts for 300–500 charge cycles under normal conditions.
By following the guidelines and best practices outlined in this documentation, you can safely and effectively use the 18650 12V 3S Li-ion Battery in your projects.