How to Use Nema 17 42-STH48: Examples, Pinouts, and Specs
Introduction
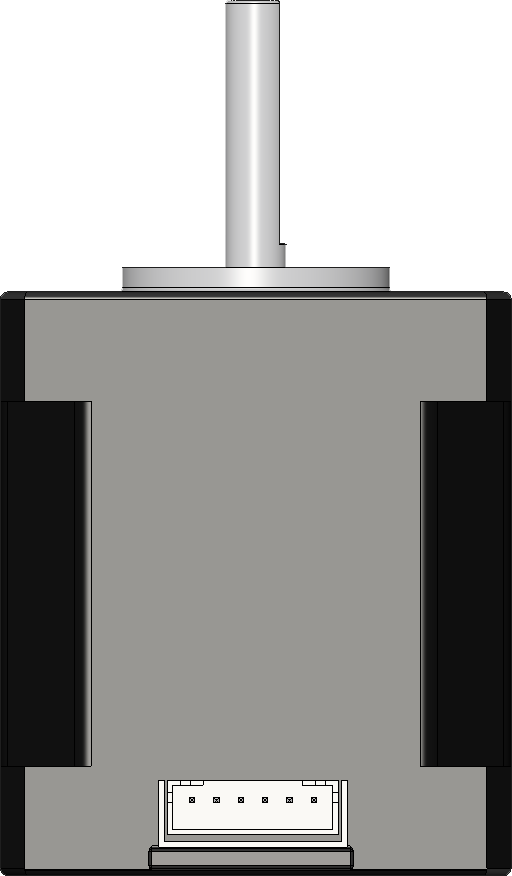
The Nema 17 42-STH48 stepper motor is a widely used component in the field of robotics, 3D printing, and CNC machining. Known for its high torque and precision, this stepper motor is an ideal choice for applications requiring controlled and accurate movements. Its compatibility with various drivers and controllers makes it a versatile option for hobbyists and professionals alike.
Explore Projects Built with Nema 17 42-STH48


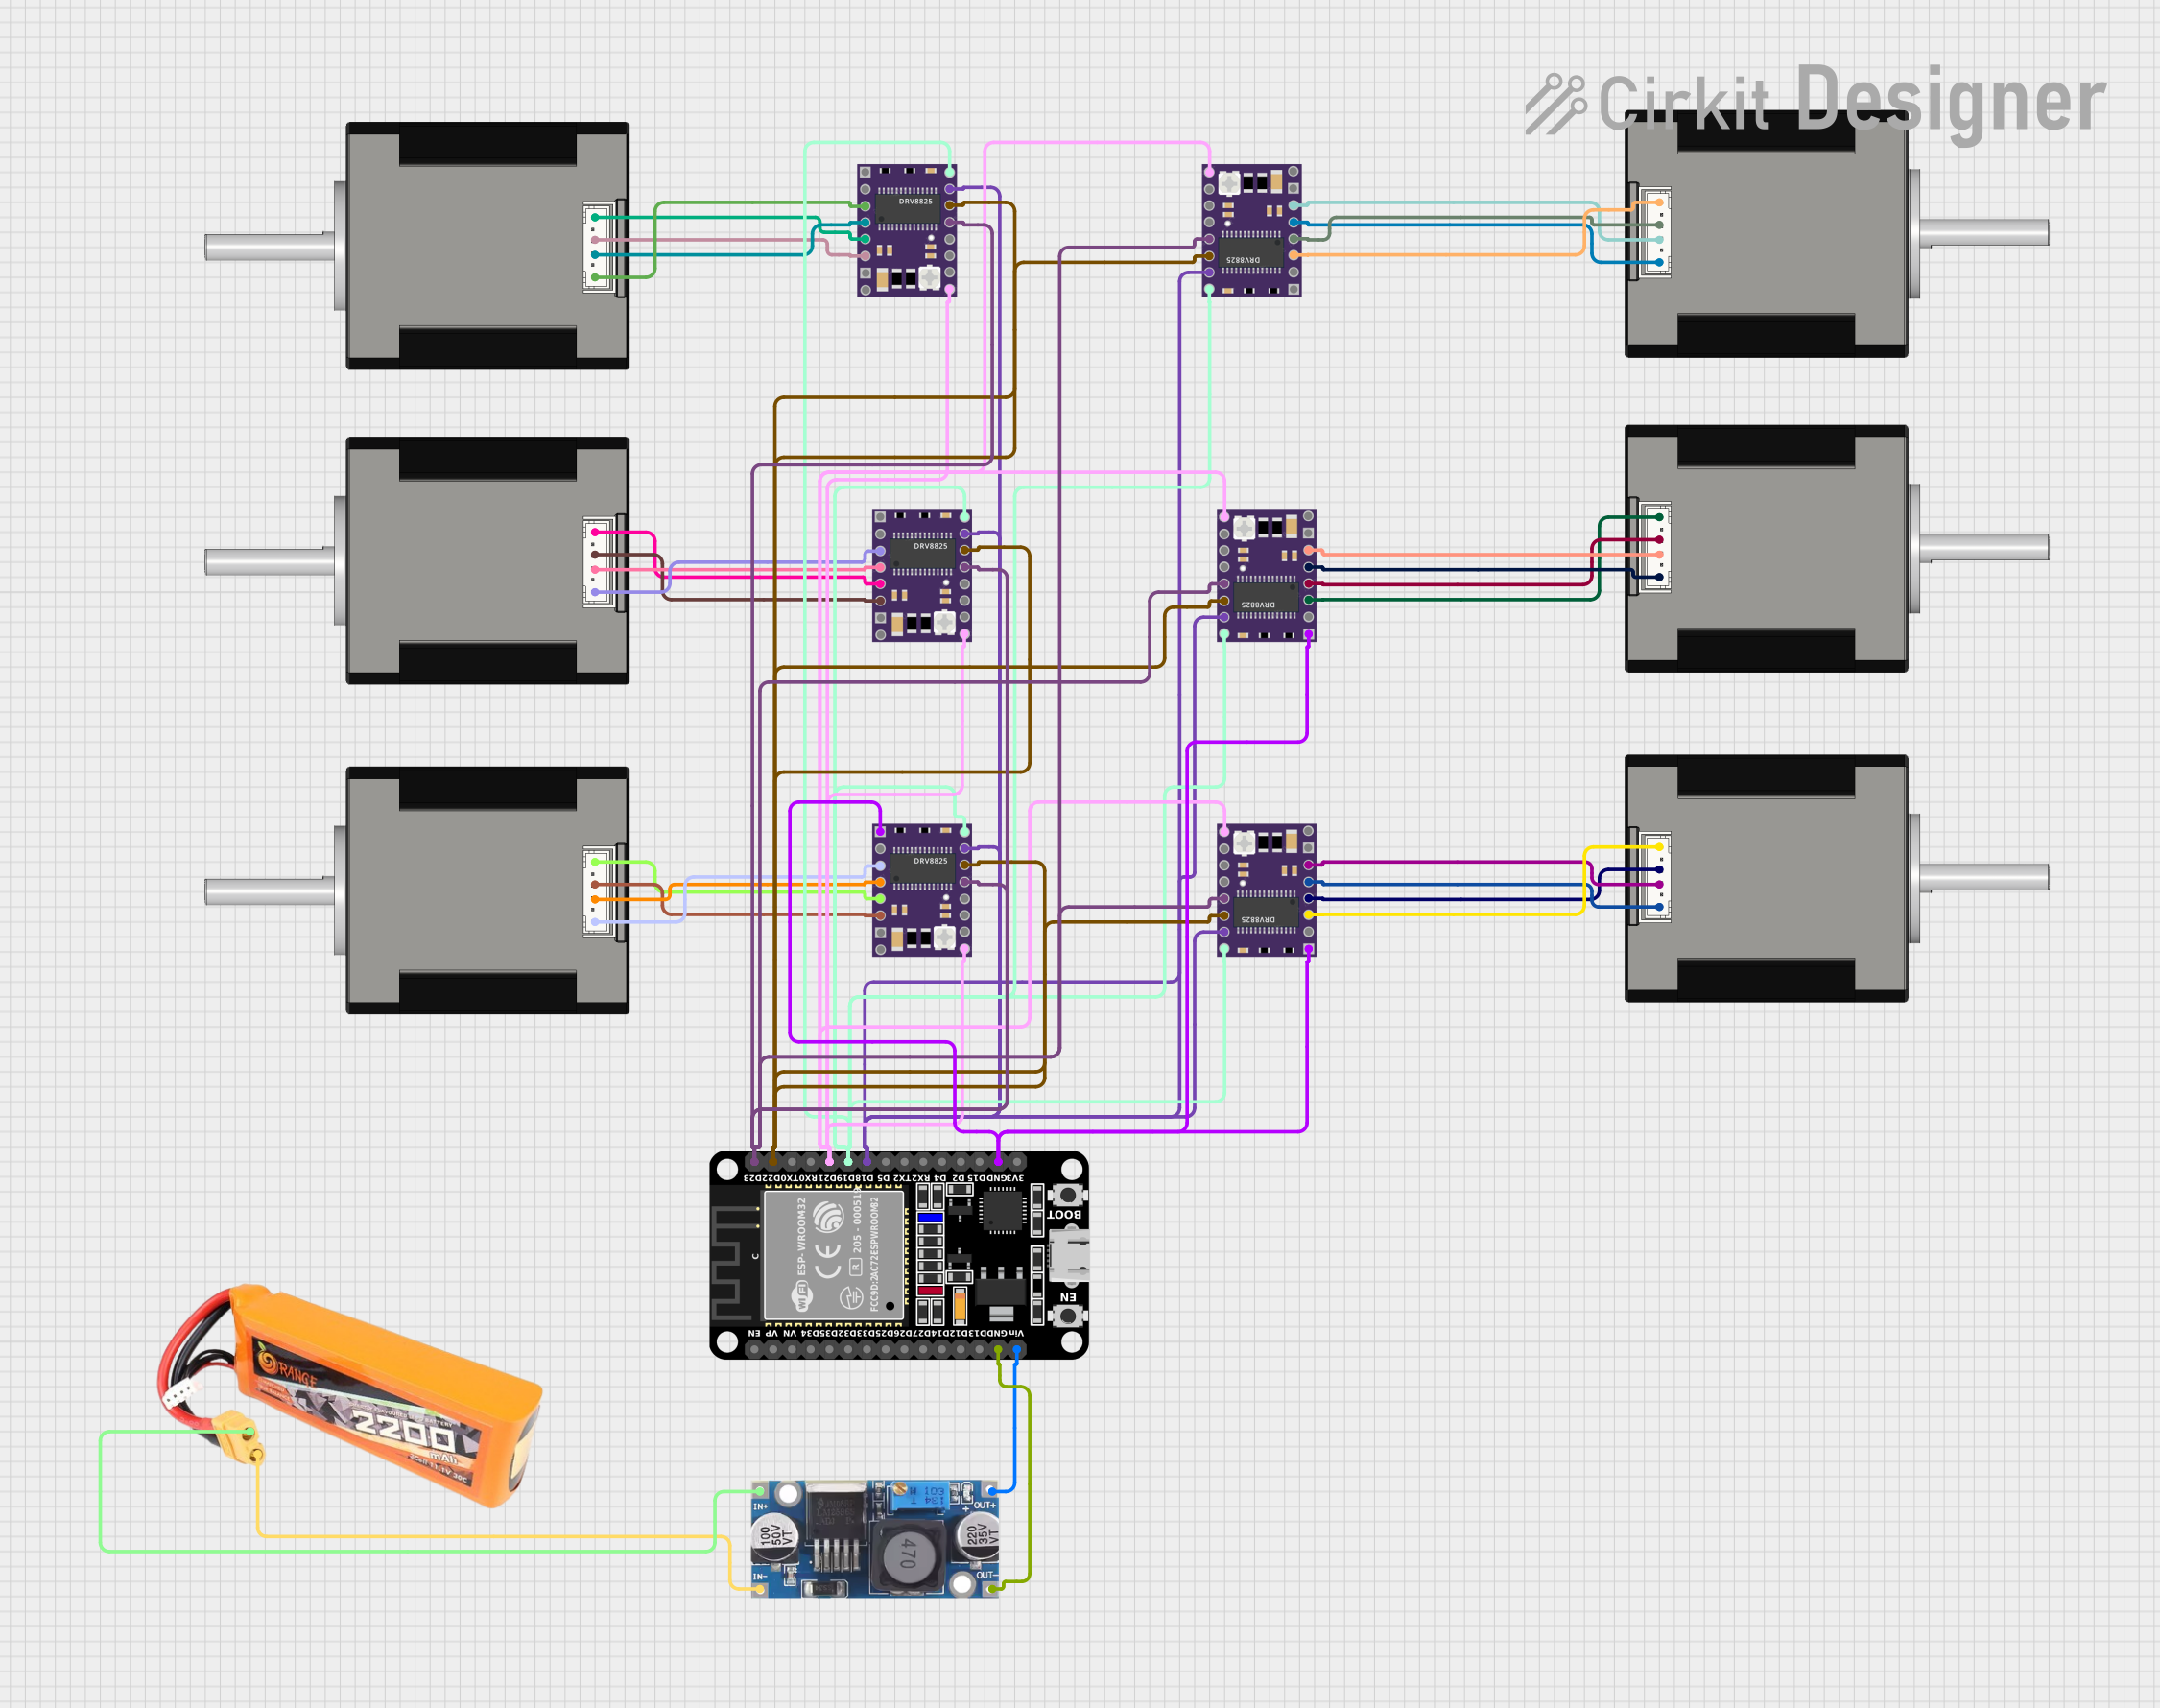
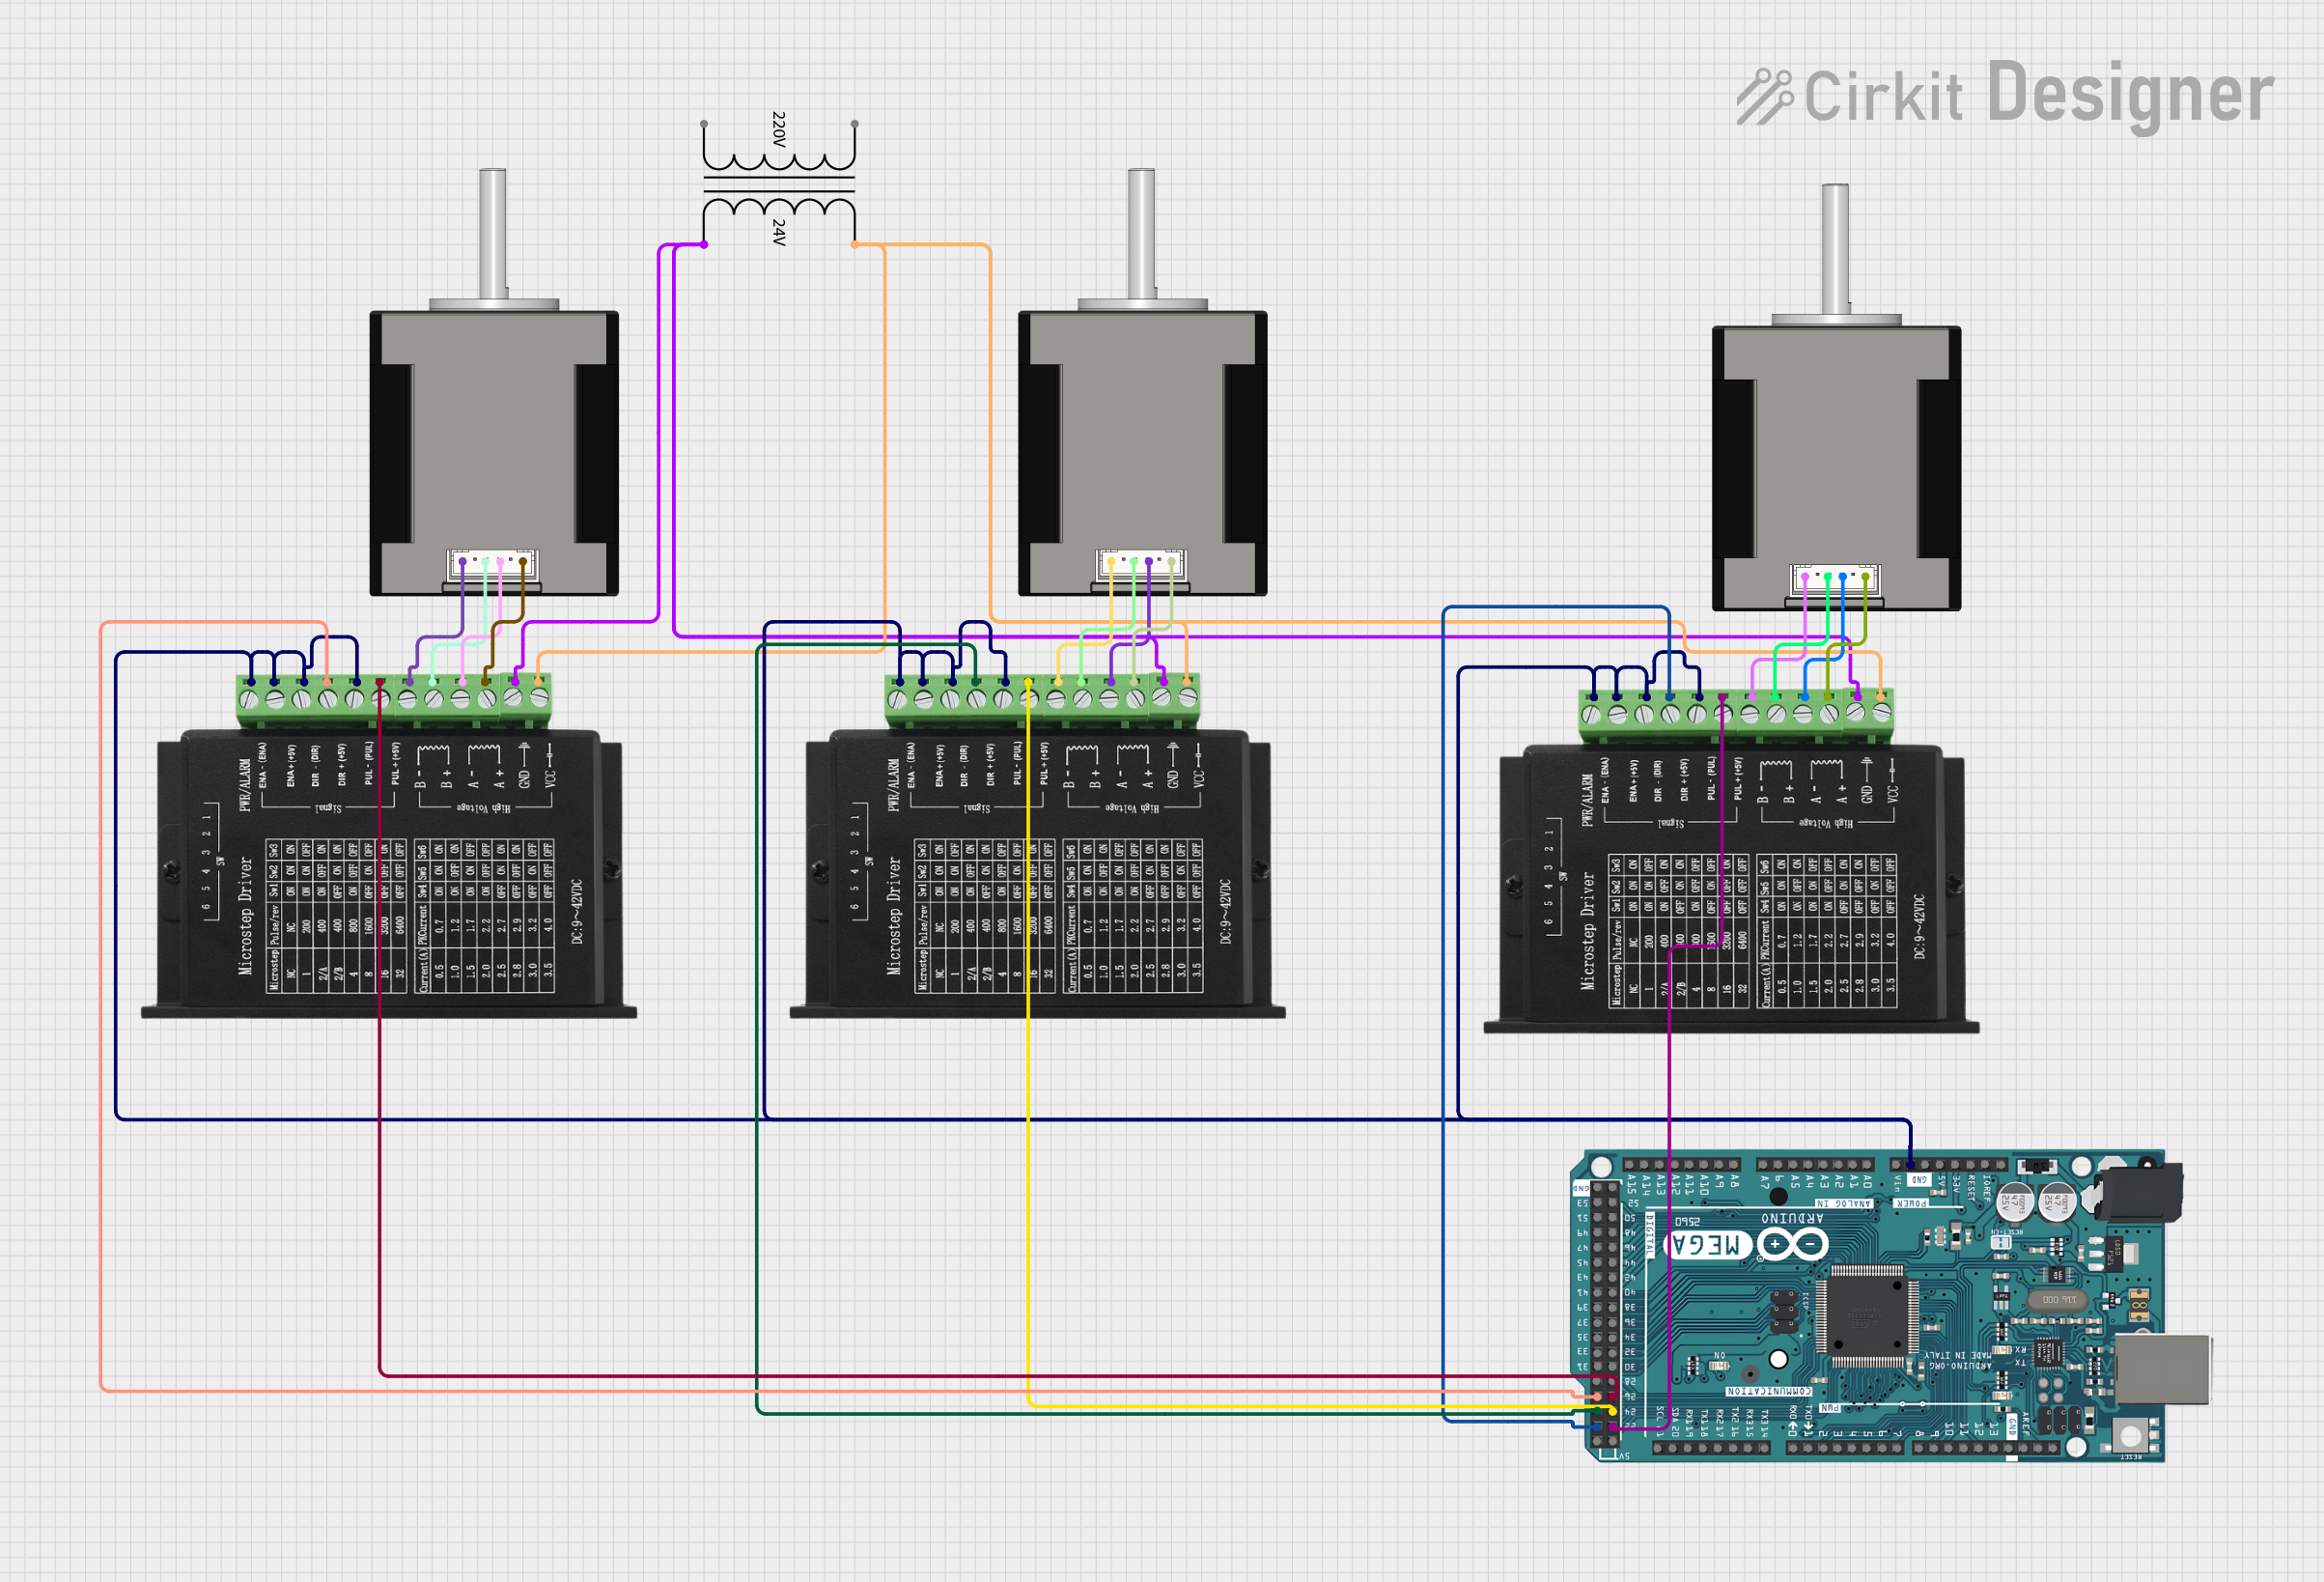
Explore Projects Built with Nema 17 42-STH48
Common Applications and Use Cases
- 3D Printers
- CNC Machines
- Robotics
- Precision Positioning Systems
- Automated Equipment
Technical Specifications
Key Technical Details
- Step Angle: 1.8°
- Voltage: 2.55V
- Current: 1.7A/Phase
- Holding Torque: 4400 g-cm (0.44 Nm)
- Resistance: 1.5 Ohms/Phase
- Inductance: 2.8 mH/Phase
- Rotor Inertia: 54 g-cm²
- Weight: 0.35 kg
Pin Configuration and Descriptions
| Pin Number | Description | Wire Color (Typical) |
|---|---|---|
| 1 | Coil A1 | Red |
| 2 | Coil A2 | Blue |
| 3 | Coil B1 | Green |
| 4 | Coil B2 | Black |
Usage Instructions
How to Use the Component in a Circuit
- Motor Driver Connection: Connect the motor to a suitable stepper motor driver, ensuring that the wire colors match the driver's A and B connections.
- Power Supply: Provide a power supply that meets the voltage and current requirements of the motor.
- Control Signal: Use a microcontroller, such as an Arduino UNO, to send step and direction signals to the motor driver.
Important Considerations and Best Practices
- Current Limiting: Always set the current limit on your motor driver to match the motor's rated current to prevent overheating.
- Voltage Supply: Do not exceed the rated voltage of the motor to avoid damaging the windings.
- Heat Dissipation: Ensure adequate cooling for the motor during operation, as it may generate heat.
- Microstepping: For smoother motion and higher resolution, configure the driver for microstepping if supported.
Example Code for Arduino UNO
#include <Stepper.h>

// Define the number of steps per revolution
const int stepsPerRevolution = 200;

// Initialize the stepper library on pins 8 through 11
Stepper myStepper(stepsPerRevolution, 8, 10, 9, 11);

void setup() {
  // Set the speed to 60 rpm
  myStepper.setSpeed(60);
}

void loop() {
  // Move one revolution in one direction
  myStepper.step(stepsPerRevolution);
  delay(500);

  // Move one revolution in the other direction
  myStepper.step(-stepsPerRevolution);
  delay(500);
}
Note: The above code assumes the use of a stepper motor driver that interfaces with the Arduino using four control pins. Adjust the pin numbers and wiring accordingly if your setup differs.
Troubleshooting and FAQs
Common Issues Users Might Face
- Motor Does Not Rotate: Check wiring connections and ensure the power supply and driver settings are correct.
- Motor Vibrates but Does Not Turn: This may indicate a misalignment of steps or incorrect wiring. Verify the sequence of connections and the step configuration.
- Motor Overheats: Ensure the current limit is set correctly on the driver. Overheating can also be caused by running the motor at a high voltage for extended periods.
Solutions and Tips for Troubleshooting
- Wiring Check: Double-check all connections against the motor's datasheet and your driver's documentation.
- Driver Configuration: Review the driver's manual to ensure it is configured for the correct step mode and current settings.
- Test with Simple Code: Use a basic code snippet to test motor functionality before integrating into complex projects.
FAQs
Q: Can I run this motor at a higher voltage than rated? A: Running the motor at a higher voltage can increase performance but may lead to overheating and reduced lifespan. Always ensure the current is limited to the motor's rated current.
Q: How do I reverse the direction of the motor? A: To reverse the direction, you can reverse the sequence of steps in your code or swap the connections of one of the motor coils.
Q: What is the maximum speed of the Nema 17 42-STH48? A: The maximum speed depends on the voltage, current settings, and load. It is essential to start at a lower speed and gradually increase to find the optimal performance for your application.