How to Use 5/2 PNEUMATIC SOLENOID: Examples, Pinouts, and Specs
Introduction
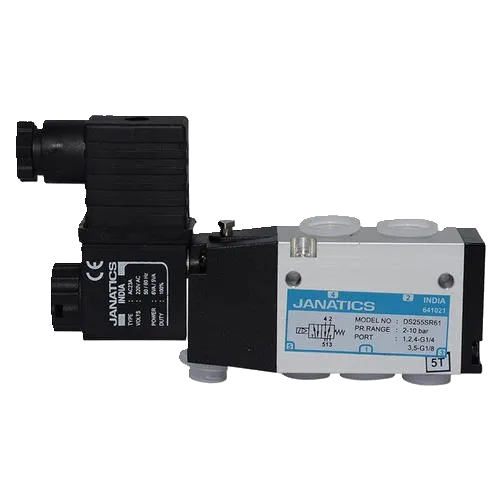
A 5/2 pneumatic solenoid is a type of valve designed to control the flow of compressed air in pneumatic systems. It features five ports and two positions, enabling it to switch the direction of airflow. This functionality makes it ideal for actuating double-acting cylinders or other pneumatic devices that require bidirectional control.
Explore Projects Built with 5/2 PNEUMATIC SOLENOID


Explore Projects Built with 5/2 PNEUMATIC SOLENOID
Common Applications and Use Cases
- Automation systems for industrial machinery
- Pneumatic actuators in robotics
- Conveyor systems
- Packaging equipment
- Automotive assembly lines
- Any system requiring bidirectional control of pneumatic cylinders
Technical Specifications
Key Technical Details
| Parameter | Value/Description |
|---|---|
| Valve Type | 5/2-way pneumatic solenoid valve |
| Operating Voltage | 12V DC, 24V DC, or 110V AC (varies by model) |
| Operating Pressure Range | 2 to 8 bar (29 to 116 psi) |
| Port Size | Typically 1/8", 1/4", or 1/2" NPT or BSP |
| Coil Power Consumption | ~3W (DC) or ~5VA (AC) |
| Response Time | ~20-50 ms |
| Material | Aluminum body, brass or stainless steel ports |
| Temperature Range | -10°C to 50°C (14°F to 122°F) |
| Actuation Type | Solenoid-operated |
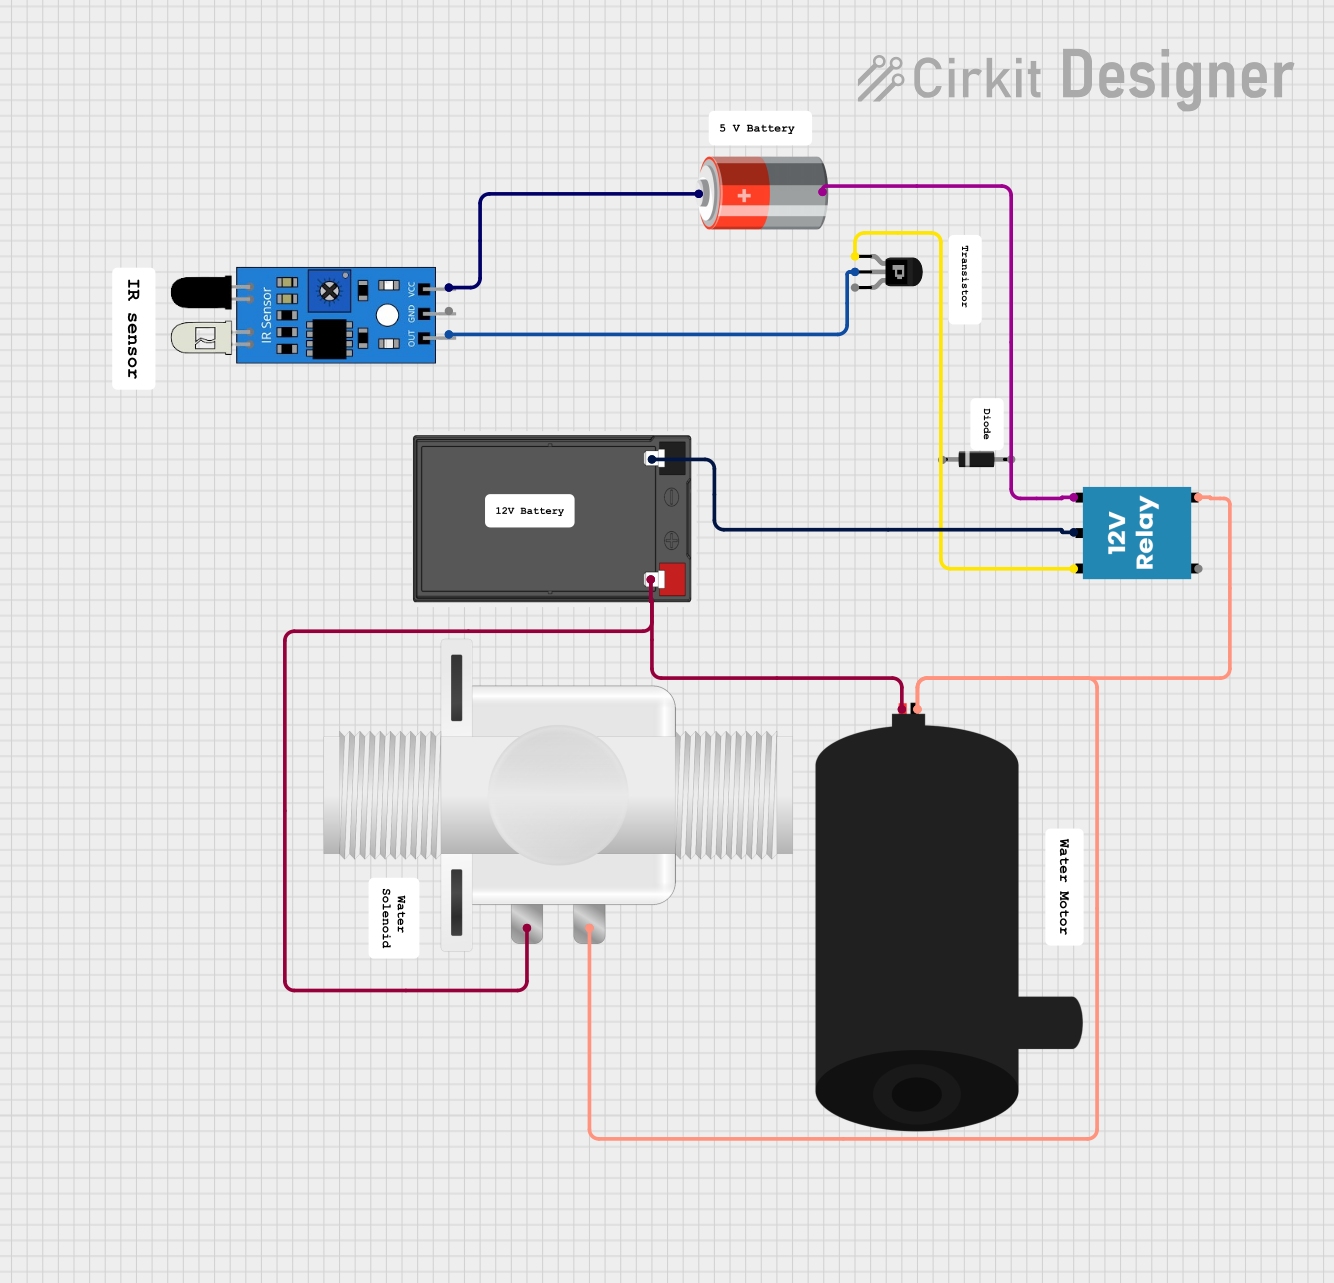
Pin Configuration and Port Descriptions
The 5/2 pneumatic solenoid has five ports and two positions. Below is a description of the ports:
| Port Number | Description |
|---|---|
| Port 1 (P) | Compressed air supply (input) |
| Port 2 (A) | Output to actuator (cylinder port 1) |
| Port 3 (R1) | Exhaust for port 2 |
| Port 4 (B) | Output to actuator (cylinder port 2) |
| Port 5 (R2) | Exhaust for port 4 |
The solenoid coil typically has two electrical terminals for connection to a power source.
Usage Instructions
How to Use the Component in a Circuit
- Connect the Air Supply: Attach the compressed air source to Port 1 (P). Ensure the air pressure is within the operating range of the solenoid.
- Connect the Actuator: Connect the two ports of the double-acting cylinder to Port 2 (A) and Port 4 (B).
- Exhaust Ports: Ensure Ports 3 (R1) and 5 (R2) are open to the atmosphere or connected to an exhaust muffler to reduce noise.
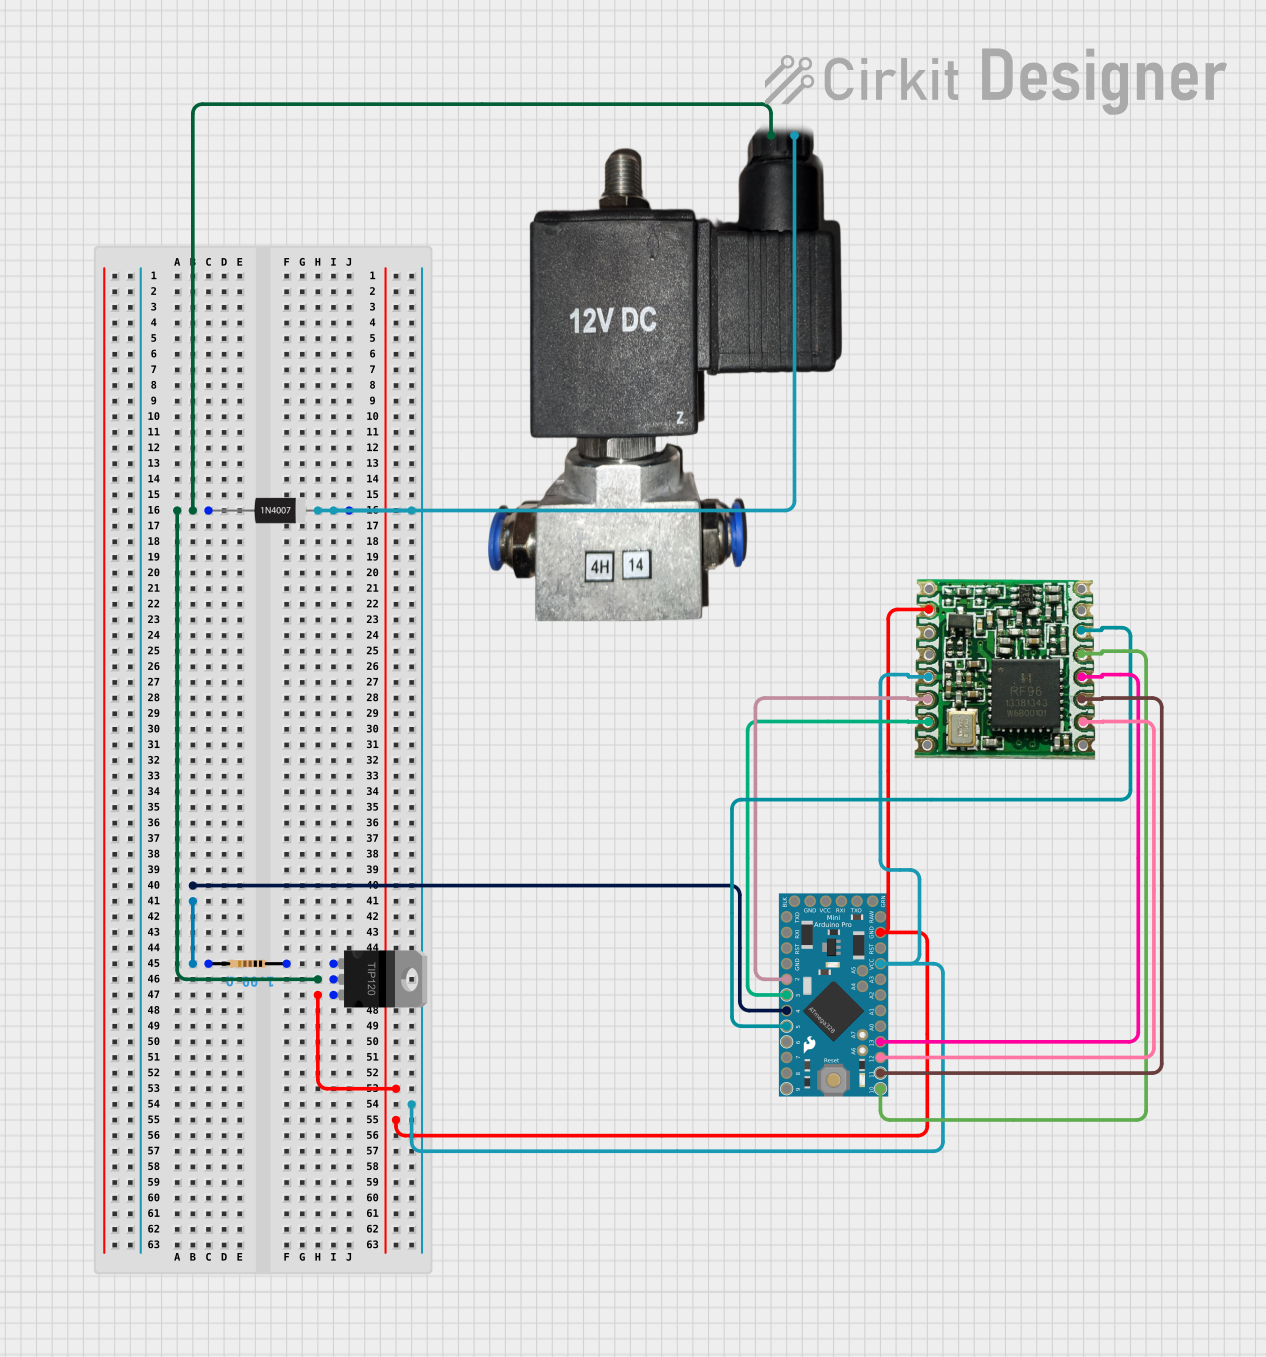
- Electrical Connection: Connect the solenoid coil to the appropriate power supply (e.g., 12V DC or 24V DC). Use a flyback diode across the coil terminals if using a DC power source to protect the circuit from voltage spikes.
- Control Signal: Use a switch, relay, or microcontroller to control the solenoid. When the solenoid is energized, the valve switches positions, directing airflow to the appropriate cylinder port.
Important Considerations and Best Practices
- Pressure Regulation: Use a pressure regulator to ensure the air supply is within the solenoid's operating pressure range.
- Filtration: Install an air filter upstream of the solenoid to prevent debris from damaging the valve.
- Mounting: Secure the solenoid valve to a stable surface to prevent vibration or movement during operation.
- Electrical Protection: Use a fuse or circuit breaker to protect the solenoid coil from overcurrent.
- Manual Override: Some solenoids include a manual override button for testing or emergency operation.
Example: Controlling a 5/2 Solenoid with Arduino UNO
Below is an example of how to control a 12V DC 5/2 pneumatic solenoid using an Arduino UNO and a relay module.
// Define the pin connected to the relay module
const int relayPin = 7;

void setup() {
  // Set the relay pin as an output
  pinMode(relayPin, OUTPUT);
}

void loop() {
  // Energize the solenoid by activating the relay
  digitalWrite(relayPin, HIGH);
  delay(2000); // Keep the solenoid energized for 2 seconds

  // De-energize the solenoid by deactivating the relay
  digitalWrite(relayPin, LOW);
  delay(2000); // Wait for 2 seconds before repeating
}
Note: Ensure the relay module is rated for the solenoid's voltage and current. Use an external power supply for the solenoid if its current exceeds the Arduino's capabilities.
Troubleshooting and FAQs
Common Issues and Solutions
| Issue | Possible Cause | Solution |
|---|---|---|
| Solenoid does not actuate | No power to the coil | Check the power supply and connections. |
| Faulty coil | Test the coil with a multimeter and replace if necessary. | |
| Insufficient air pressure | Verify the air supply pressure. | |
| Air leaks | Loose or damaged fittings | Tighten or replace fittings. |
| Damaged seals inside the valve | Replace the valve or repair seals. | |
| Slow response time | Clogged air filter or exhaust ports | Clean or replace the air filter and check exhaust ports. |
| Excessive noise during operation | Exhaust ports not muffled | Install exhaust mufflers on Ports 3 and 5. |
FAQs
Can I use a 5/2 solenoid with a single-acting cylinder?
- Yes, but it is not ideal. A 3/2 solenoid is better suited for single-acting cylinders.
What happens if I reverse the air supply and exhaust ports?
- The valve will not function correctly and may be damaged. Always follow the port configuration.
Can I control the solenoid directly with an Arduino?
- No, the Arduino cannot supply enough current. Use a relay module or a transistor circuit to control the solenoid.
How do I know if the solenoid is stuck?
- If the solenoid does not switch positions when energized, it may be stuck due to debris or internal damage. Clean or replace the valve as needed.