How to Use ESP32-C6: Examples, Pinouts, and Specs
Introduction
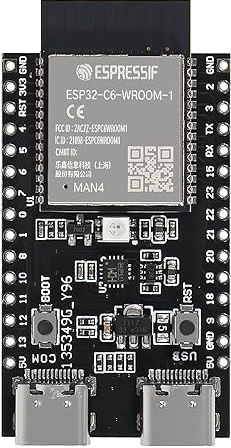
The ESP32-C6, manufactured by Espressif (Part ID: MAN16), is a low-power, dual-core microcontroller designed for Internet of Things (IoT) applications. It features a 32-bit RISC-V architecture and integrates Wi-Fi 6 and Bluetooth 5.0 capabilities, making it a versatile choice for a wide range of projects. The ESP32-C6 is ideal for applications requiring wireless connectivity, efficient power consumption, and robust processing power.
Explore Projects Built with ESP32-C6


Explore Projects Built with ESP32-C6
Common Applications and Use Cases
- Smart home devices (e.g., smart plugs, thermostats, and lighting systems)
- Industrial IoT (e.g., sensors, actuators, and monitoring systems)
- Wearable devices
- Wireless communication hubs
- Edge computing and AI/ML applications
- Low-power, battery-operated devices
Technical Specifications
Key Technical Details
| Parameter | Specification |
|---|---|
| Architecture | 32-bit RISC-V |
| Clock Speed | Up to 160 MHz |
| Flash Memory | 4 MB (external SPI flash) |
| RAM | 512 KB SRAM |
| Wireless Connectivity | Wi-Fi 6 (802.11ax), Bluetooth 5.0 (LE) |
| GPIO Pins | 22 |
| Operating Voltage | 3.0V - 3.6V |
| Power Consumption | Ultra-low power modes available |
| Communication Interfaces | UART, SPI, I2C, I2S, PWM, ADC, DAC |
| ADC Resolution | 12-bit |
| Operating Temperature | -40°C to +85°C |
| Package | QFN48 |
Pin Configuration and Descriptions
The ESP32-C6 has 48 pins, but the most commonly used GPIO pins and their functions are listed below:
| Pin Number | Pin Name | Function Description |
|---|---|---|
| 1 | GPIO0 | General-purpose I/O, boot mode selection |
| 2 | GPIO1 | UART TX, general-purpose I/O |
| 3 | GPIO2 | UART RX, general-purpose I/O |
| 4 | GPIO3 | General-purpose I/O, ADC channel |
| 5 | GPIO4 | PWM output, general-purpose I/O |
| 6 | GPIO5 | SPI CLK, general-purpose I/O |
| 7 | GPIO6 | SPI MISO, general-purpose I/O |
| 8 | GPIO7 | SPI MOSI, general-purpose I/O |
| 9 | GPIO8 | I2C SDA, general-purpose I/O |
| 10 | GPIO9 | I2C SCL, general-purpose I/O |
| 11 | EN | Chip enable (active high) |
| 12 | GND | Ground |
| 13 | 3V3 | Power supply (3.3V) |
Note: Refer to the full datasheet for a complete pinout and advanced configurations.
Usage Instructions
How to Use the ESP32-C6 in a Circuit
- Power Supply: Connect the 3V3 pin to a 3.3V power source and GND to ground. Ensure the power supply can provide sufficient current (at least 500 mA).
- Boot Mode: To upload code, connect GPIO0 to GND during reset to enter bootloader mode.
- Peripherals: Use the GPIO pins for interfacing with sensors, actuators, and other peripherals. Configure the pins in your code as needed (e.g., input, output, ADC, etc.).
- Programming: The ESP32-C6 can be programmed using the Arduino IDE, Espressif's ESP-IDF, or other compatible environments.
Important Considerations and Best Practices
- Voltage Levels: Ensure all connected peripherals operate at 3.3V logic levels to avoid damaging the ESP32-C6.
- Decoupling Capacitors: Place a 0.1 µF capacitor close to the 3V3 pin to stabilize the power supply.
- Antenna Placement: For optimal wireless performance, ensure the onboard antenna is not obstructed by metal or other conductive materials.
- Heat Management: While the ESP32-C6 is efficient, prolonged high-performance operation may generate heat. Ensure adequate ventilation if necessary.
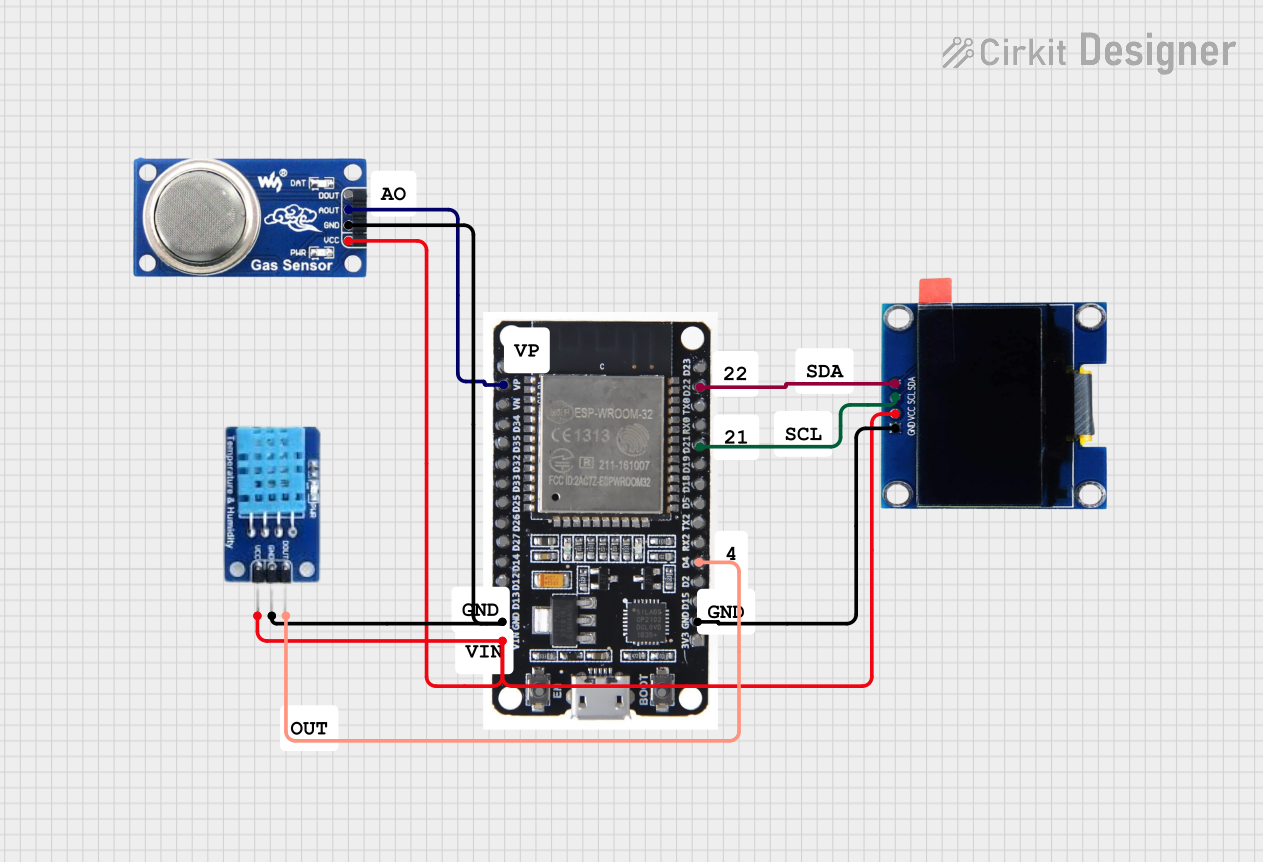
Example Code for Arduino UNO Integration
Below is an example of using the ESP32-C6 to read data from a DHT11 temperature and humidity sensor and send it over Wi-Fi:
#include <WiFi.h>
#include <DHT.h>

// Define DHT sensor type and pin
#define DHTPIN 4       // GPIO4 connected to DHT11 data pin
#define DHTTYPE DHT11  // DHT11 sensor type

DHT dht(DHTPIN, DHTTYPE);

// Wi-Fi credentials
const char* ssid = "Your_SSID";
const char* password = "Your_PASSWORD";

void setup() {
  Serial.begin(115200);
  dht.begin();

  // Connect to Wi-Fi
  WiFi.begin(ssid, password);
  Serial.print("Connecting to Wi-Fi");
  while (WiFi.status() != WL_CONNECTED) {
    delay(500);
    Serial.print(".");
  }
  Serial.println("\nConnected to Wi-Fi");
}

void loop() {
  // Read temperature and humidity
  float temperature = dht.readTemperature();
  float humidity = dht.readHumidity();

  // Check if readings are valid
  if (isnan(temperature) || isnan(humidity)) {
    Serial.println("Failed to read from DHT sensor!");
    return;
  }

  // Print readings to Serial Monitor
  Serial.print("Temperature: ");
  Serial.print(temperature);
  Serial.println("°C");
  Serial.print("Humidity: ");
  Serial.print(humidity);
  Serial.println("%");

  delay(2000); // Wait 2 seconds before next reading
}
Note: Replace
Your_SSIDandYour_PASSWORDwith your Wi-Fi network credentials.
Troubleshooting and FAQs
Common Issues and Solutions
ESP32-C6 Not Connecting to Wi-Fi
- Solution: Double-check the SSID and password. Ensure the router supports 2.4 GHz Wi-Fi, as the ESP32-C6 may not connect to 5 GHz networks.
Code Upload Fails
- Solution: Ensure GPIO0 is connected to GND during reset to enter bootloader mode. Verify the correct COM port and board settings in your IDE.
Sensor Readings Are Incorrect
- Solution: Check the wiring and ensure the sensor is compatible with 3.3V logic levels. Verify the sensor library is correctly installed.
Device Overheats
- Solution: Reduce the clock speed or optimize the code to minimize processing load. Ensure proper ventilation.
FAQs
Q: Can the ESP32-C6 operate on battery power?
- A: Yes, the ESP32-C6 supports ultra-low power modes, making it suitable for battery-operated devices.
Q: Is the ESP32-C6 compatible with Arduino libraries?
- A: Yes, the ESP32-C6 can be programmed using the Arduino IDE, and many libraries are compatible.
Q: How do I reset the ESP32-C6?
- A: Press the EN (enable) pin or button to reset the microcontroller.
Q: Can I use the ESP32-C6 for Bluetooth audio?
- A: No, the ESP32-C6 supports Bluetooth Low Energy (BLE) but does not support Bluetooth Classic for audio streaming.
For additional support, refer to the official Espressif documentation or community forums.