Cirkit Designer Logo
Cirkit Designer
Your all-in-one circuit design IDE
Home / 
Component Documentation

How to Use HX710B: Examples, Pinouts, and Specs

Image of HX710B
Cirkit Designer LogoDesign with HX710B in Cirkit Designer

Introduction

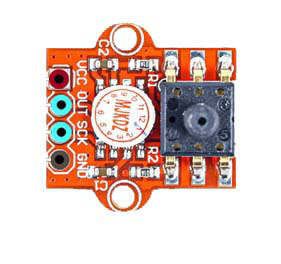
The HX710B is a precision 24-bit analog-to-digital converter (ADC) designed for weigh scales and industrial control applications to interface directly with a bridge sensor. Its simple pin configuration and digital output make it an ideal choice for various applications that require accurate weight measurements, such as electronic scales, kitchen scales, and industrial weighing systems.

Explore Projects Built with HX710B

Use Cirkit Designer to design, explore, and prototype these projects online. Some projects support real-time simulation. Click "Open Project" to start designing instantly!
Bluetooth-Controlled Multi-Function Arduino Nano Gadget
Image of Copy of Smarttt: A project utilizing HX710B in a practical application
This is a portable, microcontroller-driven interactive device featuring Bluetooth connectivity, visual (RGB LED), auditory (loudspeaker), and haptic (vibration motor) feedback, user input (pushbutton), and a rechargeable power system (TP4056 with Li-ion battery).
Cirkit Designer LogoOpen Project in Cirkit Designer
Arduino Mega ADK Automated Plant Watering and Environmental Monitoring System
Image of Automatisierungsprojekt Mega: A project utilizing HX710B in a practical application
This circuit features an Arduino Mega ADK as the central microcontroller, interfacing with a variety of sensors and actuators. It includes a BH1750 light sensor and a DHT11 temperature and humidity sensor for environmental monitoring, both interfacing via I2C. The system controls a stepper motor via an A4988 driver, two water pumps through a 3-channel relay, and a fan using an IRF520 PWM module, with several push switches to trigger inputs. An OLED display provides a user interface, and soil moisture levels are monitored with two soil sensors. A non-contact water level sensor is also included for liquid level detection.
Cirkit Designer LogoOpen Project in Cirkit Designer
Beelink Mini S12 N95 and Arduino UNO Based Fingerprint Authentication System with ESP32 CAM
Image of design 3: A project utilizing HX710B in a practical application
This circuit features a Beelink MINI S12 N95 computer connected to a 7-inch display via HDMI for video output and two USB connections for power and touch screen functionality. An Arduino UNO is interfaced with a fingerprint scanner for biometric input. The Beelink MINI S12 N95 is powered by a PC power supply, which in turn is connected to a 240V power source. Additionally, an ESP32 CAM module is powered and programmed via a USB plug and an FTDI programmer, respectively, for wireless camera capabilities.
Cirkit Designer LogoOpen Project in Cirkit Designer
Arduino UNO-Based Smart Irrigation System with Motion Detection and Bluetooth Connectivity
Image of Copy of wiring TA: A project utilizing HX710B in a practical application
This circuit is a microcontroller-based control and monitoring system. It uses an Arduino UNO to read from a DHT22 temperature and humidity sensor and an HC-SR501 motion sensor, display data on an LCD, and control a water pump and an LED through a relay. The HC-05 Bluetooth module allows for wireless communication.
Cirkit Designer LogoOpen Project in Cirkit Designer

Explore Projects Built with HX710B

Use Cirkit Designer to design, explore, and prototype these projects online. Some projects support real-time simulation. Click "Open Project" to start designing instantly!
Image of Copy of Smarttt: A project utilizing HX710B in a practical application
Bluetooth-Controlled Multi-Function Arduino Nano Gadget
This is a portable, microcontroller-driven interactive device featuring Bluetooth connectivity, visual (RGB LED), auditory (loudspeaker), and haptic (vibration motor) feedback, user input (pushbutton), and a rechargeable power system (TP4056 with Li-ion battery).
Cirkit Designer LogoOpen Project in Cirkit Designer
Image of Automatisierungsprojekt Mega: A project utilizing HX710B in a practical application
Arduino Mega ADK Automated Plant Watering and Environmental Monitoring System
This circuit features an Arduino Mega ADK as the central microcontroller, interfacing with a variety of sensors and actuators. It includes a BH1750 light sensor and a DHT11 temperature and humidity sensor for environmental monitoring, both interfacing via I2C. The system controls a stepper motor via an A4988 driver, two water pumps through a 3-channel relay, and a fan using an IRF520 PWM module, with several push switches to trigger inputs. An OLED display provides a user interface, and soil moisture levels are monitored with two soil sensors. A non-contact water level sensor is also included for liquid level detection.
Cirkit Designer LogoOpen Project in Cirkit Designer
Image of design 3: A project utilizing HX710B in a practical application
Beelink Mini S12 N95 and Arduino UNO Based Fingerprint Authentication System with ESP32 CAM
This circuit features a Beelink MINI S12 N95 computer connected to a 7-inch display via HDMI for video output and two USB connections for power and touch screen functionality. An Arduino UNO is interfaced with a fingerprint scanner for biometric input. The Beelink MINI S12 N95 is powered by a PC power supply, which in turn is connected to a 240V power source. Additionally, an ESP32 CAM module is powered and programmed via a USB plug and an FTDI programmer, respectively, for wireless camera capabilities.
Cirkit Designer LogoOpen Project in Cirkit Designer
Image of Copy of wiring TA: A project utilizing HX710B in a practical application
Arduino UNO-Based Smart Irrigation System with Motion Detection and Bluetooth Connectivity
This circuit is a microcontroller-based control and monitoring system. It uses an Arduino UNO to read from a DHT22 temperature and humidity sensor and an HC-SR501 motion sensor, display data on an LCD, and control a water pump and an LED through a relay. The HC-05 Bluetooth module allows for wireless communication.
Cirkit Designer LogoOpen Project in Cirkit Designer

Common Applications

  • Electronic personal and kitchen scales
  • Industrial weighing systems
  • Portable scales
  • Force and pressure sensing

Technical Specifications

Key Technical Details

  • Power supply: 2.6V to 5.5V DC
  • Current consumption: 1.4 mA (typical when active), 1 µA (typical in power-down mode)
  • Input signal range: -20 mV to +20 mV (Differential input voltage)
  • Data rate: 10 or 80 samples per second (selectable)
  • On-chip oscillator requiring no external component with optional external crystal
  • On-chip power-on-reset
  • Simple digital control and serial interface: pin-driven controls, no programming needed
  • Selectable 10SPS or 80SPS output data rate
  • Simultaneous 50 and 60Hz supply rejection

Pin Configuration and Descriptions

Pin Number Name Description
1 VDD Power supply (2.6V to 5.5V DC)
2 GND Ground reference
3 DOUT Serial data output
4 PD_SCK Power down and serial clock input

Usage Instructions

How to Use the HX710B in a Circuit

  1. Power Supply: Connect the VDD pin to a stable power source between 2.6V and 5.5V and the GND pin to the ground of your system.
  2. Load Cell Connections: Connect the load cell wires to the HX710B according to the load cell's datasheet. Ensure that the connections are secure and free from noise.
  3. Data Retrieval: Use the DOUT and PD_SCK pins to interface with a microcontroller, such as an Arduino, to retrieve and process the weight data.

Important Considerations and Best Practices

  • Ensure that the power supply is stable and within the specified range to prevent damage to the HX710B.
  • Keep the wiring between the HX710B and the load cell as short as possible to minimize noise and interference.
  • Implement proper filtering and shielding techniques to improve noise immunity, especially in industrial environments.
  • Calibrate the system after setup to ensure accurate weight measurements.

Example Code for Arduino UNO

// HX710B Weighing Sensor Example Code for Arduino UNO
#define DOUT  3
#define PD_SCK  2

void setup() {
  Serial.begin(9600);
  pinMode(PD_SCK, OUTPUT);
  pinMode(DOUT, INPUT);
}

void loop() {
  long weight = readWeight();
  Serial.print("Weight: ");
  Serial.println(weight);
  delay(500);
}

long readWeight() {
  long count;
  unsigned char i;
  pinMode(DOUT, INPUT);
  
  while(digitalRead(DOUT));
  
  count=0;
  pinMode(PD_SCK, OUTPUT);
  for(i=0;i<24;i++) {
    digitalWrite(PD_SCK, HIGH);
    count=count<<1;
    digitalWrite(PD_SCK, LOW);
    if(digitalRead(DOUT))
      count++;
  }
  digitalWrite(PD_SCK, HIGH);
  count ^= 0x800000;
  digitalWrite(PD_SCK, LOW);
  return(count);
}

Troubleshooting and FAQs

Common Issues

  • Inaccurate Readings: Ensure that the HX710B is correctly calibrated with the load cell. Check for any loose connections or interference.
  • No Data Output: Verify that the power supply is within the specified range and that all connections are secure. Check if the DOUT pin is correctly interfaced with the microcontroller.
  • Fluctuating Readings: This can be due to electrical noise or mechanical vibrations. Ensure that the setup is stable and away from sources of electromagnetic interference.

Solutions and Tips for Troubleshooting

  • Calibration: Perform a calibration procedure using known weights to ensure accuracy.
  • Connection Check: Recheck all connections, including solder joints and wire connections to the load cell.
  • Noise Reduction: Use twisted-pair wires for the load cell connections and keep the cable lengths short. Consider using shielded cables if necessary.

FAQs

Q: Can the HX710B be used with any load cell? A: The HX710B is compatible with most load cells. Ensure that the load cell's output voltage is within the input range of the HX710B.

Q: How do I calibrate the HX710B with my load cell? A: Calibration involves recording the output with no load and with a known load, then calculating the scale factor to convert the readings to weight units.

Q: What is the maximum sampling rate of the HX710B? A: The HX710B can sample at 10 or 80 samples per second, selectable by the user.

Q: How can I put the HX710B into power-down mode? A: The HX710B enters power-down mode when the PD_SCK pin is pulled high for longer than 60µs after a conversion.