How to Use pyBoard_clone: Examples, Pinouts, and Specs
Introduction
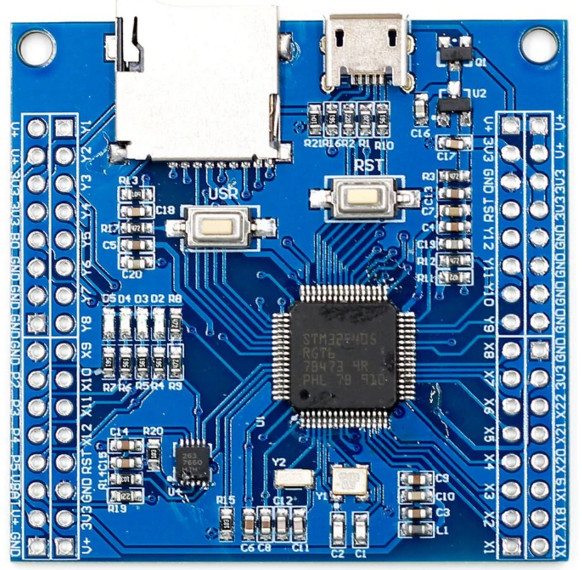
The pyBoard_clone is a versatile microcontroller board designed for easy programming and prototyping. It is compatible with MicroPython, a lightweight implementation of Python optimized for microcontrollers. The board features a variety of GPIO pins, USB connectivity, and multiple interfaces for connecting sensors, modules, and other peripherals. Its compact design and robust functionality make it ideal for both beginners and experienced developers working on embedded systems, IoT projects, and automation tasks.
Explore Projects Built with pyBoard_clone
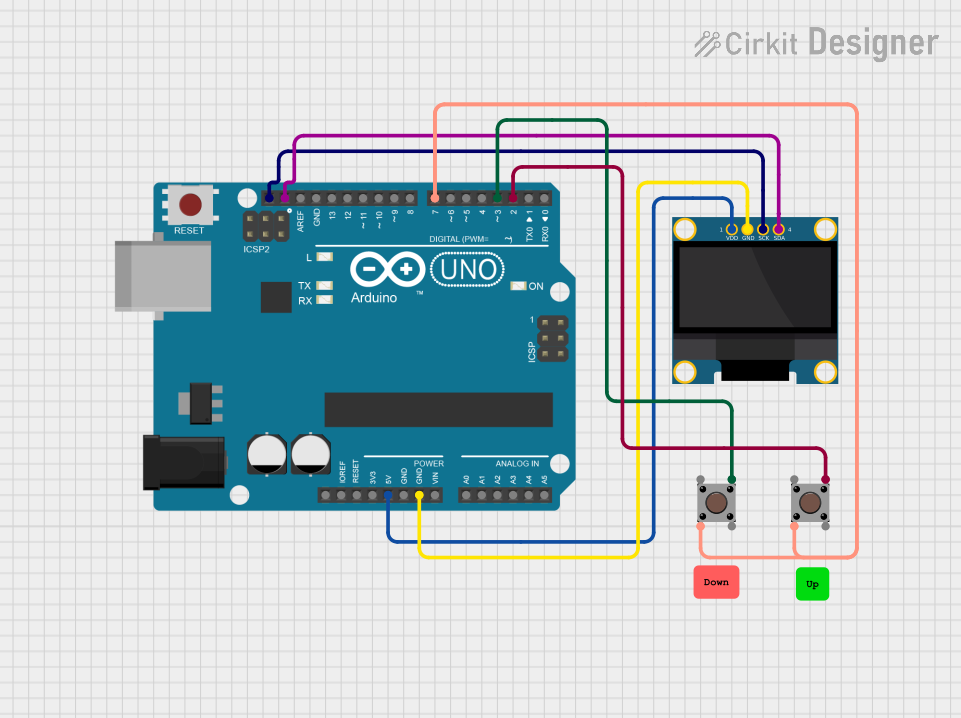
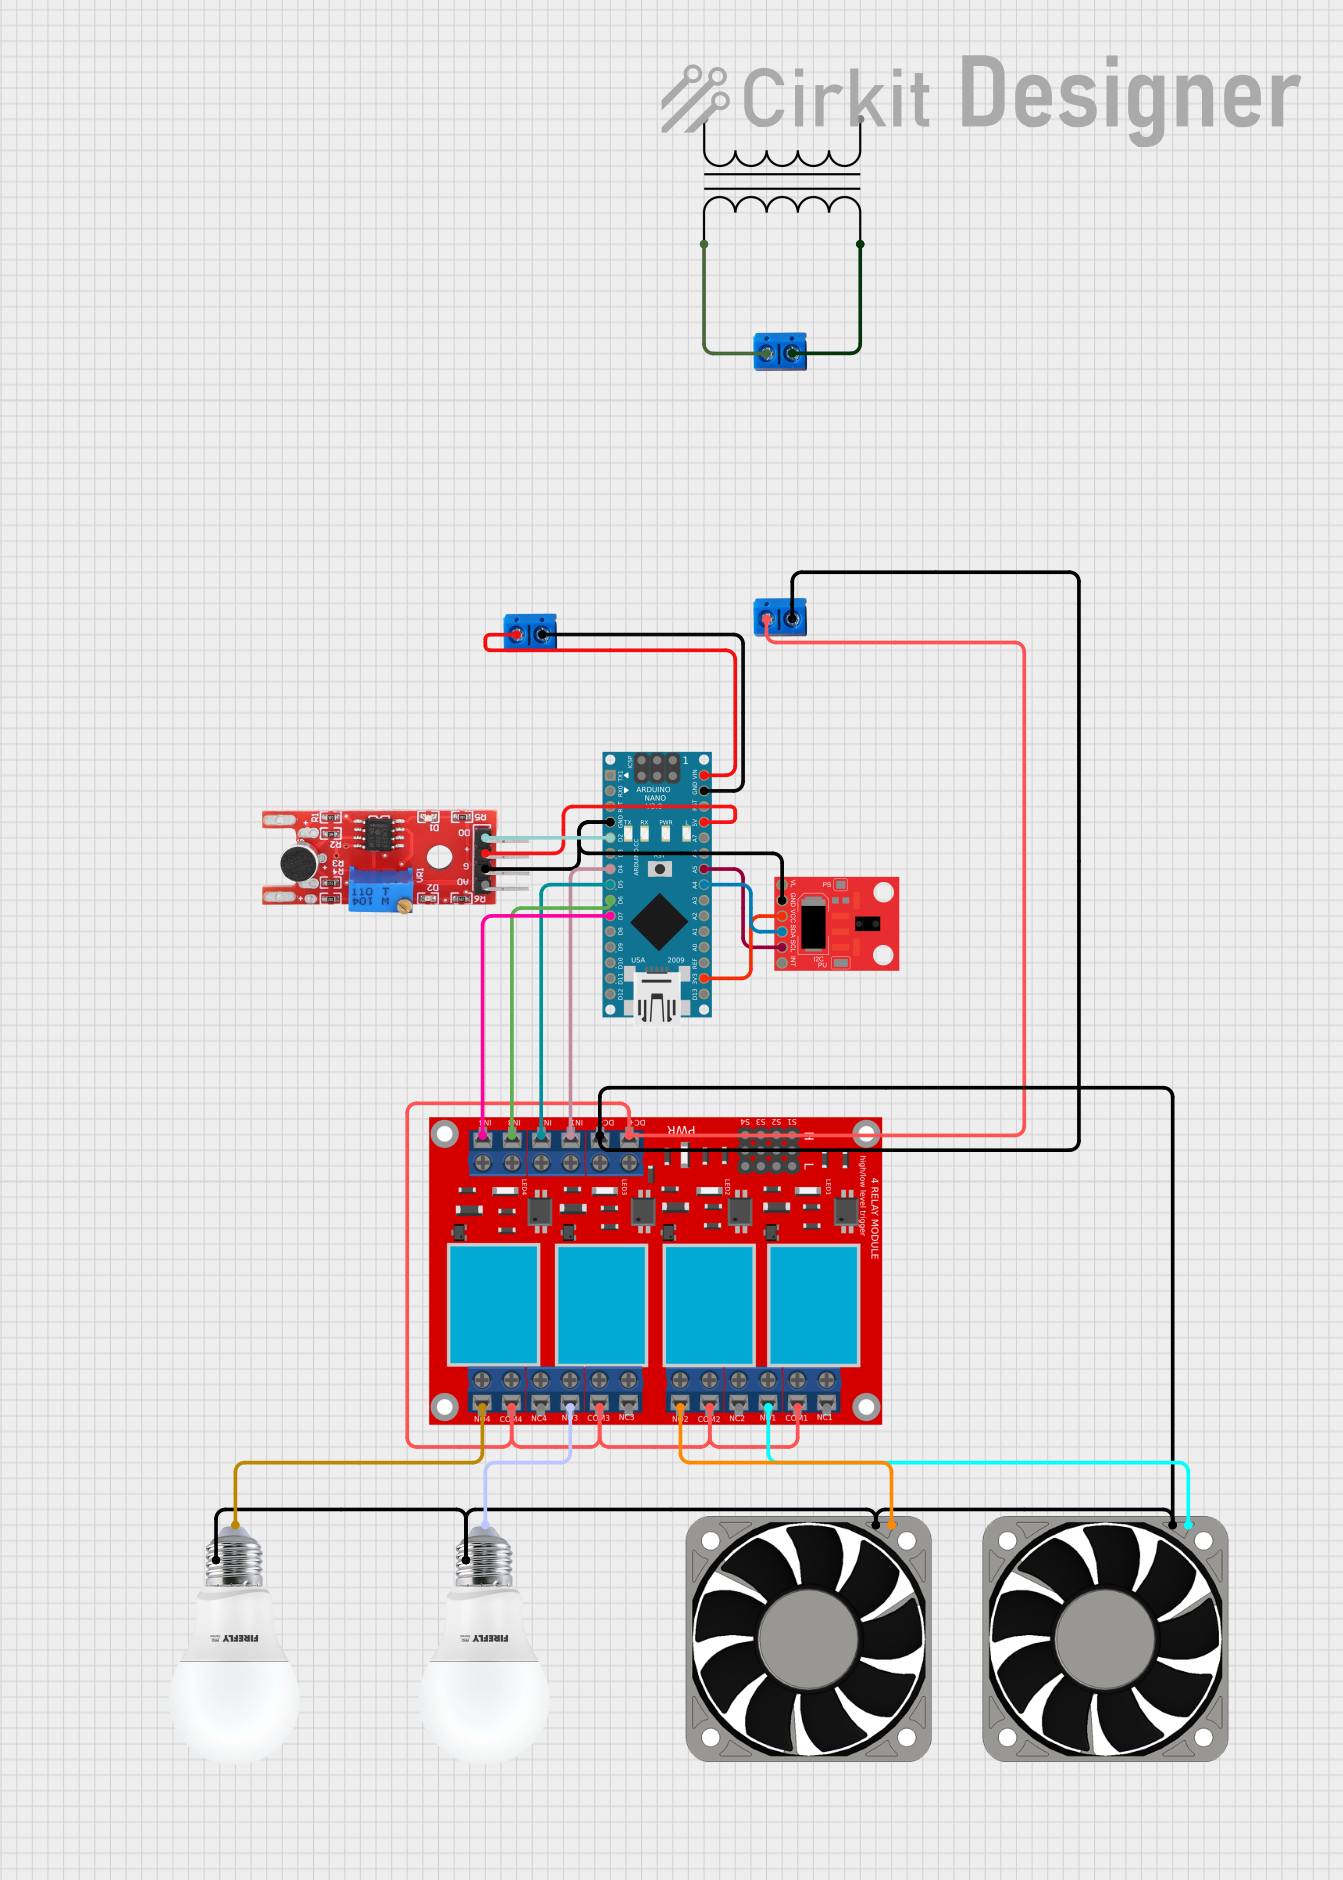
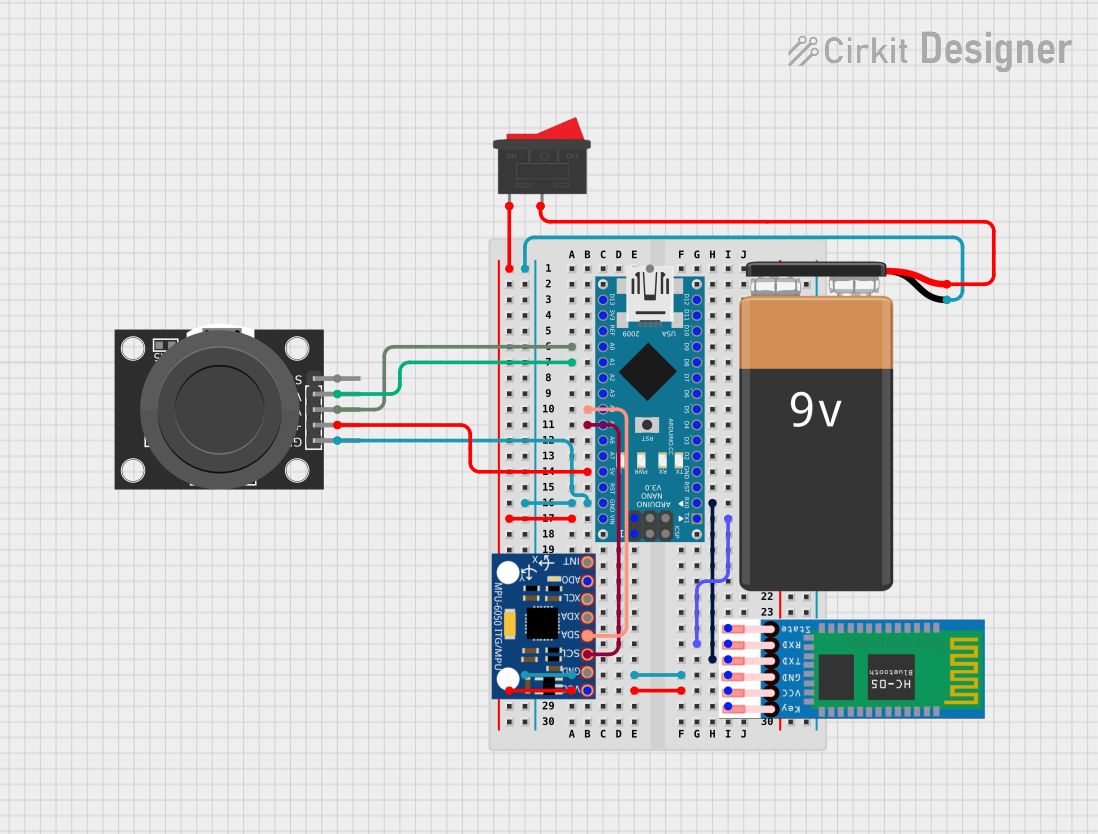
Explore Projects Built with pyBoard_clone
Common Applications
- IoT devices and smart home systems
- Robotics and automation
- Data logging and sensor interfacing
- Educational projects for learning embedded programming
- Rapid prototyping of electronic systems
Technical Specifications
The pyBoard_clone offers the following technical features:
| Specification | Details |
|---|---|
| Microcontroller | ARM Cortex-M4 processor with FPU |
| Clock Speed | 168 MHz |
| Flash Memory | 1 MB |
| RAM | 192 KB |
| GPIO Pins | 24 pins (digital and analog capable) |
| Communication Interfaces | UART, I2C, SPI, CAN |
| USB Connectivity | Micro-USB for power, programming, and data transfer |
| Operating Voltage | 3.3V (logic level) |
| Input Voltage Range | 3.6V to 10V (via VIN pin) |
| Power Consumption | ~50 mA (typical, varies with peripherals) |
| Dimensions | 55 mm x 40 mm |
Pin Configuration
The pyBoard_clone has a total of 24 GPIO pins, which are multifunctional and can be configured for digital I/O, analog input, or communication protocols. Below is the pinout description:
| Pin | Function | Description |
|---|---|---|
| VIN | Power Input | Accepts 3.6V to 10V for powering the board. |
| GND | Ground | Common ground for the circuit. |
| 3V3 | 3.3V Output | Provides 3.3V regulated output for peripherals. |
| A0-A5 | Analog Input | 12-bit ADC channels for reading analog signals. |
| D0-D13 | Digital I/O | Configurable as input or output pins. |
| TX, RX | UART Communication | Serial communication pins (TX for transmit, RX for receive). |
| SCL, SDA | I2C Communication | Clock and data lines for I2C communication. |
| SCK, MOSI, MISO | SPI Communication | Serial Peripheral Interface pins for high-speed data transfer. |
| CANH, CANL | CAN Bus Communication | Controller Area Network pins for automotive and industrial use. |
Usage Instructions
How to Use the pyBoard_clone in a Circuit
Powering the Board:
- Connect the board to a computer via the Micro-USB port for power and programming.
- Alternatively, supply power through the VIN pin (3.6V to 10V) and connect GND to the circuit ground.
Programming the Board:
- Install MicroPython on the board if not pre-installed.
- Use a MicroPython IDE (e.g., Thonny) or a terminal-based REPL to write and upload code.
- The board will appear as a USB mass storage device, allowing you to drag and drop Python scripts.
Connecting Peripherals:
- Use the GPIO pins to interface with sensors, actuators, and other modules.
- Ensure that the voltage levels of connected peripherals are compatible with the board's 3.3V logic.
Example Circuit:
- Connect an LED to pin D13 with a 220-ohm resistor in series.
- Use the following MicroPython code to blink the LED.
Example Code: Blinking an LED
from machine import Pin
from time import sleep
Configure pin D13 as an output pin
led = Pin('D13', Pin.OUT)
while True: led.value(1) # Turn the LED on sleep(1) # Wait for 1 second led.value(0) # Turn the LED off sleep(1) # Wait for 1 second
Important Considerations
- Voltage Levels: Ensure that all connected peripherals operate at 3.3V logic levels. Use level shifters if necessary.
- Power Supply: Avoid exceeding the input voltage range (3.6V to 10V) to prevent damage to the board.
- Static Protection: Handle the board with care to avoid electrostatic discharge (ESD) damage.
Troubleshooting and FAQs
Common Issues and Solutions
Board Not Detected by Computer:
- Ensure the USB cable is functional and supports data transfer.
- Check if the board is properly connected and powered.
MicroPython Code Not Running:
- Verify that the script is named
main.pyorboot.pyfor automatic execution. - Check for syntax errors in the code.
- Verify that the script is named
Peripherals Not Responding:
- Confirm that the GPIO pins are correctly configured in the code.
- Check the wiring and ensure proper connections.
Overheating:
- Ensure the input voltage does not exceed the recommended range.
- Disconnect unused peripherals to reduce power consumption.
FAQs
Q: Can I use the pyBoard_clone with Arduino IDE?
A: No, the pyBoard_clone is designed for use with MicroPython. However, you can use Python-based IDEs like Thonny for programming.
Q: How do I reset the board?
A: Press the reset button on the board or power cycle it by disconnecting and reconnecting the power source.
Q: Can I connect 5V peripherals directly to the GPIO pins?
A: No, the GPIO pins operate at 3.3V logic levels. Use a level shifter to interface with 5V peripherals.
Q: Is the pyBoard_clone compatible with all MicroPython libraries?
A: Most MicroPython libraries are compatible, but some may require minor modifications depending on the hardware.
By following this documentation, you can effectively use the pyBoard_clone for your projects and troubleshoot common issues with ease.