How to Use HX-2S-JH20: Examples, Pinouts, and Specs
Introduction
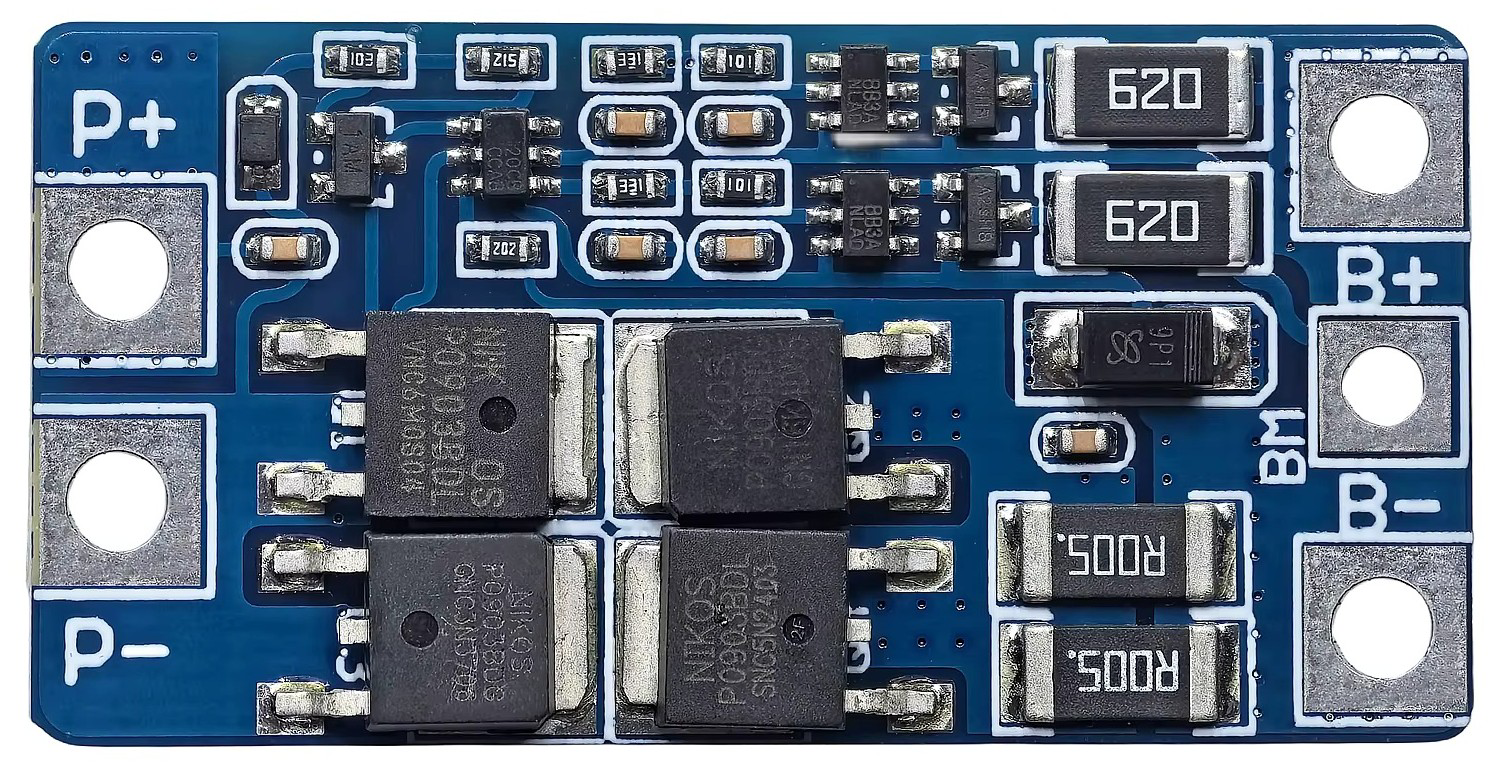
The HX-2S-JH20 is a 2-pin connector manufactured by Genérico, designed for reliable and secure wire-to-device connections in electronic circuits. Its compact design makes it ideal for applications where space is limited, while its robust construction ensures durability and consistent performance. This connector is widely used in battery packs, small electronic devices, and prototyping projects.
Explore Projects Built with HX-2S-JH20
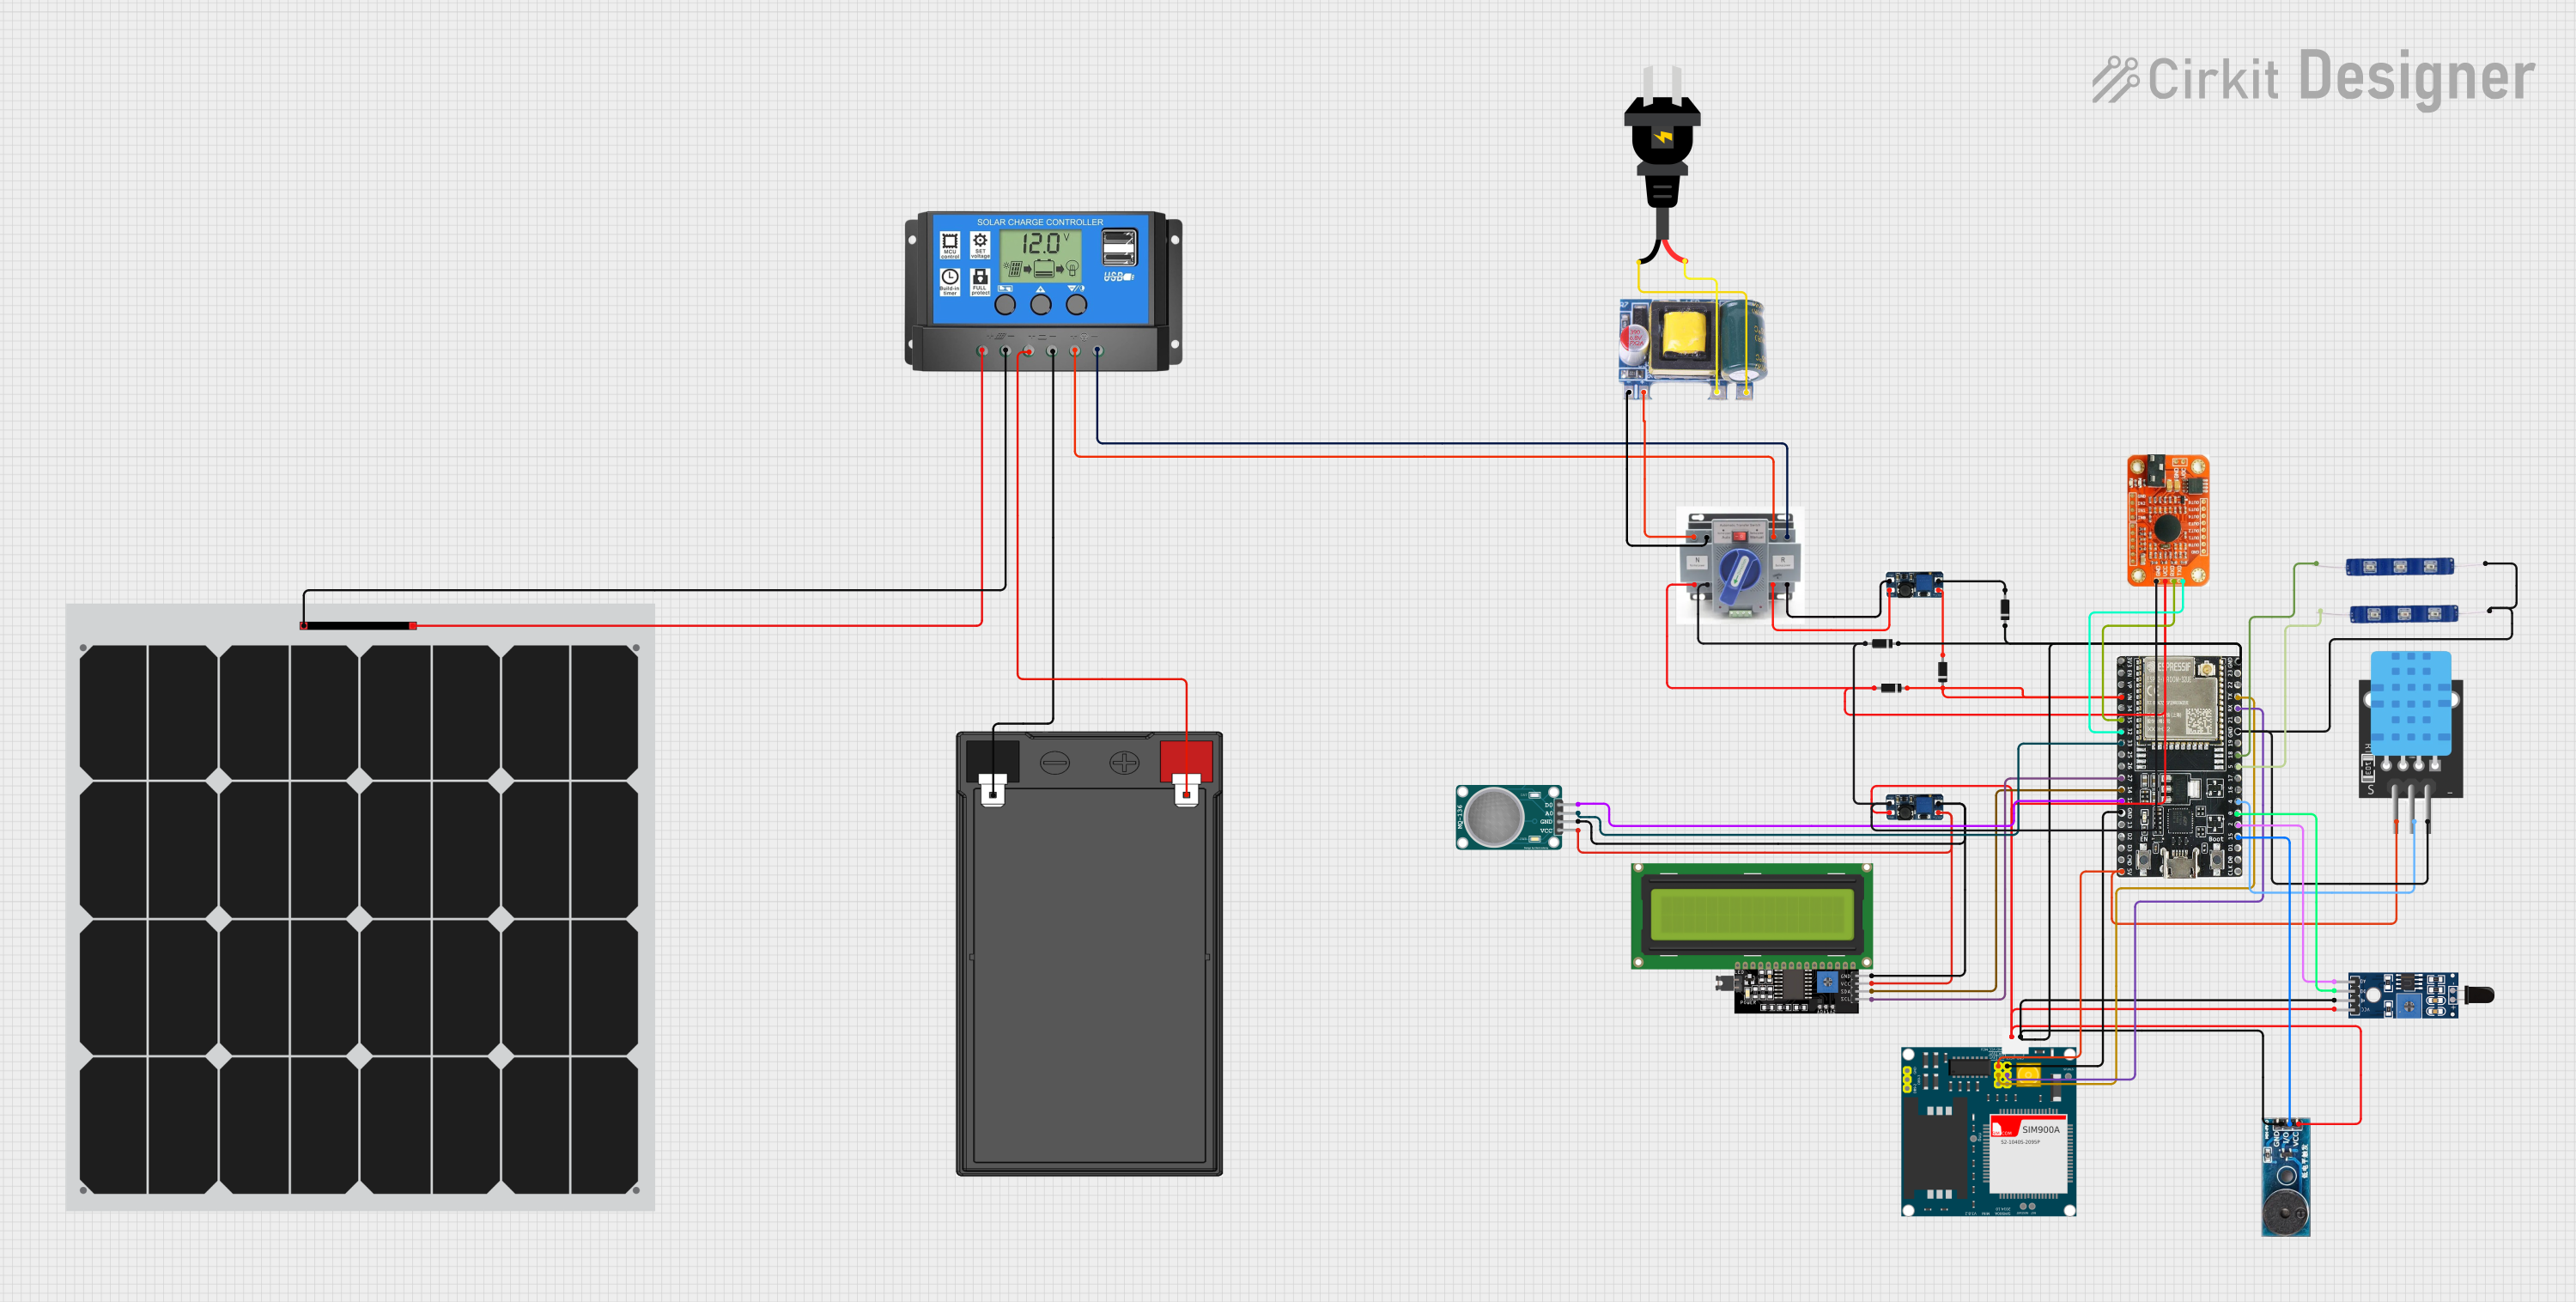

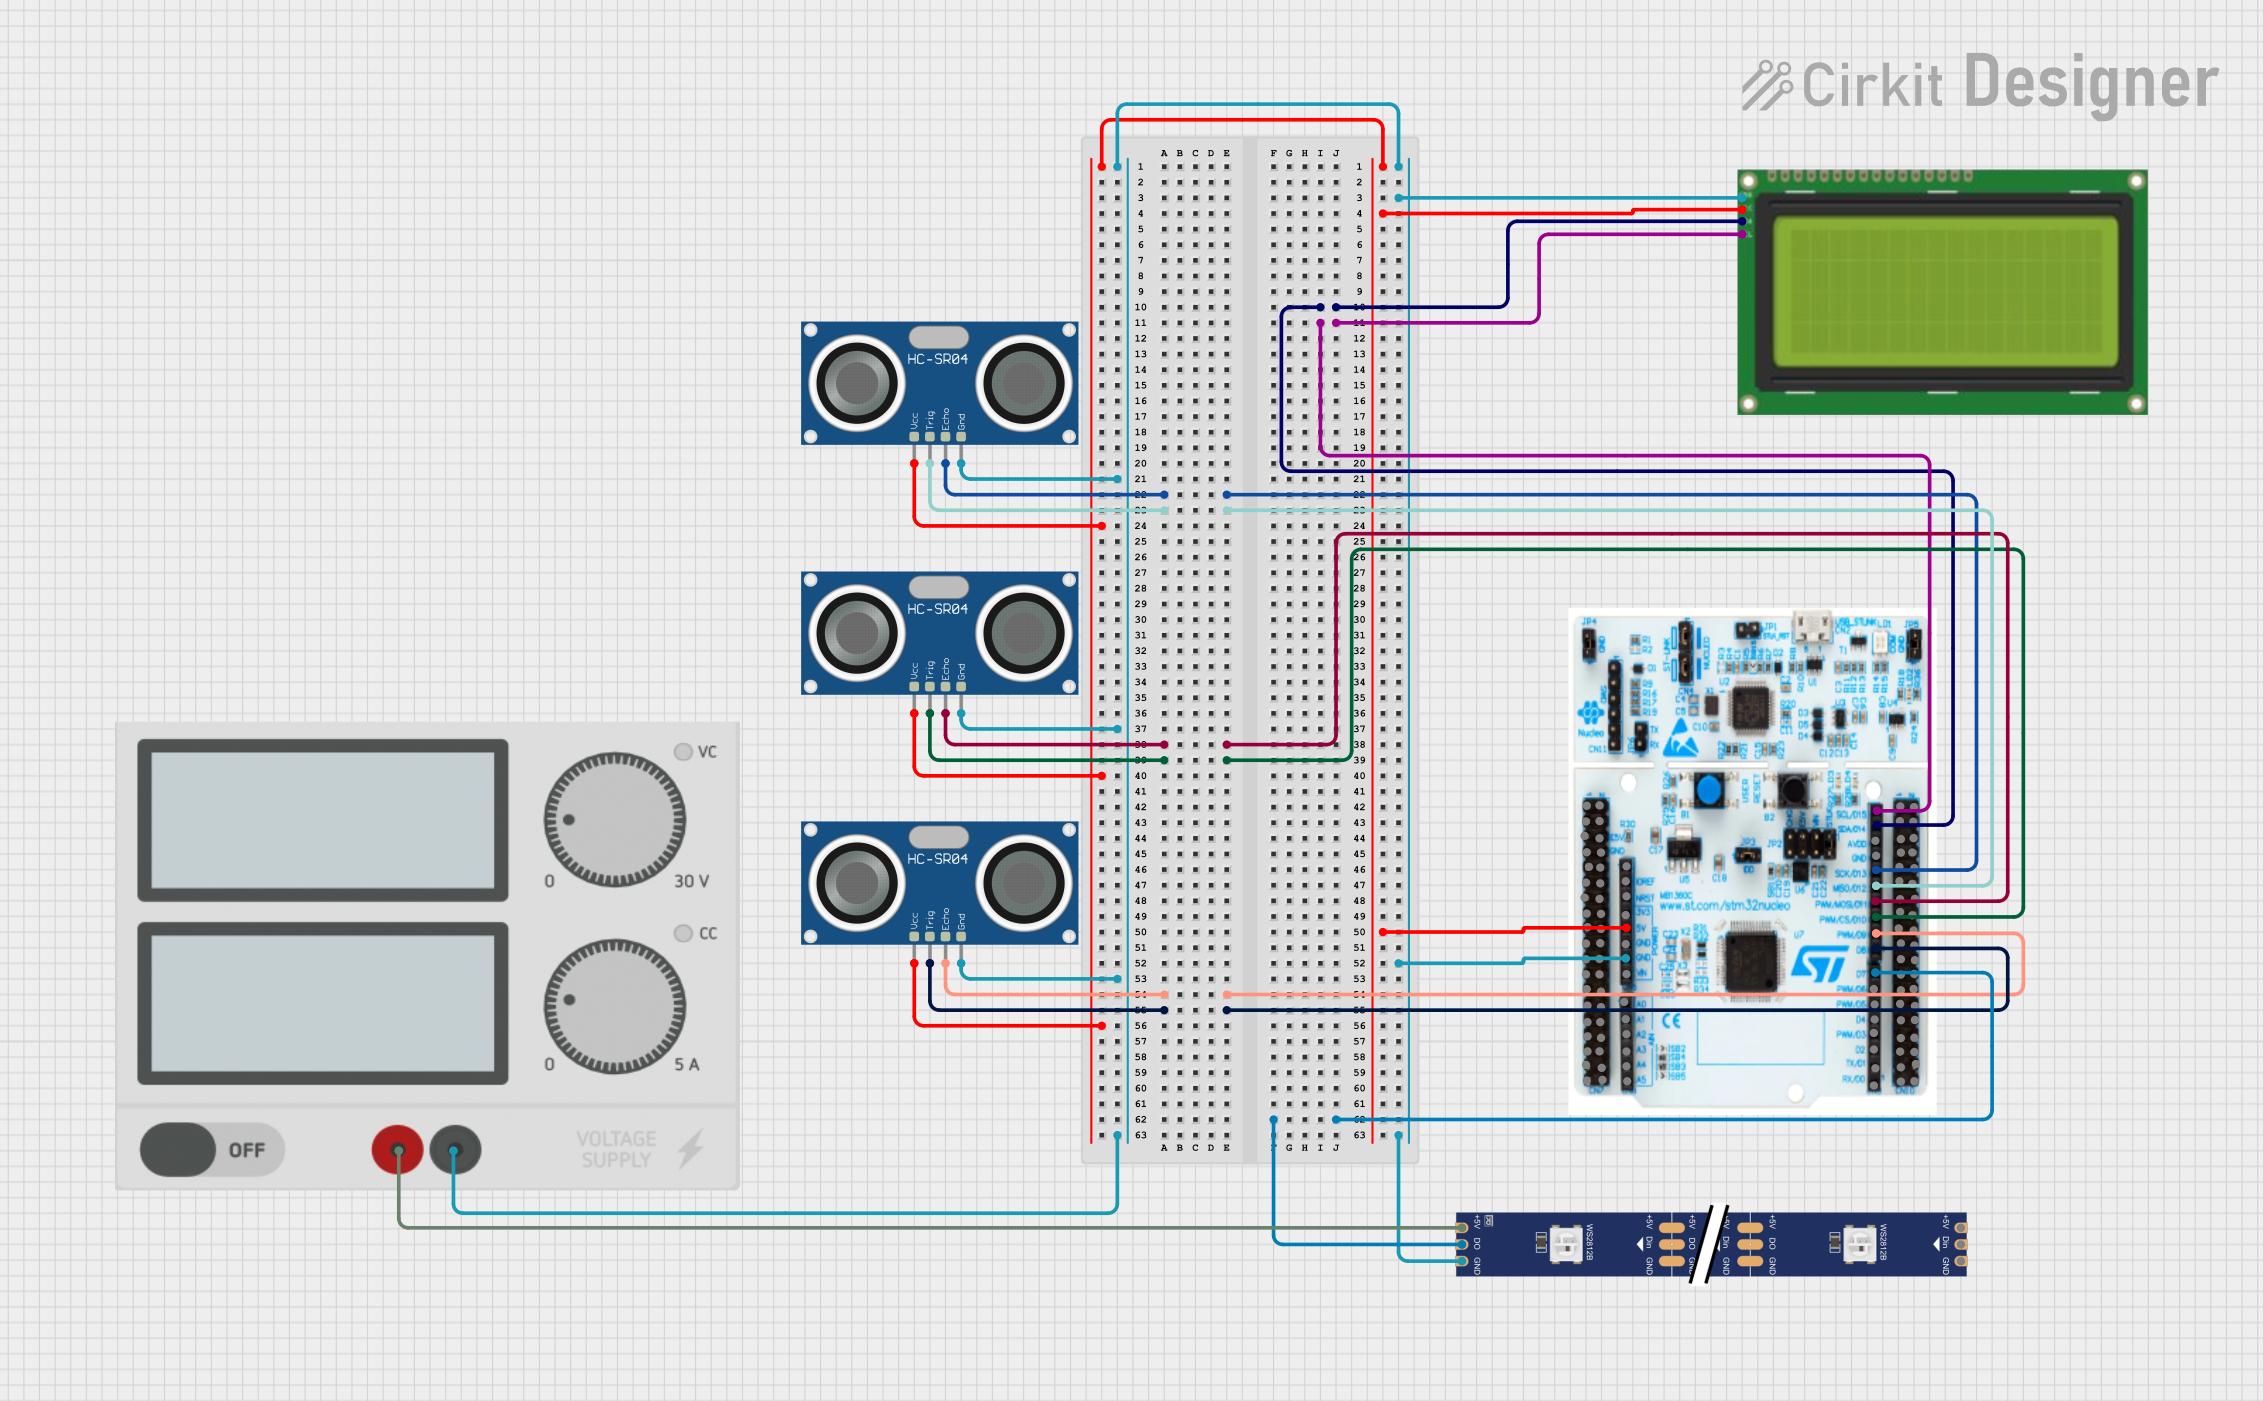

Explore Projects Built with HX-2S-JH20
Common Applications
- Connecting battery packs to circuit boards
- Power supply connections in small electronic devices
- Prototyping and DIY electronics projects
- Robotics and automation systems
Technical Specifications
The HX-2S-JH20 connector is designed to provide a secure and efficient connection for low-power applications. Below are its key technical details:
| Parameter | Specification |
|---|---|
| Manufacturer | Genérico |
| Part ID | HX-2S-JH20 |
| Number of Pins | 2 |
| Rated Voltage | 250V AC/DC |
| Rated Current | 3A |
| Contact Resistance | ≤ 20 mΩ |
| Insulation Resistance | ≥ 1000 MΩ |
| Operating Temperature | -25°C to +85°C |
| Connector Material | Nylon 66 (UL94V-0 rated) |
| Contact Material | Phosphor Bronze (Tin-plated) |
Pin Configuration and Descriptions
The HX-2S-JH20 features two pins, which are typically used for power or signal connections. Below is the pin configuration:
| Pin Number | Description | Typical Use |
|---|---|---|
| 1 | Positive (+) Terminal | Power or signal input |
| 2 | Negative (-) Terminal | Ground or signal return |
Usage Instructions
How to Use the HX-2S-JH20 in a Circuit
- Prepare the Wires: Strip the insulation from the ends of the wires you intend to connect, exposing approximately 5-7 mm of conductor.
- Insert the Wires: Insert the stripped wire ends into the corresponding terminals of the HX-2S-JH20 connector.
- Secure the Connection: Use a crimping tool to securely attach the wires to the connector pins. Ensure the connection is tight to avoid loose contacts.
- Connect to the Device: Plug the HX-2S-JH20 connector into the corresponding socket on your device or circuit board.
Important Considerations
- Polarity: Always ensure the correct polarity when connecting the HX-2S-JH20 to avoid damage to your circuit or device.
- Current Rating: Do not exceed the rated current of 3A to prevent overheating or damage to the connector.
- Environmental Conditions: Use the connector within its specified operating temperature range (-25°C to +85°C) for optimal performance.
- Crimping Tool: Use a compatible crimping tool to ensure a secure and reliable connection.
Example: Connecting to an Arduino UNO
The HX-2S-JH20 can be used to connect a battery pack to an Arduino UNO. Below is an example of how to use it in a simple circuit:
Circuit Description
- A 7.4V Li-ion battery pack is connected to the Arduino UNO's VIN and GND pins via the HX-2S-JH20 connector.
- The VIN pin allows the Arduino to regulate the input voltage to 5V.
Sample Code
// Example code for reading battery voltage on an Arduino UNO
// Ensure the battery voltage does not exceed the Arduino's input limits.

const int batteryPin = A0; // Analog pin connected to the battery's positive terminal
float batteryVoltage = 0.0;

void setup() {
  Serial.begin(9600); // Initialize serial communication
}

void loop() {
  int sensorValue = analogRead(batteryPin); // Read the analog value
  batteryVoltage = sensorValue * (5.0 / 1023.0) * 2;
  // Convert the analog value to voltage. The multiplier "2" accounts for a
  // voltage divider if used to step down the battery voltage.

  Serial.print("Battery Voltage: ");
  Serial.print(batteryVoltage);
  Serial.println(" V");

  delay(1000); // Wait for 1 second before the next reading
}
Troubleshooting and FAQs
Common Issues
- Loose Connections: If the connection is intermittent, check that the wires are securely crimped and properly inserted into the connector.
- Solution: Re-crimp the wires using a proper crimping tool and ensure a tight fit.
- Overheating: If the connector becomes hot during operation, it may be due to excessive current.
- Solution: Verify that the current does not exceed the 3A rating. Use a thicker wire if necessary.
- Polarity Reversal: Incorrect polarity can damage your circuit or device.
- Solution: Double-check the polarity before connecting the HX-2S-JH20 to your circuit.
FAQs
Q: Can the HX-2S-JH20 be used for high-power applications?
A: No, the HX-2S-JH20 is rated for a maximum current of 3A and is best suited for low-power applications.
Q: What type of crimping tool should I use?
A: Use a crimping tool designed for 2-pin connectors with a compatible pin size to ensure a secure connection.
Q: Is the HX-2S-JH20 waterproof?
A: No, the HX-2S-JH20 is not waterproof. Avoid using it in environments with high humidity or exposure to water.
Q: Can I solder wires to the HX-2S-JH20 instead of crimping?
A: While crimping is recommended for a secure connection, soldering can be used as an alternative if done carefully.