How to Use Water sensor: Examples, Pinouts, and Specs
Introduction
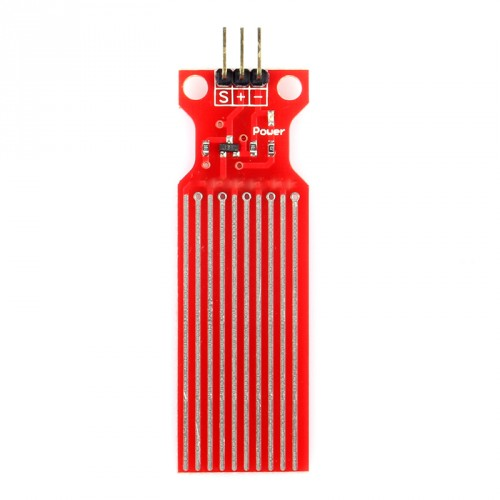
A water sensor is an electronic device that detects the presence of water or moisture in its environment. It is an essential component in various applications, including home automation systems, environmental monitoring, and industrial processes. Common use cases involve leak detection in plumbing systems, flood warning in basements, irrigation control in agriculture, and water level monitoring in tanks or bodies of water.
Explore Projects Built with Water sensor
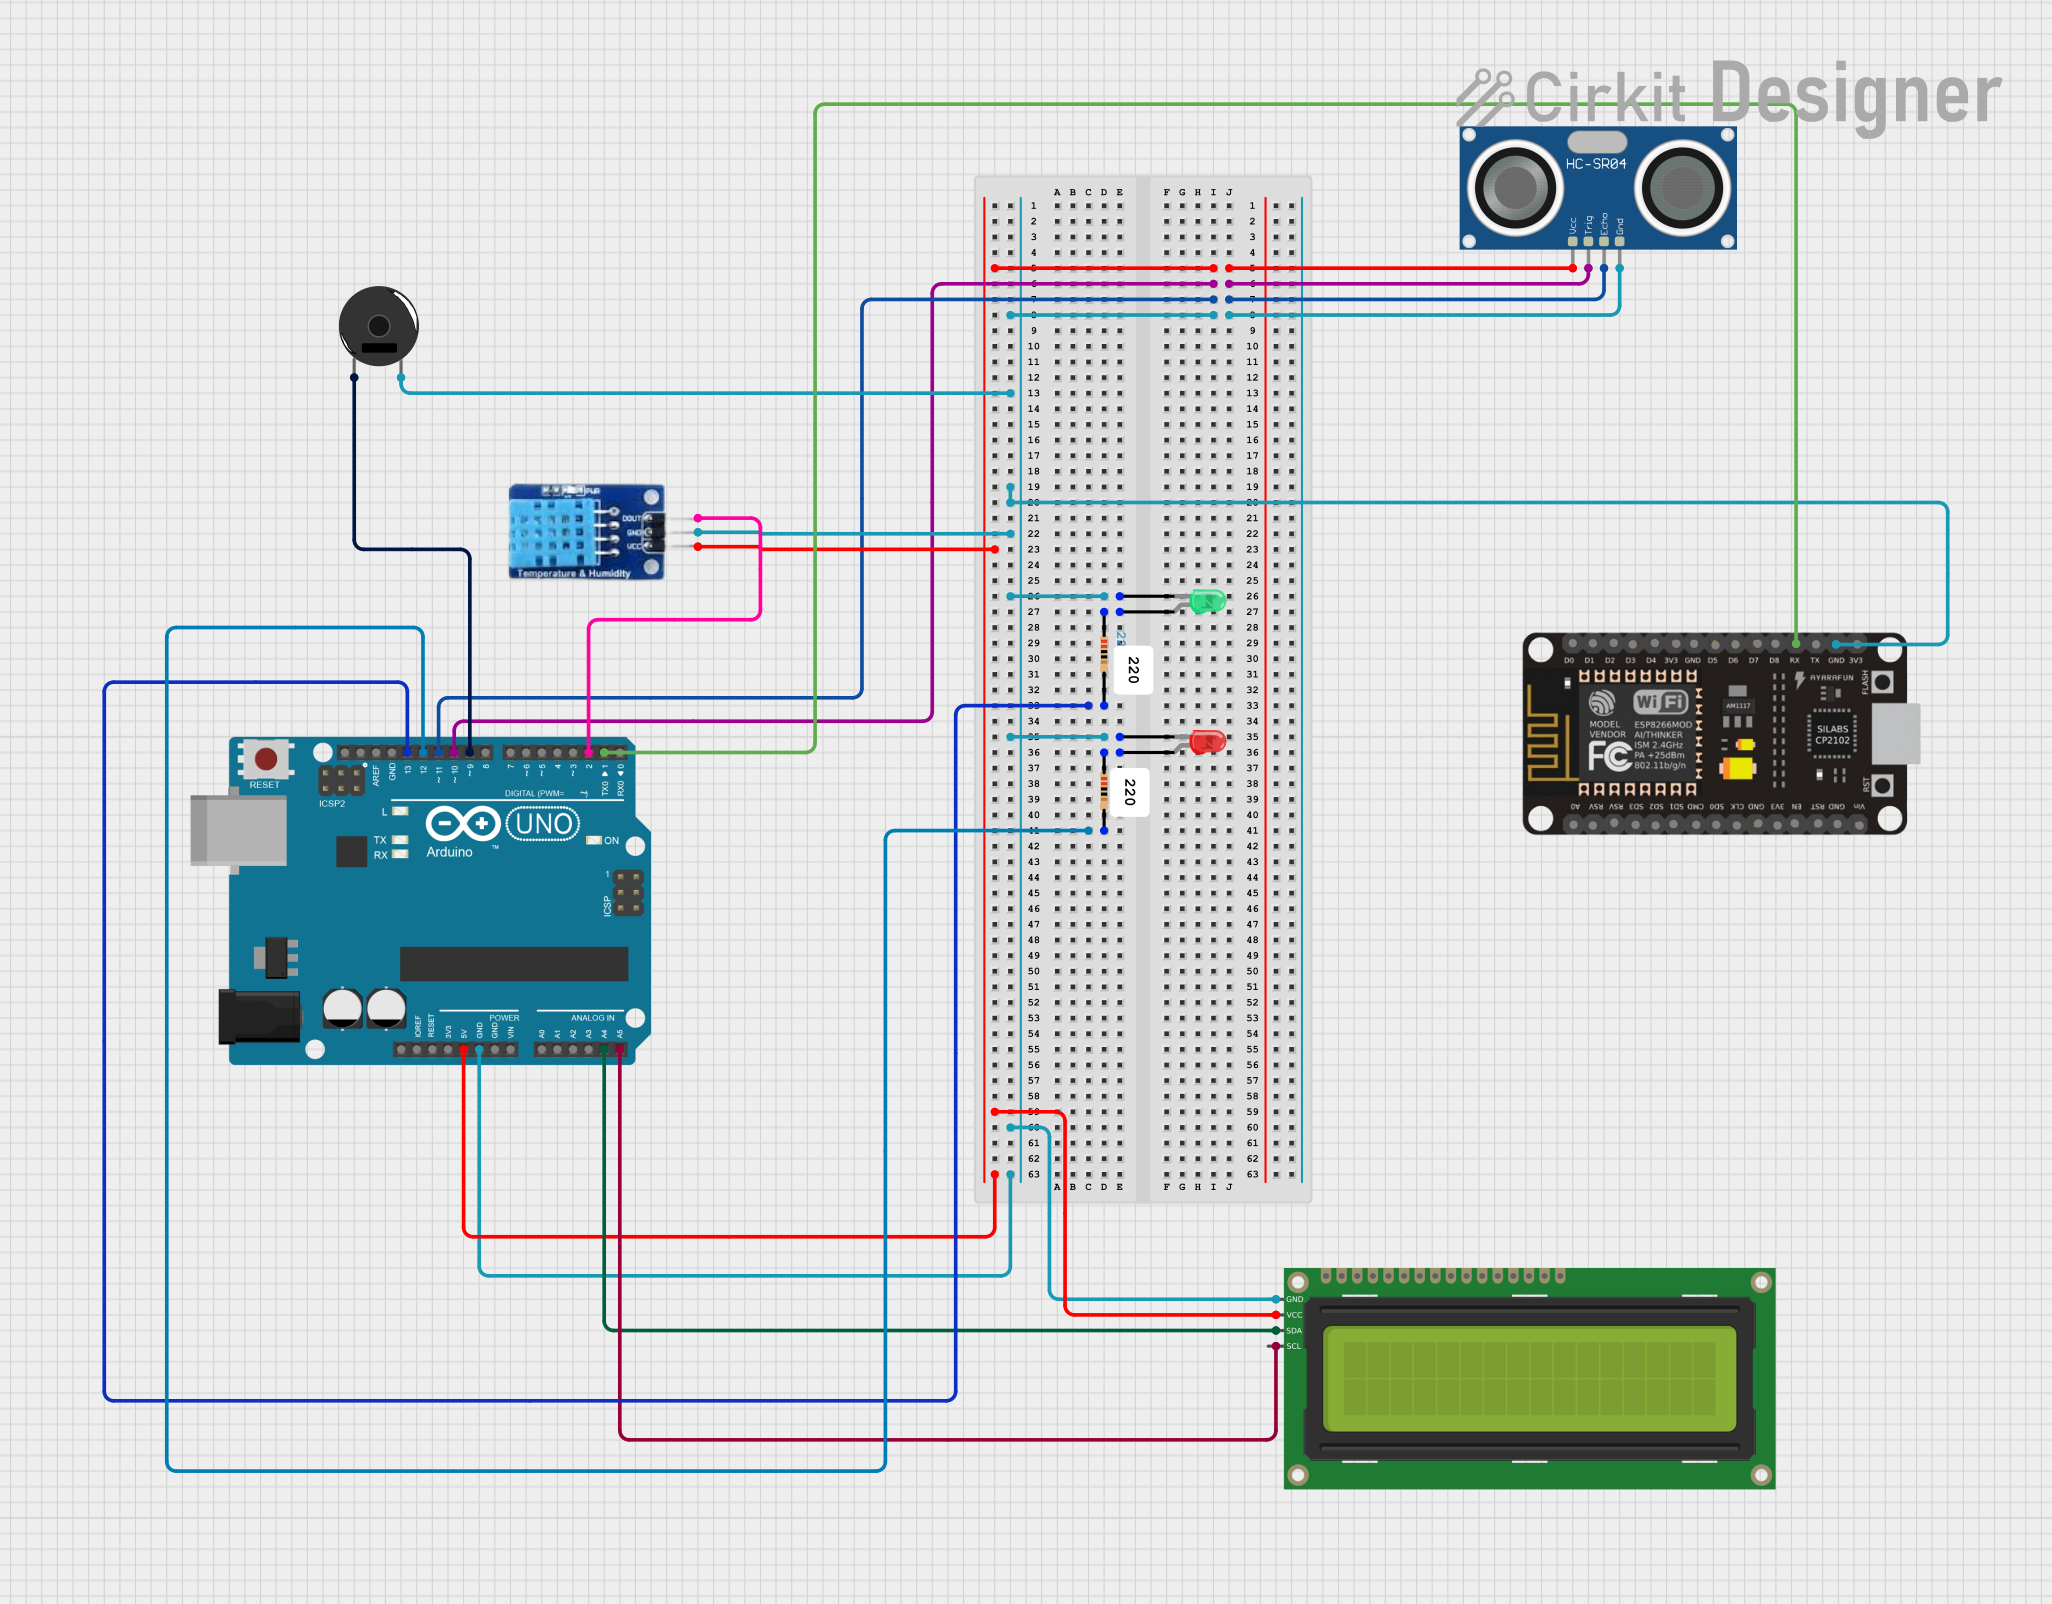
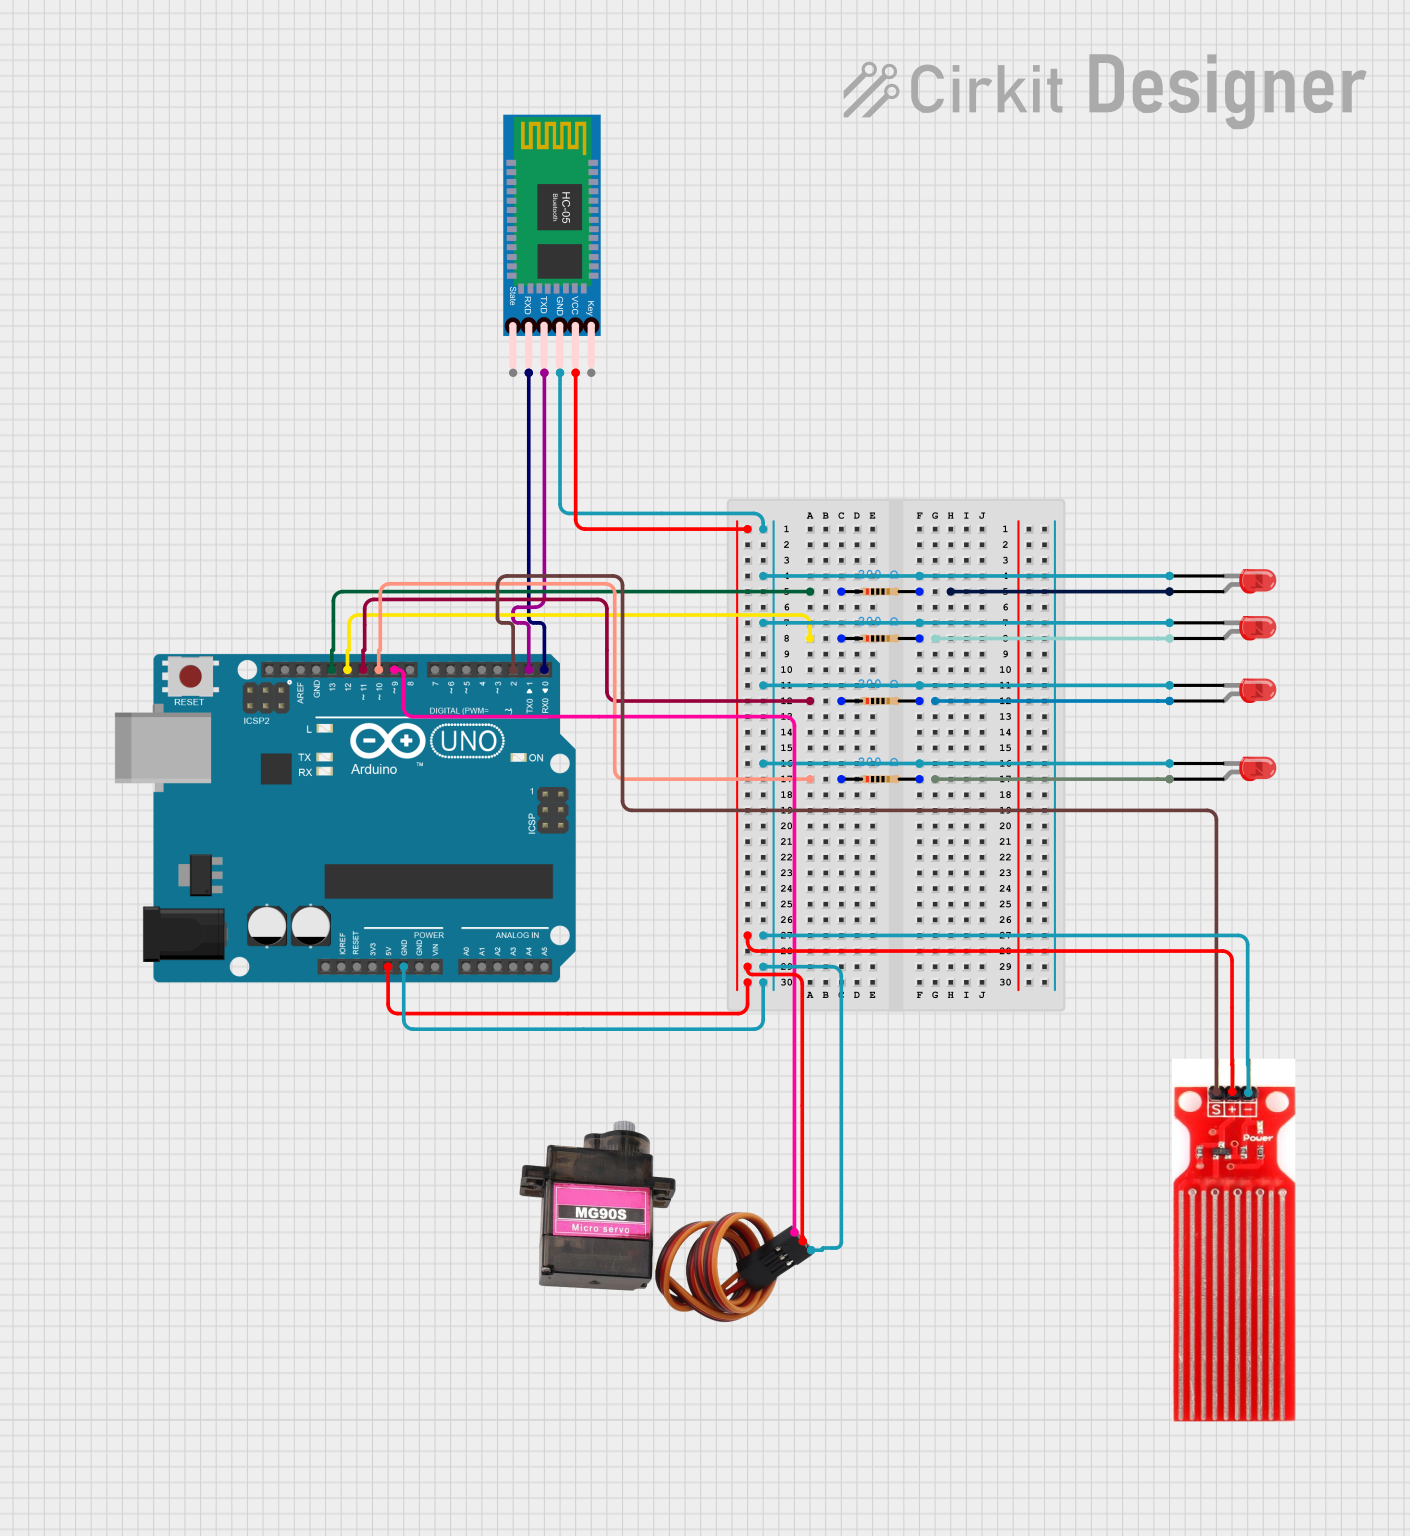
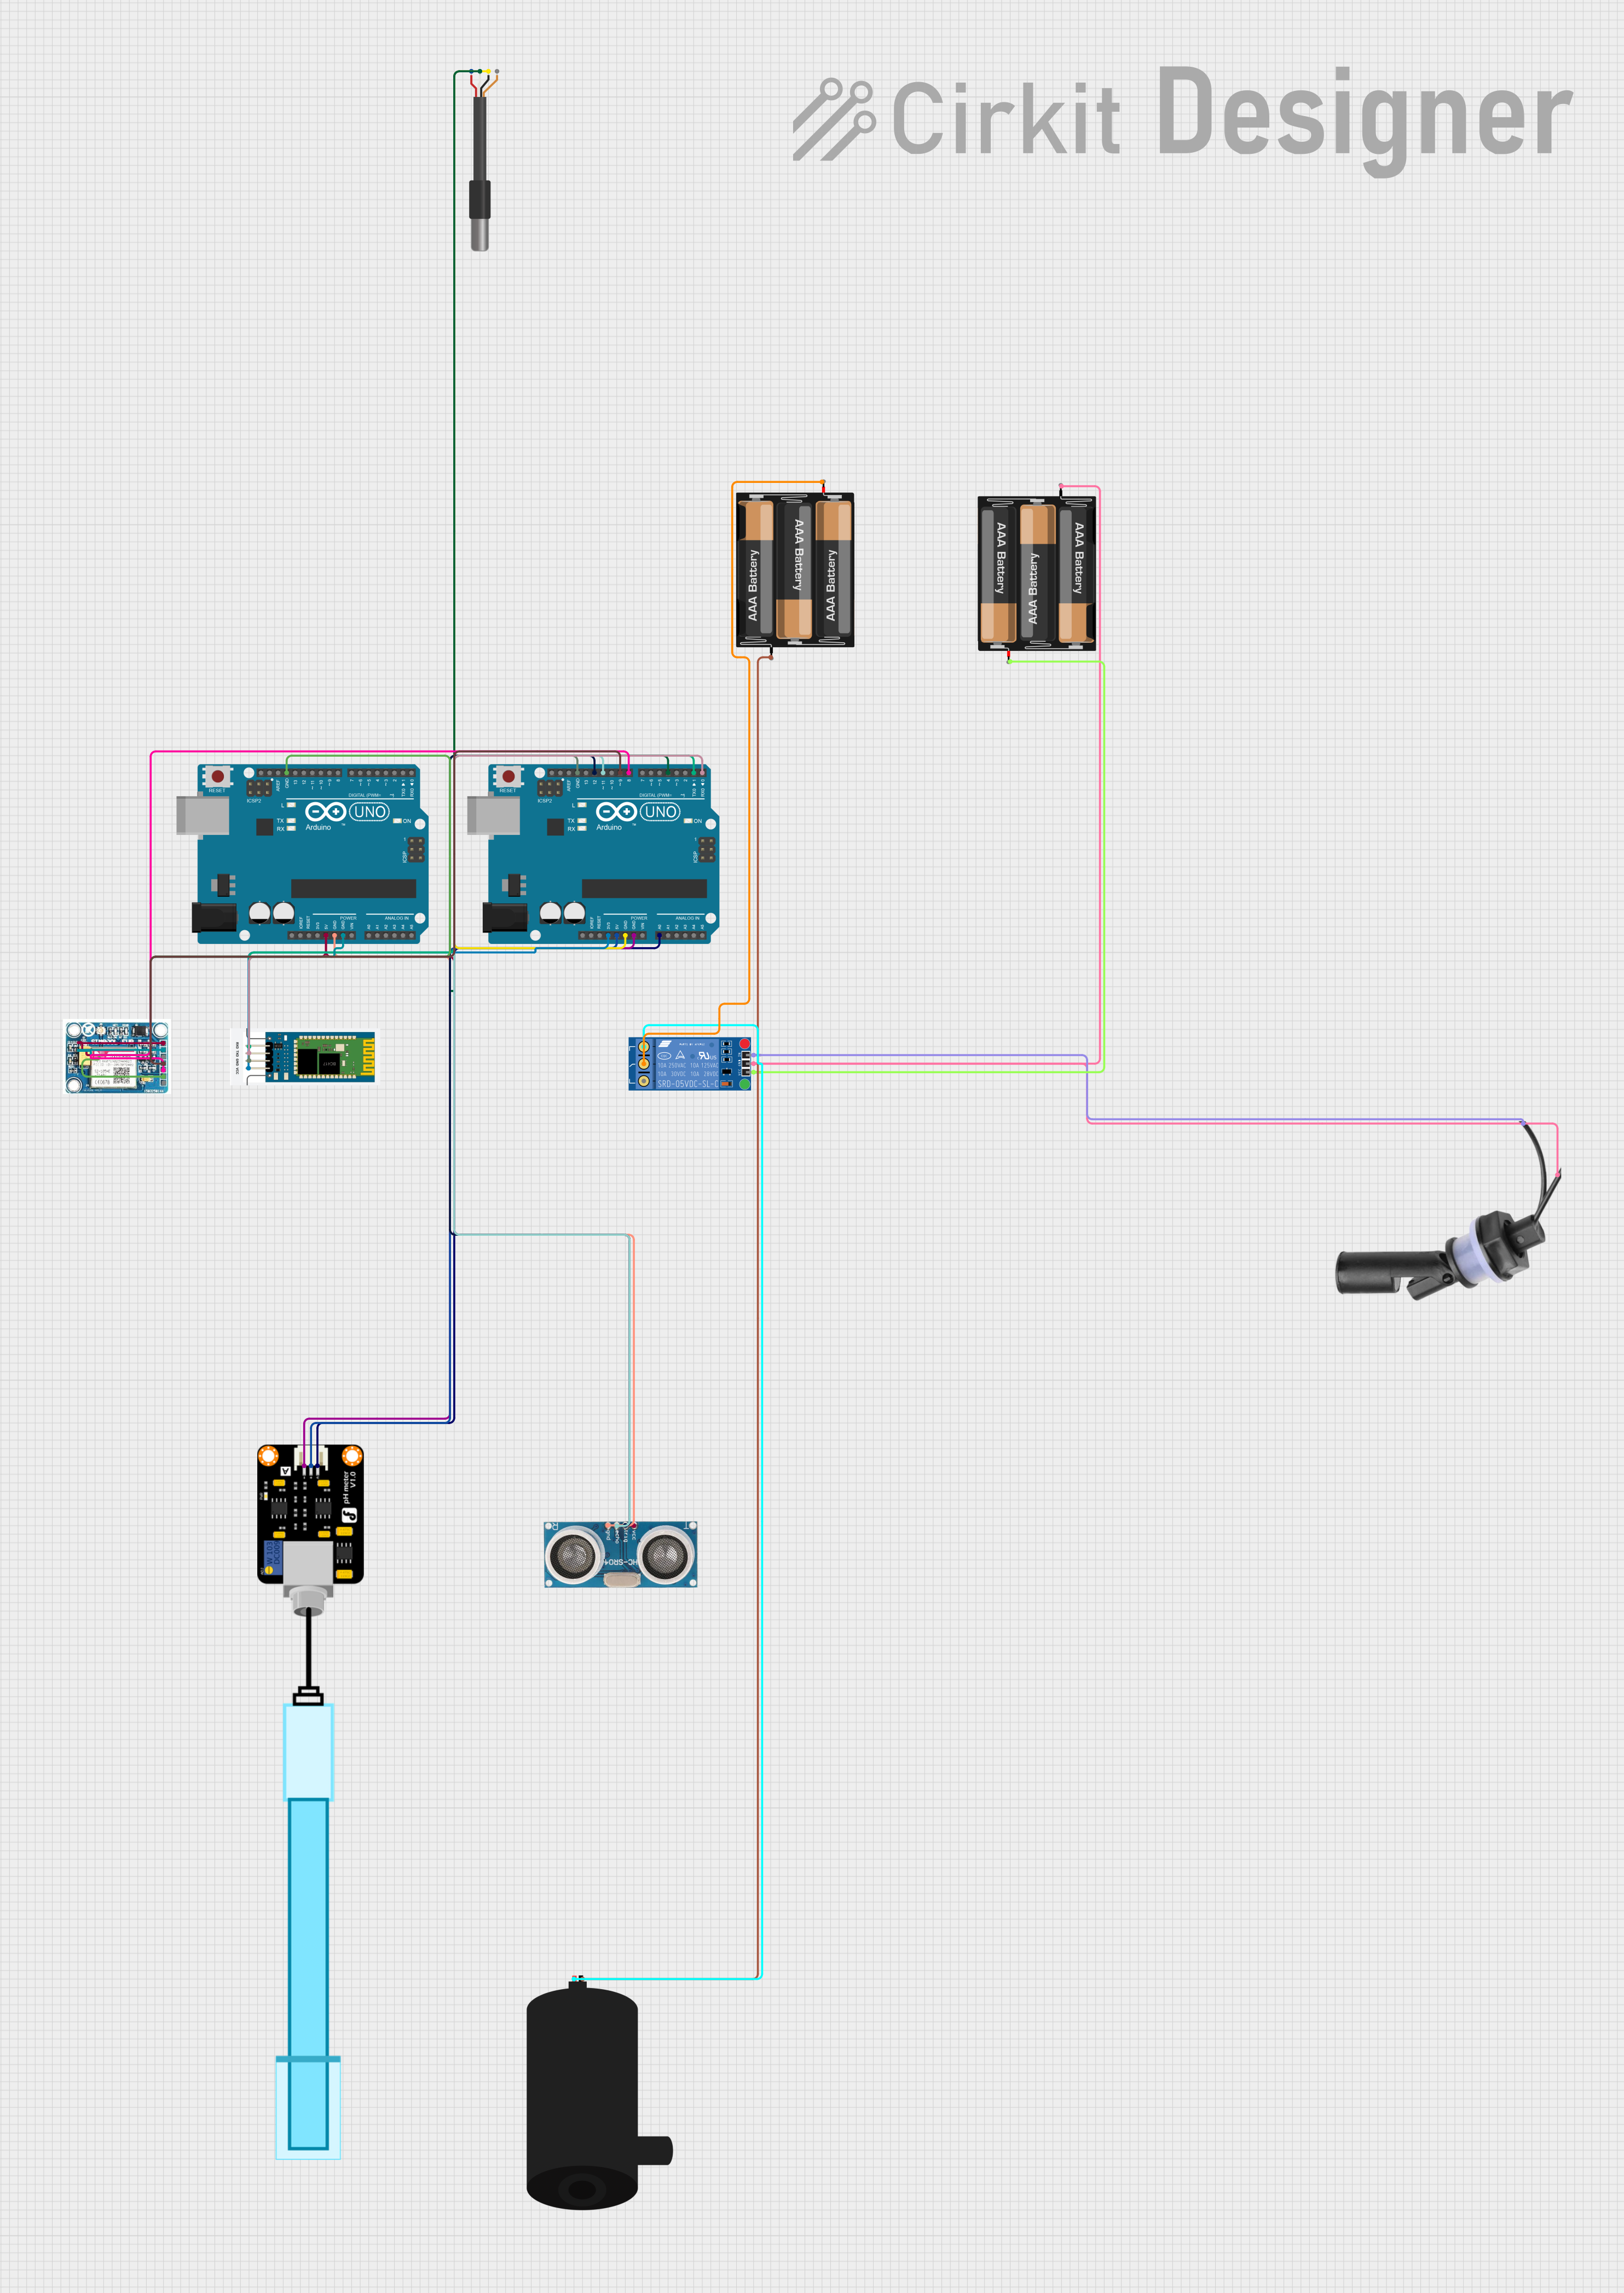

Explore Projects Built with Water sensor
Technical Specifications
General Characteristics
- Operating Voltage: Typically 3.3V to 5V
- Output Type: Digital (High/Low) or Analog (proportional to moisture level)
- Current Consumption: Varies with model, usually in the microampere to milliampere range
Pin Configuration and Descriptions
| Pin Number | Name | Description |
|---|---|---|
| 1 | VCC | Power supply input, typically 3.3V to 5V |
| 2 | GND | Ground connection |
| 3 | DO | Digital output; goes high when water is detected |
| 4 | AO | Analog output; provides an analog voltage proportional to the moisture level |
Usage Instructions
Connecting to a Circuit
- Connect the VCC pin to the power supply (3.3V or 5V, depending on your system).
- Connect the GND pin to the ground of the power supply.
- For digital output:
- Connect the DO pin to a digital input pin on your microcontroller.
- For analog output:
- Connect the AO pin to an analog input pin on your microcontroller.
Important Considerations and Best Practices
- Ensure that the power supply voltage matches the sensor's operating voltage.
- Avoid submerging the sensor completely unless it is rated for submersion.
- Use a pull-up or pull-down resistor on the digital output if the microcontroller input is floating.
- Calibrate the sensor for the specific application to ensure accurate readings.
- Protect the sensor's electronic components from water damage with appropriate enclosures.
Example Code for Arduino UNO
// Define the water sensor digital output pin
const int waterSensorPin = 2; // Connect the DO pin of the sensor to pin 2

void setup() {
  pinMode(waterSensorPin, INPUT); // Set the water sensor pin as an input
  Serial.begin(9600); // Start serial communication at 9600 baud rate
}

void loop() {
  int sensorState = digitalRead(waterSensorPin); // Read the sensor state
  if (sensorState == HIGH) {
    // Water detected
    Serial.println("Water detected!");
  } else {
    // No water detected
    Serial.println("No water detected.");
  }
  delay(1000); // Wait for 1 second before reading again
}
Troubleshooting and FAQs
Common Issues
- Sensor not responding: Ensure that the sensor is properly powered and the pins are correctly connected.
- Inaccurate readings: Calibrate the sensor for the environment it's being used in. For analog sensors, adjust the threshold value in the code.
- Sensor corrosion: If the sensor is exposed to water for extended periods, corrosion may occur. Use corrosion-resistant materials or replace the sensor periodically.
Solutions and Tips
- Power Issues: Double-check wiring and use a multimeter to verify the voltage at the sensor's VCC pin.
- Calibration: Test the sensor in known dry and wet conditions, and adjust the threshold values in your code accordingly.
- Protective Measures: Apply a waterproof coating to the sensor's board, avoiding the sensing elements.
FAQs
Q: Can the water sensor be used to measure the water level? A: Yes, but it will only provide a binary indication (wet/dry) at the sensor's location. For precise level measurements, a different type of sensor, like an ultrasonic level sensor, might be more appropriate.
Q: Is the water sensor reusable after detecting water? A: Yes, the sensor is typically reusable unless it has been damaged by prolonged exposure or corrosion.
Q: How long can the sensor be exposed to water? A: This depends on the sensor's design and materials. Some sensors are designed for brief exposure, while others can withstand prolonged periods. Check the manufacturer's specifications for more details.