Cirkit Designer Logo
Cirkit Designer
Your all-in-one circuit design IDE
Home / 
Component Documentation

How to Use 36v-72v dc to 12v 15A convertor: Examples, Pinouts, and Specs

Image of 36v-72v dc to 12v 15A convertor
Cirkit Designer LogoDesign with 36v-72v dc to 12v 15A convertor in Cirkit Designer

Introduction

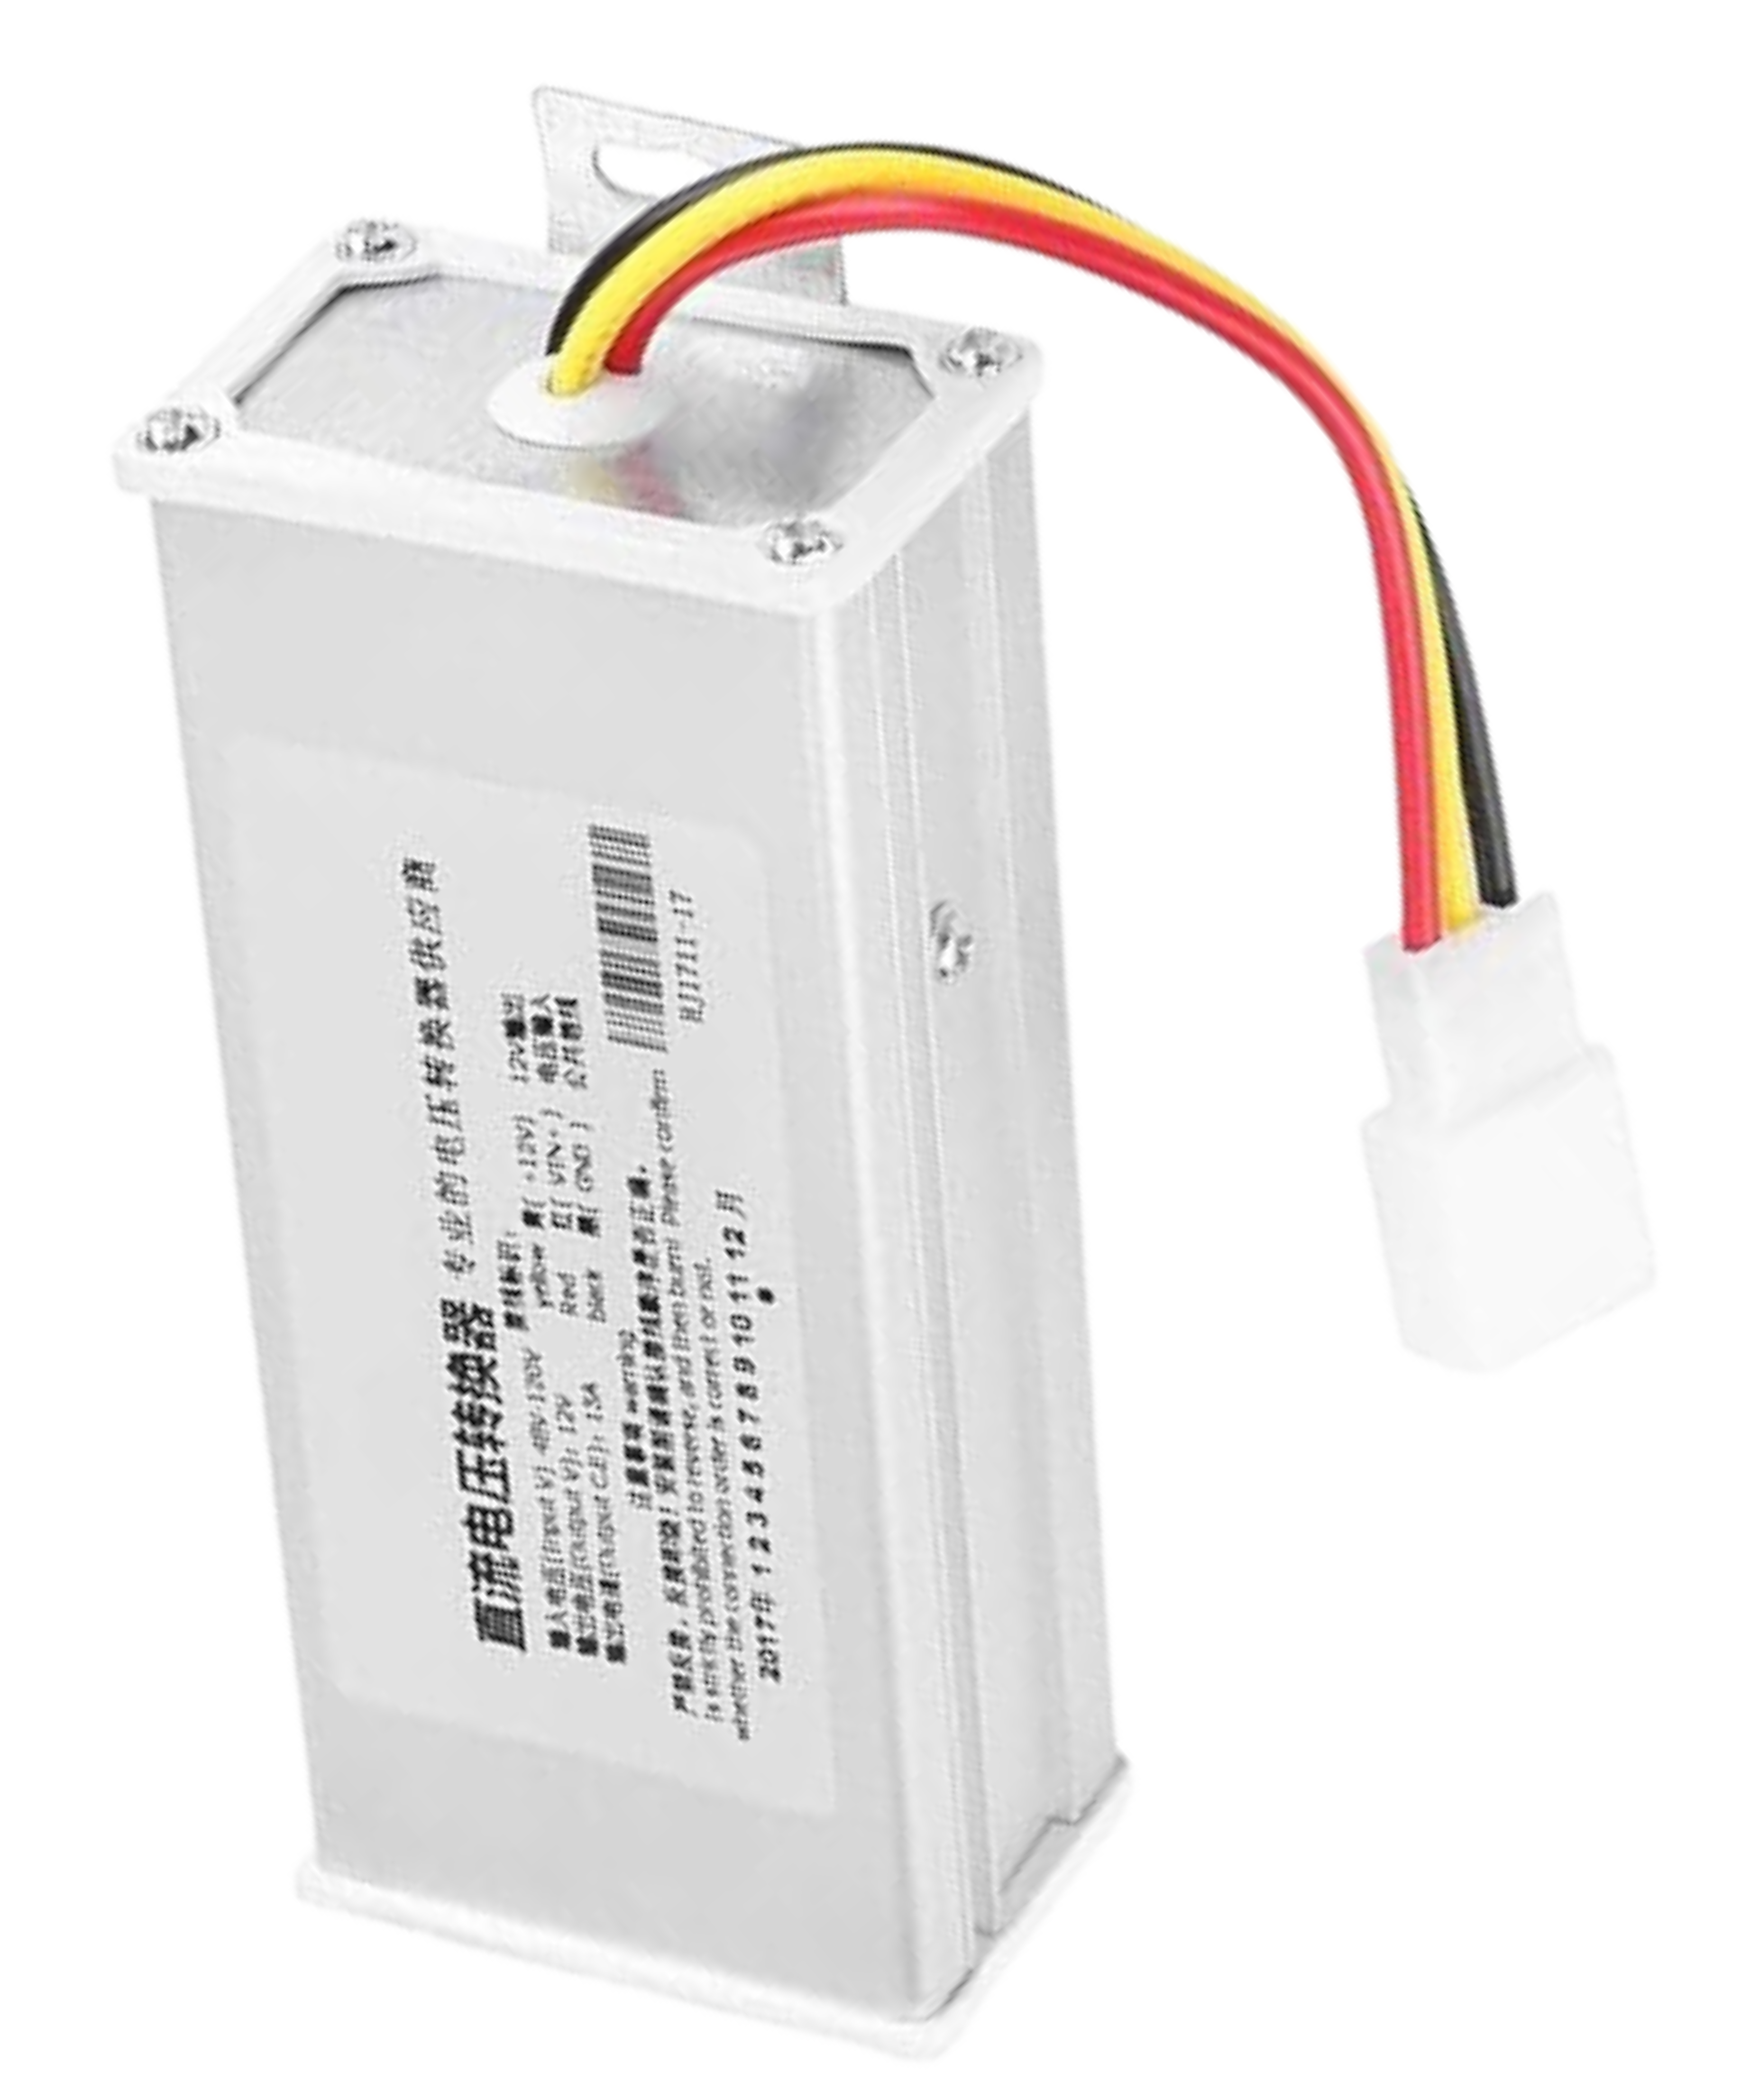
The Yanmis DC to DC Converter Stepdown is a versatile electronic component designed to convert a wide range of input DC voltages (36V to 72V) to a stable 12V output. With a maximum current rating of 15A, this converter is ideal for applications requiring a reliable 12V power supply from higher voltage sources. Common use cases include powering automotive electronics, industrial equipment, and various DC-powered devices.

Explore Projects Built with 36v-72v dc to 12v 15A convertor

Use Cirkit Designer to design, explore, and prototype these projects online. Some projects support real-time simulation. Click "Open Project" to start designing instantly!
Battery-Powered DC-DC Converter System for Multi-Voltage Power Distribution
Image of test 1 ih: A project utilizing 36v-72v dc to 12v 15A convertor in a practical application
This circuit converts a 38.5V battery output to multiple lower voltage levels using a series of DC-DC converters and a power module. It includes an emergency stop switch for safety and distributes power to various components such as a relay module, USB ports, and a bus servo adaptor.
Cirkit Designer LogoOpen Project in Cirkit Designer
Battery-Powered Motor Control with Voltage Monitoring and LED Indicator
Image of ckt: A project utilizing 36v-72v dc to 12v 15A convertor in a practical application
This circuit converts AC power to DC using a bridge rectifier to drive a 12V geared motor. It also includes a TP4056 module for charging a 3.7V battery, monitored by a mini digital volt/ammeter, and an LED indicator for power status.
Cirkit Designer LogoOpen Project in Cirkit Designer
240V to 12V Power Conversion Circuit with Stopkontak
Image of daya PLN: A project utilizing 36v-72v dc to 12v 15A convertor in a practical application
This circuit converts a 240V AC power source to a 12V DC output using a 12V adapter. The 240V AC power source is connected to a stopkontak, which then supplies the 12V adapter with the necessary AC voltage to produce a 12V DC output.
Cirkit Designer LogoOpen Project in Cirkit Designer
220V to 12V LED Strip Lighting System
Image of Effect of light on plant growth: A project utilizing 36v-72v dc to 12v 15A convertor in a practical application
This circuit consists of a 220V AC power source connected to an AC-to-DC converter, which steps down the voltage to 12V DC to power a series of three 12V white LED strips. The LED strips are connected in parallel to the output of the converter, sharing a common ground. The circuit is designed to convert household AC voltage to a lower DC voltage suitable for powering LED lighting.
Cirkit Designer LogoOpen Project in Cirkit Designer

Explore Projects Built with 36v-72v dc to 12v 15A convertor

Use Cirkit Designer to design, explore, and prototype these projects online. Some projects support real-time simulation. Click "Open Project" to start designing instantly!
Image of test 1 ih: A project utilizing 36v-72v dc to 12v 15A convertor in a practical application
Battery-Powered DC-DC Converter System for Multi-Voltage Power Distribution
This circuit converts a 38.5V battery output to multiple lower voltage levels using a series of DC-DC converters and a power module. It includes an emergency stop switch for safety and distributes power to various components such as a relay module, USB ports, and a bus servo adaptor.
Cirkit Designer LogoOpen Project in Cirkit Designer
Image of ckt: A project utilizing 36v-72v dc to 12v 15A convertor in a practical application
Battery-Powered Motor Control with Voltage Monitoring and LED Indicator
This circuit converts AC power to DC using a bridge rectifier to drive a 12V geared motor. It also includes a TP4056 module for charging a 3.7V battery, monitored by a mini digital volt/ammeter, and an LED indicator for power status.
Cirkit Designer LogoOpen Project in Cirkit Designer
Image of daya PLN: A project utilizing 36v-72v dc to 12v 15A convertor in a practical application
240V to 12V Power Conversion Circuit with Stopkontak
This circuit converts a 240V AC power source to a 12V DC output using a 12V adapter. The 240V AC power source is connected to a stopkontak, which then supplies the 12V adapter with the necessary AC voltage to produce a 12V DC output.
Cirkit Designer LogoOpen Project in Cirkit Designer
Image of Effect of light on plant growth: A project utilizing 36v-72v dc to 12v 15A convertor in a practical application
220V to 12V LED Strip Lighting System
This circuit consists of a 220V AC power source connected to an AC-to-DC converter, which steps down the voltage to 12V DC to power a series of three 12V white LED strips. The LED strips are connected in parallel to the output of the converter, sharing a common ground. The circuit is designed to convert household AC voltage to a lower DC voltage suitable for powering LED lighting.
Cirkit Designer LogoOpen Project in Cirkit Designer

Technical Specifications

Key Technical Details

Parameter Value
Input Voltage Range 36V to 72V DC
Output Voltage 12V DC
Maximum Output Current 15A
Efficiency Up to 95%
Operating Temperature -40°C to +85°C
Dimensions 74mm x 74mm x 32mm
Weight 200g

Pin Configuration and Descriptions

Pin Number Pin Name Description
1 VIN+ Positive input voltage (36V-72V)
2 VIN- Negative input voltage (Ground)
3 VOUT+ Positive output voltage (12V)
4 VOUT- Negative output voltage (Ground)

Usage Instructions

How to Use the Component in a Circuit

  1. Connection Setup:

    • Connect the positive input voltage (36V-72V) to the VIN+ pin.
    • Connect the negative input voltage (Ground) to the VIN- pin.
    • Connect the positive output voltage (12V) to the VOUT+ pin.
    • Connect the negative output voltage (Ground) to the VOUT- pin.
  2. Powering Up:

    • Ensure all connections are secure and correct.
    • Apply the input voltage within the specified range (36V-72V).
    • The converter will regulate the input voltage to provide a stable 12V output.

Important Considerations and Best Practices

  • Heat Dissipation: Ensure adequate ventilation or cooling, as the converter may generate heat during operation, especially at higher currents.
  • Input Voltage Range: Do not exceed the specified input voltage range (36V-72V) to avoid damaging the converter.
  • Load Requirements: Ensure the connected load does not exceed the maximum output current of 15A.
  • Polarity: Double-check the polarity of connections to prevent reverse polarity damage.

Troubleshooting and FAQs

Common Issues and Solutions

  1. No Output Voltage:

    • Check Connections: Ensure all connections are secure and correctly oriented.
    • Input Voltage: Verify that the input voltage is within the specified range (36V-72V).
    • Overload Protection: Ensure the connected load does not exceed 15A.
  2. Overheating:

    • Ventilation: Ensure the converter has adequate ventilation or cooling.
    • Load Current: Verify that the load current is within the specified limit (15A).
  3. Fluctuating Output Voltage:

    • Stable Input: Ensure the input voltage is stable and within the specified range.
    • Load Stability: Check if the connected load is stable and not causing fluctuations.

FAQs

Q1: Can I use this converter with an Arduino UNO? A1: Yes, you can use this converter to power an Arduino UNO by providing a stable 12V supply. Connect the VOUT+ to the Arduino's VIN pin and VOUT- to the GND pin.

Q2: What happens if I exceed the input voltage range? A2: Exceeding the input voltage range (36V-72V) can damage the converter. Always ensure the input voltage is within the specified range.

Q3: Is the converter waterproof? A3: The converter is not waterproof. Ensure it is used in a dry environment or within a protective enclosure if used outdoors.

Q4: Can I use this converter to charge a 12V battery? A4: Yes, you can use this converter to charge a 12V battery, but ensure the charging current does not exceed the battery's specifications.

Example Code for Arduino UNO

Here is an example code to power an Arduino UNO using the Yanmis DC to DC Converter Stepdown:

// Example code to power Arduino UNO using Yanmis DC to DC Converter Stepdown

void setup() {
  // Initialize serial communication at 9600 baud rate
  Serial.begin(9600);
  // Print a message to indicate the Arduino is powered on
  Serial.println("Arduino UNO powered by Yanmis DC to DC Converter Stepdown");
}

void loop() {
  // Main loop code
  // Add your application logic here
}

This documentation provides a comprehensive guide to using the Yanmis DC to DC Converter Stepdown, ensuring both beginners and experienced users can effectively utilize this component in their projects.