How to Use BLTouch: Examples, Pinouts, and Specs
Introduction
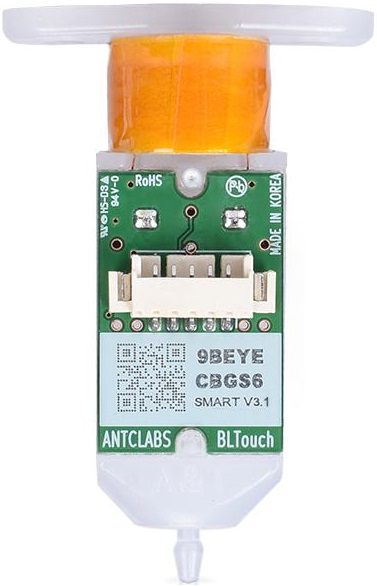
The BLTouch by Antclabs is an advanced auto bed leveling sensor designed for 3D printers. It uses a retractable probe to measure the distance between the printer's nozzle and the print bed, ensuring precise first-layer height and improved print quality. The BLTouch is compatible with a wide range of 3D printers and is highly regarded for its accuracy, reliability, and ease of integration.
Explore Projects Built with BLTouch


Explore Projects Built with BLTouch
Common Applications and Use Cases
- Automatic bed leveling for FDM 3D printers
- Ensuring consistent first-layer adhesion
- Compensating for uneven or warped print beds
- Enhancing print quality and reducing manual calibration efforts
Technical Specifications
The BLTouch is a compact and versatile sensor with the following key specifications:
| Parameter | Value |
|---|---|
| Manufacturer | Antclabs |
| Part ID | BLTouch |
| Operating Voltage | 4.8V to 5.1V |
| Current Consumption | 15mA to 20mA |
| Signal Type | Digital (PWM) |
| Probe Trigger Distance | 2.5mm ± 0.05mm |
| Probe Repeatability | Standard Deviation ≤ 0.01mm |
| Operating Temperature | -10°C to 70°C |
| Dimensions | 28.5mm x 15.5mm x 7.3mm |
| Weight | 8.5g |
Pin Configuration and Descriptions
The BLTouch has a 5-pin connector with the following pinout:
| Pin Number | Wire Color | Function | Description |
|---|---|---|---|
| 1 | Brown | GND | Ground connection |
| 2 | Red | VCC | Power supply (4.8V to 5.1V) |
| 3 | Orange | Signal | PWM signal for probe control |
| 4 | Black | Z Min (Endstop) | Z-axis endstop signal |
| 5 | White | Z Min (Endstop GND) | Ground for Z-axis endstop |
Usage Instructions
How to Use the BLTouch in a Circuit
Wiring the BLTouch:
- Connect the BLTouch's wires to the appropriate pins on your 3D printer's mainboard. Refer to your printer's mainboard documentation for the correct pin assignments.
- Ensure the power supply voltage is within the BLTouch's operating range (4.8V to 5.1V).
Firmware Configuration:
- Update your 3D printer's firmware (e.g., Marlin) to enable auto bed leveling and configure the BLTouch.
- Set the probe offsets, trigger height, and bed leveling parameters in the firmware.
Calibration:
- Perform a Z-offset calibration to determine the correct distance between the nozzle and the print bed.
- Use the printer's control interface or G-code commands to fine-tune the Z-offset.
Bed Leveling:
- Use the BLTouch to perform a mesh bed leveling procedure. This will map the bed's surface and compensate for any irregularities during printing.
Important Considerations and Best Practices
- Secure Mounting: Ensure the BLTouch is securely mounted to the printer's print head. Use a compatible mounting bracket for your printer model.
- Probe Clearance: Verify that the probe can extend and retract without obstruction.
- Firmware Updates: Always use the latest firmware version for your printer to ensure compatibility with the BLTouch.
- Cable Management: Route the BLTouch's wires carefully to avoid interference with moving parts.
Example Code for Arduino UNO
If you are testing the BLTouch with an Arduino UNO, you can use the following example code to control the probe:
#include <Servo.h> // Include the Servo library

Servo bltouch; // Create a Servo object for the BLTouch

const int signalPin = 9; // Define the pin connected to the BLTouch signal

void setup() {
  bltouch.attach(signalPin); // Attach the BLTouch to the signal pin
  Serial.begin(9600); // Initialize serial communication for debugging

  // Deploy the probe
  Serial.println("Deploying probe...");
  bltouch.write(10); // Send PWM signal to deploy the probe
  delay(1000); // Wait for 1 second

  // Retract the probe
  Serial.println("Retracting probe...");
  bltouch.write(90); // Send PWM signal to retract the probe
  delay(1000); // Wait for 1 second
}

void loop() {
  // The loop can be used to test the probe repeatedly
  Serial.println("Testing probe deployment...");
  bltouch.write(10); // Deploy the probe
  delay(1000); // Wait for 1 second

  Serial.println("Testing probe retraction...");
  bltouch.write(90); // Retract the probe
  delay(1000); // Wait for 1 second
}
Note: This example is for testing purposes only. For actual 3D printer integration, use the printer's firmware and mainboard configuration.
Troubleshooting and FAQs
Common Issues and Solutions
BLTouch Probe Does Not Deploy or Retract:
- Cause: Incorrect wiring or insufficient power supply.
- Solution: Double-check the wiring connections and ensure the power supply voltage is within the specified range.
Inconsistent Bed Leveling Results:
- Cause: Loose mounting or incorrect Z-offset calibration.
- Solution: Securely mount the BLTouch and recalibrate the Z-offset.
Firmware Does Not Recognize the BLTouch:
- Cause: Firmware not configured for the BLTouch.
- Solution: Update the firmware and enable the BLTouch in the configuration files.
Probe Stuck in Deployed Position:
- Cause: Mechanical obstruction or damaged probe.
- Solution: Inspect the probe for obstructions or damage. Replace the probe if necessary.
FAQs
Q: Can the BLTouch be used with any 3D printer?
A: The BLTouch is compatible with most FDM 3D printers that support auto bed leveling. Check your printer's mainboard for compatibility.Q: How often should I calibrate the Z-offset?
A: It is recommended to recalibrate the Z-offset whenever you change the nozzle, print bed, or BLTouch mounting position.Q: What is the lifespan of the BLTouch?
A: The BLTouch is designed for long-term use and can perform thousands of probe cycles. Regular maintenance ensures optimal performance.Q: Can I use the BLTouch with a heated bed?
A: Yes, the BLTouch is compatible with heated beds. Ensure the operating temperature does not exceed 70°C.
By following this documentation, you can successfully integrate and use the BLTouch for precise and reliable 3D printing.