How to Use Gaz: Examples, Pinouts, and Specs
Introduction
The Gaz component is a versatile electronic component designed for applications involving gas detection, measurement, or control. It is commonly used in industrial, environmental, and safety systems to monitor gas levels or facilitate chemical processes. Its robust design and high sensitivity make it suitable for a wide range of use cases, including gas leak detection, air quality monitoring, and fuel management systems.
Explore Projects Built with Gaz
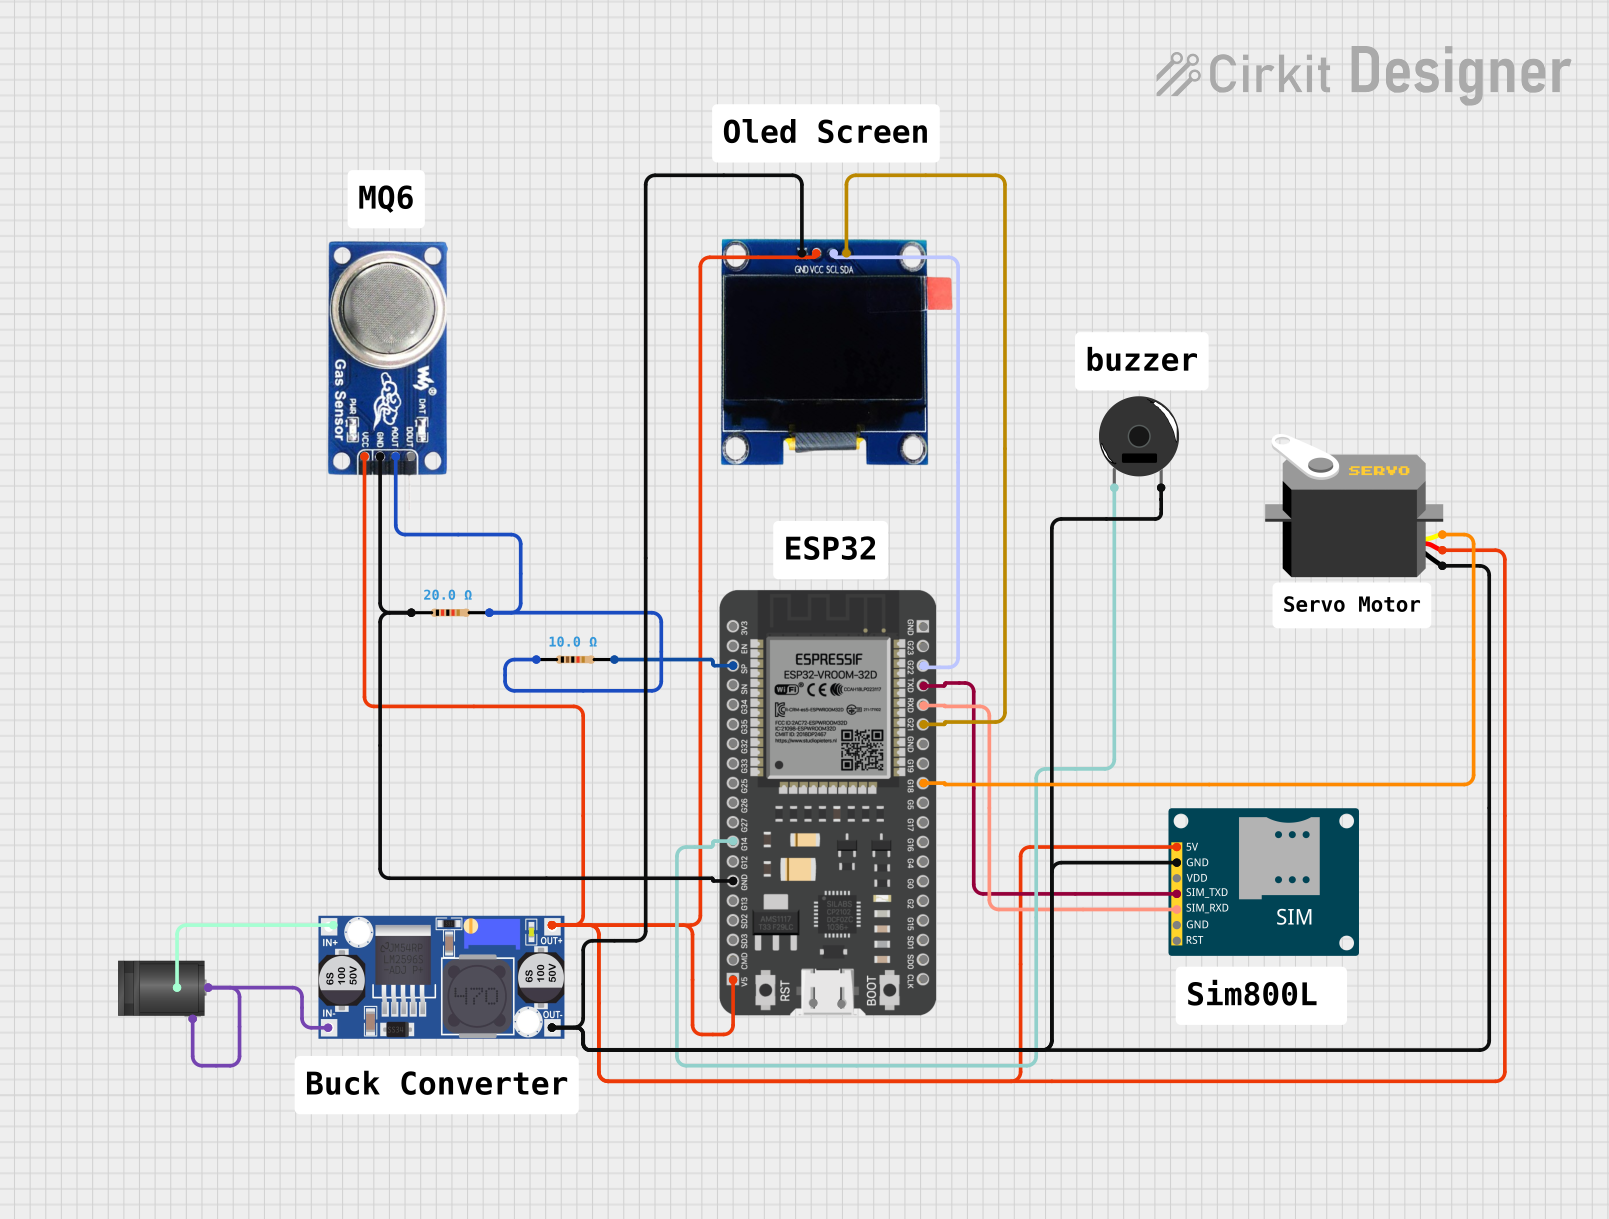
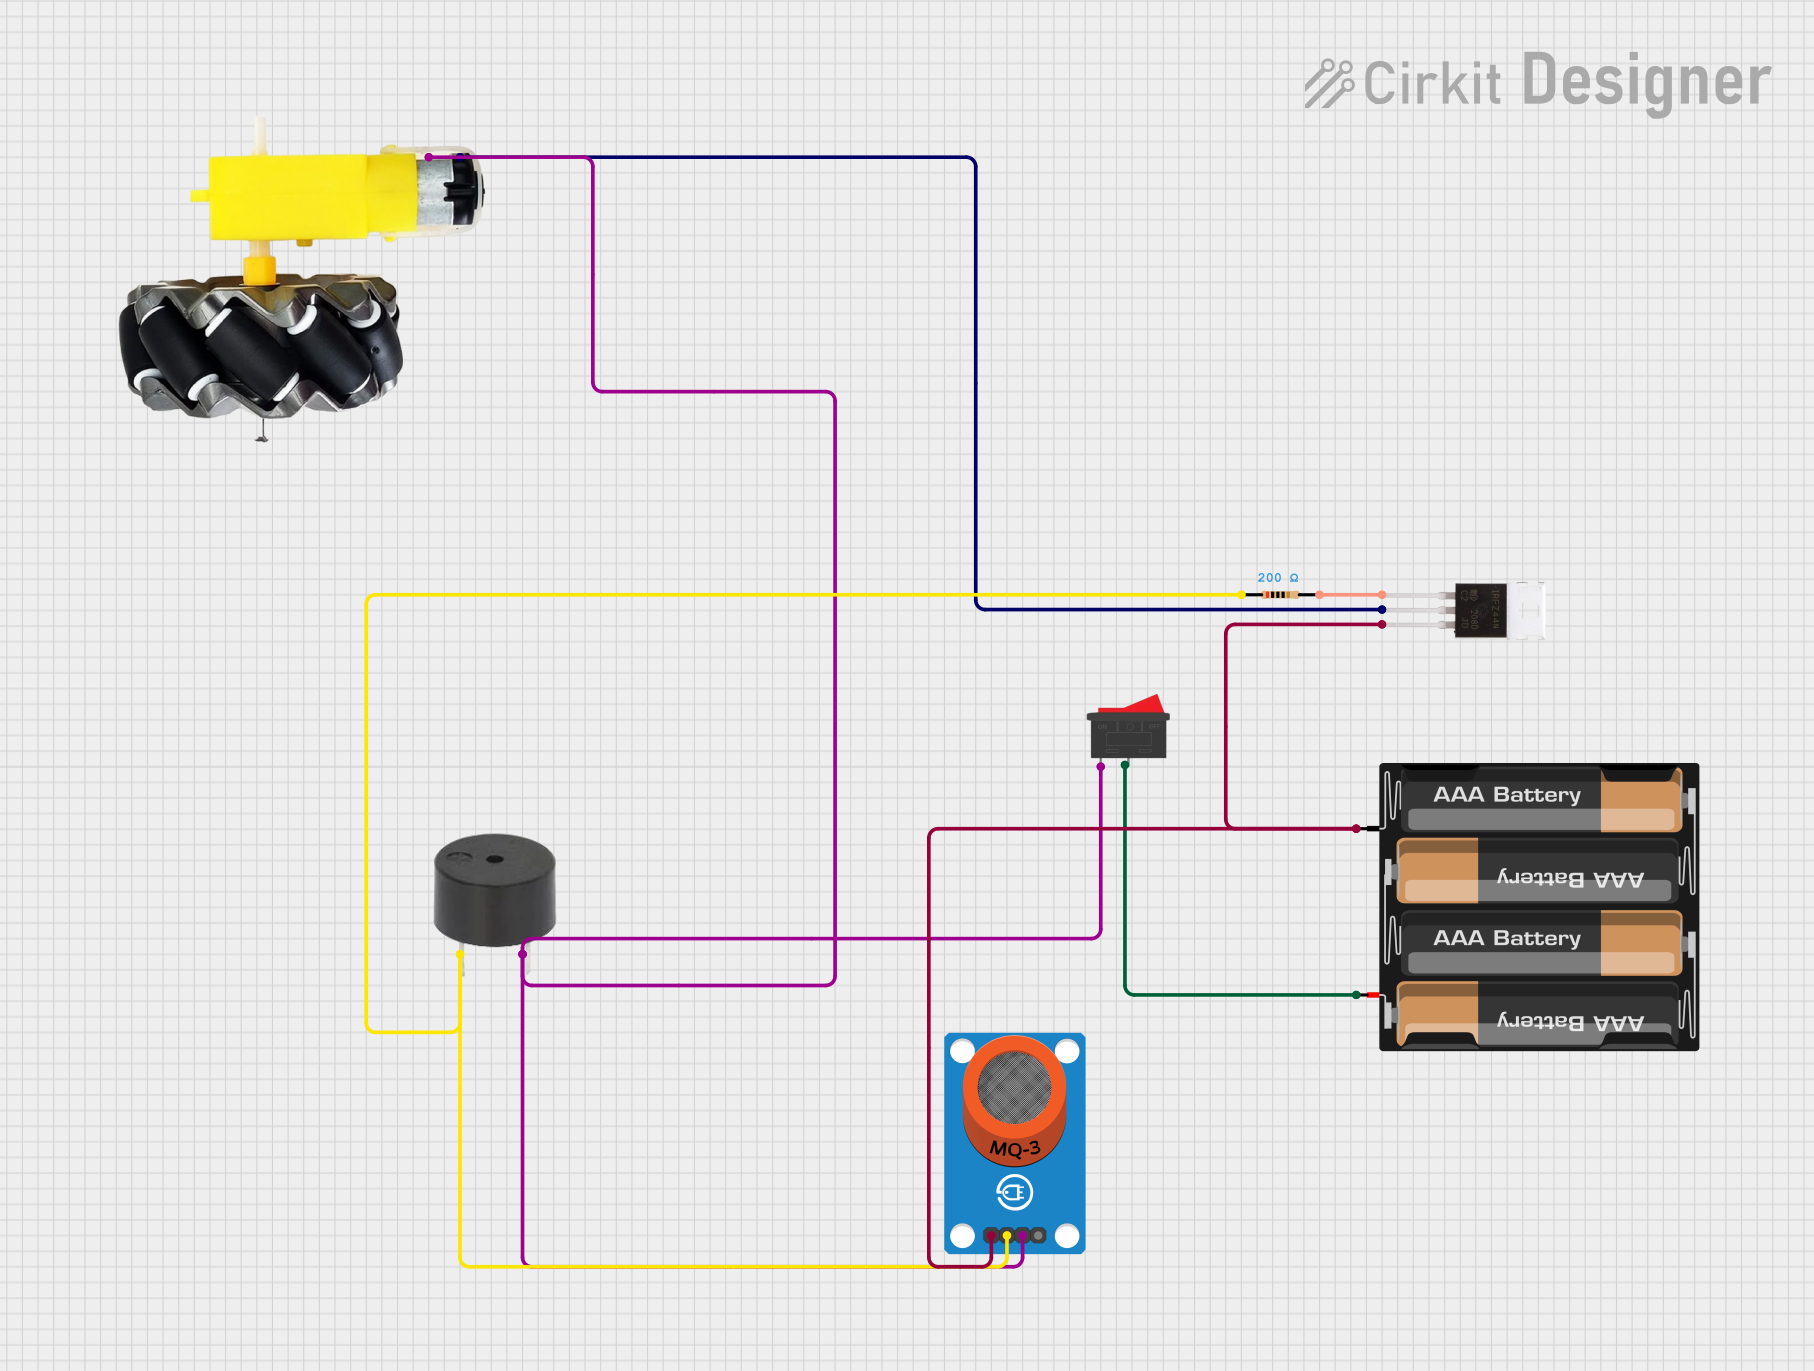

Explore Projects Built with Gaz
Common Applications
- Gas leak detection in industrial and residential environments
- Air quality monitoring systems
- Fuel management and combustion control
- Chemical process monitoring
- Environmental safety systems
Technical Specifications
Below are the key technical details for the Gaz component:
| Parameter | Value |
|---|---|
| Manufacturer | // |
| Manufacturer Part ID | // |
| Operating Voltage | 3.3V to 5V |
| Operating Current | 150mA (typical) |
| Detection Range | 0 to 1000 ppm (parts per million) |
| Response Time | < 10 seconds |
| Operating Temperature | -20°C to 50°C |
| Storage Temperature | -40°C to 80°C |
| Humidity Range | 10% to 90% RH (non-condensing) |
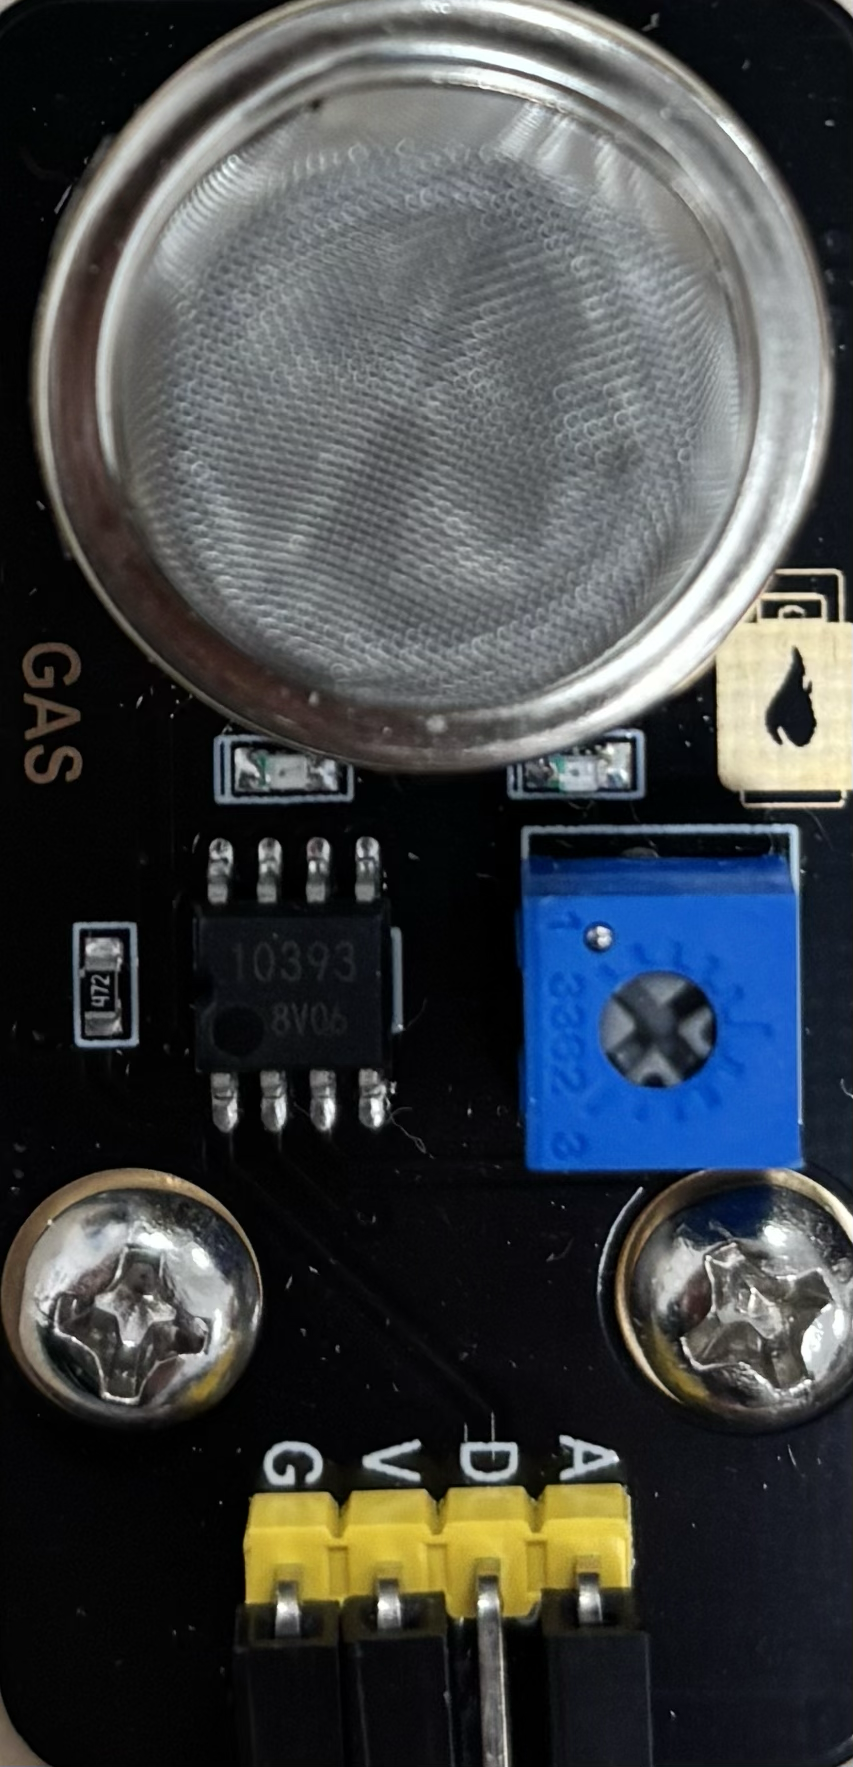
Pin Configuration
The Gaz component typically has a 4-pin configuration. The table below describes each pin:
| Pin | Name | Description |
|---|---|---|
| 1 | VCC | Power supply input (3.3V to 5V) |
| 2 | GND | Ground connection |
| 3 | Analog Out | Analog signal output proportional to gas concentration |
| 4 | Digital Out | Digital signal output (high/low based on threshold) |
Usage Instructions
To use the Gaz component in a circuit, follow these steps:
- Power Connection: Connect the VCC pin to a 3.3V or 5V power source and the GND pin to the ground of your circuit.
- Signal Reading:
- Use the Analog Out pin to read the gas concentration as an analog voltage. This can be connected to an ADC (Analog-to-Digital Converter) pin on a microcontroller.
- Use the Digital Out pin for a simple high/low signal based on a preset threshold. The threshold can often be adjusted using an onboard potentiometer.
- Calibration: Allow the sensor to warm up for 24-48 hours during the first use to ensure accurate readings.
- Placement: Place the sensor in an area where it can detect the target gas without obstructions. Avoid exposure to high humidity or corrosive gases.
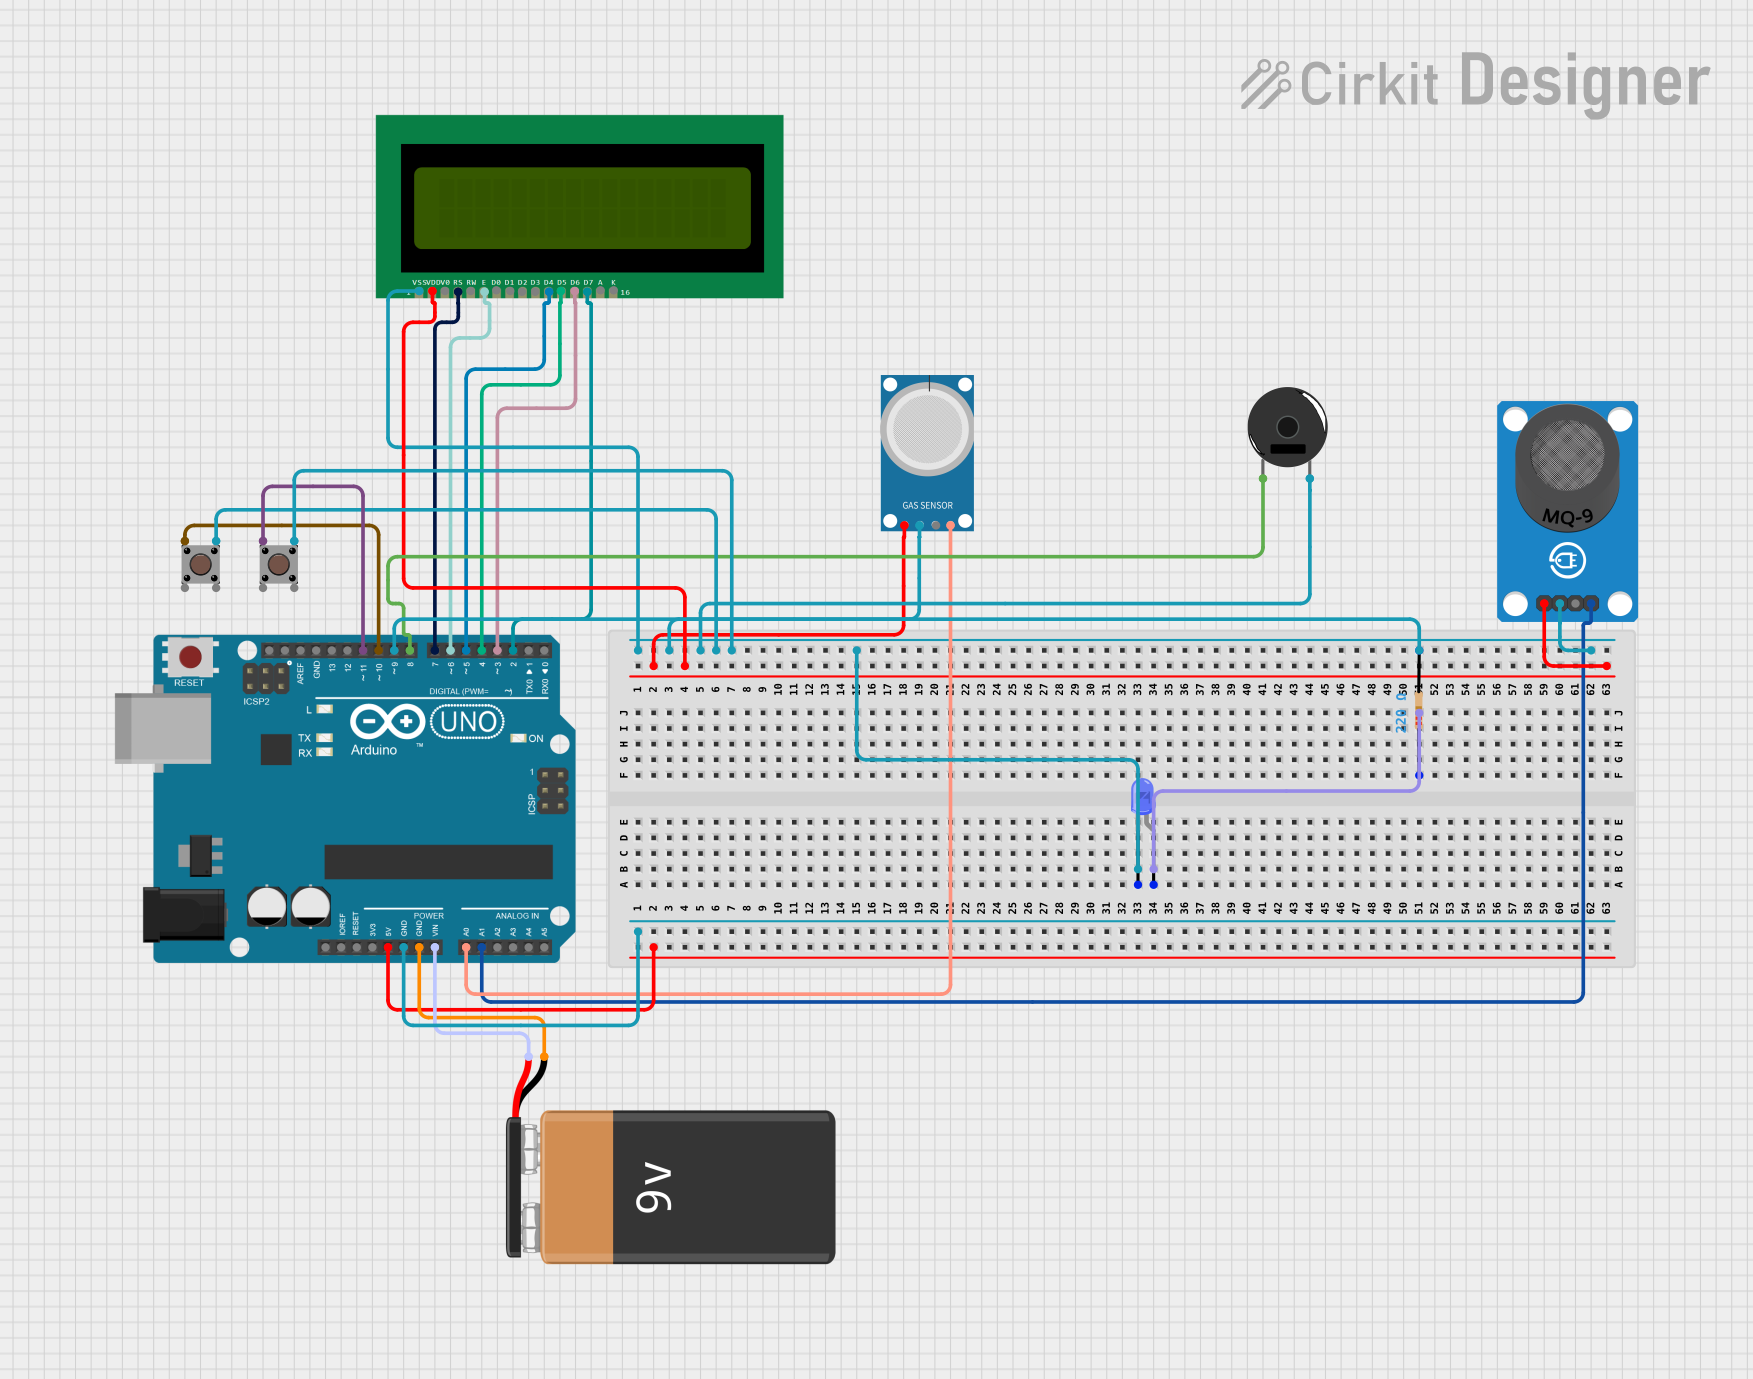
Example: Connecting to an Arduino UNO
Below is an example of how to connect and use the Gaz component with an Arduino UNO:
Circuit Diagram
- Connect the VCC pin to the 5V pin on the Arduino.
- Connect the GND pin to the GND pin on the Arduino.
- Connect the Analog Out pin to the A0 pin on the Arduino.
Arduino Code
// Gaz Component Example Code
// This code reads the analog output of the Gaz component and prints the gas
// concentration to the Serial Monitor.

const int gasSensorPin = A0; // Analog pin connected to Gaz Analog Out

void setup() {
  Serial.begin(9600); // Initialize serial communication at 9600 baud
  pinMode(gasSensorPin, INPUT); // Set the gas sensor pin as input
}

void loop() {
  int sensorValue = analogRead(gasSensorPin); // Read the analog value
  float voltage = sensorValue * (5.0 / 1023.0); // Convert to voltage
  Serial.print("Gas Sensor Voltage: ");
  Serial.print(voltage);
  Serial.println(" V");

  // Add a delay for stability
  delay(1000); // Wait for 1 second before the next reading
}
Best Practices
- Ensure the sensor is powered within the specified voltage range to avoid damage.
- Avoid placing the sensor in environments with high humidity or corrosive gases for extended periods.
- Regularly calibrate the sensor for accurate readings, especially in critical applications.
Troubleshooting and FAQs
Common Issues
- No Output Signal:
- Check the power connections (VCC and GND).
- Ensure the sensor is powered within the specified voltage range.
- Inaccurate Readings:
- Allow the sensor to warm up for the recommended time (24-48 hours for initial use).
- Verify that the sensor is placed in an appropriate environment for gas detection.
- Fluctuating Readings:
- Ensure stable power supply and proper grounding.
- Avoid placing the sensor near sources of electrical noise.
FAQs
Q: How long does the sensor take to stabilize after power-up?
A: The sensor typically stabilizes within 1-2 minutes after power-up, but for the first use, a 24-48 hour warm-up period is recommended.
Q: Can the sensor detect multiple gases?
A: The sensor is designed to detect specific gases. Refer to the datasheet or application notes for details on supported gases.
Q: How do I adjust the digital output threshold?
A: Most Gaz components include an onboard potentiometer. Rotate the potentiometer to set the desired threshold level for the digital output.
Q: What should I do if the sensor stops working?
A: Check the power supply, connections, and environmental conditions. If the issue persists, the sensor may need replacement.
By following this documentation, users can effectively integrate and troubleshoot the Gaz component in their projects.