How to Use Grove IR Sensor: Examples, Pinouts, and Specs
Introduction
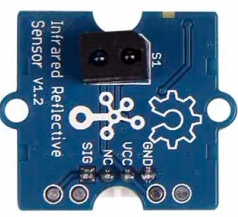
The Grove IR Sensor, manufactured by Seeed Studio, is an infrared sensor designed to detect the presence of objects and measure distances using infrared light. It is a versatile and reliable component commonly used in robotics, automation, and proximity sensing applications. The sensor operates by emitting infrared light and detecting the reflected signal, making it ideal for obstacle detection, line-following robots, and other interactive projects.
Explore Projects Built with Grove IR Sensor

Explore Projects Built with Grove IR Sensor
Common Applications
- Obstacle detection in robotics
- Proximity sensing in automation systems
- Line-following robots
- Object counting and sorting systems
- Interactive installations and projects
Technical Specifications
The Grove IR Sensor is designed to be easy to use and integrate into various projects. Below are its key technical details:
| Parameter | Value |
|---|---|
| Operating Voltage | 3.3V to 5V |
| Operating Current | ≤ 20mA |
| Detection Range | 0.5 cm to 10 cm |
| Output Signal | Digital (High/Low) |
| Response Time | ≤ 2 ms |
| Interface Type | Grove 4-pin interface |
| Dimensions | 20mm x 20mm |
| Operating Temperature | -10°C to 50°C |
Pin Configuration
The Grove IR Sensor uses a 4-pin Grove connector. Below is the pinout description:
| Pin | Name | Description |
|---|---|---|
| 1 | VCC | Power supply pin (3.3V to 5V) |
| 2 | GND | Ground connection |
| 3 | SIG | Digital output signal (High when object detected) |
| 4 | NC | Not connected (reserved for future use) |
Usage Instructions
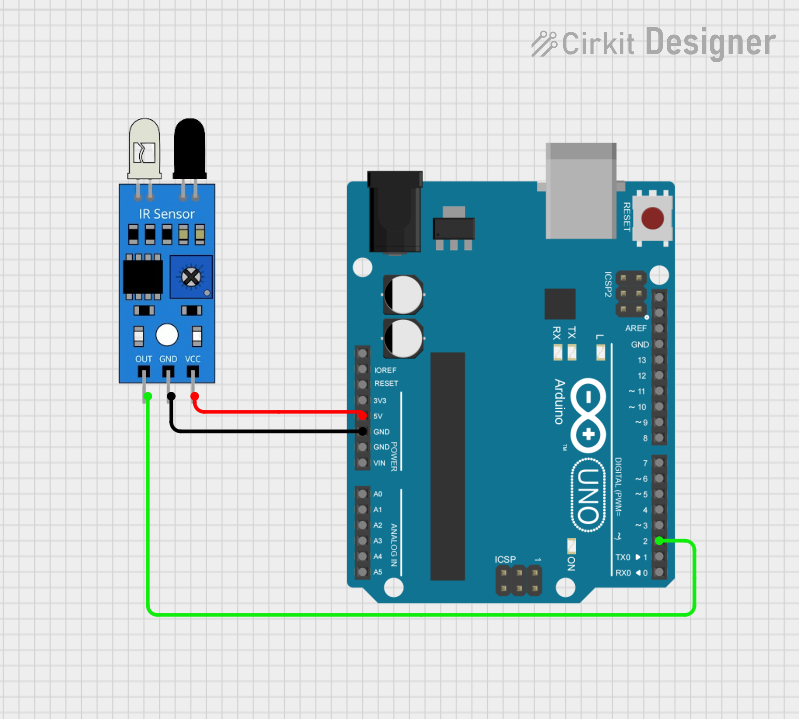
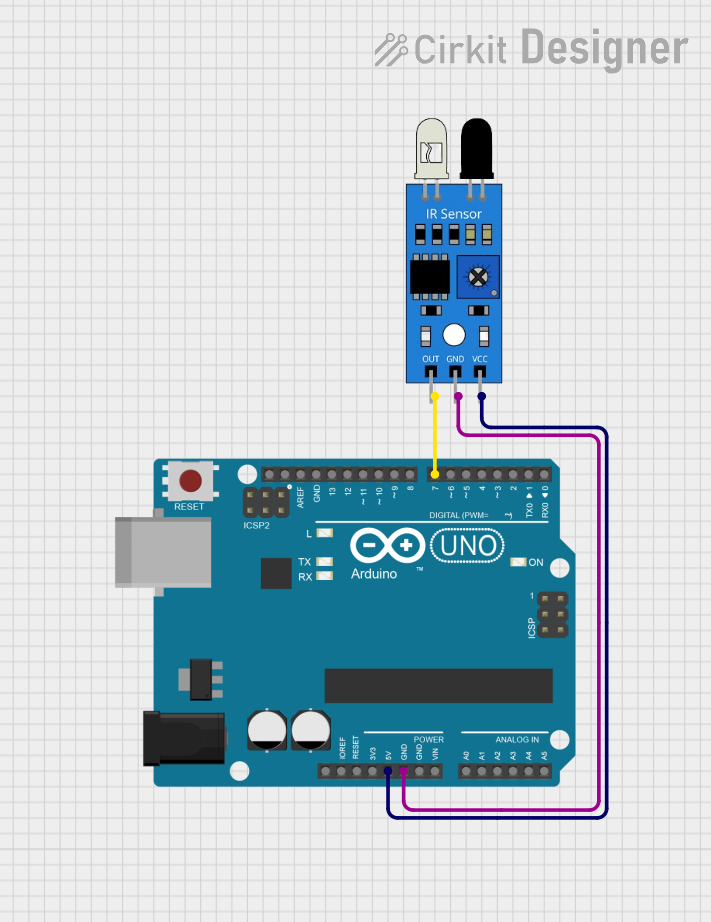
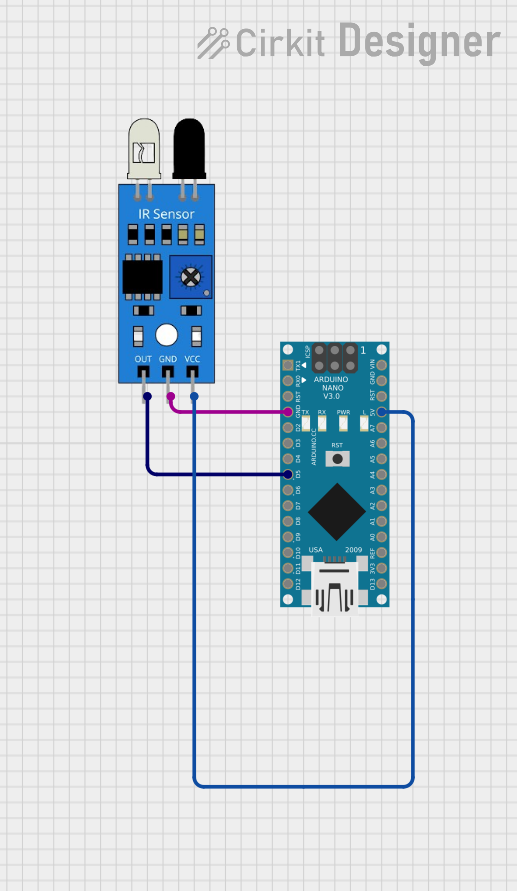
The Grove IR Sensor is simple to use and can be connected directly to a microcontroller, such as an Arduino UNO, using the Grove interface. Follow the steps below to integrate the sensor into your project:
Connecting the Sensor
- Connect the Grove IR Sensor to a Grove Base Shield attached to your Arduino UNO.
- Use a Grove cable to connect the sensor to a digital input port (e.g., D2) on the Base Shield.
- Ensure the Arduino is powered via USB or an external power source.
Sample Arduino Code
The following example demonstrates how to use the Grove IR Sensor with an Arduino UNO to detect objects:
// Grove IR Sensor Example Code
// This code reads the digital output of the Grove IR Sensor and prints
// whether an object is detected to the Serial Monitor.

const int IR_SENSOR_PIN = 2; // Connect the sensor to digital pin D2

void setup() {
  pinMode(IR_SENSOR_PIN, INPUT); // Set the sensor pin as input
  Serial.begin(9600);           // Initialize serial communication
}

void loop() {
  int sensorValue = digitalRead(IR_SENSOR_PIN); // Read the sensor output

  if (sensorValue == HIGH) {
    // If the sensor output is HIGH, an object is detected
    Serial.println("Object detected!");
  } else {
    // If the sensor output is LOW, no object is detected
    Serial.println("No object detected.");
  }

  delay(500); // Wait for 500ms before the next reading
}
Important Considerations
- Power Supply: Ensure the sensor is powered within its operating voltage range (3.3V to 5V).
- Detection Range: The sensor is most effective within its specified range of 0.5 cm to 10 cm.
- Ambient Light: Avoid using the sensor in environments with strong ambient infrared light, as it may interfere with detection accuracy.
- Mounting: Position the sensor so that it faces the target object directly for optimal performance.
Troubleshooting and FAQs
Common Issues and Solutions
Sensor Not Detecting Objects
- Cause: Incorrect wiring or loose connections.
- Solution: Double-check the wiring and ensure the Grove cable is securely connected to the Base Shield and sensor.
False Positives or Inconsistent Readings
- Cause: Strong ambient infrared light or reflective surfaces.
- Solution: Use the sensor in a controlled environment with minimal infrared interference. Avoid pointing the sensor at highly reflective surfaces.
No Output Signal
- Cause: Sensor not powered or damaged.
- Solution: Verify the power supply voltage and check for physical damage to the sensor.
FAQs
Q: Can the Grove IR Sensor measure the exact distance to an object?
A: No, the Grove IR Sensor provides a digital output (High/Low) to indicate the presence of an object but does not measure the exact distance.
Q: Can I use the sensor with a Raspberry Pi?
A: Yes, the sensor can be used with a Raspberry Pi by connecting it to a GPIO pin and reading the digital signal.
Q: What is the maximum detection range of the sensor?
A: The sensor can detect objects within a range of 0.5 cm to 10 cm.
Q: Is the sensor suitable for outdoor use?
A: The sensor is not designed for outdoor use and may be affected by environmental factors such as sunlight and temperature extremes.
By following this documentation, you can effectively integrate the Grove IR Sensor into your projects and troubleshoot common issues.