Cirkit Designer Logo
Cirkit Designer
Your all-in-one circuit design IDE
Home / 
Component Documentation

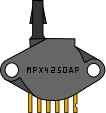
How to Use MPX5500DP: Examples, Pinouts, and Specs

Image of MPX5500DP
Cirkit Designer LogoDesign with MPX5500DP in Cirkit Designer

Introduction

The MPX5500DP is a piezoresistive pressure sensor that delivers a linear voltage output proportional to the applied pressure. It is designed for high accuracy and stability, capable of measuring pressures in the range of 0 to 500 kPa. This sensor is widely used in applications requiring precise pressure measurements, such as:

  • Automotive: Engine control, tire pressure monitoring, and fuel system diagnostics.
  • Industrial: Process control, pneumatic systems, and HVAC systems.
  • Medical: Respiratory systems, blood pressure monitoring, and other diagnostic equipment.

Its dual-port design allows for differential pressure measurements, making it versatile for a variety of use cases.


Explore Projects Built with MPX5500DP

Use Cirkit Designer to design, explore, and prototype these projects online. Some projects support real-time simulation. Click "Open Project" to start designing instantly!
Bluetooth Audio Receiver with Battery-Powered Amplifier and Loudspeakers
Image of speaker bluetooh portable: A project utilizing MPX5500DP in a practical application
This circuit is a Bluetooth-enabled audio system powered by a rechargeable 18650 Li-ion battery. It includes a TP4056 module for battery charging and protection, a PAM8403 amplifier with volume control to drive two loudspeakers, and a Bluetooth audio receiver to wirelessly receive audio signals.
Cirkit Designer LogoOpen Project in Cirkit Designer
Arduino UNO Controlled Soundwave Generator with IR Sensor Activation and Relay Switching
Image of Fish Attractor: A project utilizing MPX5500DP in a practical application
This circuit features an Arduino UNO microcontroller interfaced with a 4-channel relay, two IR sensors, a servo motor, an LCD I2C display, a PAM8403 audio amplifier connected to a speaker, and an XR2206 function generator with a resistor and capacitor for frequency shaping. The Arduino controls the relays based on a potentiometer input, displays frequency information on the LCD, and adjusts the servo position in response to the IR sensors. The XR2206 generates an adjustable frequency signal, while the PAM8403 amplifies audio for the speaker.
Cirkit Designer LogoOpen Project in Cirkit Designer
Optiplex Micro and PoE Camera Surveillance System with Ethernet Switching
Image of Engine Mounts Wiring: A project utilizing MPX5500DP in a practical application
This circuit describes a networked system where an Optiplex Micro computer is powered by a PC Power Supply and connected to a PC Screen via HDMI for display output. The computer is networked through an Ethernet Switch, which also connects to two PoE Cameras and a Toyopuc PLC. The Ethernet Switch is powered by a PoE PSU 48V DC, and all AC-powered devices are connected to a common 220V AC source.
Cirkit Designer LogoOpen Project in Cirkit Designer
Battery-Powered MP3 Player with Amplified Dual Speakers
Image of bluethooth speaker( 2 speaker): A project utilizing MPX5500DP in a practical application
This circuit is a portable audio playback system powered by two 18650 Li-ion batteries, which are charged and protected by a TP4056 module. The MP3 module provides audio signals to a 5V amplifier board, which then drives two speakers. A push switch is used to control the power to the MP3 module and amplifier.
Cirkit Designer LogoOpen Project in Cirkit Designer

Explore Projects Built with MPX5500DP

Use Cirkit Designer to design, explore, and prototype these projects online. Some projects support real-time simulation. Click "Open Project" to start designing instantly!
Image of speaker bluetooh portable: A project utilizing MPX5500DP in a practical application
Bluetooth Audio Receiver with Battery-Powered Amplifier and Loudspeakers
This circuit is a Bluetooth-enabled audio system powered by a rechargeable 18650 Li-ion battery. It includes a TP4056 module for battery charging and protection, a PAM8403 amplifier with volume control to drive two loudspeakers, and a Bluetooth audio receiver to wirelessly receive audio signals.
Cirkit Designer LogoOpen Project in Cirkit Designer
Image of Fish Attractor: A project utilizing MPX5500DP in a practical application
Arduino UNO Controlled Soundwave Generator with IR Sensor Activation and Relay Switching
This circuit features an Arduino UNO microcontroller interfaced with a 4-channel relay, two IR sensors, a servo motor, an LCD I2C display, a PAM8403 audio amplifier connected to a speaker, and an XR2206 function generator with a resistor and capacitor for frequency shaping. The Arduino controls the relays based on a potentiometer input, displays frequency information on the LCD, and adjusts the servo position in response to the IR sensors. The XR2206 generates an adjustable frequency signal, while the PAM8403 amplifies audio for the speaker.
Cirkit Designer LogoOpen Project in Cirkit Designer
Image of Engine Mounts Wiring: A project utilizing MPX5500DP in a practical application
Optiplex Micro and PoE Camera Surveillance System with Ethernet Switching
This circuit describes a networked system where an Optiplex Micro computer is powered by a PC Power Supply and connected to a PC Screen via HDMI for display output. The computer is networked through an Ethernet Switch, which also connects to two PoE Cameras and a Toyopuc PLC. The Ethernet Switch is powered by a PoE PSU 48V DC, and all AC-powered devices are connected to a common 220V AC source.
Cirkit Designer LogoOpen Project in Cirkit Designer
Image of bluethooth speaker( 2 speaker): A project utilizing MPX5500DP in a practical application
Battery-Powered MP3 Player with Amplified Dual Speakers
This circuit is a portable audio playback system powered by two 18650 Li-ion batteries, which are charged and protected by a TP4056 module. The MP3 module provides audio signals to a 5V amplifier board, which then drives two speakers. A push switch is used to control the power to the MP3 module and amplifier.
Cirkit Designer LogoOpen Project in Cirkit Designer

Technical Specifications

Key Technical Details

Parameter Value
Pressure Range 0 to 500 kPa
Supply Voltage (Vcc) 4.75 V to 5.25 V
Output Voltage Range 0.2 V to 4.7 V
Sensitivity 9.0 mV/kPa
Accuracy ±1.5% of full-scale span
Operating Temperature Range -40°C to +125°C
Response Time 1 ms
Port Configuration Dual port (differential)

Pin Configuration and Descriptions

The MPX5500DP has a 6-pin configuration. The table below describes each pin:

Pin Number Pin Name Description
1 Vout Analog output voltage proportional to pressure
2 GND Ground (0 V reference)
3 Vcc Supply voltage (4.75 V to 5.25 V)
4 NC Not connected
5 NC Not connected
6 NC Not connected

Usage Instructions

How to Use the MPX5500DP in a Circuit

  1. Power Supply: Connect the Vcc pin to a regulated 5 V power supply and the GND pin to the ground of the circuit.
  2. Output Signal: The Vout pin provides an analog voltage proportional to the applied pressure. This output can be read using an ADC (Analog-to-Digital Converter) on a microcontroller.
  3. Pressure Ports: The MPX5500DP has two ports:
    • P1 (Pressure Side): Connect this port to the pressure source you want to measure.
    • P2 (Vacuum Side): Leave this port open to the atmosphere for gauge pressure measurements or connect it to another pressure source for differential pressure measurements.

Important Considerations and Best Practices

  • Stabilized Power Supply: Use a stable 5 V power supply to ensure accurate readings.
  • Filtering: Add a decoupling capacitor (e.g., 0.1 µF) between Vcc and GND to reduce noise.
  • Mounting: Ensure the sensor is securely mounted to avoid mechanical stress that could affect accuracy.
  • Temperature Effects: The sensor is temperature-compensated, but extreme conditions may still impact performance. Use within the specified operating temperature range.

Example: Connecting MPX5500DP to an Arduino UNO

Below is an example of how to connect the MPX5500DP to an Arduino UNO and read the pressure:

Circuit Connections

  • MPX5500DP Vcc → Arduino 5V
  • MPX5500DP GND → Arduino GND
  • MPX5500DP Vout → Arduino A0 (Analog Input)

Arduino Code

// Define the analog pin connected to the MPX5500DP output
const int pressurePin = A0;

// Define the sensor's characteristics
const float Vcc = 5.0; // Supply voltage to the sensor
const float sensitivity = 0.009; // Sensitivity in V/kPa (9 mV/kPa)
const float offset = 0.2; // Offset voltage at 0 kPa in volts

void setup() {
  Serial.begin(9600); // Initialize serial communication
}

void loop() {
  // Read the analog value from the sensor
  int sensorValue = analogRead(pressurePin);

  // Convert the analog value to voltage
  float voltage = (sensorValue / 1023.0) * Vcc;

  // Calculate the pressure in kPa
  float pressure = (voltage - offset) / sensitivity;

  // Print the pressure to the Serial Monitor
  Serial.print("Pressure: ");
  Serial.print(pressure);
  Serial.println(" kPa");

  delay(1000); // Wait for 1 second before the next reading
}

Troubleshooting and FAQs

Common Issues and Solutions

  1. No Output Voltage:

    • Cause: Incorrect wiring or no power supply.
    • Solution: Verify all connections and ensure the sensor is powered with 5 V.
  2. Inaccurate Readings:

    • Cause: Electrical noise or unstable power supply.
    • Solution: Add a decoupling capacitor (e.g., 0.1 µF) between Vcc and GND.
  3. Output Voltage Stuck at Offset (0.2 V):

    • Cause: No pressure applied or blocked pressure port.
    • Solution: Check the pressure source and ensure the ports are unobstructed.
  4. Fluctuating Readings:

    • Cause: Environmental noise or vibrations.
    • Solution: Use proper shielding and ensure the sensor is securely mounted.

FAQs

Q1: Can the MPX5500DP measure negative pressures?
A1: Yes, the MPX5500DP can measure negative pressures (vacuum) when used in a differential configuration. Connect the higher pressure source to P1 and the lower pressure source to P2.

Q2: What is the maximum pressure the MPX5500DP can handle?
A2: The MPX5500DP can measure up to 500 kPa. Exceeding this limit may damage the sensor.

Q3: Can I use the MPX5500DP with a 3.3 V microcontroller?
A3: The MPX5500DP requires a 5 V supply for proper operation. However, you can use a voltage divider or level shifter to interface its output with a 3.3 V microcontroller.

Q4: How do I calibrate the sensor?
A4: The MPX5500DP is factory-calibrated. If additional calibration is needed, you can use software to adjust for any offset or scaling errors.