Cirkit Designer Logo
Cirkit Designer
Your all-in-one circuit design IDE
Home / 
Component Documentation

How to Use HX711 - Bridge Sensor Interface: Examples, Pinouts, and Specs
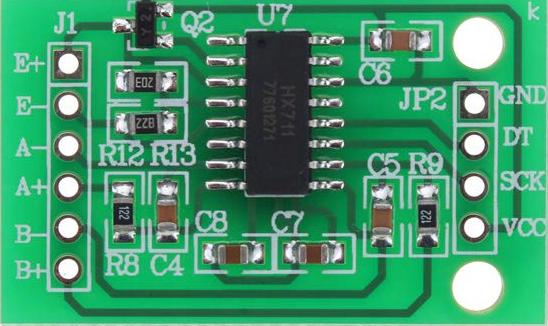
Image of HX711 - Bridge Sensor Interface
Cirkit Designer LogoDesign with HX711 - Bridge Sensor Interface in Cirkit Designer

Introduction

The HX711 module, manufactured by YOUMILE with the part ID HCMODU0073, is a precision 24-bit analog-to-digital converter (ADC) designed for weigh scales and industrial control applications. It is specifically tailored for interfacing with a bridge sensor, such as a load cell, which is commonly used in electronic weighing systems. The HX711 provides a simple and effective solution for obtaining high-resolution measurements of pressure, force, and weight.

Explore Projects Built with HX711 - Bridge Sensor Interface
Use Cirkit Designer to design, explore, and prototype these projects online. Some projects support real-time simulation. Click "Open Project" to start designing instantly!
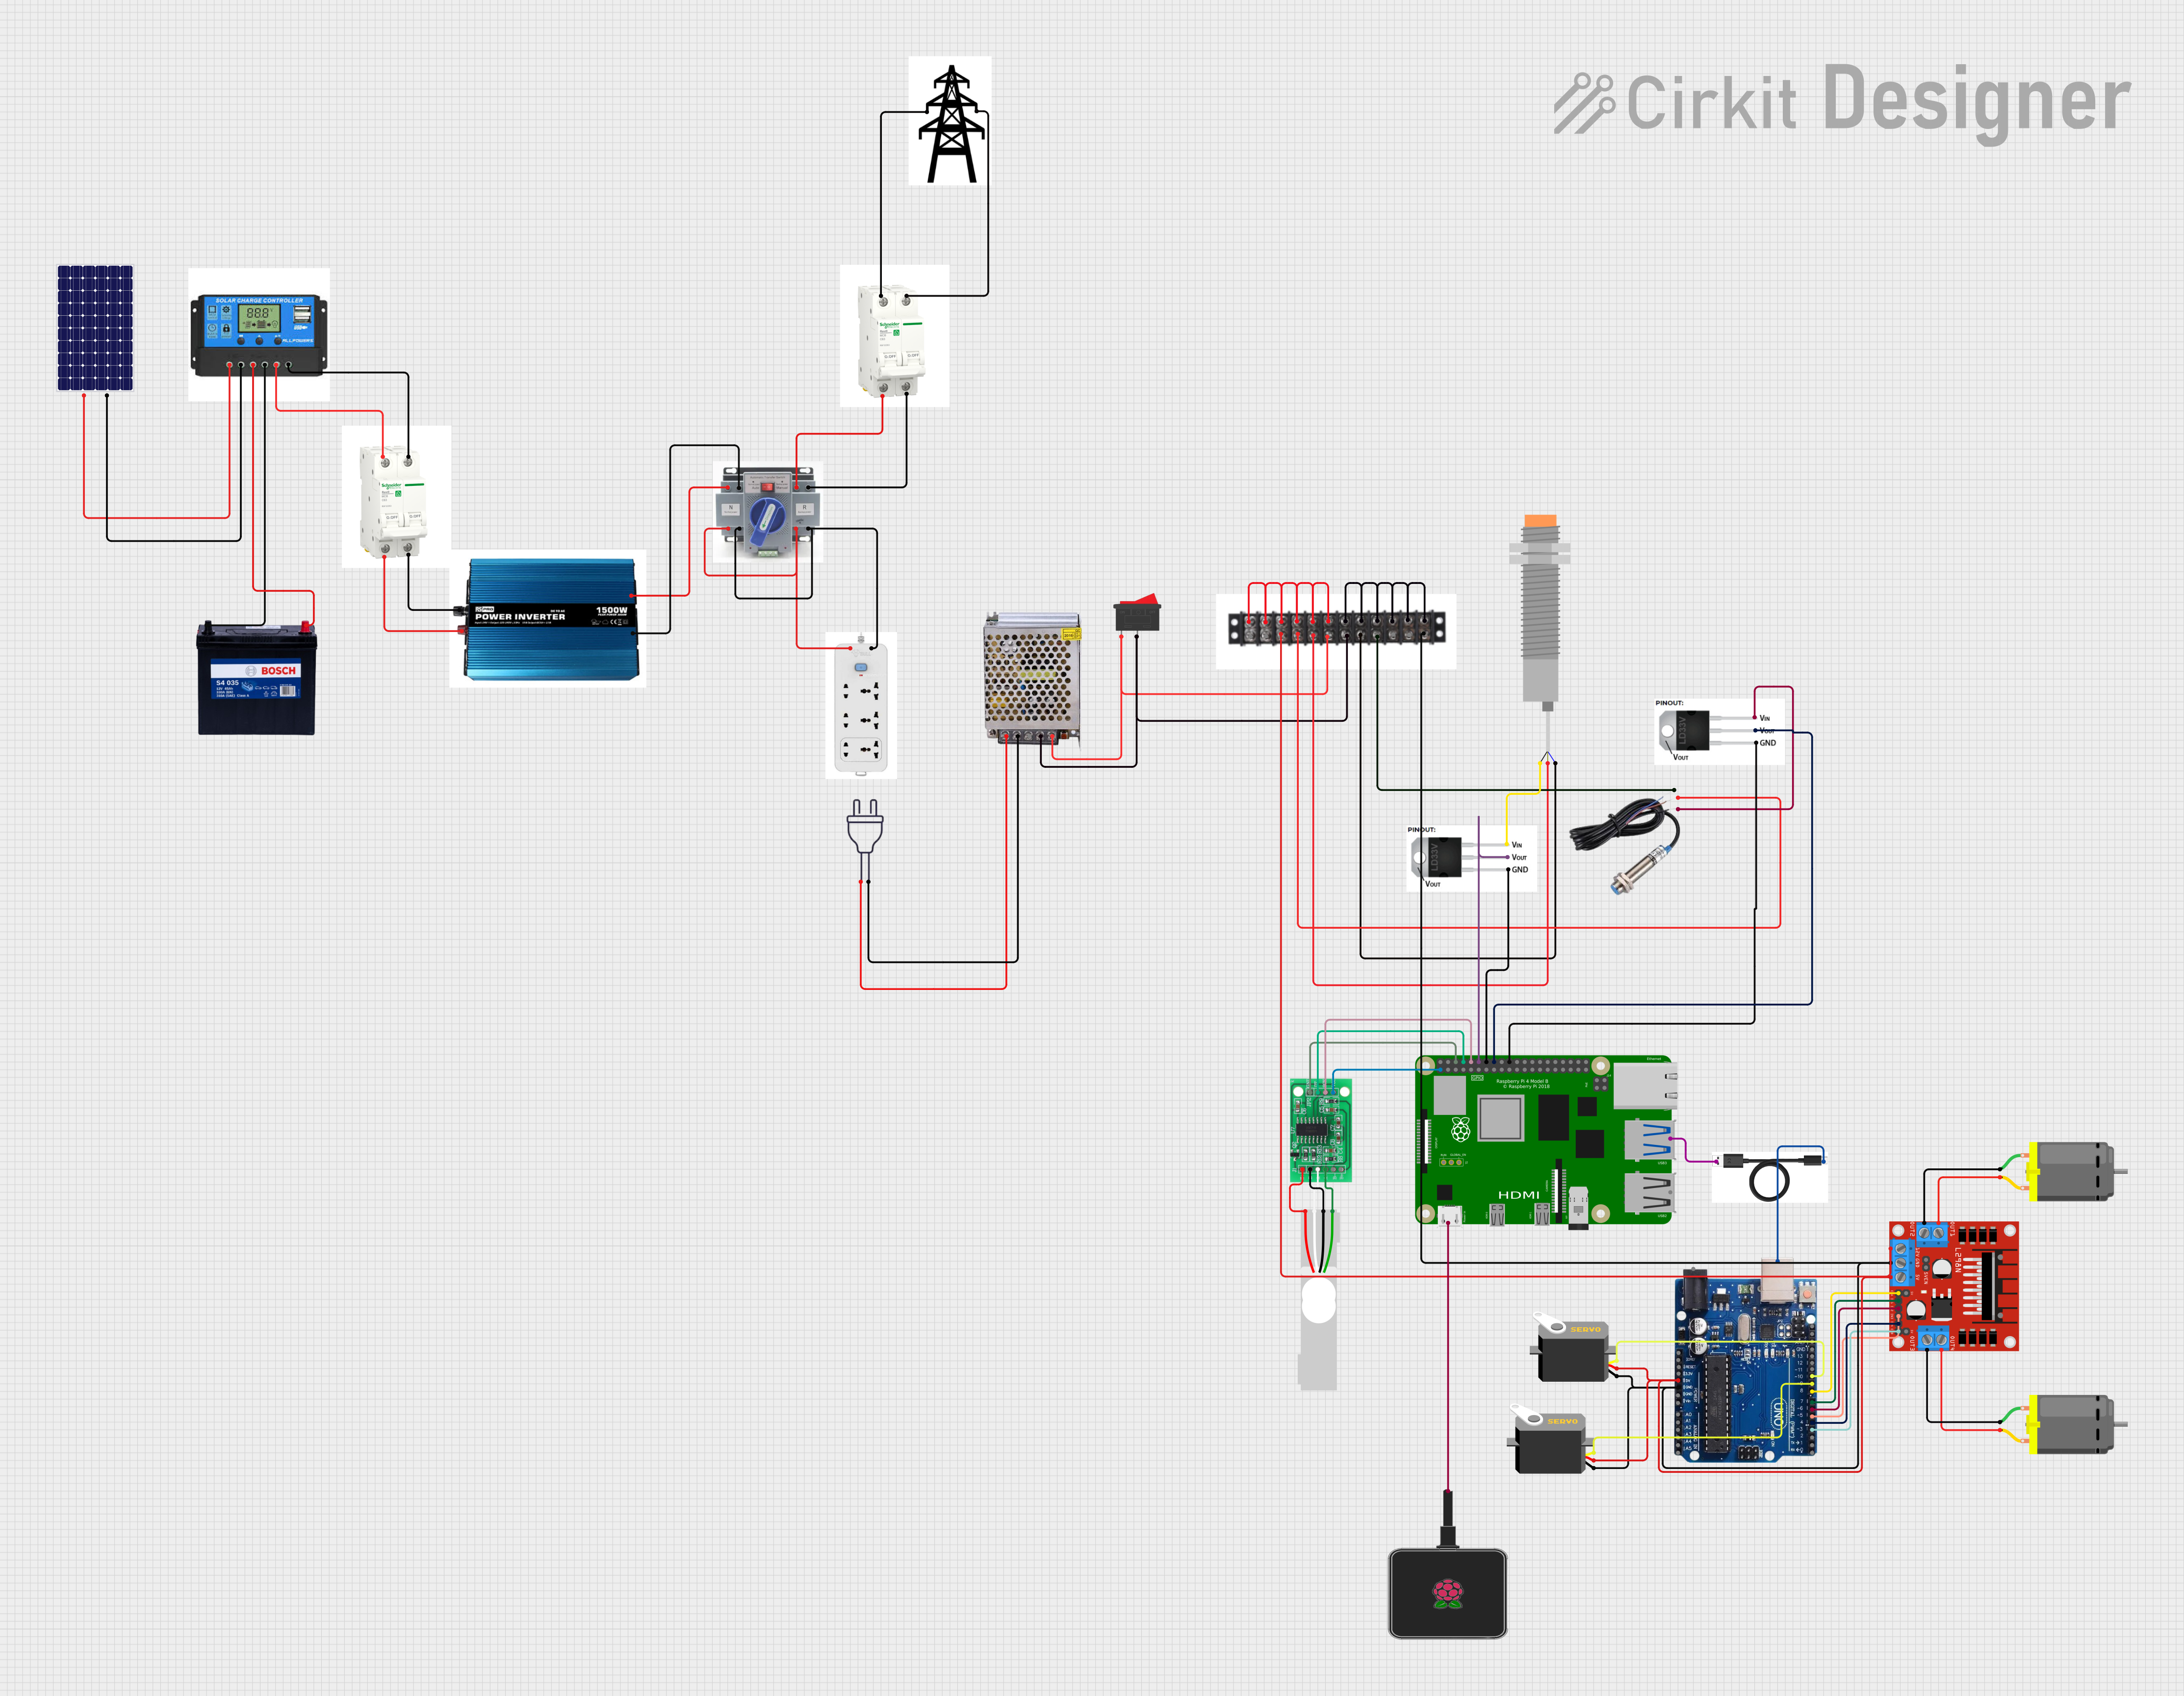
Raspberry Pi-Controlled Weight Measurement and Object Detection System with Actuation and Motion Control
Image of Pictorial Schema 4th yr: A project utilizing HX711 - Bridge Sensor Interface in a practical application
This circuit is designed to interface a load cell with an HX711 bridge sensor interface, which is connected to a Raspberry Pi for data processing. The circuit also includes an Arduino Uno controlling two servos and two DC motors via an L298N motor driver, with power regulation provided by ld1117v33 voltage regulators. Additional components include inductive proximity sensors for position or distance measurement, a power supply system with a solar panel, charge controller, and battery, and safety features like breakers and an ATS for automatic power source switching.
Cirkit Designer LogoOpen Project in Cirkit Designer
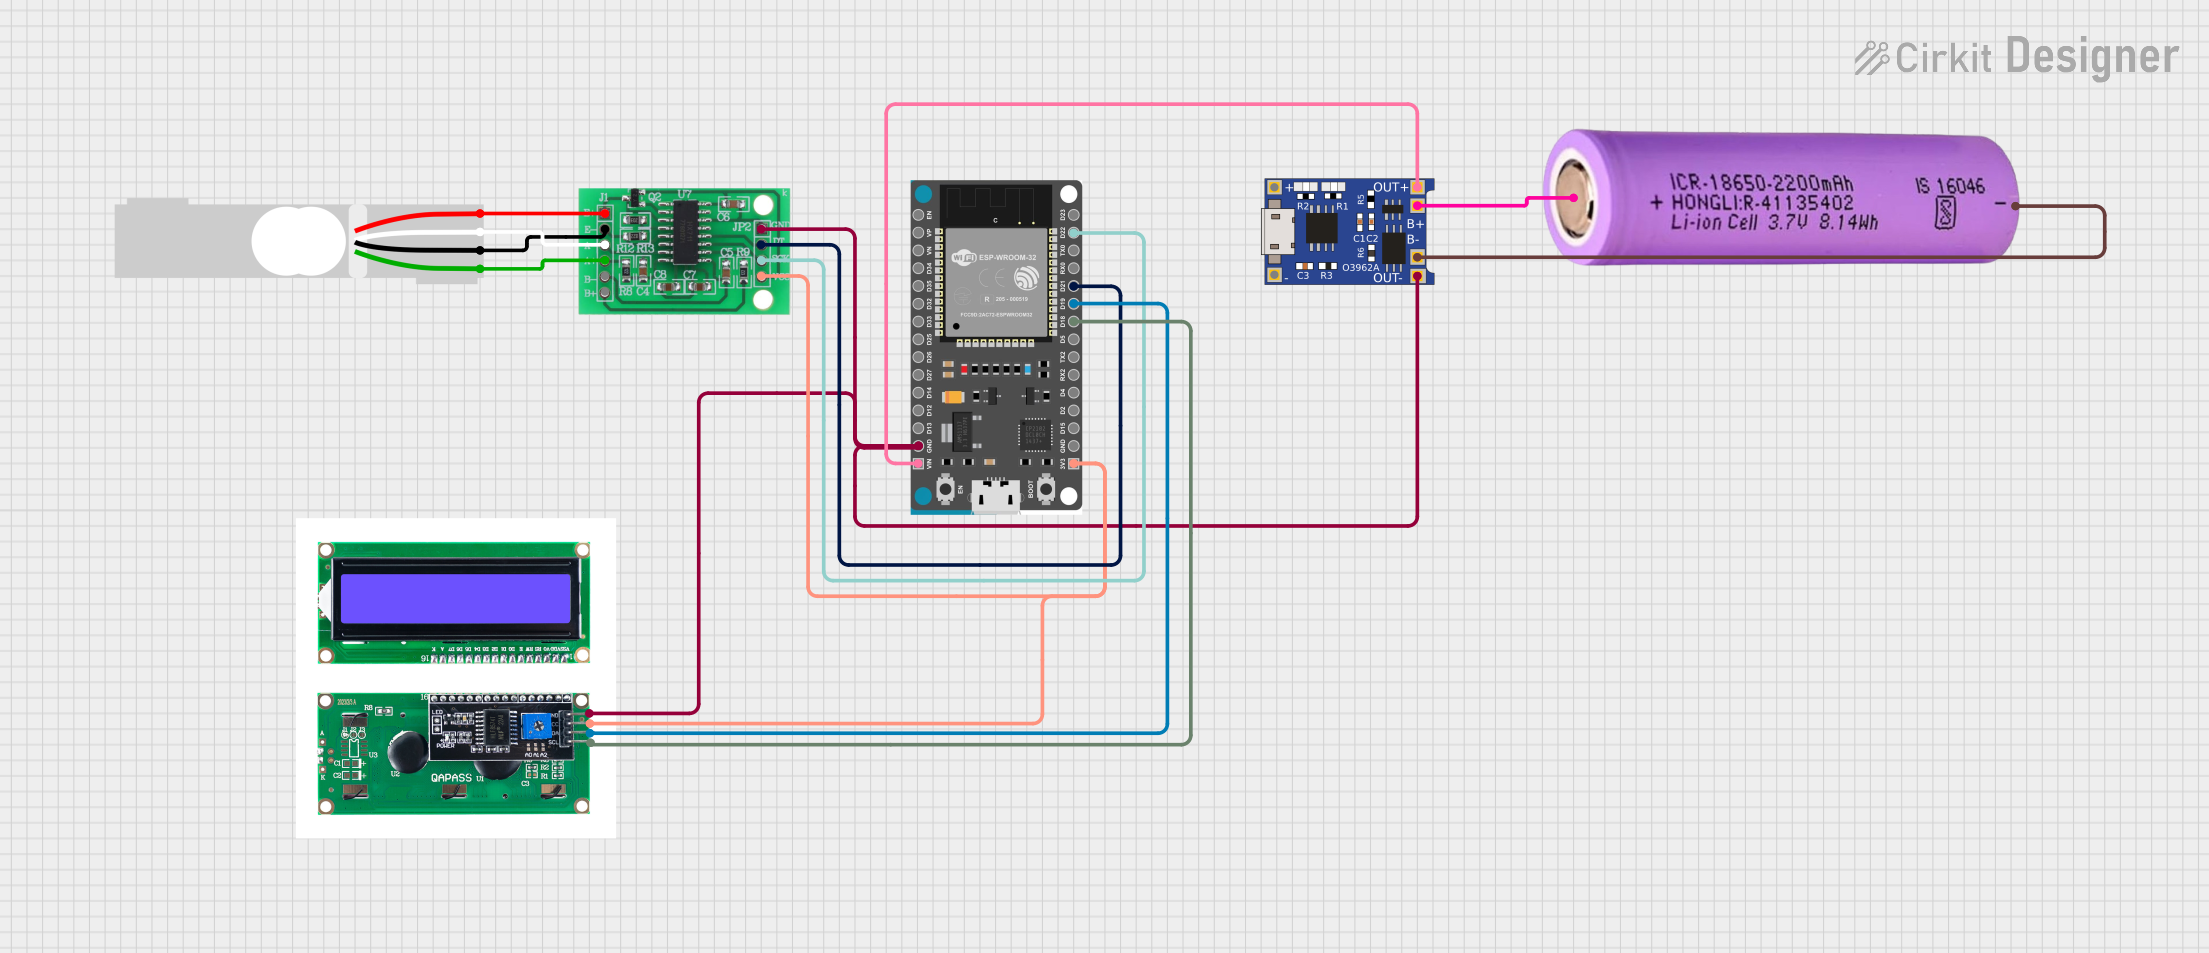
ESP32-Based Battery-Powered Load Cell Weight Measurement System with LCD Display
Image of ELDER: A project utilizing HX711 - Bridge Sensor Interface in a practical application
This circuit is a load measurement system that uses an HX711 bridge sensor interface to read data from a load cell and an ESP32 microcontroller to process the data and display it on an I2C LCD. The system is powered by a rechargeable 18650 battery managed by a TP4056 charging module.
Cirkit Designer LogoOpen Project in Cirkit Designer
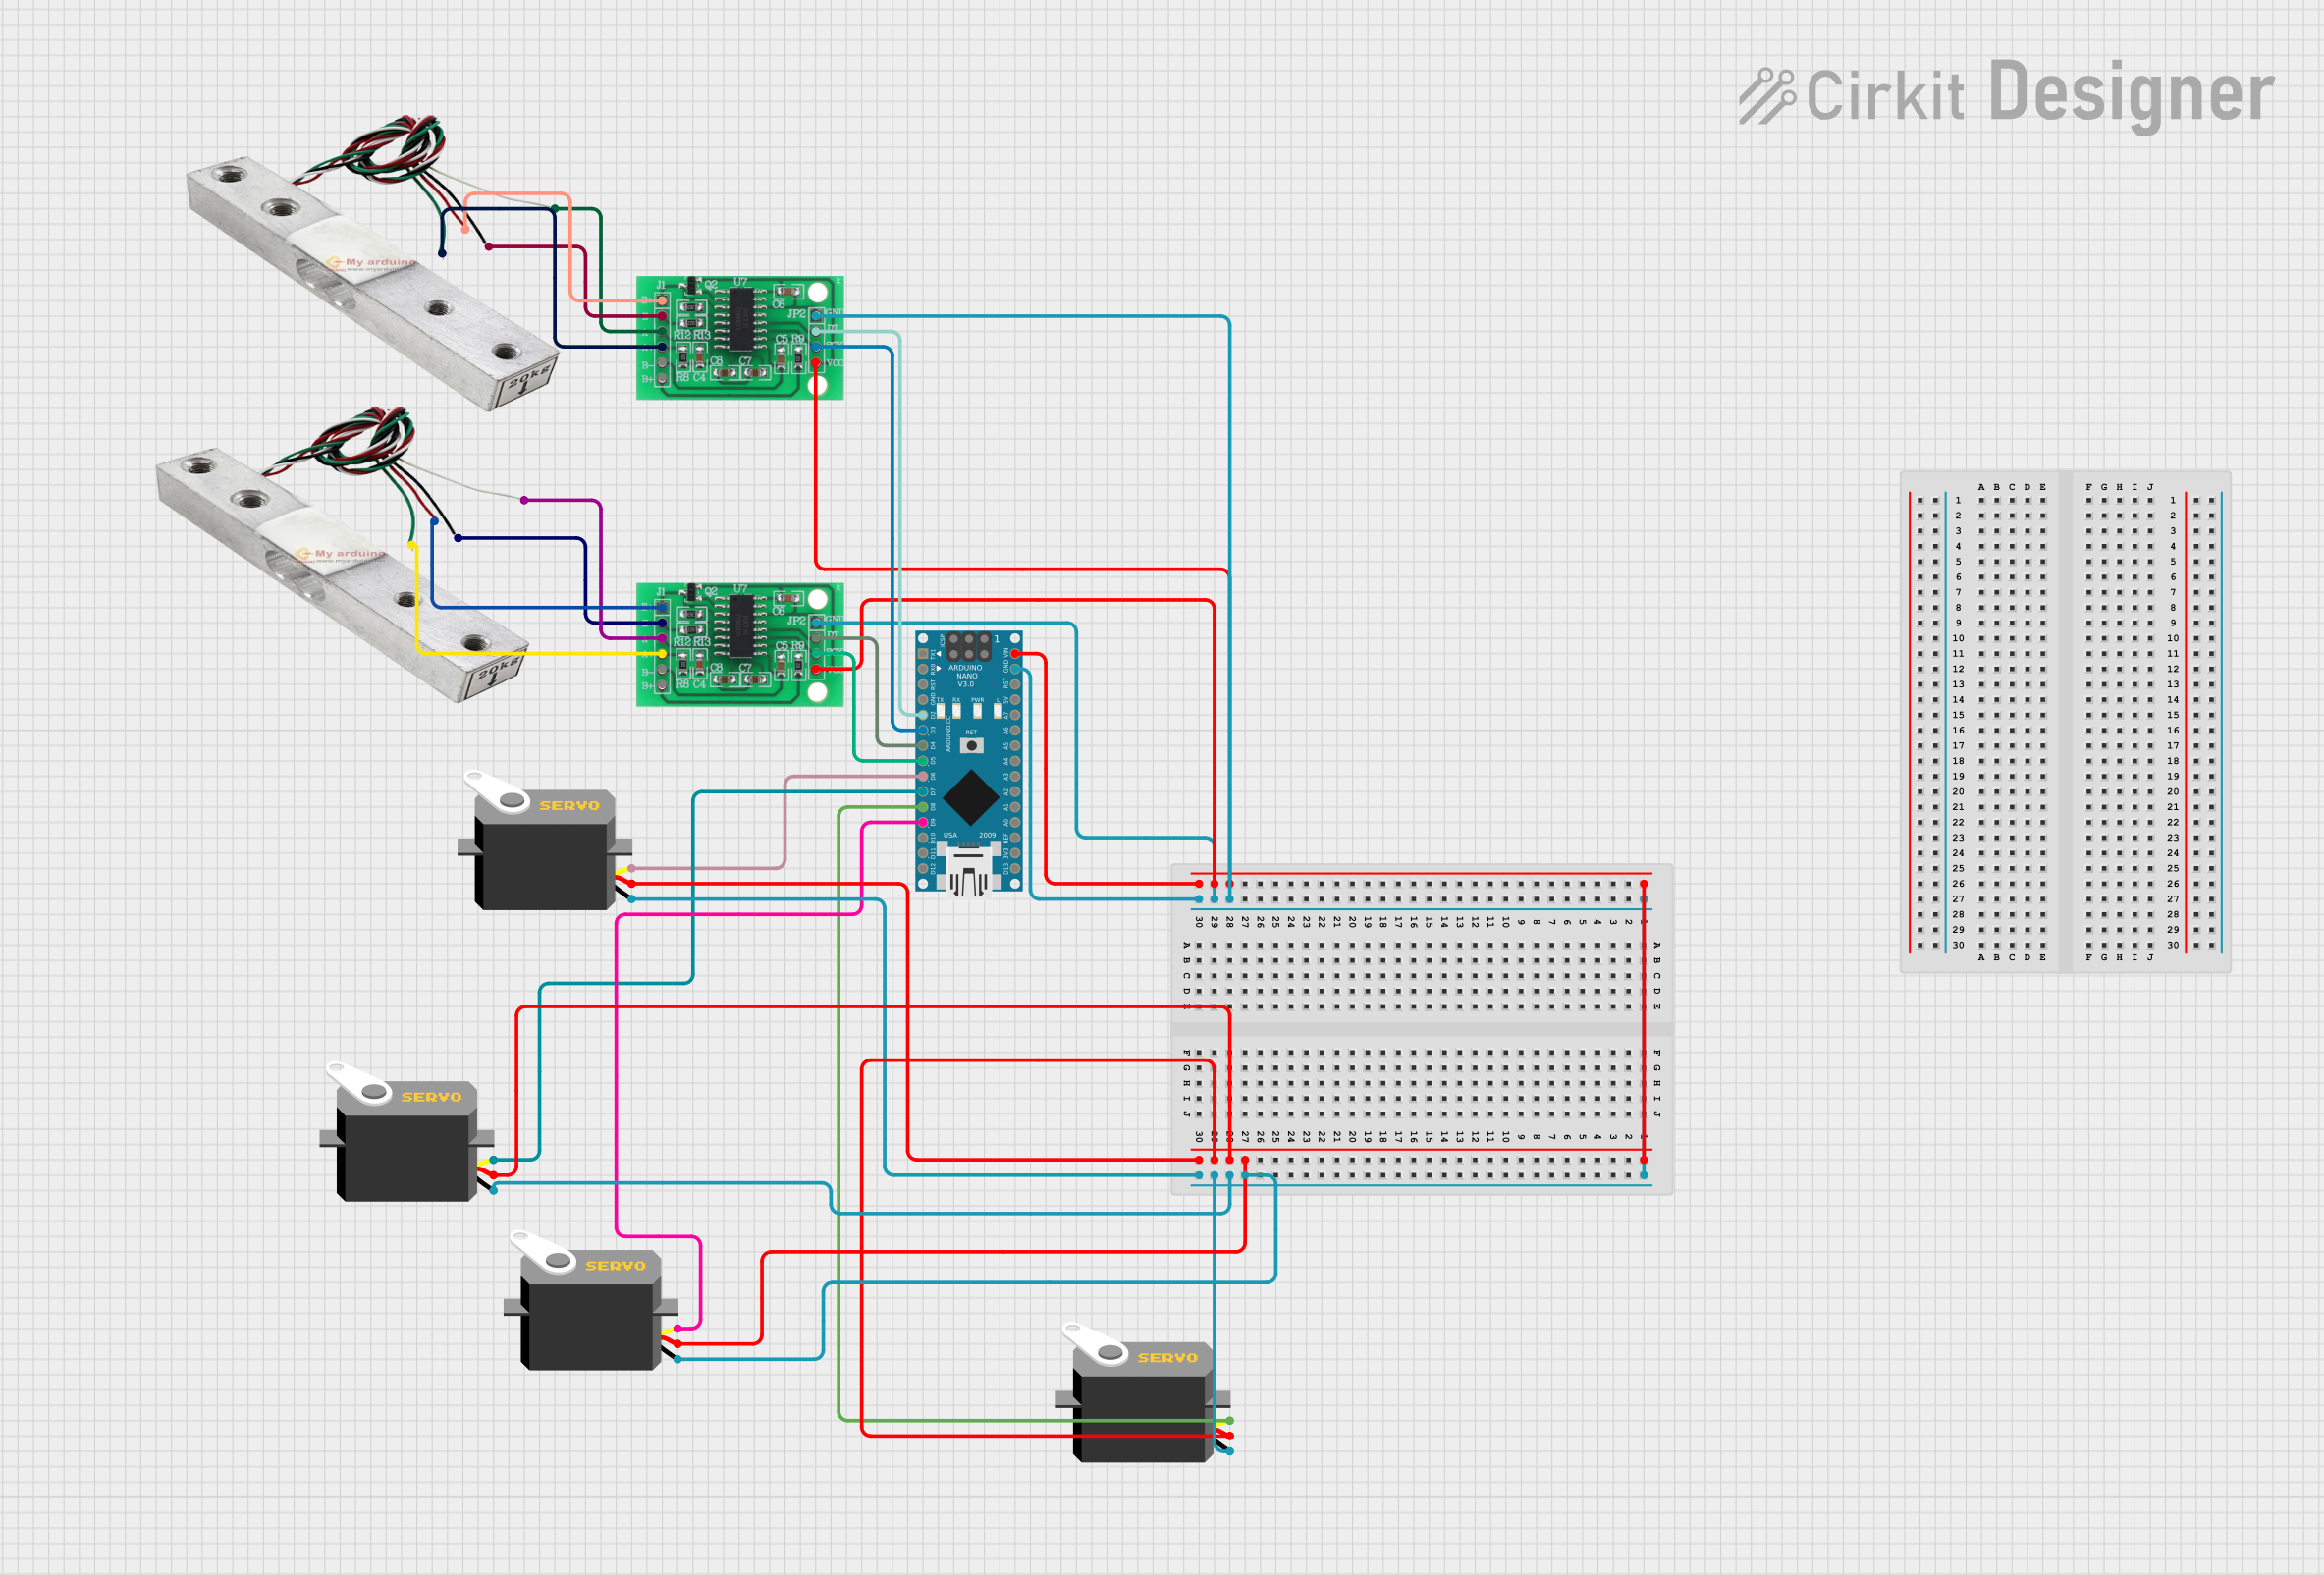
Arduino Nano-Controlled Servo System with Dual HX711 Load Sensors
Image of circuit diagram: A project utilizing HX711 - Bridge Sensor Interface in a practical application
This circuit features an Arduino Nano microcontroller interfaced with two HX711 bridge sensor interfaces and four servo motors. The HX711 modules are connected to separate load sensors for weight measurement, and their data outputs are linked to digital pins on the Arduino for processing. The servo motors are controlled by the Arduino through different digital pins, and both the servos and HX711 modules share a common power supply from the Arduino.
Cirkit Designer LogoOpen Project in Cirkit Designer
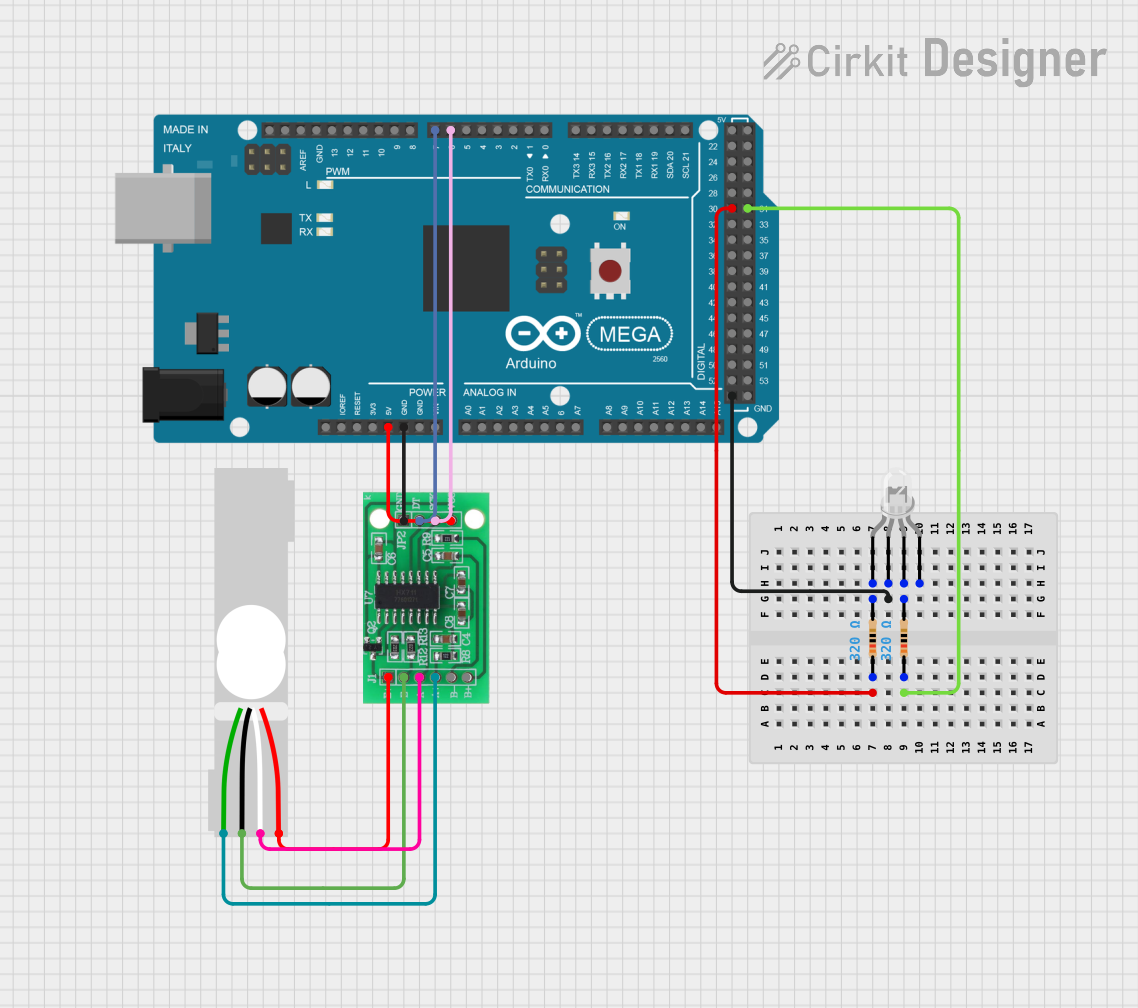
Arduino Mega 2560 Based Load Cell Weight Measurement System with HX711 and LED Indicator
Image of Loadcell and RGB: A project utilizing HX711 - Bridge Sensor Interface in a practical application
This circuit is designed to interface with a load cell using an HX711 bridge sensor interface, which is connected to an Arduino Mega 2560 for data processing. The Arduino controls the HX711 using digital pins D6 and D7 for clock and data respectively, and reads the measurements from the load cell for further processing. Additionally, the circuit includes an LED with current-limiting resistors connected to two digital pins of the Arduino, which could be used for status indication.
Cirkit Designer LogoOpen Project in Cirkit Designer

Explore Projects Built with HX711 - Bridge Sensor Interface

Use Cirkit Designer to design, explore, and prototype these projects online. Some projects support real-time simulation. Click "Open Project" to start designing instantly!
Image of Pictorial Schema 4th yr: A project utilizing HX711 - Bridge Sensor Interface in a practical application
Raspberry Pi-Controlled Weight Measurement and Object Detection System with Actuation and Motion Control
This circuit is designed to interface a load cell with an HX711 bridge sensor interface, which is connected to a Raspberry Pi for data processing. The circuit also includes an Arduino Uno controlling two servos and two DC motors via an L298N motor driver, with power regulation provided by ld1117v33 voltage regulators. Additional components include inductive proximity sensors for position or distance measurement, a power supply system with a solar panel, charge controller, and battery, and safety features like breakers and an ATS for automatic power source switching.
Cirkit Designer LogoOpen Project in Cirkit Designer
Image of ELDER: A project utilizing HX711 - Bridge Sensor Interface in a practical application
ESP32-Based Battery-Powered Load Cell Weight Measurement System with LCD Display
This circuit is a load measurement system that uses an HX711 bridge sensor interface to read data from a load cell and an ESP32 microcontroller to process the data and display it on an I2C LCD. The system is powered by a rechargeable 18650 battery managed by a TP4056 charging module.
Cirkit Designer LogoOpen Project in Cirkit Designer
Image of circuit diagram: A project utilizing HX711 - Bridge Sensor Interface in a practical application
Arduino Nano-Controlled Servo System with Dual HX711 Load Sensors
This circuit features an Arduino Nano microcontroller interfaced with two HX711 bridge sensor interfaces and four servo motors. The HX711 modules are connected to separate load sensors for weight measurement, and their data outputs are linked to digital pins on the Arduino for processing. The servo motors are controlled by the Arduino through different digital pins, and both the servos and HX711 modules share a common power supply from the Arduino.
Cirkit Designer LogoOpen Project in Cirkit Designer
Image of Loadcell and RGB: A project utilizing HX711 - Bridge Sensor Interface in a practical application
Arduino Mega 2560 Based Load Cell Weight Measurement System with HX711 and LED Indicator
This circuit is designed to interface with a load cell using an HX711 bridge sensor interface, which is connected to an Arduino Mega 2560 for data processing. The Arduino controls the HX711 using digital pins D6 and D7 for clock and data respectively, and reads the measurements from the load cell for further processing. Additionally, the circuit includes an LED with current-limiting resistors connected to two digital pins of the Arduino, which could be used for status indication.
Cirkit Designer LogoOpen Project in Cirkit Designer

Common Applications and Use Cases

  • Digital weighing scales
  • Industrial process control
  • Force measurement systems
  • Pressure sensing applications

Technical Specifications

Key Technical Details

  • Precision: 24-bit ADC
  • Input Voltage: 2.6V to 5.5V
  • Rated Operating Temperature: -40°C to +85°C
  • Gain Selection Options: 32, 64, or 128
  • Data Rate: 10SPS or 80SPS (samples per second)
  • On-chip oscillator requiring no external component with optional external crystal

Pin Configuration and Descriptions

Pin Number Pin Name Description
1 VCC Power supply (2.6V to 5.5V)
2 GND Ground
3 DT Data output from HX711 to microcontroller
4 SCK Serial clock input
5 E+ Excitation+ for load cell
6 E- Excitation- for load cell
7 A- Channel A negative input
8 A+ Channel A positive input
9 B- Channel B negative input (optional)
10 B+ Channel B positive input (optional)

Usage Instructions

How to Use the HX711 in a Circuit

  1. Connect VCC to a 2.6V to 5.5V power supply.
  2. Connect GND to the ground of the power supply.
  3. Connect DT to a digital input pin on your microcontroller (e.g., Arduino).
  4. Connect SCK to a digital output pin on your microcontroller.
  5. Connect the load cell wires to E+, E-, A+, and A- accordingly. If using a four-wire load cell, ignore B+ and B-.

Important Considerations and Best Practices

  • Ensure that the power supply voltage is within the specified range to avoid damaging the HX711.
  • Use a stable and noise-free power supply for accurate measurements.
  • Keep the wires between the HX711 and the load cell as short as possible to minimize noise and signal degradation.
  • Calibrate the load cell with known weights to ensure accurate readings.
  • Implement proper ESD precautions when handling the HX711 to prevent static damage.

Example Code for Arduino UNO

#include "HX711.h"

// HX711 circuit wiring
const int LOADCELL_DOUT_PIN = 3;
const int LOADCELL_SCK_PIN = 2;

HX711 scale;

void setup() {
  Serial.begin(9600);
  scale.begin(LOADCELL_DOUT_PIN, LOADCELL_SCK_PIN);
}

void loop() {
  if (scale.is_ready()) {
    long reading = scale.read();
    Serial.print("Reading: ");
    Serial.println(reading);
  } else {
    Serial.println("HX711 not found.");
  }
  delay(1000);
}

Troubleshooting and FAQs

Common Issues

  • Inaccurate Readings: Ensure the load cell is correctly calibrated and that the HX711 is receiving a stable power supply.
  • No Data Output: Check the wiring between the HX711 and the microcontroller, ensuring that DT and SCK are connected to the correct pins.
  • Erratic Values: Make sure the load cell is securely mounted and that there is no mechanical stress or vibrations affecting the readings.

Solutions and Tips for Troubleshooting

  • Double-check all connections and solder joints for any loose or cold solder points.
  • Use a multimeter to verify the voltage levels at VCC and GND.
  • Isolate the load cell and HX711 from electrical noise sources.
  • If using long wires, consider using shielded cables or twisted pairs to reduce noise.

FAQs

Q: Can the HX711 be used with any load cell? A: The HX711 is compatible with most strain gauge load cells. Ensure the load cell's rated output matches the HX711's input requirements.

Q: How do I calibrate my scale using the HX711? A: Calibration involves recording the raw output from the HX711 with a known weight on the load cell and then calculating a conversion factor to convert raw readings to weight units.

Q: What is the purpose of the gain selection option? A: The gain selection allows you to set the amplification factor for the signal coming from the load cell, which can be adjusted based on the load cell's sensitivity and the required resolution.

Q: How can I increase the sampling rate? A: The HX711 has two selectable data rates: 10SPS and 80SPS. The rate can be set by controlling the SCK pin according to the HX711 datasheet.

Q: Can I use the HX711 for applications other than weighing scales? A: Yes, the HX711 can be used in any application that requires high-resolution analog-to-digital conversion of a differential input signal, such as pressure sensors or force sensors.