Cirkit Designer Logo
Cirkit Designer
Your all-in-one circuit design IDE
Home / 
Component Documentation

How to Use Led AxaCube: Examples, Pinouts, and Specs

Image of Led AxaCube
Cirkit Designer LogoDesign with Led AxaCube in Cirkit Designer

Introduction

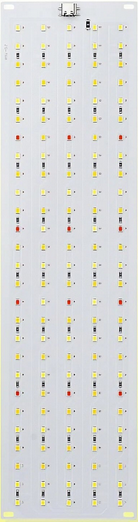
The LED AxaCube, manufactured by AxaCube, is a compact and versatile LED light source designed for a wide range of applications. Its unique cube-shaped design allows for seamless integration into various lighting setups, making it ideal for both professional and hobbyist projects. The AxaCube is engineered for energy efficiency, durability, and consistent light output, making it a reliable choice for applications such as decorative lighting, architectural illumination, and DIY electronics projects.

Explore Projects Built with Led AxaCube

Use Cirkit Designer to design, explore, and prototype these projects online. Some projects support real-time simulation. Click "Open Project" to start designing instantly!
Arduino UNO Controlled LED Matrix and LCD Interface with Joystick Interaction
Image of Digital Game Circuit: A project utilizing Led AxaCube in a practical application
This circuit features an Arduino UNO microcontroller interfaced with an 8x8 LED matrix, an LCD screen, and a KY-023 Dual Axis Joystick Module. The Arduino controls the LED matrix via digital pins D10-D12 and powers the matrix, LCD, and joystick module from its 5V output. The joystick's analog outputs are connected to the Arduino's analog inputs A0 and A1 for position sensing, while the LCD is controlled through digital pins D2-D6 and D13 for display purposes.
Cirkit Designer LogoOpen Project in Cirkit Designer
Arduino UNO Controlled Interactive Display with Joystick and Buzzer Feedback
Image of joystick: A project utilizing Led AxaCube in a practical application
This circuit features an Arduino UNO microcontroller connected to an 8x8 LED matrix, an LCD display with I2C interface, a KY-023 Dual Axis Joystick Module, and a Piezo Buzzer. The Arduino controls the LED matrix via digital pins and provides an interface for the joystick's analog inputs and button press. The LCD display is used for output, and the buzzer is driven by a digital pin for audio feedback.
Cirkit Designer LogoOpen Project in Cirkit Designer
LilyPad Arduino and Accelerometer-Based Wearable Fitness Tracker with Heart Rate Monitoring
Image of proj2: A project utilizing Led AxaCube in a practical application
This circuit is designed for wearable applications, featuring a LilyPad Arduino USB microcontroller that controls a chain of LED Pixel Boards and reads data from a Heart Pulse Sensor and a three-axis Accelerometer. It is capable of interactive LED displays synchronized with motion and heart rate data, suitable for dynamic wearable projects.
Cirkit Designer LogoOpen Project in Cirkit Designer
Arduino CNC Machine with Joystick Control and LED Indicator
Image of CNC Machine 2 Axis: A project utilizing Led AxaCube in a practical application
This circuit is a CNC control system that uses an Arduino UNO to interface with a CNC Shield V3, which drives two NEMA23 stepper motors for X and Y axis control. A KY-023 Dual Axis Joystick Module provides manual control inputs, and an LED with a current-limiting resistor indicates the spindle direction status.
Cirkit Designer LogoOpen Project in Cirkit Designer

Explore Projects Built with Led AxaCube

Use Cirkit Designer to design, explore, and prototype these projects online. Some projects support real-time simulation. Click "Open Project" to start designing instantly!
Image of Digital Game Circuit: A project utilizing Led AxaCube in a practical application
Arduino UNO Controlled LED Matrix and LCD Interface with Joystick Interaction
This circuit features an Arduino UNO microcontroller interfaced with an 8x8 LED matrix, an LCD screen, and a KY-023 Dual Axis Joystick Module. The Arduino controls the LED matrix via digital pins D10-D12 and powers the matrix, LCD, and joystick module from its 5V output. The joystick's analog outputs are connected to the Arduino's analog inputs A0 and A1 for position sensing, while the LCD is controlled through digital pins D2-D6 and D13 for display purposes.
Cirkit Designer LogoOpen Project in Cirkit Designer
Image of joystick: A project utilizing Led AxaCube in a practical application
Arduino UNO Controlled Interactive Display with Joystick and Buzzer Feedback
This circuit features an Arduino UNO microcontroller connected to an 8x8 LED matrix, an LCD display with I2C interface, a KY-023 Dual Axis Joystick Module, and a Piezo Buzzer. The Arduino controls the LED matrix via digital pins and provides an interface for the joystick's analog inputs and button press. The LCD display is used for output, and the buzzer is driven by a digital pin for audio feedback.
Cirkit Designer LogoOpen Project in Cirkit Designer
Image of proj2: A project utilizing Led AxaCube in a practical application
LilyPad Arduino and Accelerometer-Based Wearable Fitness Tracker with Heart Rate Monitoring
This circuit is designed for wearable applications, featuring a LilyPad Arduino USB microcontroller that controls a chain of LED Pixel Boards and reads data from a Heart Pulse Sensor and a three-axis Accelerometer. It is capable of interactive LED displays synchronized with motion and heart rate data, suitable for dynamic wearable projects.
Cirkit Designer LogoOpen Project in Cirkit Designer
Image of CNC Machine 2 Axis: A project utilizing Led AxaCube in a practical application
Arduino CNC Machine with Joystick Control and LED Indicator
This circuit is a CNC control system that uses an Arduino UNO to interface with a CNC Shield V3, which drives two NEMA23 stepper motors for X and Y axis control. A KY-023 Dual Axis Joystick Module provides manual control inputs, and an LED with a current-limiting resistor indicates the spindle direction status.
Cirkit Designer LogoOpen Project in Cirkit Designer

Common Applications and Use Cases

  • Decorative lighting for homes, offices, and events
  • Architectural and accent lighting
  • DIY electronics and hobbyist projects
  • Embedded lighting in furniture or fixtures
  • Indicator lights for devices and control panels

Technical Specifications

The LED AxaCube is designed to deliver optimal performance while maintaining a compact form factor. Below are the key technical specifications:

Parameter Value
Operating Voltage 3.0V - 3.3V
Operating Current 20mA (typical), 30mA (max)
Power Consumption 0.06W (typical)
Light Output (Luminous Flux) 20 lumens (typical)
Color Temperature 3000K (Warm White)
Dimensions 10mm x 10mm x 10mm
Beam Angle 120°
Lifespan 50,000 hours (typical)
Operating Temperature -20°C to 60°C

Pin Configuration and Descriptions

The LED AxaCube has two pins for electrical connections. The table below describes the pin configuration:

Pin Name Description
1 Anode Positive terminal (connect to +3.3V)
2 Cathode Negative terminal (connect to ground)

Usage Instructions

How to Use the LED AxaCube in a Circuit

  1. Power Supply: Ensure the power supply provides a voltage between 3.0V and 3.3V. Exceeding this range may damage the LED.
  2. Current Limiting Resistor: To prevent overcurrent, use a resistor in series with the LED. Calculate the resistor value using Ohm's Law: [ R = \frac{V_{supply} - V_{forward}}{I_{forward}} ] For example, with a 5V supply and a forward voltage of 3.0V, and a desired current of 20mA: [ R = \frac{5V - 3.0V}{0.02A} = 100 , \Omega ]
  3. Connection: Connect the Anode (Pin 1) to the positive terminal of the power supply through the resistor. Connect the Cathode (Pin 2) to the ground.

Example Circuit with Arduino UNO

The LED AxaCube can be easily controlled using an Arduino UNO. Below is an example of how to blink the LED:

// Define the pin connected to the LED AxaCube
const int ledPin = 9; // Pin 9 is used for PWM control

void setup() {
  pinMode(ledPin, OUTPUT); // Set the LED pin as an output
}

void loop() {
  digitalWrite(ledPin, HIGH); // Turn the LED on
  delay(1000);                // Wait for 1 second
  digitalWrite(ledPin, LOW);  // Turn the LED off
  delay(1000);                // Wait for 1 second
}

Important Considerations and Best Practices

  • Heat Management: Although the AxaCube is energy-efficient, prolonged use at maximum current may generate heat. Ensure proper ventilation or heat dissipation if used in enclosed spaces.
  • Polarity: Always connect the Anode to the positive voltage and the Cathode to ground. Reversing the polarity may damage the LED.
  • Resistor Selection: Always use an appropriate current-limiting resistor to prevent overdriving the LED.

Troubleshooting and FAQs

Common Issues and Solutions

  1. LED Does Not Light Up

    • Cause: Incorrect polarity or loose connections.
    • Solution: Verify that the Anode is connected to the positive voltage and the Cathode to ground. Check all connections for stability.
  2. LED Flickers

    • Cause: Insufficient power supply or loose connections.
    • Solution: Ensure the power supply provides a stable voltage within the operating range. Check for secure connections.
  3. LED Burns Out Quickly

    • Cause: Excessive current due to the absence of a current-limiting resistor.
    • Solution: Always use a resistor in series with the LED to limit the current.
  4. LED is Dim

    • Cause: Insufficient current or incorrect resistor value.
    • Solution: Recalculate the resistor value to ensure the LED receives the recommended current (20mA).

FAQs

Q: Can I use the LED AxaCube with a 12V power supply?
A: Yes, but you must use a resistor to drop the voltage to the operating range of 3.0V to 3.3V. Alternatively, use a voltage regulator.

Q: Is the LED AxaCube waterproof?
A: No, the AxaCube is not waterproof. For outdoor or wet environments, use a protective enclosure.

Q: Can I control the brightness of the LED AxaCube?
A: Yes, you can control the brightness using Pulse Width Modulation (PWM) from a microcontroller like an Arduino.

Q: What is the maximum current the LED AxaCube can handle?
A: The maximum current is 30mA. However, for optimal performance and longevity, it is recommended to operate at 20mA.

By following this documentation, you can effectively integrate the LED AxaCube into your projects and ensure reliable performance.