How to Use CO2L: Examples, Pinouts, and Specs
Introduction
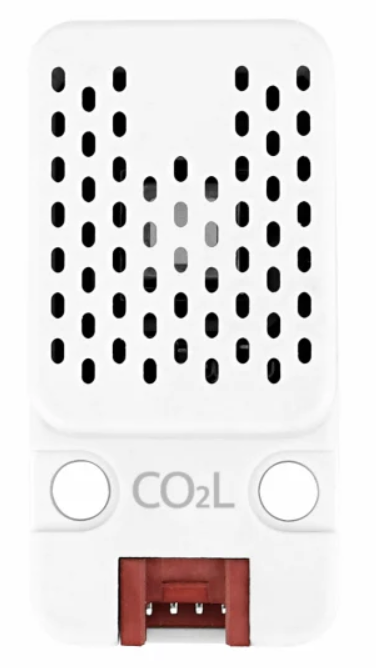
The CO2L is a carbon dioxide (CO2) sensor module manufactured by M5Stack. It is designed to measure the concentration of CO2 in the air with high accuracy and reliability. This sensor is commonly used in applications such as HVAC systems, indoor air quality monitoring, greenhouses, and industrial environments where CO2 levels need to be tracked and controlled.
The CO2L sensor is compact, easy to integrate into various systems, and provides digital output for seamless communication with microcontrollers like Arduino or ESP32.
Explore Projects Built with CO2L
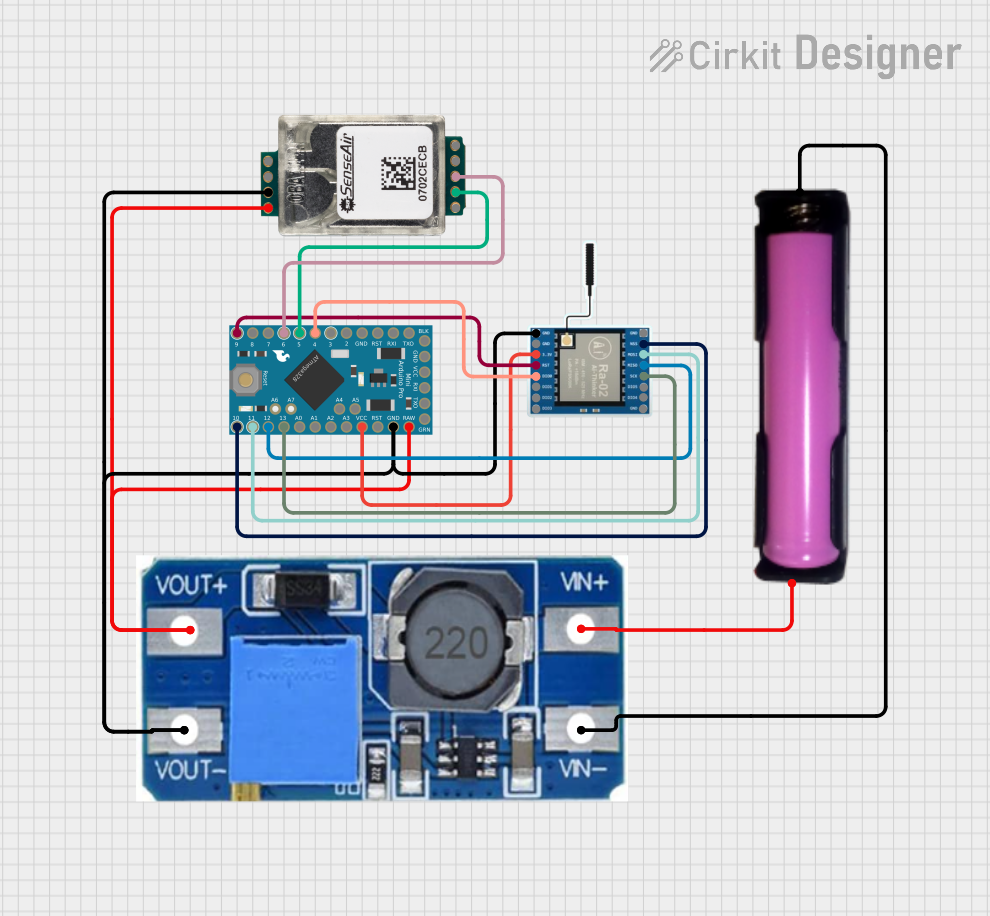
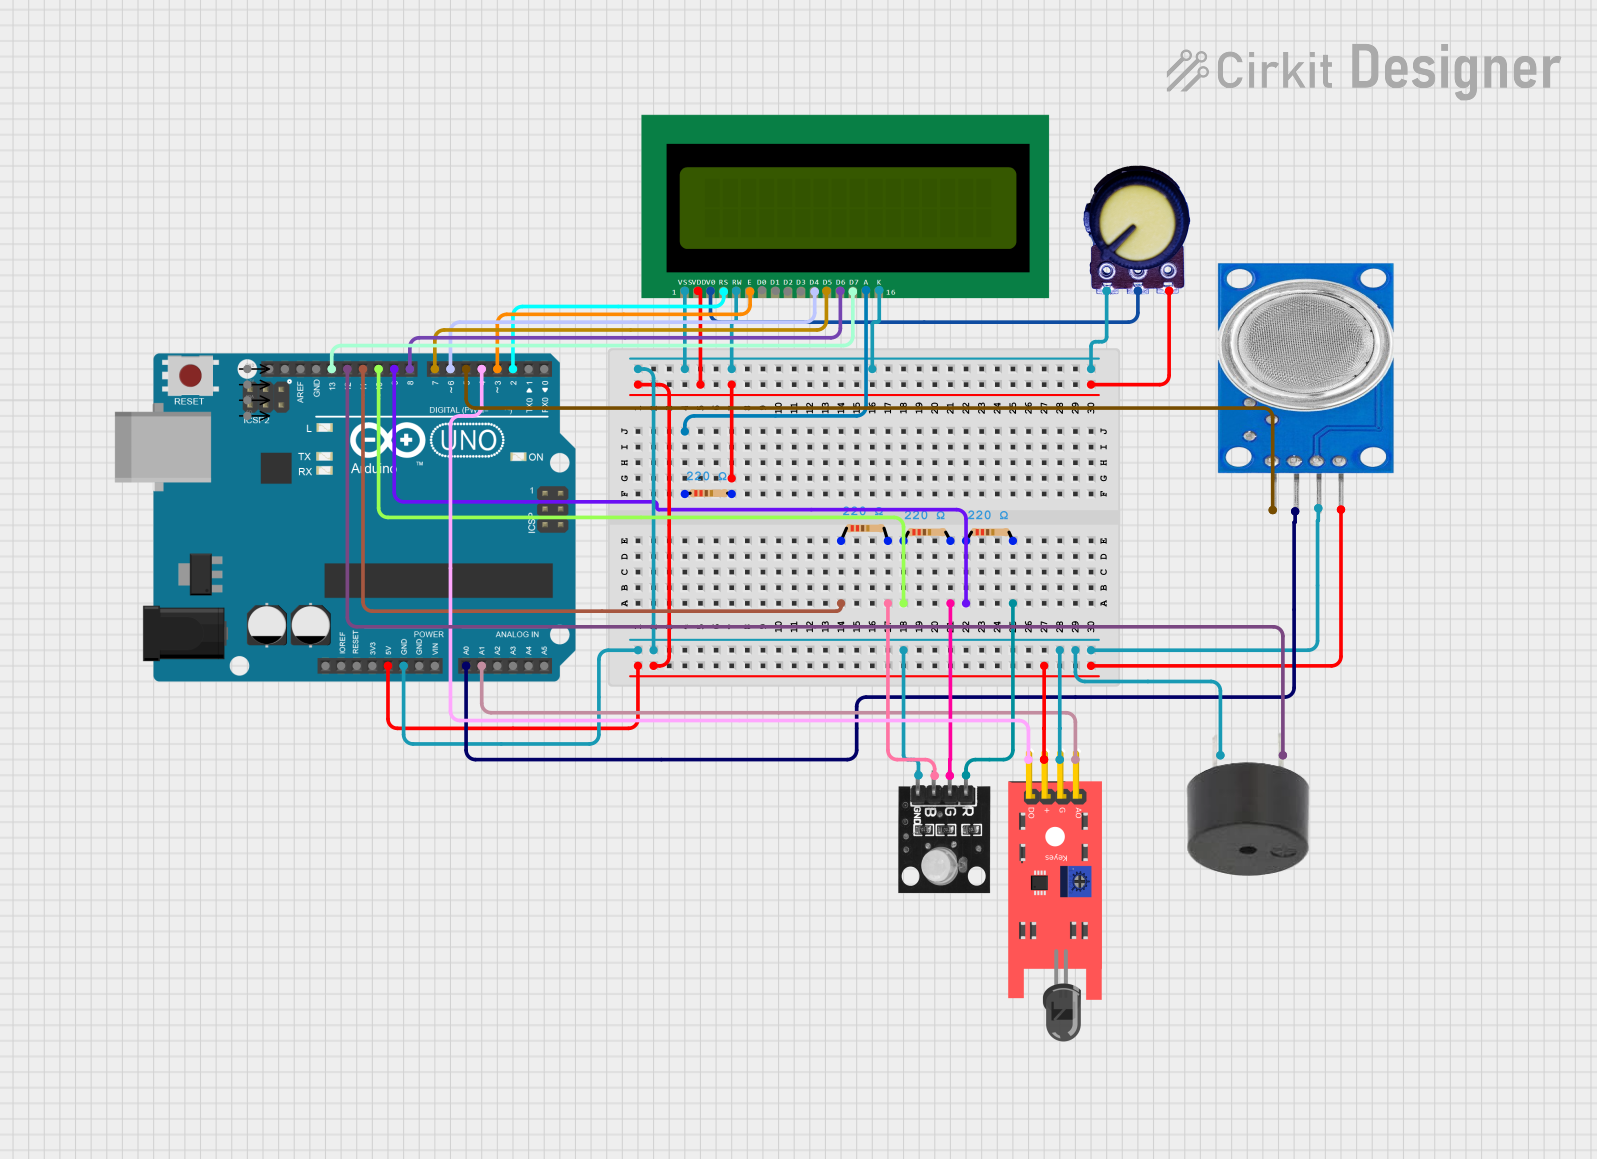
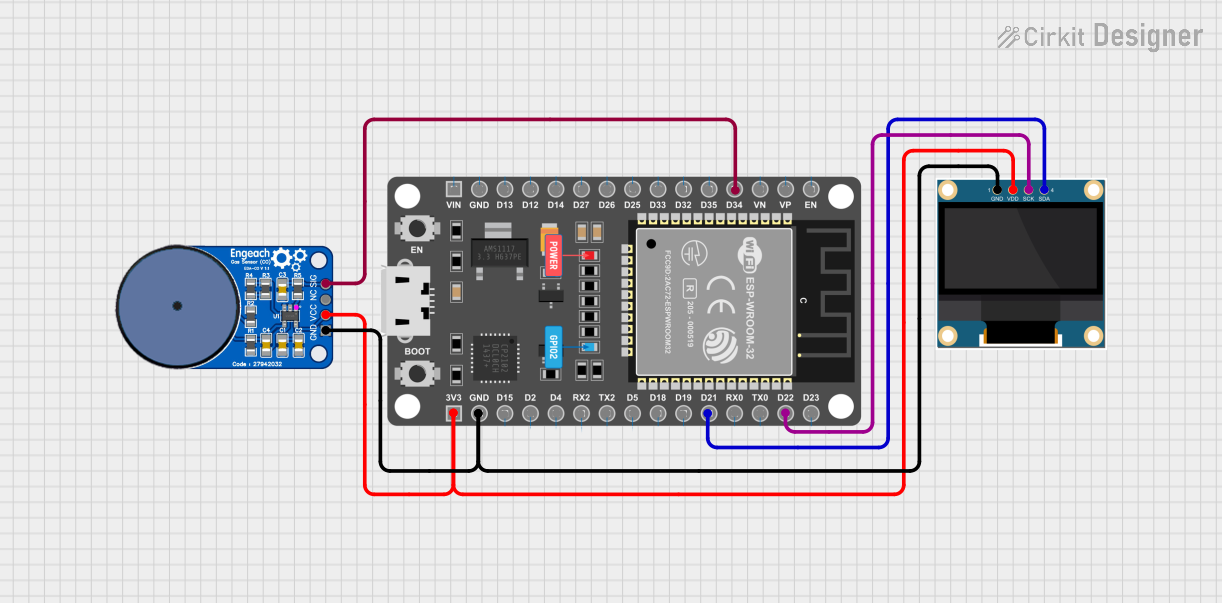
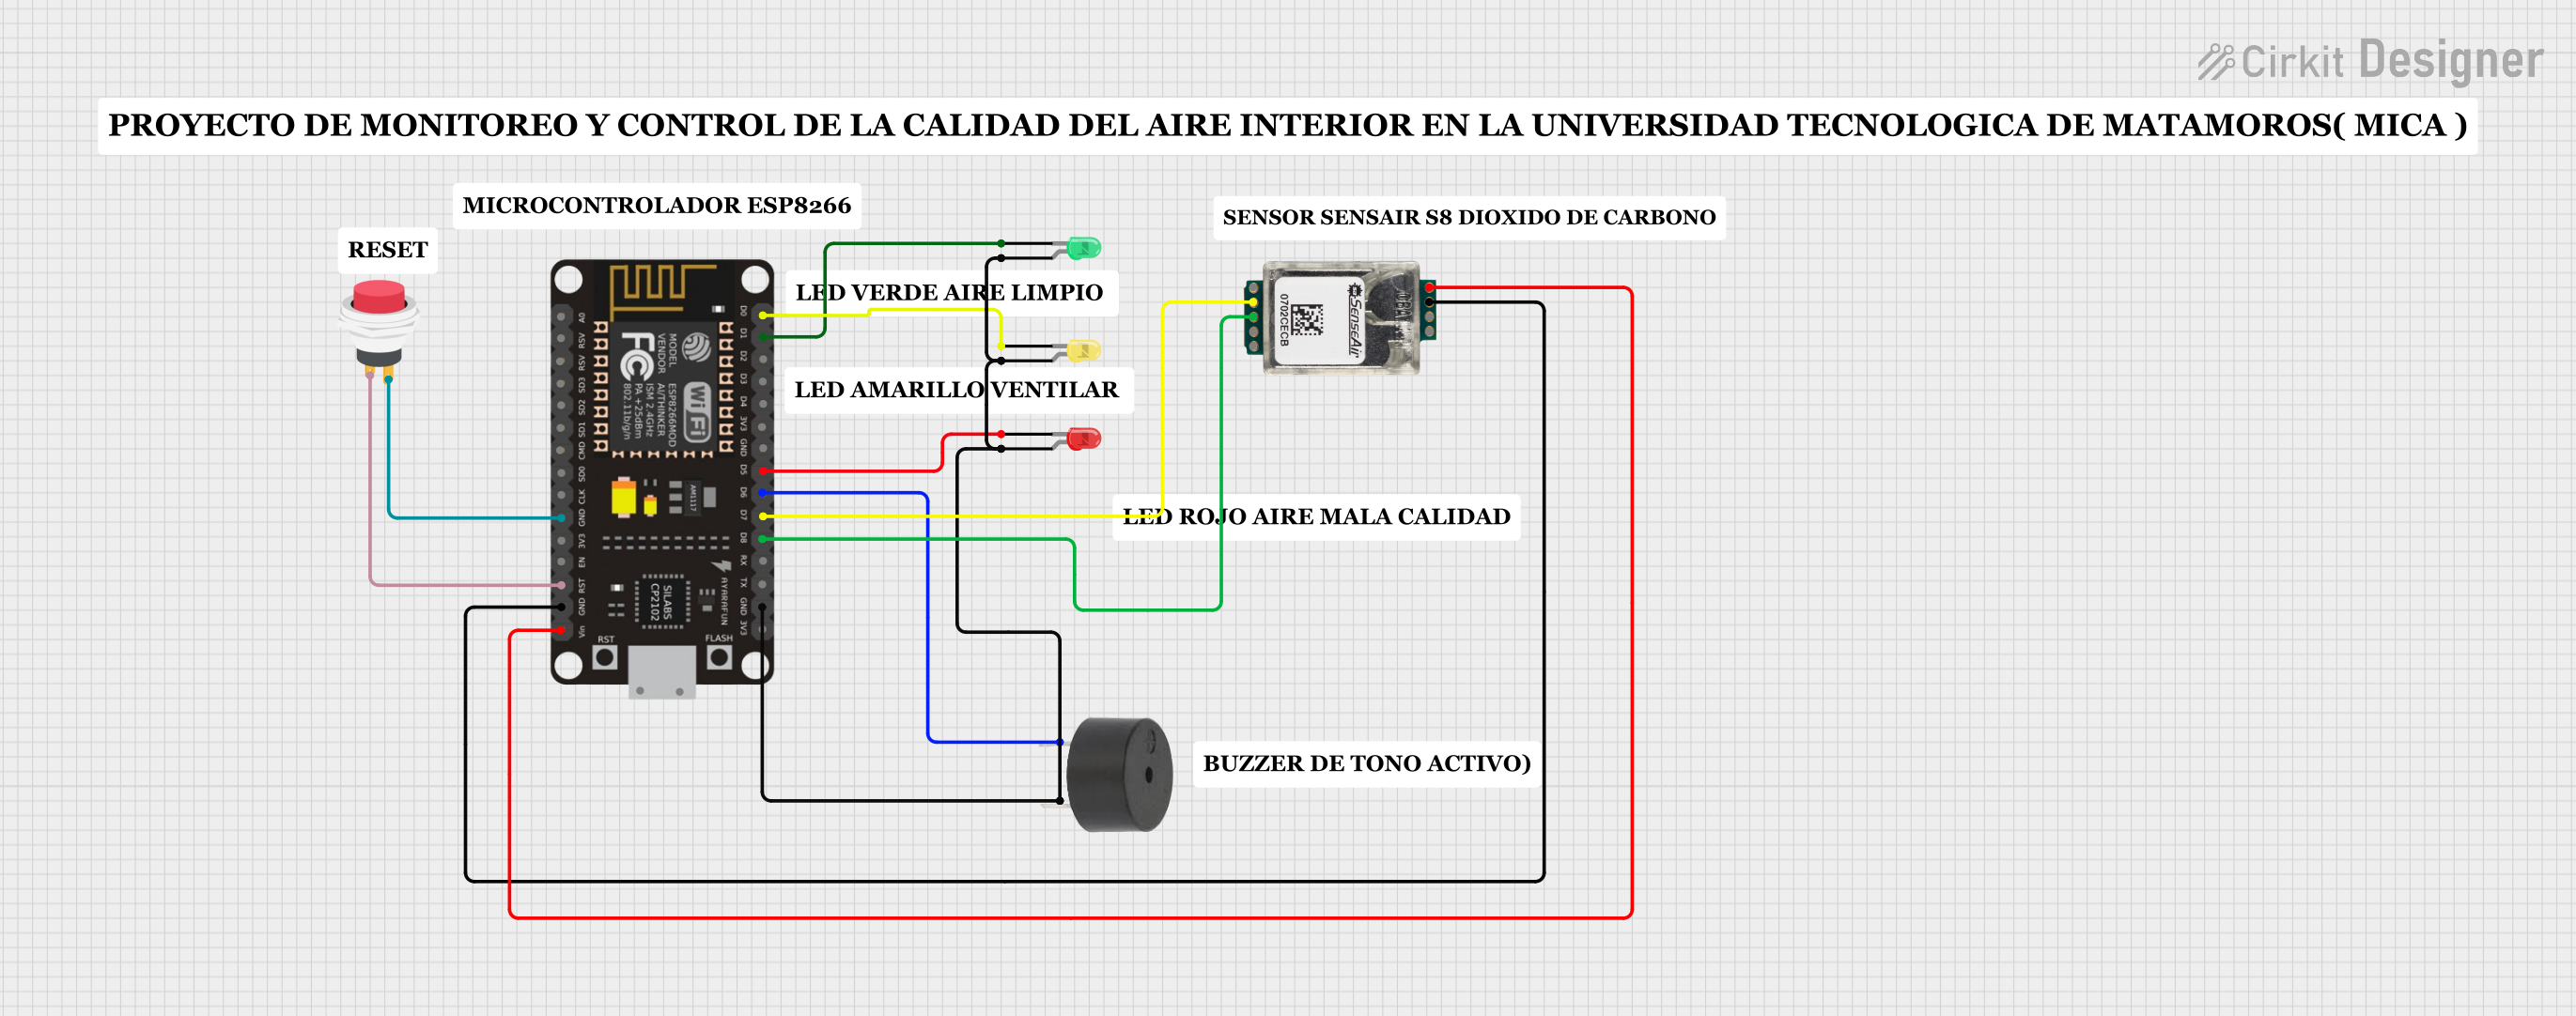
Explore Projects Built with CO2L
Technical Specifications
Below are the key technical details of the CO2L sensor:
| Parameter | Value |
|---|---|
| Manufacturer | M5Stack |
| Part ID | CO2L |
| Measurement Range | 400 ppm to 5000 ppm |
| Accuracy | ±50 ppm or ±5% of reading |
| Operating Voltage | 5V DC |
| Communication Protocol | UART (default) or I2C |
| Operating Temperature | 0°C to 50°C |
| Power Consumption | < 100 mA |
| Dimensions | 54mm x 24mm x 12mm |
Pin Configuration and Descriptions
The CO2L sensor has a standard pinout for easy integration. Below is the pin configuration:
| Pin Name | Description |
|---|---|
| VCC | Power supply input (5V DC) |
| GND | Ground |
| TX | UART Transmit pin (data output) |
| RX | UART Receive pin (data input) |
| SDA | I2C Data line (optional communication) |
| SCL | I2C Clock line (optional communication) |
Usage Instructions
How to Use the CO2L Sensor in a Circuit
- Power the Sensor: Connect the VCC pin to a 5V power source and the GND pin to ground.
- Choose Communication Protocol: By default, the CO2L sensor uses UART for communication. If you prefer I2C, ensure your microcontroller supports it and configure the sensor accordingly.
- Connect to a Microcontroller:
- For UART: Connect the TX pin of the sensor to the RX pin of the microcontroller, and the RX pin of the sensor to the TX pin of the microcontroller.
- For I2C: Connect the SDA and SCL pins to the corresponding I2C pins on the microcontroller.
- Read Data: Use the appropriate library or code to read CO2 concentration values from the sensor.
Important Considerations and Best Practices
- Warm-Up Time: Allow the sensor to warm up for at least 3 minutes after powering it on to ensure accurate readings.
- Ventilation: Ensure the sensor is placed in an area with proper airflow for accurate CO2 measurements.
- Avoid Contaminants: Keep the sensor away from dust, water, and other contaminants that could affect its performance.
- Calibration: Periodically calibrate the sensor as per the manufacturer's guidelines to maintain accuracy.
Example Code for Arduino UNO
Below is an example of how to interface the CO2L sensor with an Arduino UNO using UART communication:
#include <SoftwareSerial.h>

// Define the RX and TX pins for SoftwareSerial
SoftwareSerial CO2Serial(10, 11); // RX = pin 10, TX = pin 11

void setup() {
  Serial.begin(9600); // Initialize Serial Monitor at 9600 baud
  CO2Serial.begin(9600); // Initialize CO2 sensor communication at 9600 baud

  Serial.println("CO2L Sensor Initialization...");
}

void loop() {
  if (CO2Serial.available()) {
    // Read data from the CO2 sensor
    String co2Data = CO2Serial.readStringUntil('\n');

    // Print the CO2 concentration to the Serial Monitor
    Serial.print("CO2 Concentration: ");
    Serial.println(co2Data);
  }

  delay(1000); // Wait 1 second before the next reading
}
Note: Replace
10and11in theSoftwareSerialdefinition with the actual pins you are using for RX and TX on your Arduino UNO.
Troubleshooting and FAQs
Common Issues and Solutions
No Data Output:
- Ensure the sensor is properly powered (5V to VCC and GND connected).
- Verify the UART or I2C connections are correct.
- Check the baud rate (default is 9600 for UART).
Inaccurate Readings:
- Allow the sensor to warm up for at least 3 minutes after powering on.
- Ensure the sensor is not exposed to extreme temperatures or humidity.
- Perform a calibration if readings remain inconsistent.
Communication Errors:
- Double-check the wiring for UART or I2C connections.
- Ensure the microcontroller's UART or I2C pins are not being used by other peripherals.
FAQs
Q: Can the CO2L sensor measure other gases?
A: No, the CO2L sensor is specifically designed to measure carbon dioxide (CO2) concentrations.
Q: How often should I calibrate the sensor?
A: Calibration frequency depends on the application, but it is recommended to calibrate the sensor every 6-12 months for optimal accuracy.
Q: Can I use the CO2L sensor outdoors?
A: The CO2L sensor is designed for indoor use. Outdoor use may expose it to extreme conditions that could affect its performance.
Q: What is the default communication protocol?
A: The default communication protocol for the CO2L sensor is UART. However, it also supports I2C if configured.
By following this documentation, you can effectively integrate and use the CO2L sensor in your projects.