How to Use 3.7V Li Battery: Examples, Pinouts, and Specs
Introduction
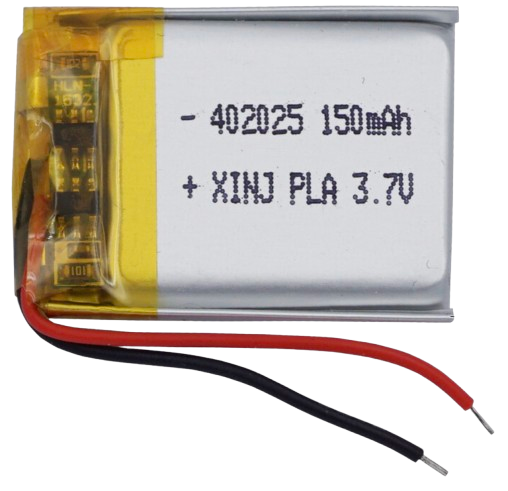
The 3.7V Li Battery is a rechargeable lithium-ion battery widely used in portable electronic devices due to its high energy density, lightweight design, and reliable performance. It provides a nominal voltage of 3.7 volts and is available in various capacities, making it suitable for applications ranging from smartphones and wearables to DIY electronics projects and robotics.
Explore Projects Built with 3.7V Li Battery


Explore Projects Built with 3.7V Li Battery
Common Applications and Use Cases
- Powering portable electronic devices (e.g., smartphones, tablets, cameras)
- DIY electronics projects and prototyping
- Robotics and small motorized systems
- Backup power supplies for microcontrollers and sensors
- Wearable technology and IoT devices
Technical Specifications
The following table outlines the key technical details of a typical 3.7V Li Battery:
| Parameter | Specification |
|---|---|
| Nominal Voltage | 3.7V |
| Full Charge Voltage | 4.2V |
| Discharge Cutoff Voltage | 2.5V - 3.0V (varies by manufacturer) |
| Capacity Range | 500mAh to 5000mAh (varies by model) |
| Chemistry | Lithium-Ion |
| Charging Current | Typically 0.5C to 1C of battery capacity |
| Discharge Current | Varies, typically 1C to 3C |
| Operating Temperature | 0°C to 45°C (charging), -20°C to 60°C (discharging) |
| Weight | Varies, typically 20g to 50g |
Pin Configuration and Descriptions
The 3.7V Li Battery typically has two terminals:
| Pin Name | Description |
|---|---|
| Positive (+) | The positive terminal of the battery, connected to the load or charging circuit. |
| Negative (-) | The negative terminal of the battery, connected to the ground of the circuit. |
Some batteries may include additional pins for features like temperature sensing or battery management system (BMS) communication.
Usage Instructions
How to Use the 3.7V Li Battery in a Circuit
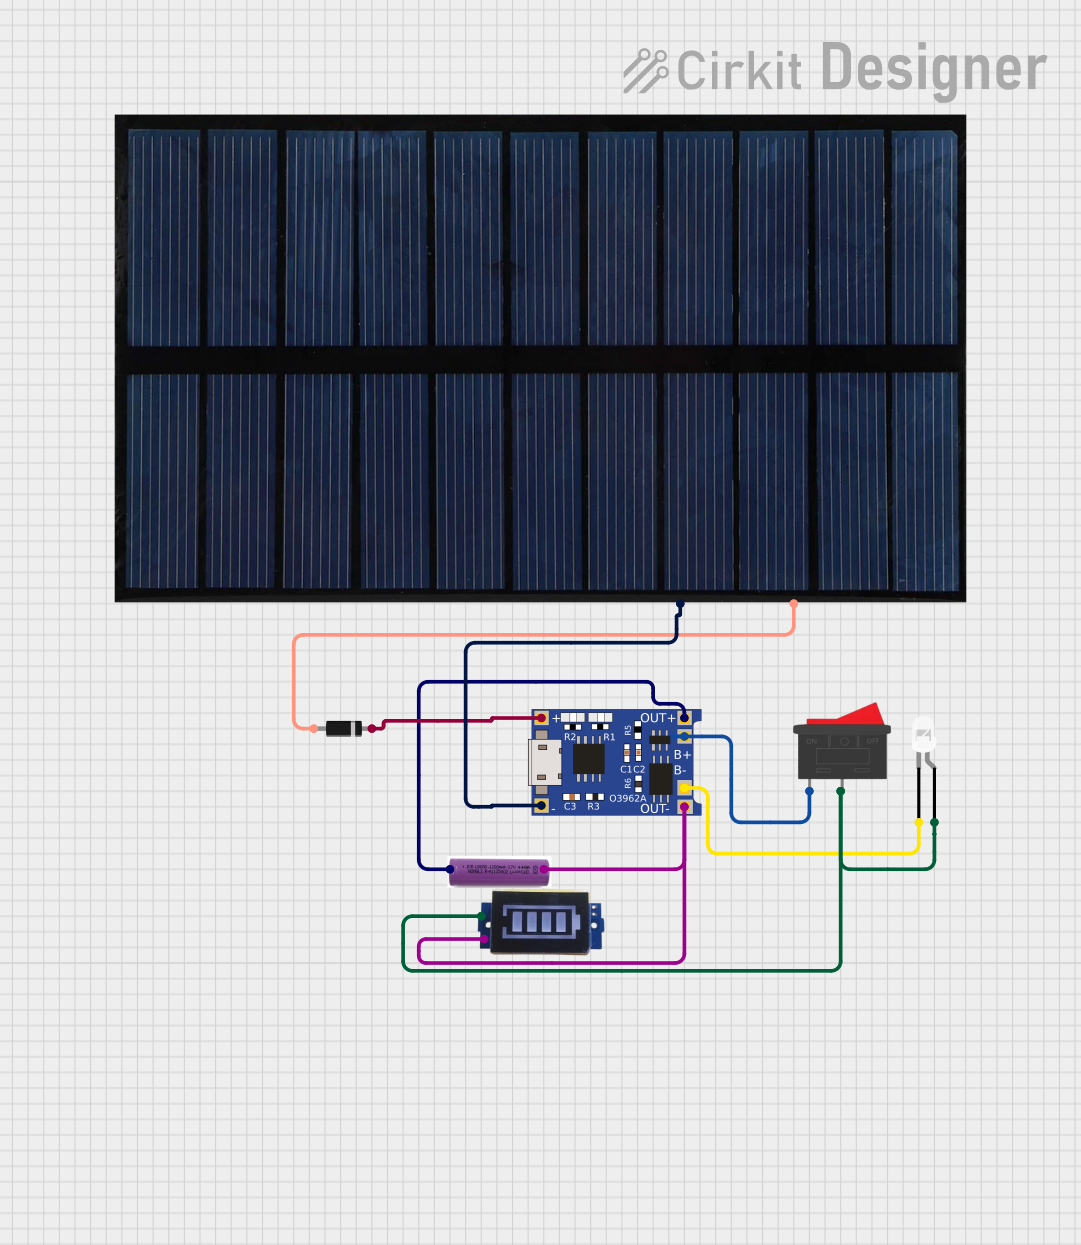
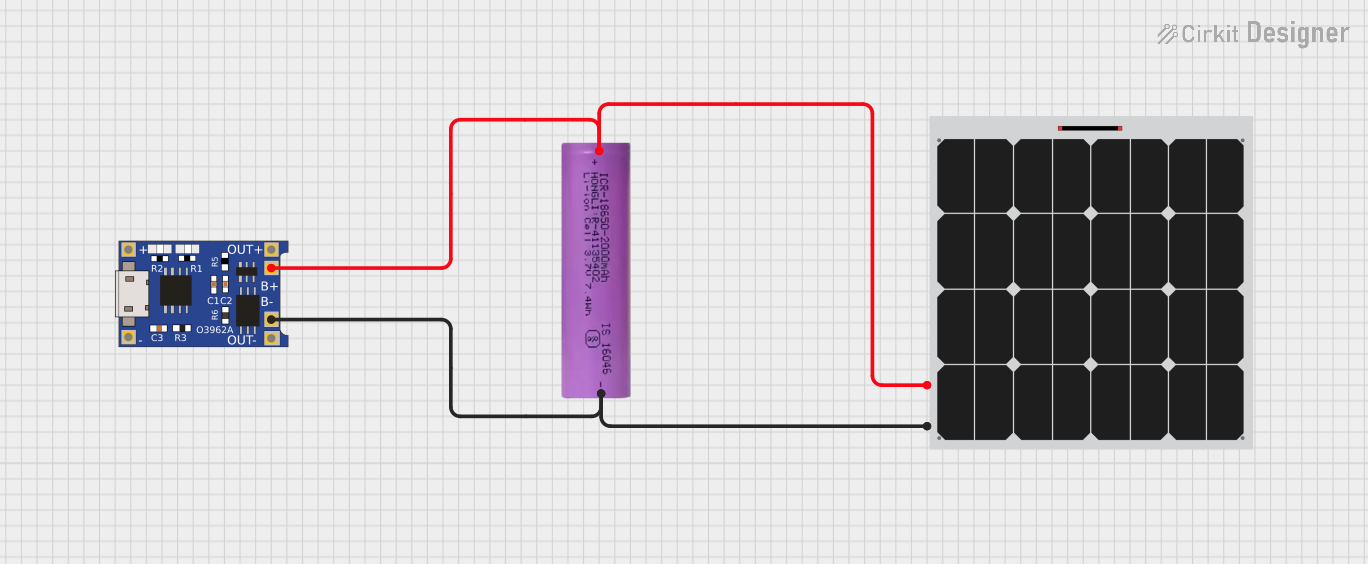
- Connection: Connect the positive terminal of the battery to the positive input of your circuit and the negative terminal to the ground.
- Charging: Use a dedicated lithium-ion battery charger module (e.g., TP4056) to safely charge the battery. Ensure the charging voltage does not exceed 4.2V.
- Protection: Use a battery protection circuit to prevent overcharging, over-discharging, and short circuits.
- Load Compatibility: Ensure the load current does not exceed the battery's maximum discharge current rating.
Important Considerations and Best Practices
- Avoid Overcharging: Overcharging can damage the battery and pose safety risks. Always use a charger with overcharge protection.
- Prevent Over-Discharging: Discharging below the cutoff voltage can permanently damage the battery. Use a low-voltage cutoff circuit if necessary.
- Temperature Management: Avoid exposing the battery to extreme temperatures, as this can reduce its lifespan and performance.
- Storage: Store the battery at a partial charge (around 40-60%) in a cool, dry place if not in use for extended periods.
- Polarity: Double-check the polarity before connecting the battery to a circuit to avoid damage.
Example: Using a 3.7V Li Battery with an Arduino UNO
To power an Arduino UNO with a 3.7V Li Battery, you can use a DC-DC boost converter to step up the voltage to 5V. Below is an example circuit and code:
Circuit Setup
- Connect the battery's positive terminal to the input of the boost converter.
- Connect the battery's negative terminal to the ground of the boost converter.
- Connect the output of the boost converter to the Arduino UNO's 5V and GND pins.
Example Code
// Example code to read a sensor value and send it via Serial Monitor
// Ensure the Arduino is powered by the 3.7V Li Battery through a boost converter

const int sensorPin = A0; // Analog pin connected to the sensor
int sensorValue = 0;      // Variable to store the sensor reading

void setup() {
  Serial.begin(9600); // Initialize serial communication at 9600 baud
}

void loop() {
  sensorValue = analogRead(sensorPin); // Read the sensor value
  Serial.print("Sensor Value: ");      // Print label to Serial Monitor
  Serial.println(sensorValue);         // Print the sensor value
  delay(1000);                         // Wait for 1 second before next reading
}
Troubleshooting and FAQs
Common Issues and Solutions
Battery Not Charging:
- Cause: Faulty charger or incorrect charging voltage.
- Solution: Verify the charger is functioning correctly and outputs 4.2V for charging.
Battery Drains Quickly:
- Cause: High load current or degraded battery capacity.
- Solution: Check the load current and replace the battery if it has reached the end of its lifespan.
Battery Overheats:
- Cause: Overcharging or excessive discharge current.
- Solution: Use a charger with overcharge protection and ensure the load current is within the battery's rating.
Arduino UNO Not Powering On:
- Cause: Insufficient voltage or current from the battery.
- Solution: Use a DC-DC boost converter to step up the voltage to 5V and ensure the battery can supply sufficient current.
FAQs
Q: Can I connect a 3.7V Li Battery directly to an Arduino UNO?
A: No, the Arduino UNO requires a 5V input. Use a DC-DC boost converter to step up the battery voltage to 5V.
Q: How do I know when the battery is fully charged?
A: Most chargers have an indicator LED that turns green or off when the battery is fully charged.
Q: Can I use a 3.7V Li Battery in parallel to increase capacity?
A: Yes, but ensure the batteries are of the same type, capacity, and charge level. Use a battery management system (BMS) for safety.
Q: Is it safe to solder directly onto the battery terminals?
A: No, soldering directly onto the terminals can damage the battery. Use pre-soldered tabs or connectors instead.