How to Use pH Meter V1.1: Examples, Pinouts, and Specs
Introduction
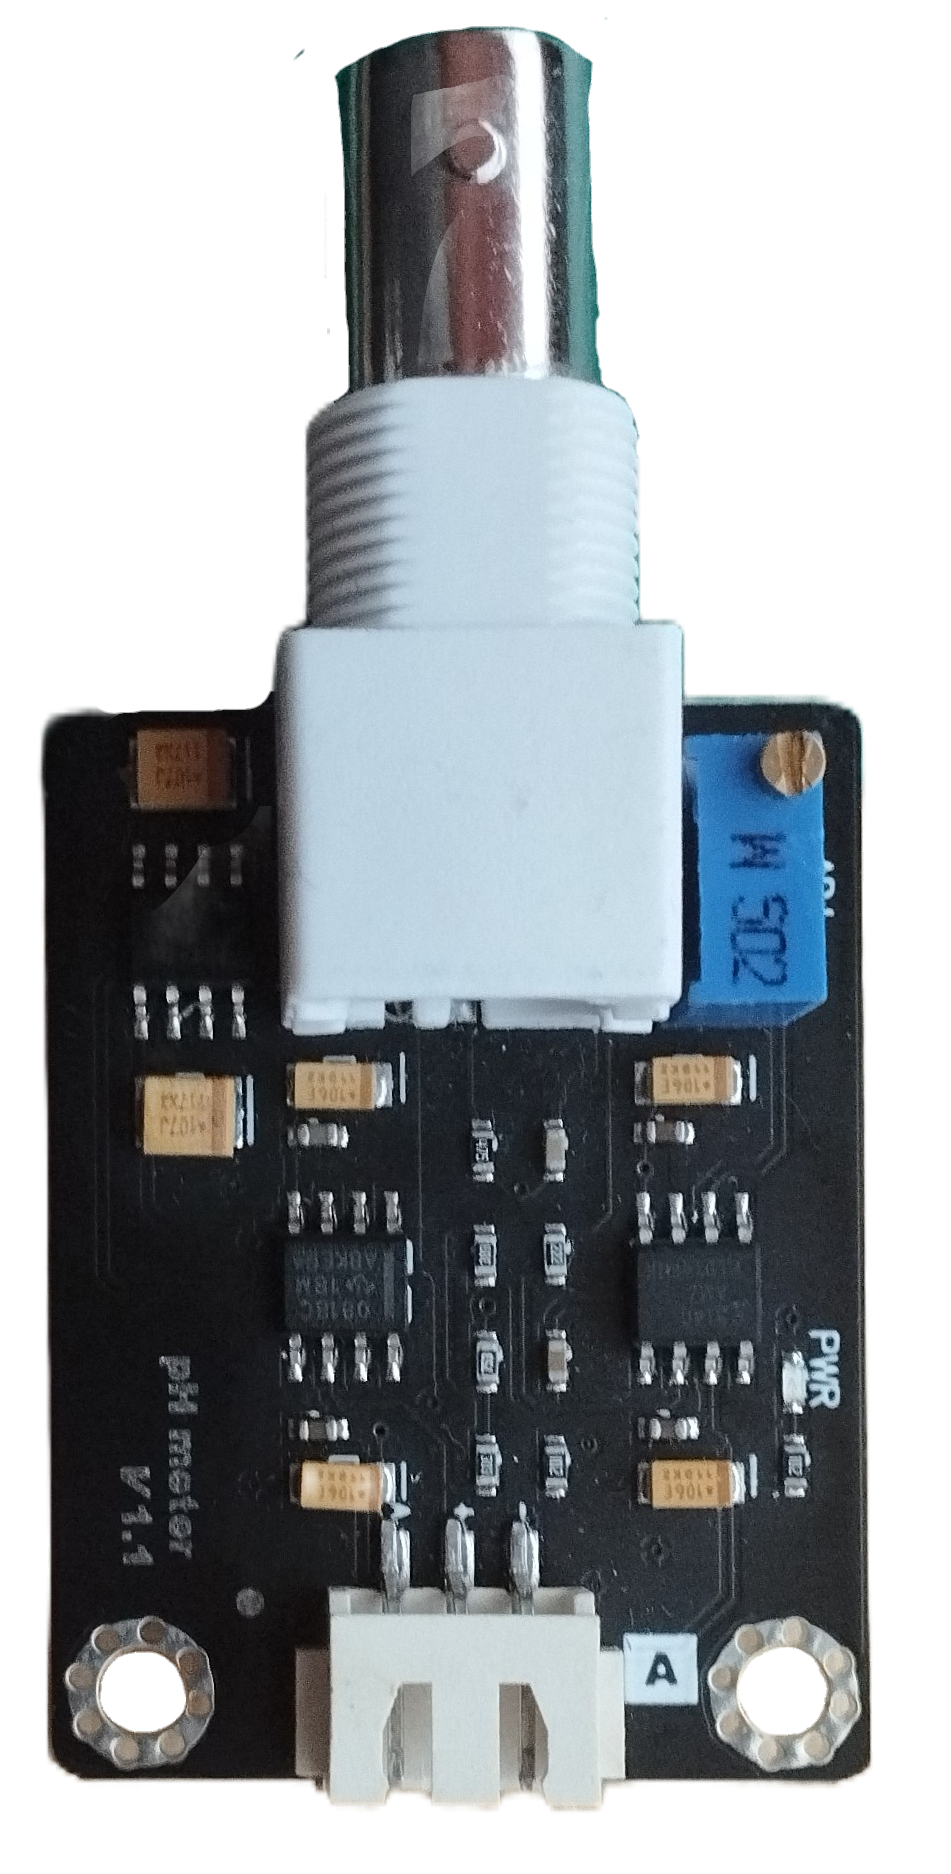
The pH Meter V1.1 is an electronic device designed to measure the acidity or alkalinity of a liquid solution. It is commonly used in various applications such as laboratory research, water quality monitoring, aquarium maintenance, and hydroponics. The device typically employs a glass electrode to provide accurate pH readings, which are essential for ensuring the proper chemical balance in different environments.
Explore Projects Built with pH Meter V1.1
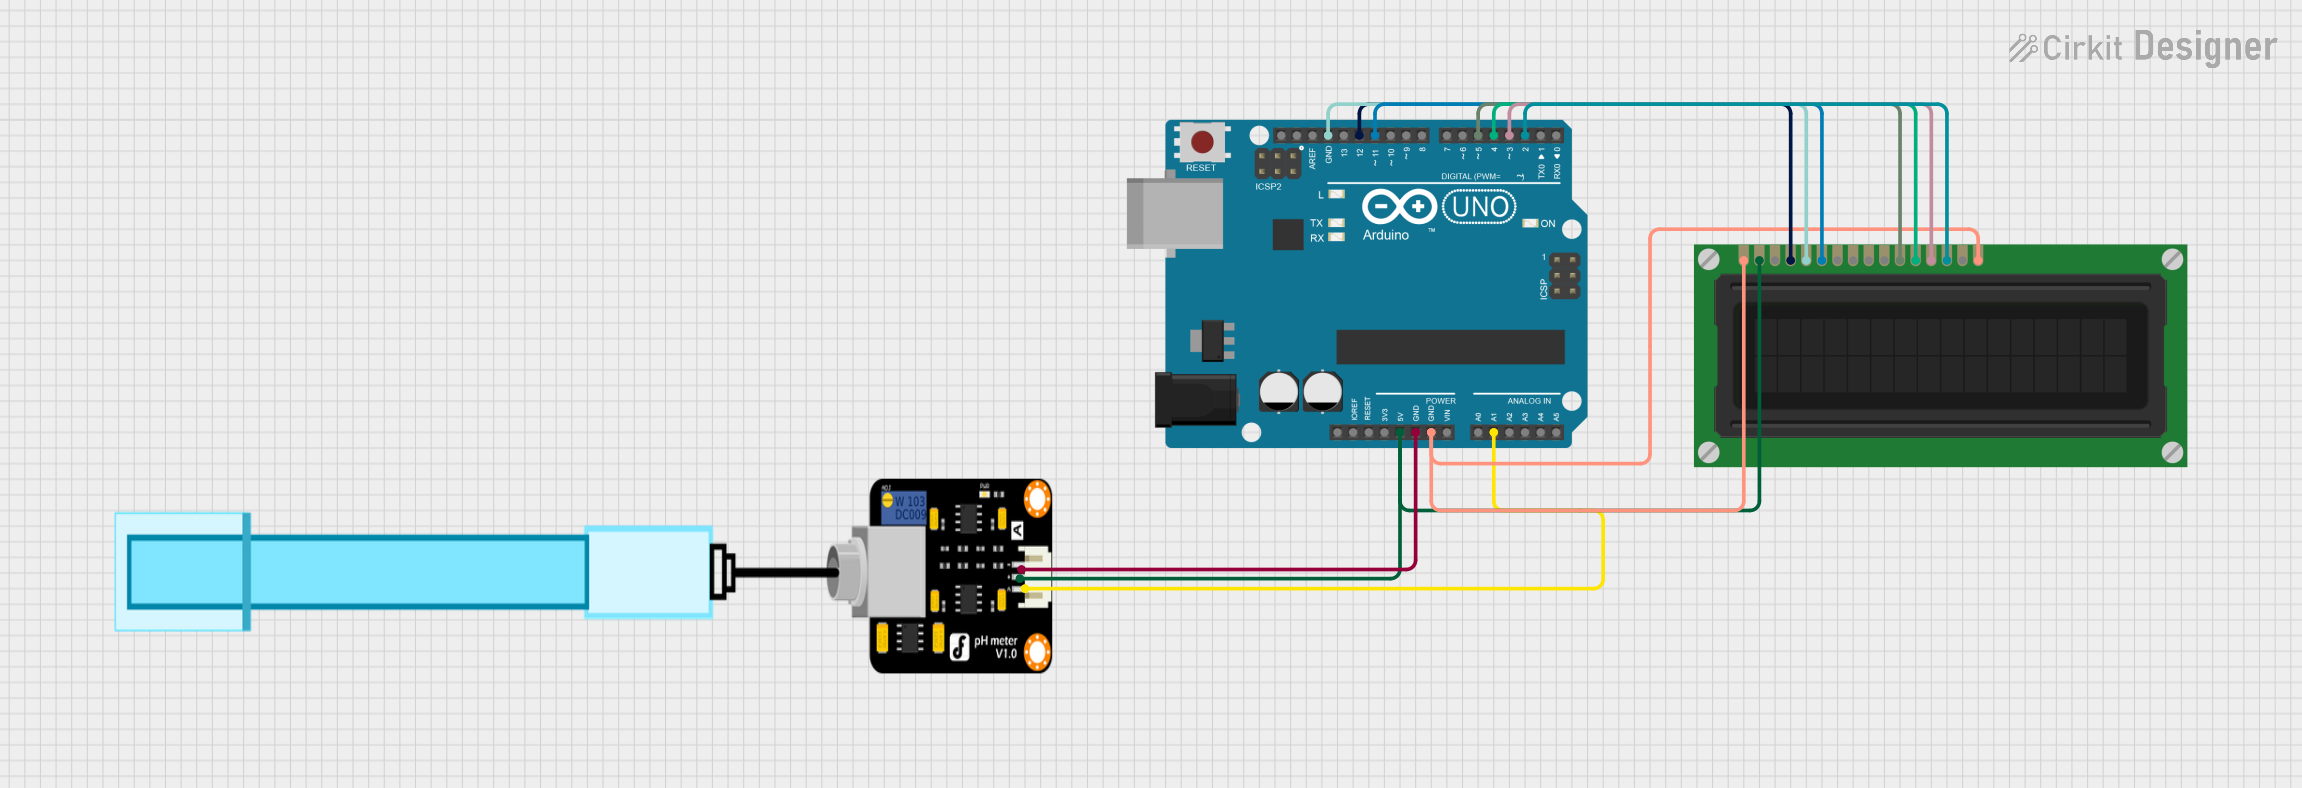
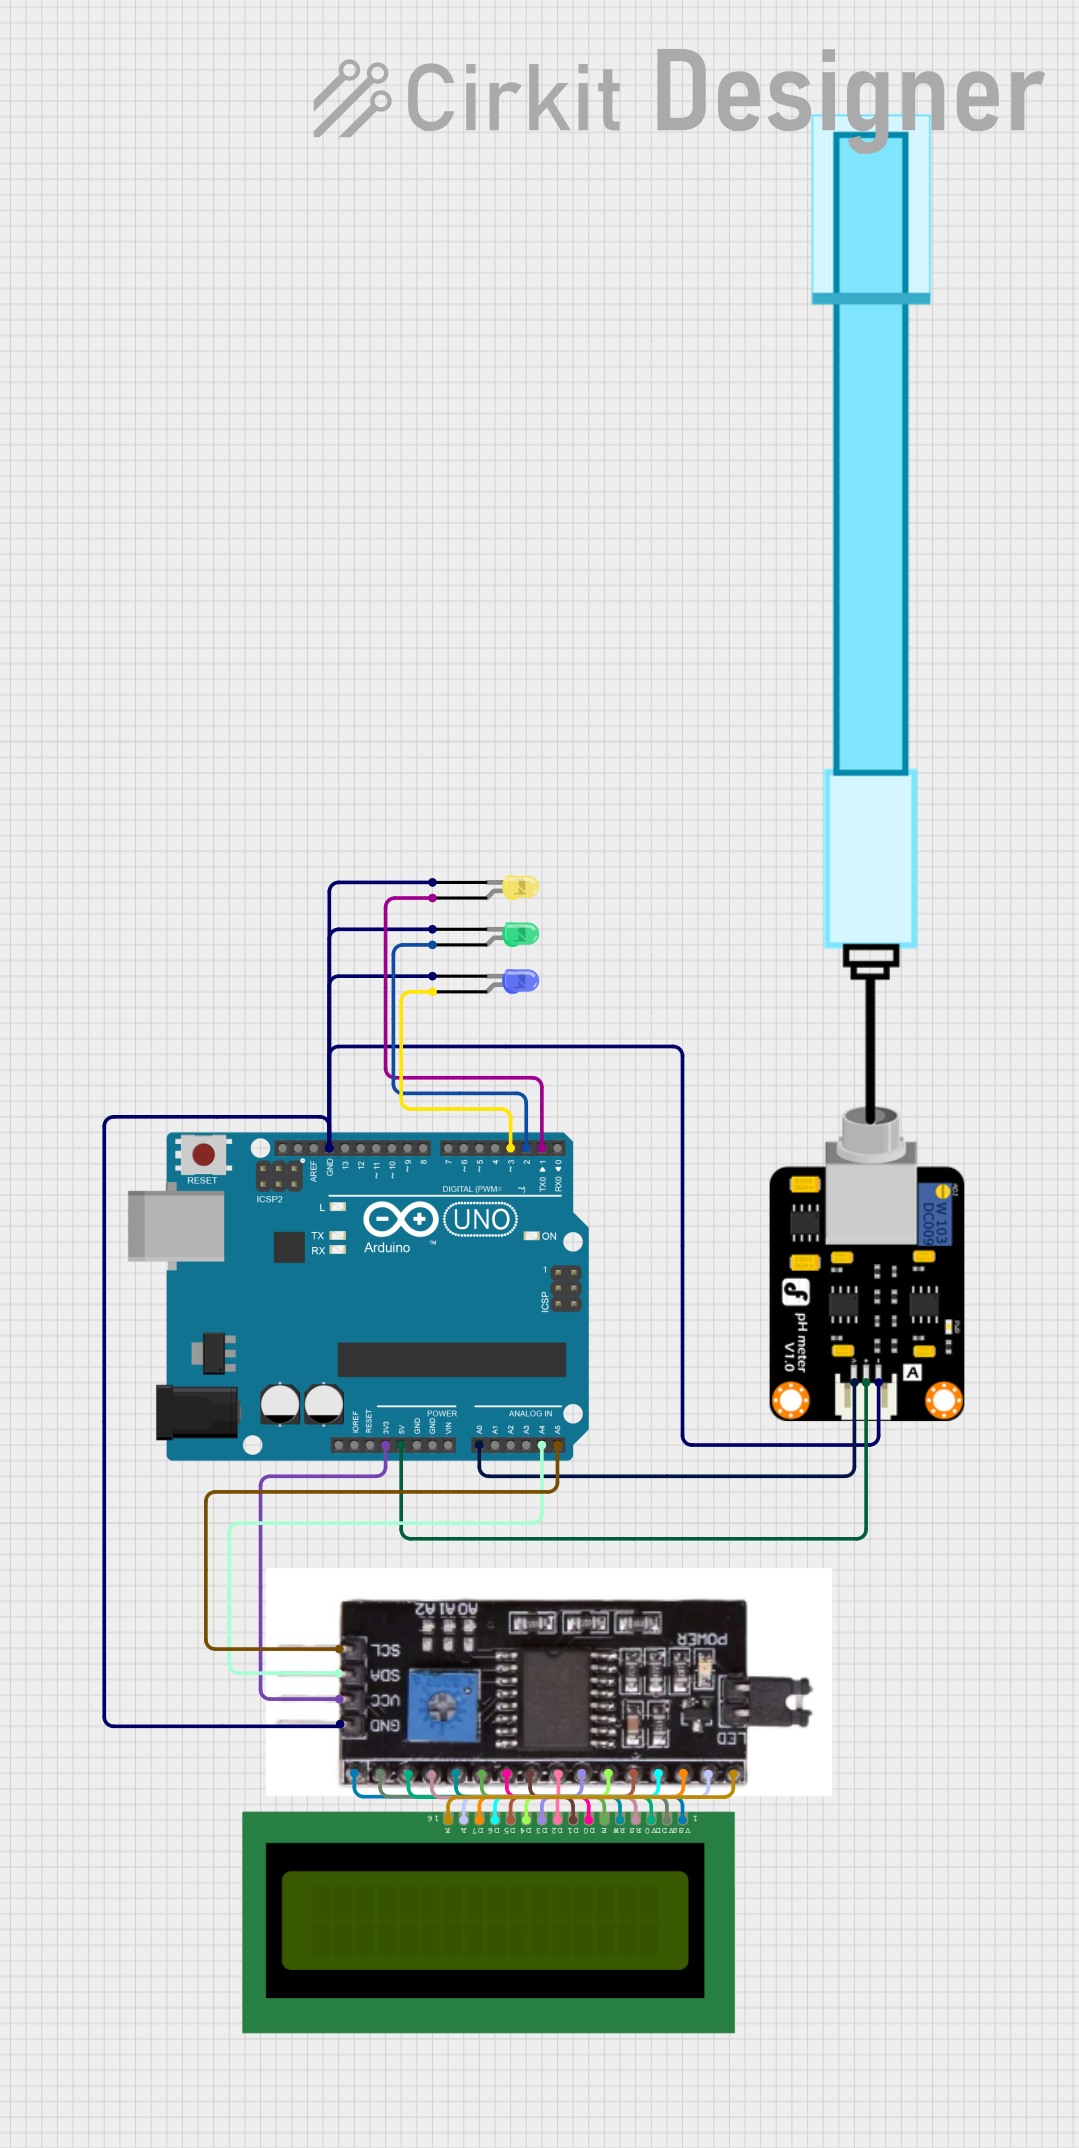
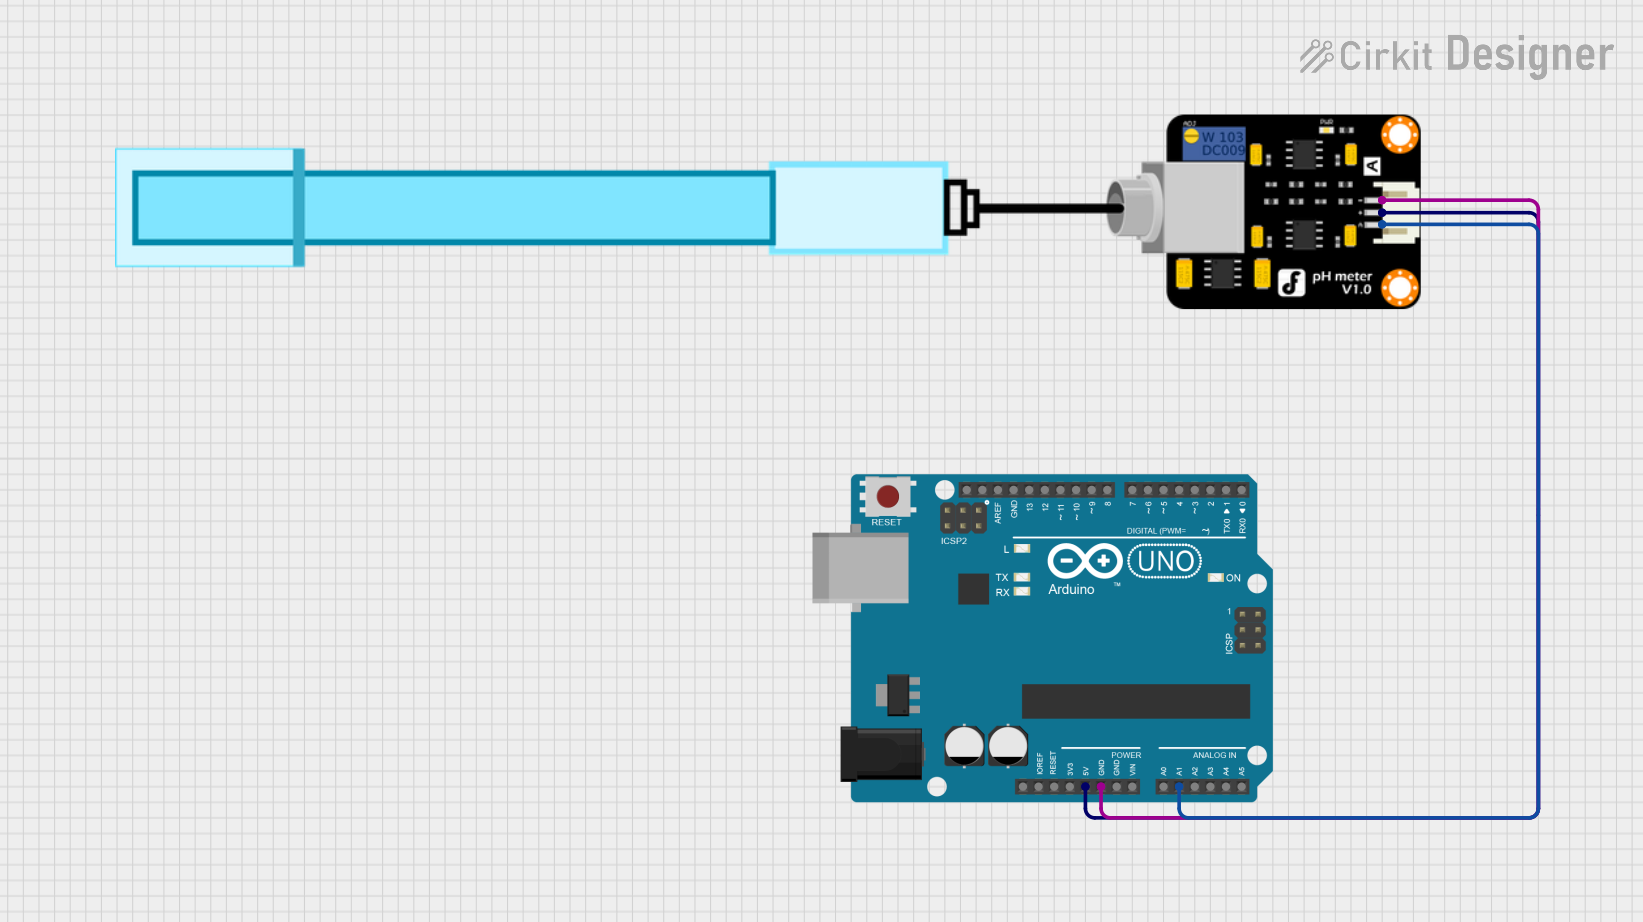
Explore Projects Built with pH Meter V1.1
Technical Specifications
Key Technical Details
- Measurement Range: 0-14 pH
- Resolution: 0.01 pH
- Accuracy: ±0.1 pH
- Operating Temperature: 0°C to 60°C
- Input Voltage: 3.3V to 5.5V DC
- Output: Analog voltage proportional to pH value
Pin Configuration and Descriptions
| Pin Number | Pin Name | Description |
|---|---|---|
| 1 | V+ | Power supply input (3.3V to 5.5V DC) |
| 2 | GND | Ground |
| 3 | PO | Analog pH value output |
| 4 | DO | Digital output (not used in this version) |
| 5 | TEMP | Temperature sensor input (optional) |
Usage Instructions
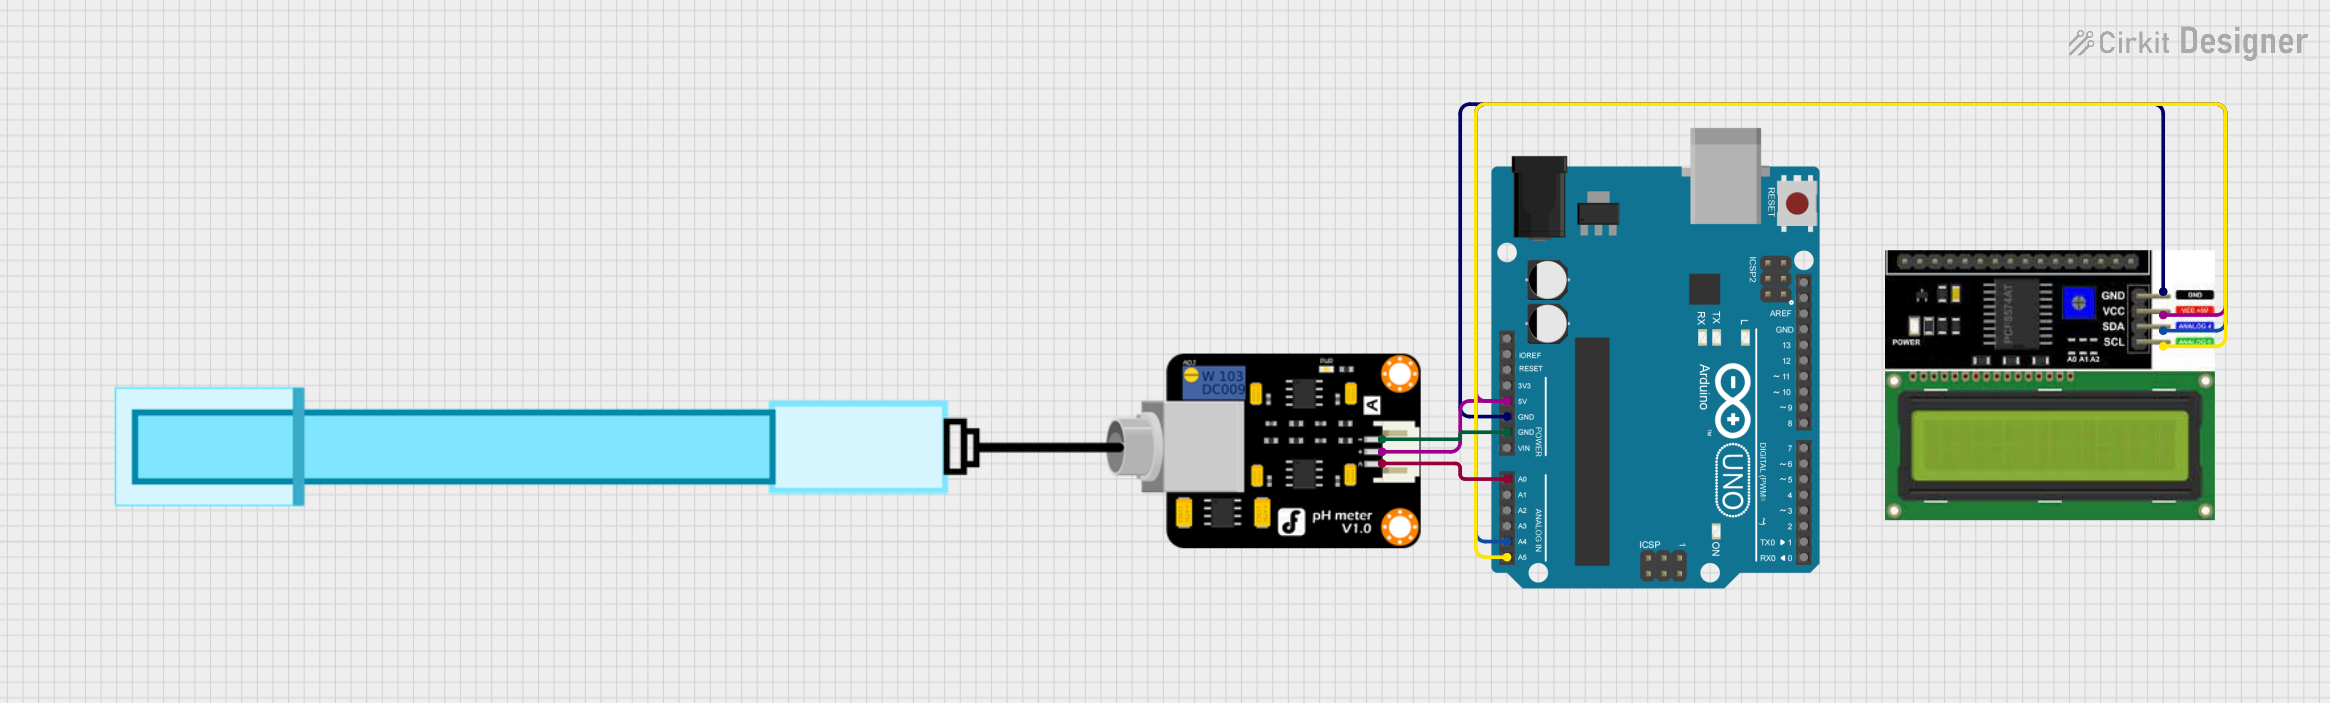
Connecting to a Circuit
- Connect the V+ pin to a 3.3V or 5V power supply.
- Connect the GND pin to the ground of the power supply.
- Connect the PO pin to an analog input on your microcontroller, such as an Arduino UNO.
- (Optional) Connect the TEMP pin to an additional analog input if temperature compensation is required.
Calibration
Before using the pH Meter V1.1, it is crucial to calibrate it with standard pH buffer solutions. Follow the calibration procedure provided by the manufacturer or use a general calibration method suitable for pH meters.
Best Practices
- Always rinse the electrode with distilled water before and after use to prevent contamination.
- Store the electrode in a proper storage solution when not in use.
- Avoid exposing the electrode to extreme temperatures and direct sunlight.
- Handle the glass electrode with care to prevent breakage.
Example Code for Arduino UNO
// Define the analog input pin for the pH Meter V1.1
const int pHMeterPin = A0;

void setup() {
  Serial.begin(9600); // Start serial communication at 9600 baud rate
}

void loop() {
  int sensorValue = analogRead(pHMeterPin); // Read the analog value from sensor
  float voltage = sensorValue * (5.0 / 1023.0); // Convert to voltage
  float pH = (voltage * 3.5) + 0.5; // Convert voltage to pH value (example equation)

  Serial.print("pH value: ");
  Serial.println(pH); // Print the pH value to the serial monitor

  delay(1000); // Wait for a second before reading again
}
Troubleshooting and FAQs
Common Issues
- Inaccurate Readings: Ensure the pH meter is properly calibrated. Check for any residue on the electrode and clean it if necessary.
- No Readings: Verify that all connections are secure and the power supply is within the specified voltage range.
- Drifting Readings: This could be due to a temperature effect. Use the TEMP pin for temperature compensation if needed.
Solutions and Tips
- Calibration: Perform regular calibration with standard buffer solutions to maintain accuracy.
- Cleaning: Use distilled water to clean the electrode and avoid touching the glass bulb with your fingers.
- Storage: When not in use, store the pH meter with the electrode immersed in a suitable storage solution.
FAQs
Q: Can the pH Meter V1.1 be used in strong acid or base solutions? A: Yes, but ensure that the electrode is thoroughly rinsed after use to prevent damage.
Q: How often should I calibrate the pH Meter V1.1? A: Calibration frequency depends on usage, but it is generally recommended to calibrate before each critical measurement session.
Q: What should I do if the readings are inconsistent? A: Inconsistent readings can be due to a variety of factors, including a dirty electrode, improper calibration, or electrical interference. Address these issues to improve consistency.
For further assistance, please refer to the manufacturer's manual or contact technical support.