Cirkit Designer Logo
Cirkit Designer
Your all-in-one circuit design IDE
Home / 
Component Documentation

How to Use Cargador : Examples, Pinouts, and Specs

Image of Cargador
Cirkit Designer LogoDesign with Cargador in Cirkit Designer

Introduction

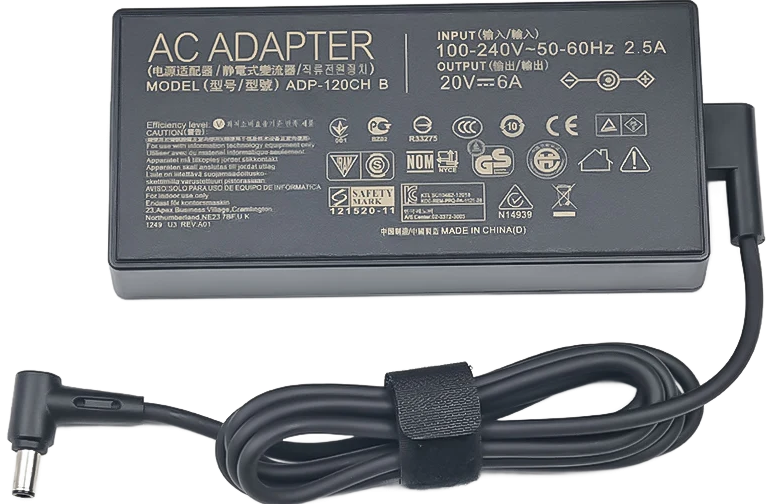
The Cargador is a versatile device used to supply electrical energy to recharge batteries or power electronic devices. It is an essential component in various applications, ranging from consumer electronics to industrial equipment. The Cargador ensures that your devices remain operational by providing a reliable power source.

Explore Projects Built with Cargador

Use Cirkit Designer to design, explore, and prototype these projects online. Some projects support real-time simulation. Click "Open Project" to start designing instantly!
Battery-Powered USB Charger with LED Indicator and DC Motor
Image of Copy of Hand Crank mobile charger : A project utilizing Cargador  in a practical application
This circuit converts AC power to DC using a bridge rectifier and regulates the voltage to 5V with a 7805 voltage regulator. It powers a USB port and indicates power status with an LED, while also providing a charging interface through a multi-charging cable.
Cirkit Designer LogoOpen Project in Cirkit Designer
Solar and Wind Energy Harvesting System with Charge Controller and Inverter
Image of bolito: A project utilizing Cargador  in a practical application
This circuit is designed for a renewable energy system that integrates solar and wind power generation. It includes a solar and wind charge controller connected to a solar panel and a lantern vertical wind turbine for energy harvesting, a 12V 200Ah battery for energy storage, and a dump load for excess energy dissipation. The system also features a 12V inverter to convert stored DC power to AC, powering an outlet and a wireless charger for end-use applications.
Cirkit Designer LogoOpen Project in Cirkit Designer
Arduino UNO Bluetooth-Controlled Motor Driver Circuit
Image of Car: A project utilizing Cargador  in a practical application
This circuit is a Bluetooth-controlled motor driver system using an Arduino UNO. The Arduino UNO interfaces with an HC-05 Bluetooth module for wireless communication and controls two motors via an H-bridge motor driver. The system is powered by a 9V battery, and the motors are driven by the H-bridge based on commands received through the Bluetooth module.
Cirkit Designer LogoOpen Project in Cirkit Designer
ESP32-Powered Wi-Fi Controlled Robotic Car with OLED Display and Ultrasonic Sensor
Image of playbot: A project utilizing Cargador  in a practical application
This circuit is a battery-powered system featuring an ESP32 microcontroller that controls an OLED display, a motor driver for two hobby motors, an ultrasonic sensor for distance measurement, and a DFPlayer Mini for audio output through a loudspeaker. The TP4056 module manages battery charging, and a step-up boost converter provides a stable 5V supply to the components.
Cirkit Designer LogoOpen Project in Cirkit Designer

Explore Projects Built with Cargador

Use Cirkit Designer to design, explore, and prototype these projects online. Some projects support real-time simulation. Click "Open Project" to start designing instantly!
Image of Copy of Hand Crank mobile charger : A project utilizing Cargador  in a practical application
Battery-Powered USB Charger with LED Indicator and DC Motor
This circuit converts AC power to DC using a bridge rectifier and regulates the voltage to 5V with a 7805 voltage regulator. It powers a USB port and indicates power status with an LED, while also providing a charging interface through a multi-charging cable.
Cirkit Designer LogoOpen Project in Cirkit Designer
Image of bolito: A project utilizing Cargador  in a practical application
Solar and Wind Energy Harvesting System with Charge Controller and Inverter
This circuit is designed for a renewable energy system that integrates solar and wind power generation. It includes a solar and wind charge controller connected to a solar panel and a lantern vertical wind turbine for energy harvesting, a 12V 200Ah battery for energy storage, and a dump load for excess energy dissipation. The system also features a 12V inverter to convert stored DC power to AC, powering an outlet and a wireless charger for end-use applications.
Cirkit Designer LogoOpen Project in Cirkit Designer
Image of Car: A project utilizing Cargador  in a practical application
Arduino UNO Bluetooth-Controlled Motor Driver Circuit
This circuit is a Bluetooth-controlled motor driver system using an Arduino UNO. The Arduino UNO interfaces with an HC-05 Bluetooth module for wireless communication and controls two motors via an H-bridge motor driver. The system is powered by a 9V battery, and the motors are driven by the H-bridge based on commands received through the Bluetooth module.
Cirkit Designer LogoOpen Project in Cirkit Designer
Image of playbot: A project utilizing Cargador  in a practical application
ESP32-Powered Wi-Fi Controlled Robotic Car with OLED Display and Ultrasonic Sensor
This circuit is a battery-powered system featuring an ESP32 microcontroller that controls an OLED display, a motor driver for two hobby motors, an ultrasonic sensor for distance measurement, and a DFPlayer Mini for audio output through a loudspeaker. The TP4056 module manages battery charging, and a step-up boost converter provides a stable 5V supply to the components.
Cirkit Designer LogoOpen Project in Cirkit Designer

Common Applications and Use Cases

  • Consumer Electronics: Charging smartphones, tablets, and laptops.
  • Industrial Equipment: Powering tools and machinery.
  • Automotive: Charging car batteries and powering in-car electronics.
  • Renewable Energy Systems: Charging batteries from solar panels or wind turbines.

Technical Specifications

The following tables provide detailed technical specifications and pin configurations for the Cargador.

Key Technical Details

Parameter Value
Input Voltage 100-240V AC
Output Voltage 5V, 9V, 12V, 19V DC
Output Current 1A, 2A, 3A, 5A
Power Rating Up to 100W
Efficiency >85%
Operating Temperature -10°C to 50°C
Storage Temperature -20°C to 70°C
Dimensions 100mm x 50mm x 30mm
Weight 150g

Pin Configuration and Descriptions

Pin Number Pin Name Description
1 AC_L AC Live input
2 AC_N AC Neutral input
3 GND Ground
4 Vout+ Positive DC output
5 Vout- Negative DC output
6 LED Status LED indicator (optional)

Usage Instructions

How to Use the Cargador in a Circuit

  1. Connect the AC Input:

    • Connect the AC_L pin to the live wire of the AC power source.
    • Connect the AC_N pin to the neutral wire of the AC power source.
  2. Connect the DC Output:

    • Connect the Vout+ pin to the positive terminal of the device or battery.
    • Connect the Vout- pin to the negative terminal of the device or battery.
  3. Grounding:

    • Ensure the GND pin is connected to the ground of the circuit to avoid any potential differences.
  4. Status LED (Optional):

    • If using the status LED, connect it to the LED pin to monitor the charging status.

Important Considerations and Best Practices

  • Voltage Matching: Ensure the output voltage of the Cargador matches the voltage requirements of the device or battery being charged.
  • Current Rating: Verify that the Cargador's current rating is sufficient for the device or battery to prevent overheating or damage.
  • Heat Dissipation: Place the Cargador in a well-ventilated area to allow for proper heat dissipation.
  • Polarity: Double-check the polarity of the connections to avoid damaging the device or battery.

Troubleshooting and FAQs

Common Issues Users Might Face

  1. No Output Voltage:

    • Solution: Check the AC input connections and ensure the power source is active. Verify that the Cargador is not damaged.
  2. Overheating:

    • Solution: Ensure the Cargador is not overloaded. Check for proper ventilation and reduce the load if necessary.
  3. LED Not Lighting Up:

    • Solution: Verify the LED connections. Ensure the LED is functional and correctly oriented.
  4. Device Not Charging:

    • Solution: Check the output voltage and current ratings. Ensure they match the device's requirements. Verify the connections and polarity.

FAQs

Q1: Can I use the Cargador to charge different types of batteries?

  • A1: Yes, the Cargador can charge various types of batteries, provided the output voltage and current ratings match the battery specifications.

Q2: Is the Cargador compatible with Arduino UNO?

  • A2: Yes, the Cargador can be used to power an Arduino UNO. Ensure the output voltage is set to 5V and the current rating is sufficient.

Q3: How do I know if the Cargador is working correctly?

  • A3: The status LED (if connected) will indicate the charging status. Additionally, you can measure the output voltage with a multimeter.

Q4: Can I use the Cargador in outdoor environments?

  • A4: The Cargador is designed for indoor use. If outdoor use is necessary, ensure it is protected from moisture and extreme temperatures.

Example Code for Arduino UNO

Below is an example code to use the Cargador with an Arduino UNO to power an LED.

// Example code to power an LED using the Cargador and Arduino UNO

const int ledPin = 13; // Pin connected to the LED

void setup() {
  pinMode(ledPin, OUTPUT); // Set the LED pin as an output
}

void loop() {
  digitalWrite(ledPin, HIGH); // Turn the LED on
  delay(1000); // Wait for 1 second
  digitalWrite(ledPin, LOW); // Turn the LED off
  delay(1000); // Wait for 1 second
}

In this example, the Cargador provides power to the Arduino UNO, which in turn controls an LED connected to pin 13. The LED will blink on and off every second.


This documentation provides a comprehensive guide to understanding, using, and troubleshooting the Cargador. Whether you are a beginner or an experienced user, this guide aims to help you make the most of this essential electronic component.