Cirkit Designer Logo
Cirkit Designer
Your all-in-one circuit design IDE
Home / 
Component Documentation

How to Use Automation pHAT: Examples, Pinouts, and Specs

Image of Automation pHAT
Cirkit Designer LogoDesign with Automation pHAT in Cirkit Designer

Introduction

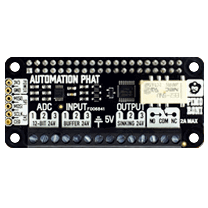
The Automation pHAT, manufactured by Pimoroni, is a versatile add-on board designed for Raspberry Pi. It is tailored for automation projects, offering a range of inputs and outputs to control and monitor devices. With its GPIO pins, analog inputs, relays, and other features, the Automation pHAT simplifies the process of integrating sensors, actuators, and other components into your projects.

Explore Projects Built with Automation pHAT

Use Cirkit Designer to design, explore, and prototype these projects online. Some projects support real-time simulation. Click "Open Project" to start designing instantly!
ESP32-Based Aquaponics Monitoring System with Multi-Parameter Sensors and Relay Control
Image of 2110253_ Aquaponics Circuit Diagram: A project utilizing Automation pHAT in a practical application
This circuit is designed for an aquaponics system monitoring application. It uses an Arduino Nano ESP32 to read data from various sensors including temperature, humidity (AHT10), pH, TDS (Total Dissolved Solids), and dissolved oxygen, and controls a water pump via a relay based on the water temperature. The system is powered by a lipo battery through a buck converter, ensuring stable voltage supply to the sensors and the relay controlling the pump.
Cirkit Designer LogoOpen Project in Cirkit Designer
ESP8266 Controlled PH Meter with LCD Display and Pneumatic Solenoid Valve Activation
Image of ph: A project utilizing Automation pHAT in a practical application
This circuit features an ESP-8266 microcontroller interfaced with a PH Meter for sensing pH levels, an LCD Display for output, and a 5V relay to control a 12V pneumatic solenoid valve based on the microcontroller's logic. The ESP-8266 reads the pH value from the PH Meter and likely displays it on the LCD. Power regulation is managed by a voltage regulator that steps down 12V to 5V and 3V required by the various components, and a 12V 5A power supply is used to provide power to the circuit, which is also connected to a 220V AC source.
Cirkit Designer LogoOpen Project in Cirkit Designer
Raspberry Pi and ADS1115-Based pH Monitoring System with Relay Control
Image of ORP & PH & RELAY: A project utilizing Automation pHAT in a practical application
This circuit involves two Raspberry Pi 3B units interfacing with multiple pH Meter V1.1 sensors and ADS1115 ADCs to measure pH levels. Additionally, two 4-channel relay modules are controlled by the Raspberry Pis to manage external devices, likely for automation purposes.
Cirkit Designer LogoOpen Project in Cirkit Designer
ESP32-Based Smart Irrigation and Environmental Monitoring System
Image of Skripsi: A project utilizing Automation pHAT in a practical application
This is an automated environmental control system for plant growth that uses an ESP32 to monitor soil moisture and pH levels, and to manage irrigation through solenoid valves. The system aims to maintain optimal growing conditions by adjusting watering schedules based on sensor inputs.
Cirkit Designer LogoOpen Project in Cirkit Designer

Explore Projects Built with Automation pHAT

Use Cirkit Designer to design, explore, and prototype these projects online. Some projects support real-time simulation. Click "Open Project" to start designing instantly!
Image of 2110253_ Aquaponics Circuit Diagram: A project utilizing Automation pHAT in a practical application
ESP32-Based Aquaponics Monitoring System with Multi-Parameter Sensors and Relay Control
This circuit is designed for an aquaponics system monitoring application. It uses an Arduino Nano ESP32 to read data from various sensors including temperature, humidity (AHT10), pH, TDS (Total Dissolved Solids), and dissolved oxygen, and controls a water pump via a relay based on the water temperature. The system is powered by a lipo battery through a buck converter, ensuring stable voltage supply to the sensors and the relay controlling the pump.
Cirkit Designer LogoOpen Project in Cirkit Designer
Image of ph: A project utilizing Automation pHAT in a practical application
ESP8266 Controlled PH Meter with LCD Display and Pneumatic Solenoid Valve Activation
This circuit features an ESP-8266 microcontroller interfaced with a PH Meter for sensing pH levels, an LCD Display for output, and a 5V relay to control a 12V pneumatic solenoid valve based on the microcontroller's logic. The ESP-8266 reads the pH value from the PH Meter and likely displays it on the LCD. Power regulation is managed by a voltage regulator that steps down 12V to 5V and 3V required by the various components, and a 12V 5A power supply is used to provide power to the circuit, which is also connected to a 220V AC source.
Cirkit Designer LogoOpen Project in Cirkit Designer
Image of ORP & PH & RELAY: A project utilizing Automation pHAT in a practical application
Raspberry Pi and ADS1115-Based pH Monitoring System with Relay Control
This circuit involves two Raspberry Pi 3B units interfacing with multiple pH Meter V1.1 sensors and ADS1115 ADCs to measure pH levels. Additionally, two 4-channel relay modules are controlled by the Raspberry Pis to manage external devices, likely for automation purposes.
Cirkit Designer LogoOpen Project in Cirkit Designer
Image of Skripsi: A project utilizing Automation pHAT in a practical application
ESP32-Based Smart Irrigation and Environmental Monitoring System
This is an automated environmental control system for plant growth that uses an ESP32 to monitor soil moisture and pH levels, and to manage irrigation through solenoid valves. The system aims to maintain optimal growing conditions by adjusting watering schedules based on sensor inputs.
Cirkit Designer LogoOpen Project in Cirkit Designer

Common Applications and Use Cases

  • Home automation systems (e.g., controlling lights, fans, or appliances)
  • Industrial monitoring and control
  • Data logging from sensors
  • Prototyping automation solutions
  • Educational projects involving Raspberry Pi and IoT

Technical Specifications

The Automation pHAT is packed with features that make it ideal for automation tasks. Below are its key technical specifications:

General Specifications

  • Compatible Boards: Raspberry Pi (all 40-pin models)
  • Power Supply: 5V (via Raspberry Pi GPIO header)
  • Dimensions: 65mm x 30mm x 8mm

Features

  • 1x Relay: Capable of switching up to 24V DC or 2A
  • 3x 12-bit ADC Inputs: For reading analog sensors (0-24V range)
  • 3x Buffered Outputs: 24V tolerant, 500mA sink per channel
  • 3x LED Indicators: For visual feedback on outputs
  • 1x Screw Terminal Block: For secure wiring connections
  • GPIO Breakout: Access to Raspberry Pi GPIO pins

Pin Configuration and Descriptions

The Automation pHAT connects to the Raspberry Pi via the GPIO header. Below is the pin configuration:

Pin Name Description
1 5V Power Supplies power to the Automation pHAT
2 GND Ground connection
3 Relay COM Common terminal for the relay
4 Relay NO Normally open terminal for the relay
5 ADC1 Analog input channel 1 (0-24V)
6 ADC2 Analog input channel 2 (0-24V)
7 ADC3 Analog input channel 3 (0-24V)
8 Output 1 Buffered output channel 1
9 Output 2 Buffered output channel 2
10 Output 3 Buffered output channel 3

Usage Instructions

The Automation pHAT is easy to set up and use with a Raspberry Pi. Follow the steps below to get started:

Installation

  1. Attach the Automation pHAT: Align the pHAT with the Raspberry Pi's GPIO header and press it down gently.
  2. Install the Pimoroni Library:
    • Open a terminal on your Raspberry Pi.
    • Run the following command to install the required Python library:
      curl -sS https://get.pimoroni.com/automationphat | bash
      
    • Follow the on-screen instructions to complete the installation.

Example Code

Below is an example Python script to control the relay and read an analog input:

import automationhat
import time

Ensure the Automation pHAT is detected

if not automationhat.is_automation_hat(): print("Automation pHAT not detected. Please check the connection.") exit()

Turn on the relay for 5 seconds

print("Turning on the relay...") automationhat.relay.one.on() time.sleep(5) automationhat.relay.one.off() print("Relay turned off.")

Read and display the value of ADC channel 1

adc_value = automationhat.analog.one.read() print(f"ADC Channel 1 Value: {adc_value:.2f}V")


Important Considerations and Best Practices

  • Voltage Limits: Ensure that the input voltage to the ADC channels does not exceed 24V.
  • Relay Ratings: Do not exceed the relay's maximum switching capacity of 24V DC or 2A.
  • Secure Connections: Use the screw terminal block for reliable and secure wiring.
  • Library Updates: Regularly update the Pimoroni library to access the latest features and bug fixes.

Troubleshooting and FAQs

Common Issues

  1. Automation pHAT Not Detected:

    • Ensure the pHAT is properly seated on the Raspberry Pi GPIO header.
    • Verify that the Pimoroni library is installed correctly.
  2. Relay Not Switching:

    • Check the wiring to the relay terminals.
    • Ensure the load connected to the relay is within its rated capacity.
  3. Incorrect ADC Readings:

    • Verify that the input voltage to the ADC channels is within the 0-24V range.
    • Check for loose or faulty connections to the analog sensors.

FAQs

Q: Can I use the Automation pHAT with a Raspberry Pi Zero?
A: Yes, the Automation pHAT is compatible with all 40-pin Raspberry Pi models, including the Raspberry Pi Zero.

Q: How do I power the Automation pHAT?
A: The pHAT is powered directly through the Raspberry Pi's GPIO header, so no additional power supply is needed.

Q: Can I control the relay and outputs simultaneously?
A: Yes, the relay and buffered outputs can be controlled independently using the Pimoroni library.

Q: Is the Automation pHAT suitable for AC loads?
A: The relay is designed for DC loads up to 24V. For AC loads, additional precautions and components may be required.

By following this documentation, you can effectively integrate the Automation pHAT into your automation projects and take full advantage of its features.