A 3.3-volt battery is a compact and reliable power source designed to deliver a steady voltage of 3.3 volts, which is ideal for powering a wide range of low-power electronic circuits and devices. This type of battery is commonly used in applications such as powering microcontrollers, real-time clocks, wearable devices, and other portable electronics that require a consistent voltage level for optimal operation.
Explore Projects Built with 3.3v battery
Use Cirkit Designer to design, explore, and prototype these projects online. Some projects support real-time simulation. Click "Open Project" to start designing instantly!
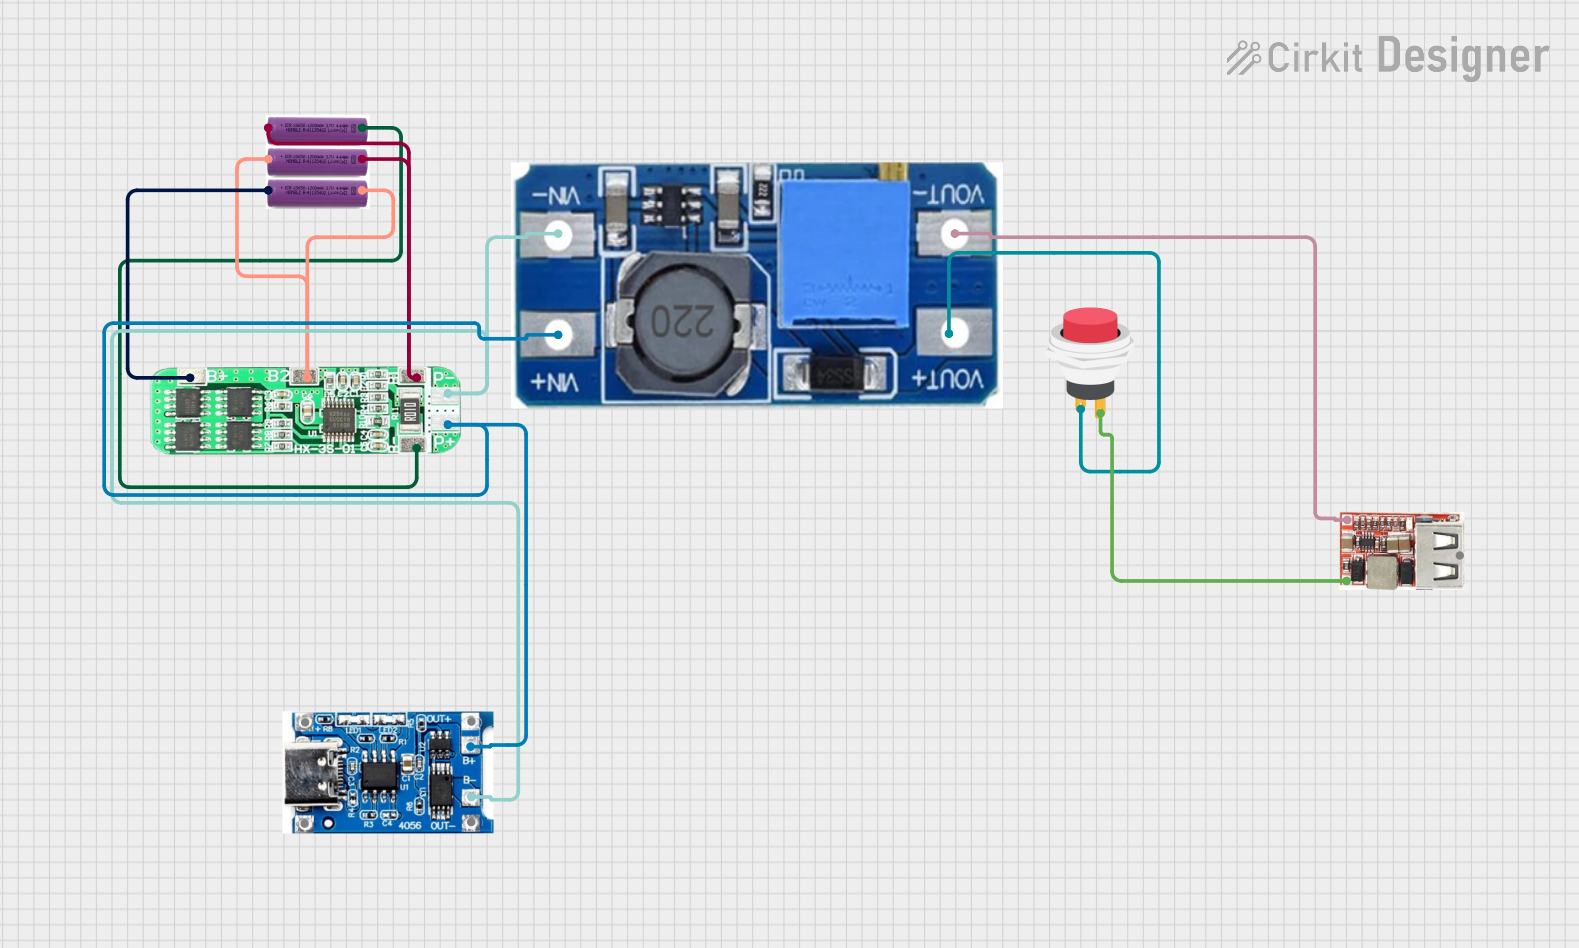
This circuit is a battery management and power supply system that uses three 3.7V batteries connected to a 3S 10A Li-ion 18650 Charger Protection Board Module for balanced charging and protection. The system includes a TP4056 Battery Charging Protection Module for additional charging safety, a Step Up Boost Power Converter to regulate and boost the voltage, and a USB regulator to provide a stable 5V output, controlled by a push switch.
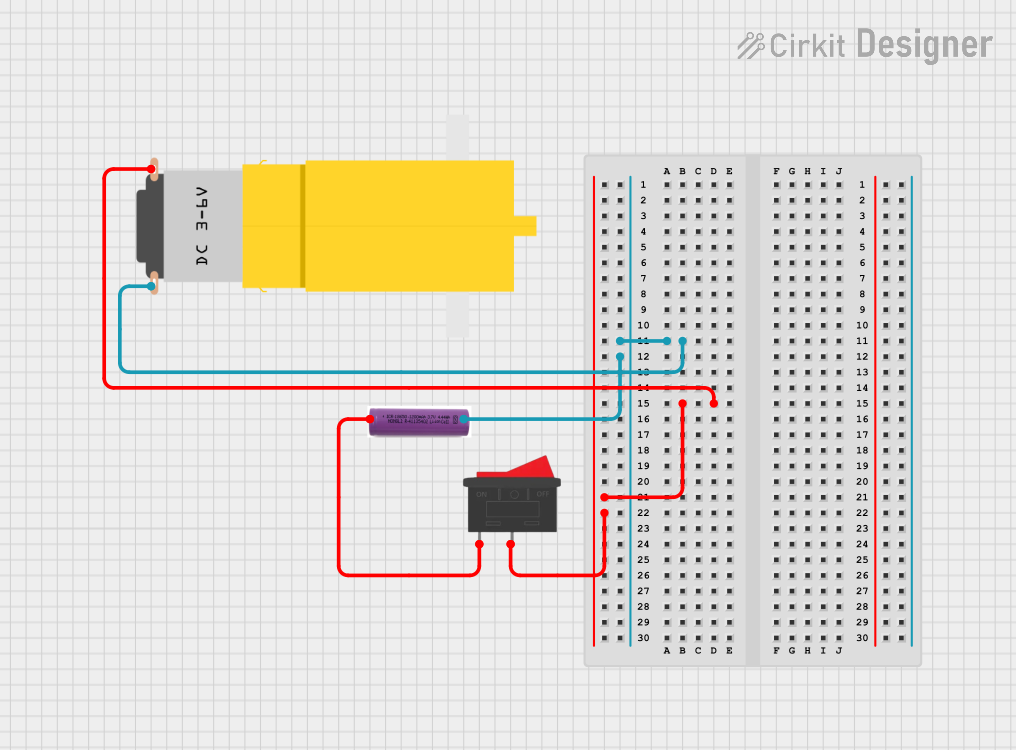
This circuit consists of a 3.7V battery, a rocker switch, and a hobby motor. The rocker switch controls the power supply from the battery to the motor, allowing the user to turn the motor on and off.
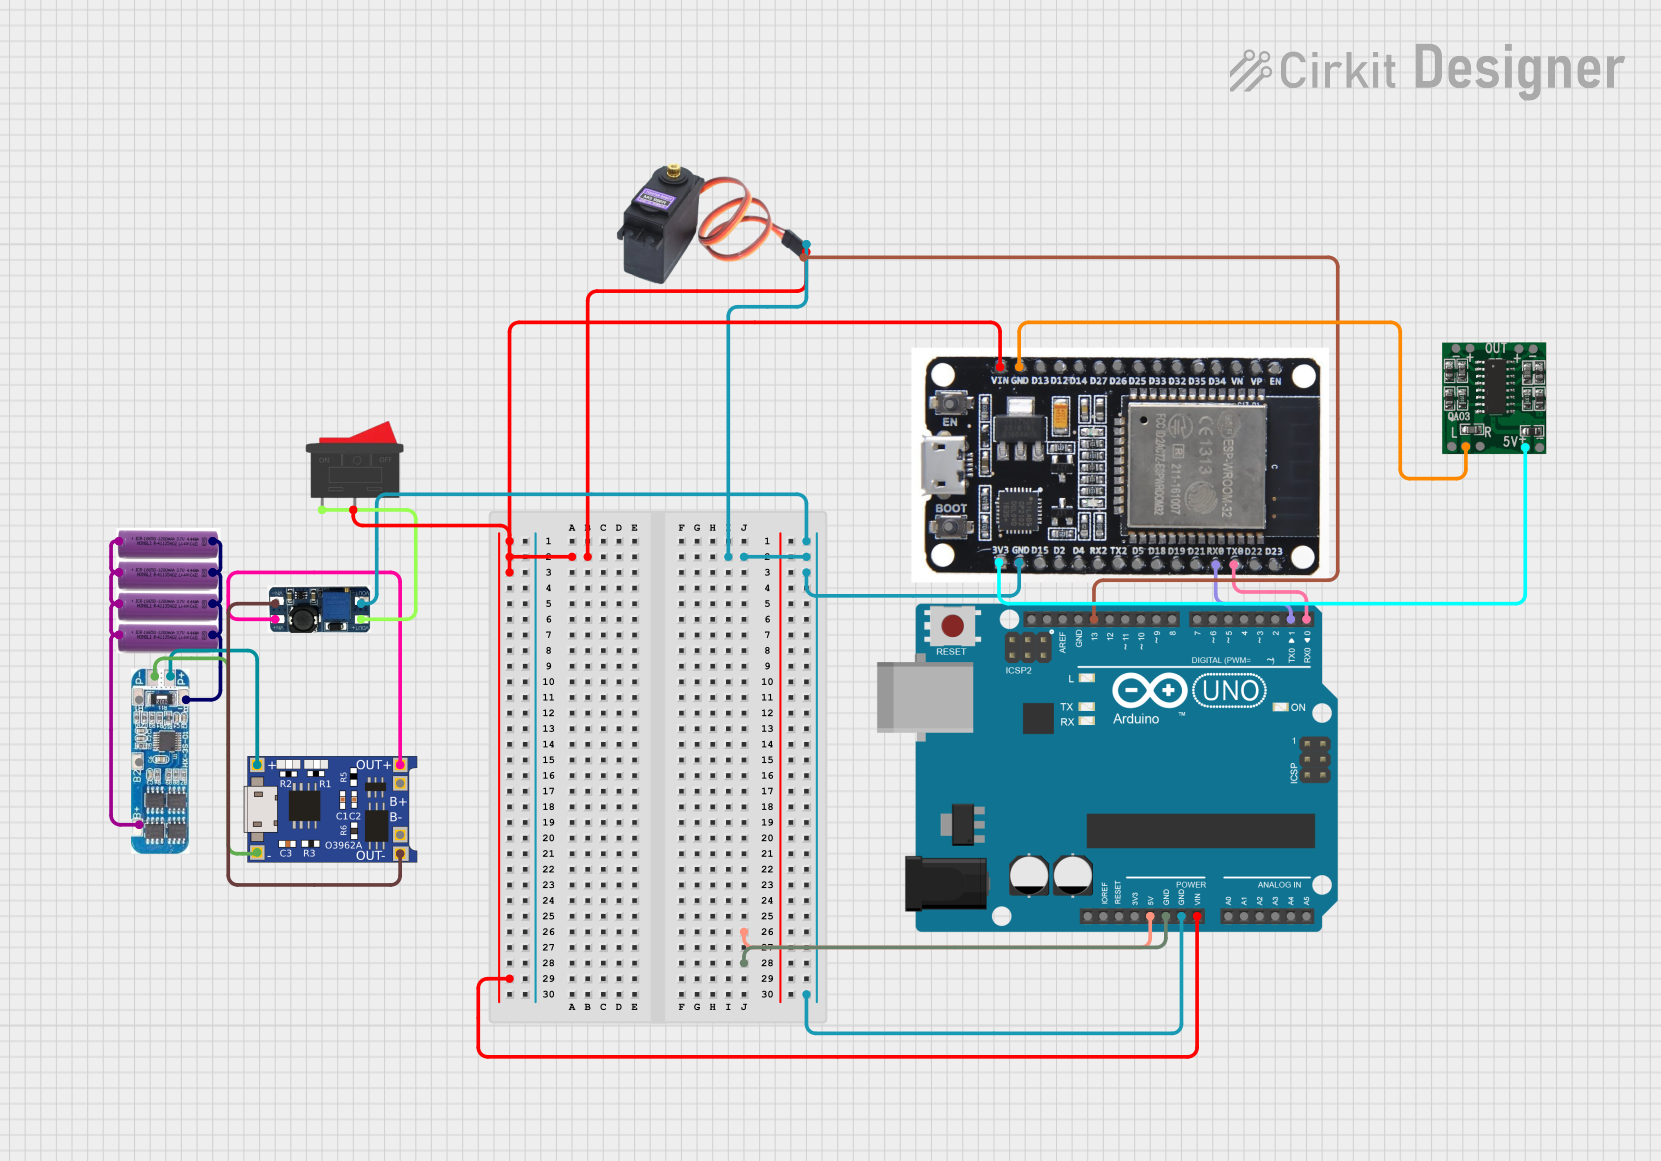
This circuit integrates multiple 3.7V batteries managed by a Battery Management System (BMS) and charged via a TP4056 module. It powers an Arduino UNO, an ESP32, a DC-DC boost converter, and a servo motor, with the Arduino controlling the servo and communicating with the ESP32.
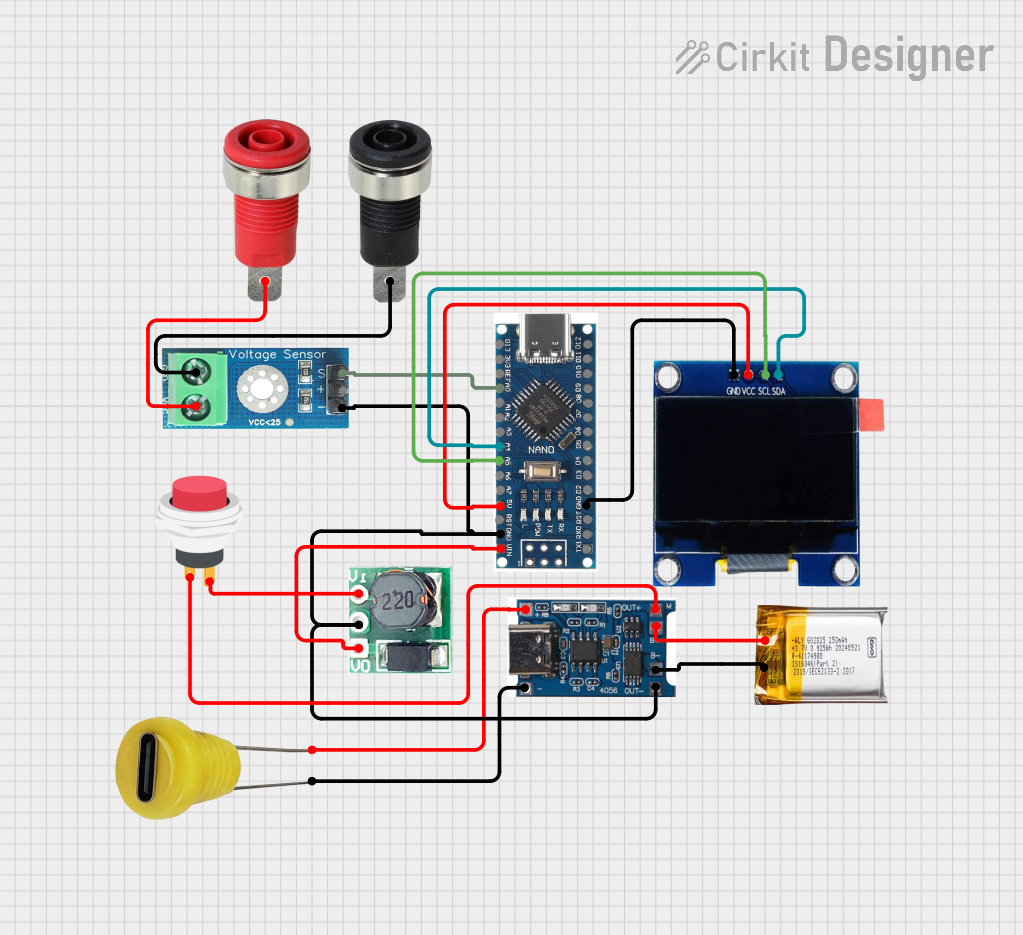
This circuit is a voltage monitoring and display system powered by a 3.7V LiPo battery. It uses an ATmega328P microcontroller to read voltage levels from a DC voltage sensor and displays the readings on a 1.3" OLED screen. The system includes a battery charger and a step-up boost converter to ensure stable operation and power management.
Microcontroller power supply (e.g., Arduino, ESP8266, ARM Cortex-based boards)
Real-time clocks (RTC)
Wearable electronics
Portable medical devices
Wireless sensors and IoT devices
Technical Specifications
Key Technical Details
Specification
Value
Description
Nominal Voltage
3.3V
The voltage at which the battery operates
Capacity
Varies (mAh)
The amount of charge the battery can hold
Chemistry
Varies
The chemical composition (e.g., Li-Ion, LiPo)
Rechargeability
Yes/No
Indicates if the battery is rechargeable
Operating Temperature
Varies (°C)
The range of temperatures for safe operation
Pin Configuration and Descriptions
Since a 3.3V battery typically comes as a cell without pins, the "pin" configuration refers to the battery terminals:
Terminal
Description
Positive (+)
The anode of the battery, usually marked with a plus sign
Negative (-)
The cathode of the battery, usually marked with a minus sign
Usage Instructions
How to Use the Component in a Circuit
Identify the polarity: Determine the positive and negative terminals of the battery.
Connect to the circuit: Attach the positive terminal to the VCC or VIN of the electronic device and the negative terminal to the ground (GND).
Power management: If the device has an onboard voltage regulator, ensure it is compatible with the 3.3V input. If not, a voltage regulator may be necessary to step down higher voltages.
Important Considerations and Best Practices
Voltage compatibility: Ensure that the device you are powering can operate at 3.3V.
Current draw: Check that the battery's capacity can handle the current draw of your circuit for the desired duration.
Battery life: To maximize battery life, implement power-saving features in your design.
Safety: Use a battery management system (BMS) for rechargeable batteries to prevent overcharging and deep discharging.
Troubleshooting and FAQs
Common Issues Users Might Face
Device not powering on: Check the battery charge and connections.
Short battery life: Ensure the current draw is within the battery's capacity limits.
Inconsistent performance: Verify that the operating temperature is within the specified range.
Solutions and Tips for Troubleshooting
Battery charge: Use a multimeter to check the battery voltage. If below 3.3V, recharge or replace the battery.
Connection issues: Inspect for loose connections and ensure proper polarity.
Temperature effects: Operate the device within the recommended temperature range.
FAQs
Q: Can I recharge a 3.3V battery?
A: It depends on the battery chemistry. Rechargeable batteries like Li-Ion or LiPo can be recharged, while primary cells cannot.
Q: How do I know when to replace the battery?
A: When the voltage drops below the operational level of the device or the device fails to function correctly, it's time to replace the battery.
Q: Is it safe to connect multiple 3.3V batteries in parallel or series?
A: Connecting in parallel is generally safe and increases capacity, but ensure the batteries are of the same type and charge level. Connecting in series will increase voltage and is not recommended for devices designed for 3.3V.
Example Code for Arduino UNO
// Example code to check battery voltage using Arduino UNO

int batteryPin = A0; // Analog pin connected to battery +

void setup() {
  Serial.begin(9600);
}

void loop() {
  int sensorValue = analogRead(batteryPin); // Read the battery voltage
  float voltage = sensorValue * (3.3 / 1023.0); // Convert to voltage
  Serial.print("Battery Voltage: ");
  Serial.println(voltage);
  delay(1000); // Wait for a second before next reading
}
Note: This code assumes that the Arduino's AREF is set to 3.3V. If the AREF is set to 5V, adjust the conversion factor accordingly.


 Open Project in Cirkit Designer