How to Use Water Level Float Switch Sensor: Examples, Pinouts, and Specs
Introduction
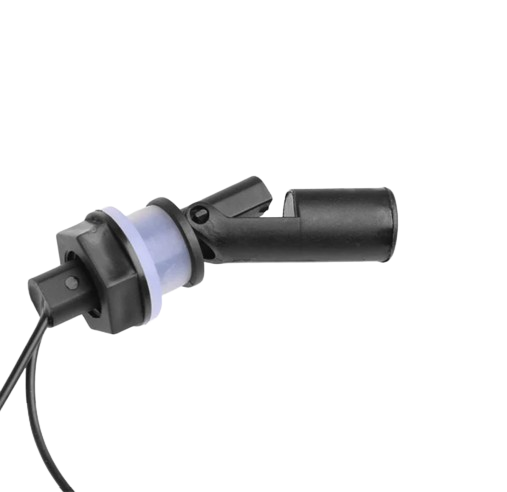
The Water Level Float Switch Sensor is a device designed to detect and monitor the liquid level in a tank, reservoir, or other container. It operates using a floating mechanism that moves with the liquid level, triggering an internal switch to open or close. This simple yet effective design makes it ideal for a wide range of applications, including water tanks, sump pumps, industrial fluid management, and home automation systems.
Explore Projects Built with Water Level Float Switch Sensor
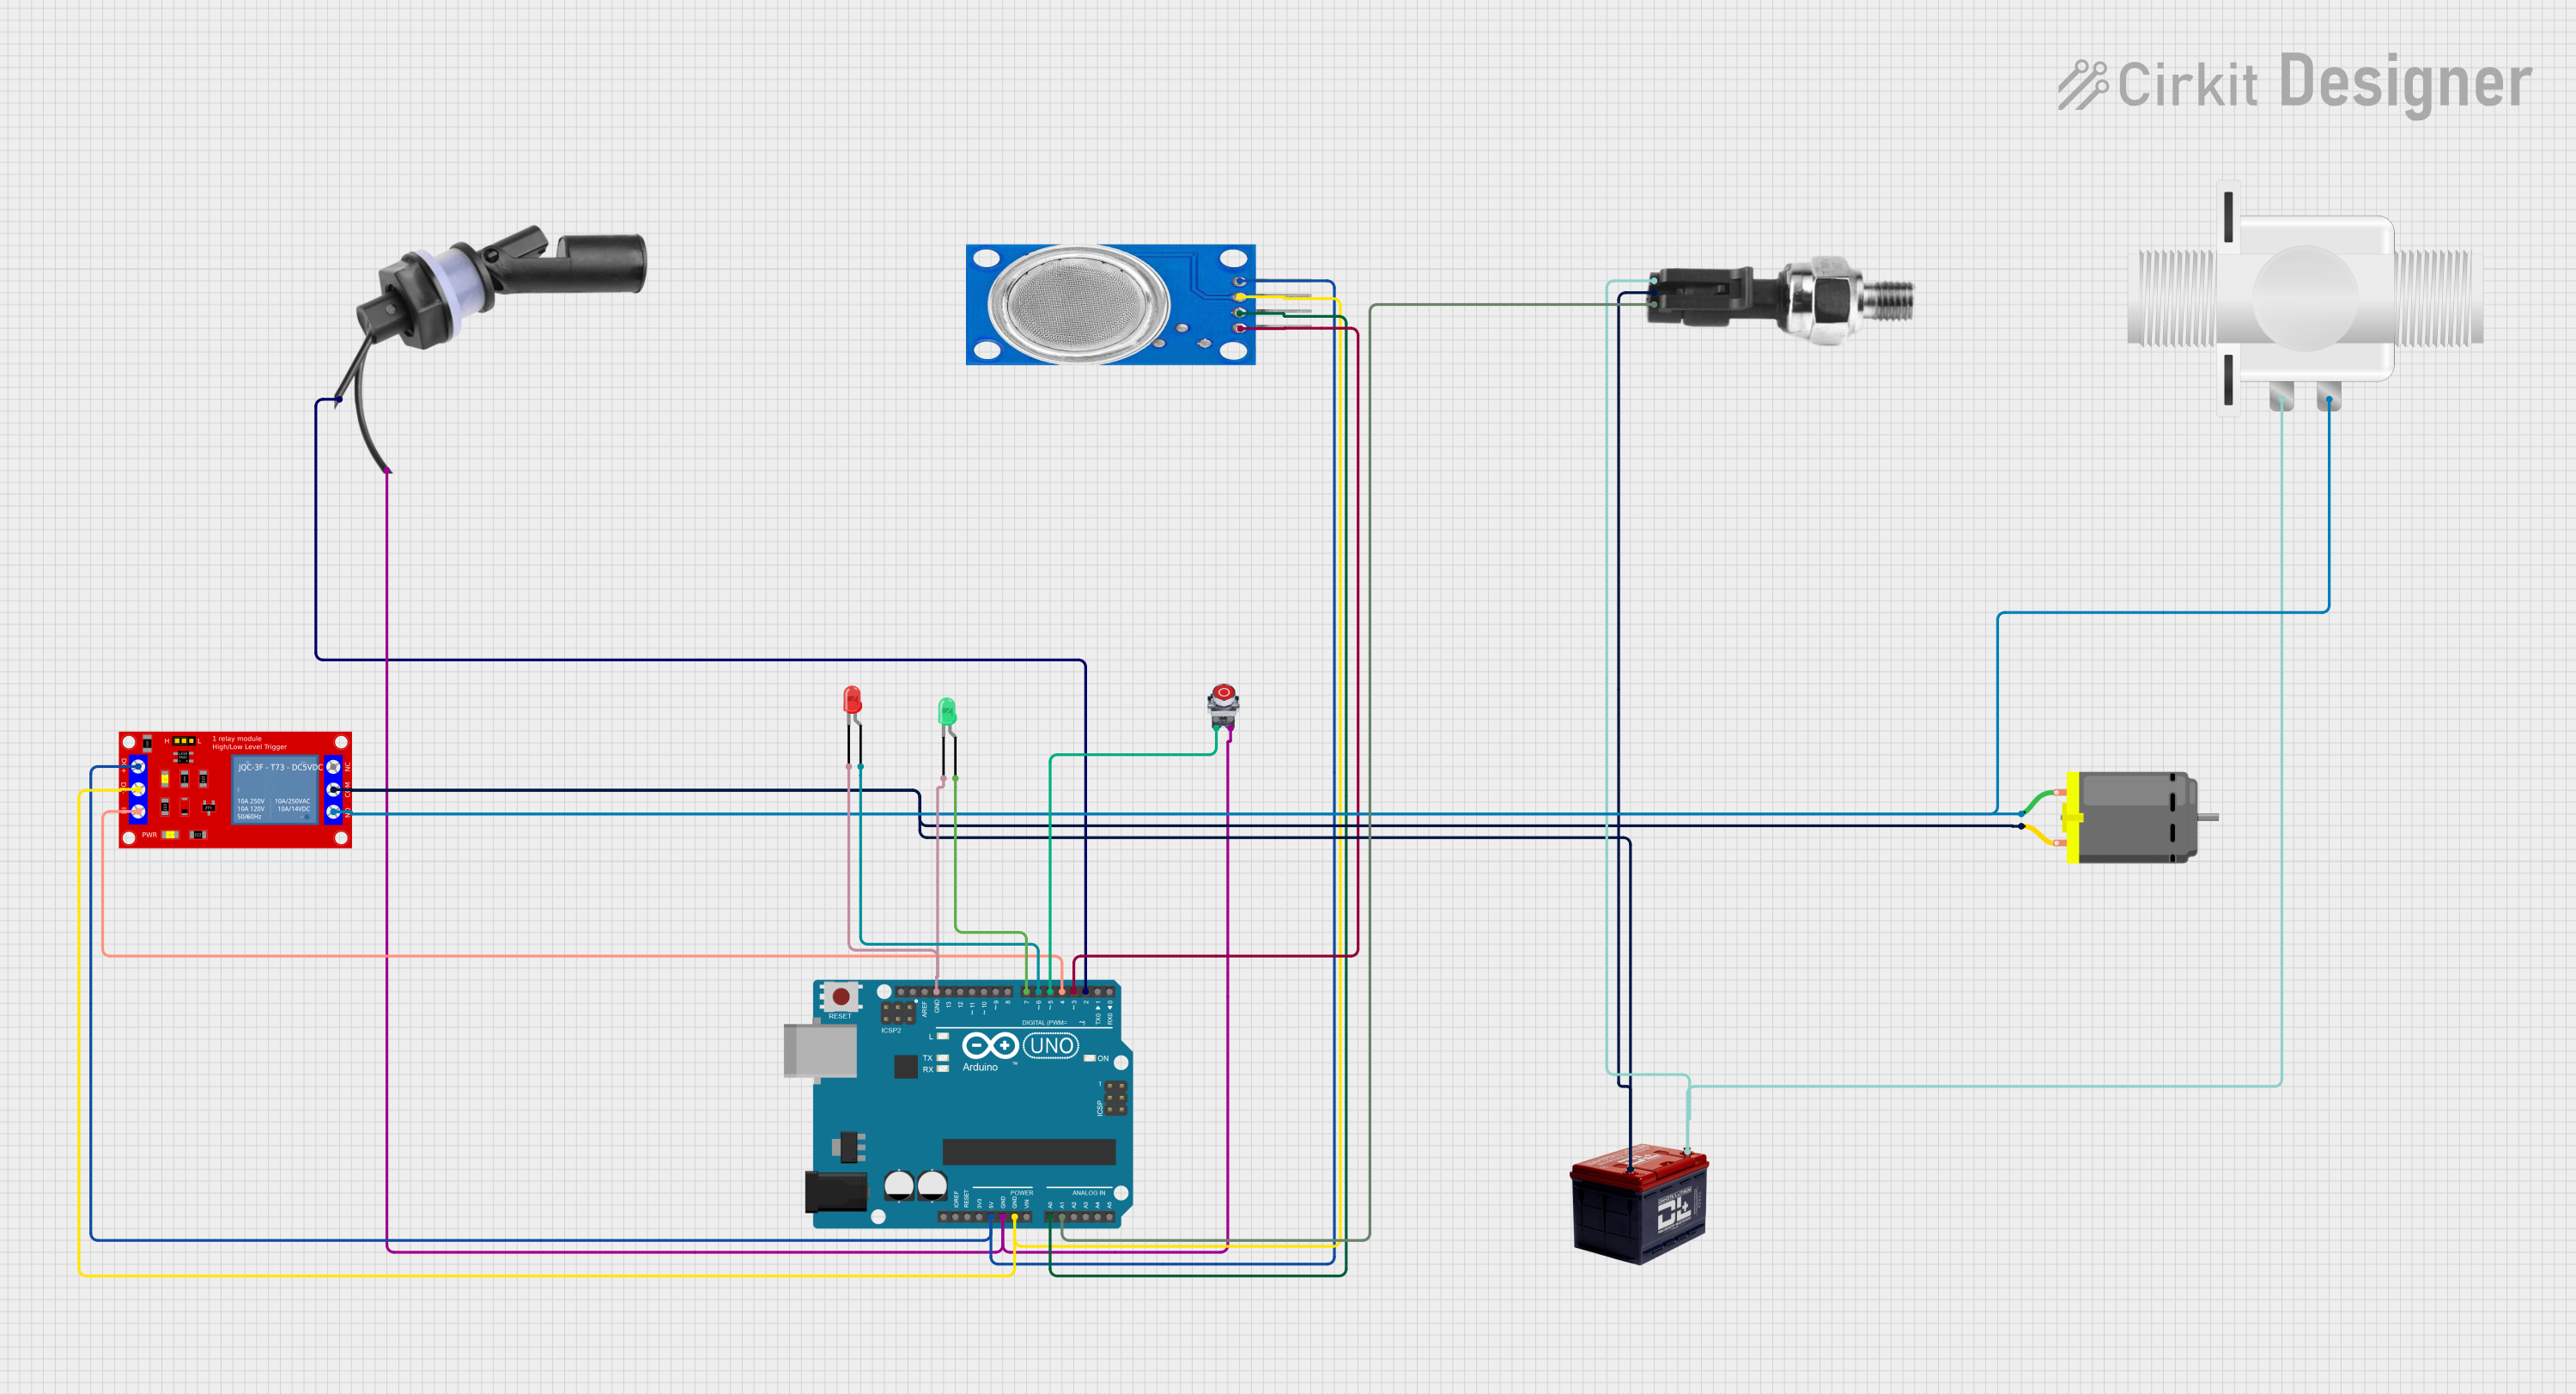
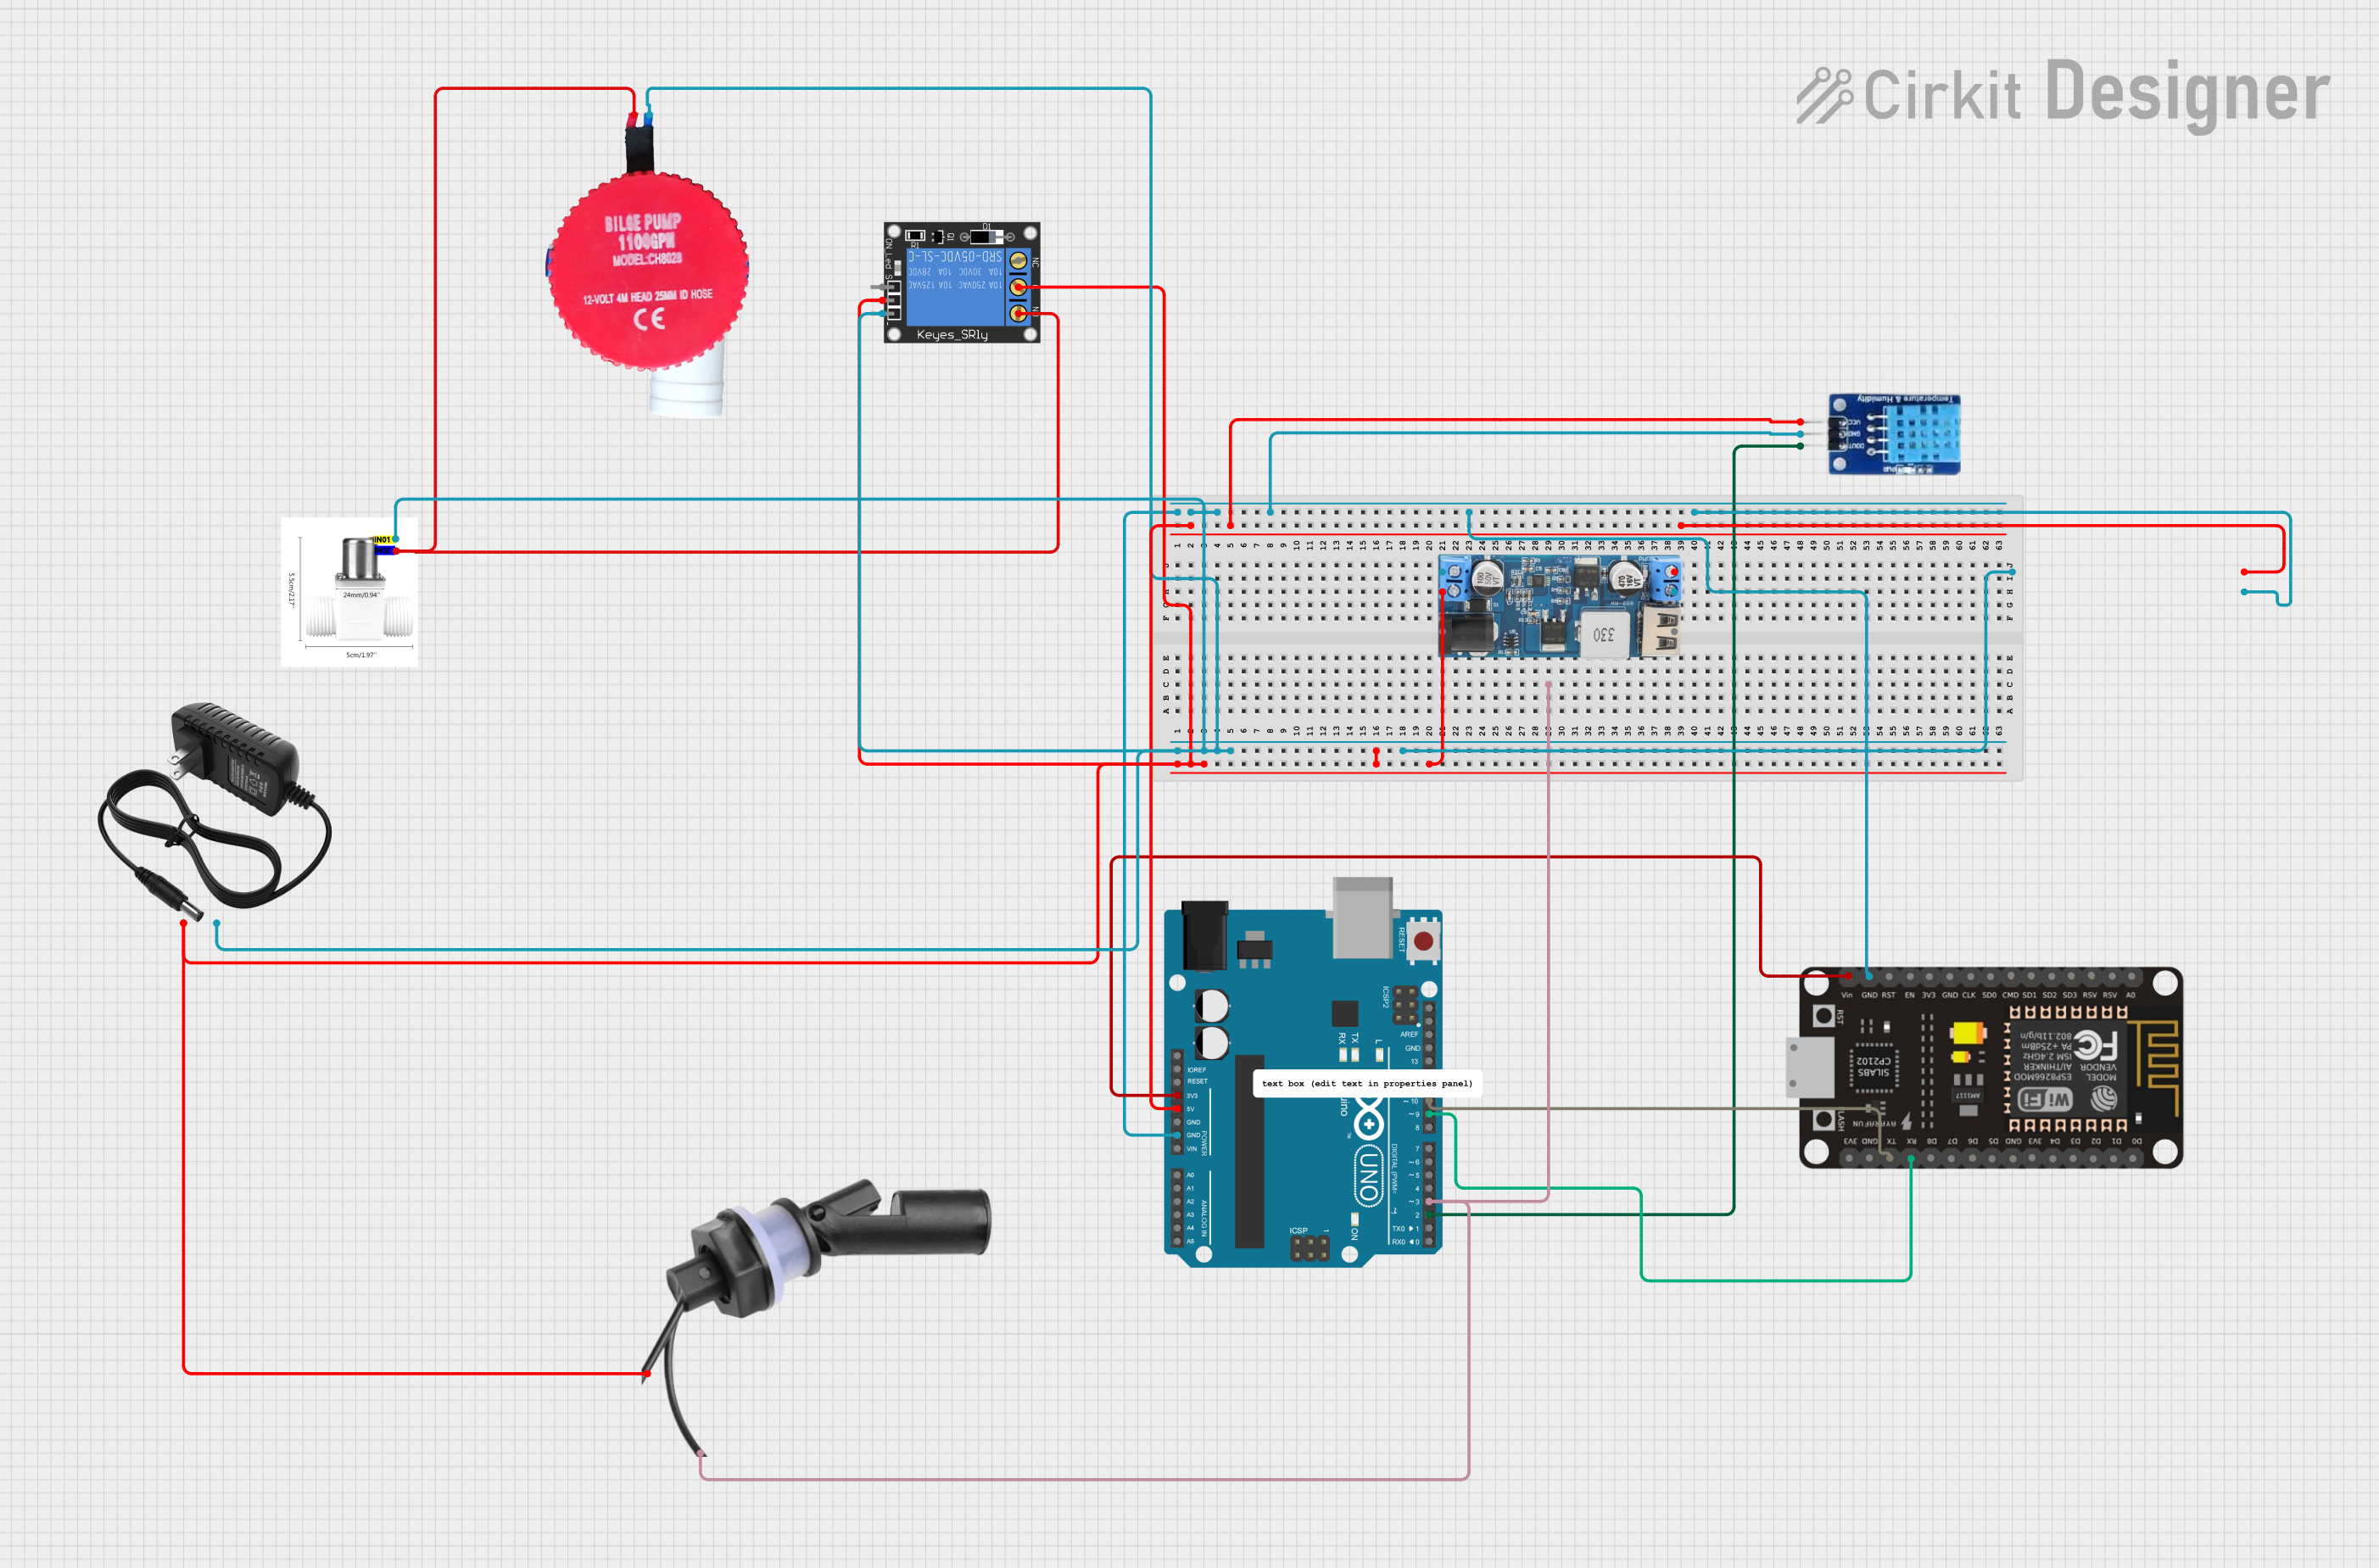
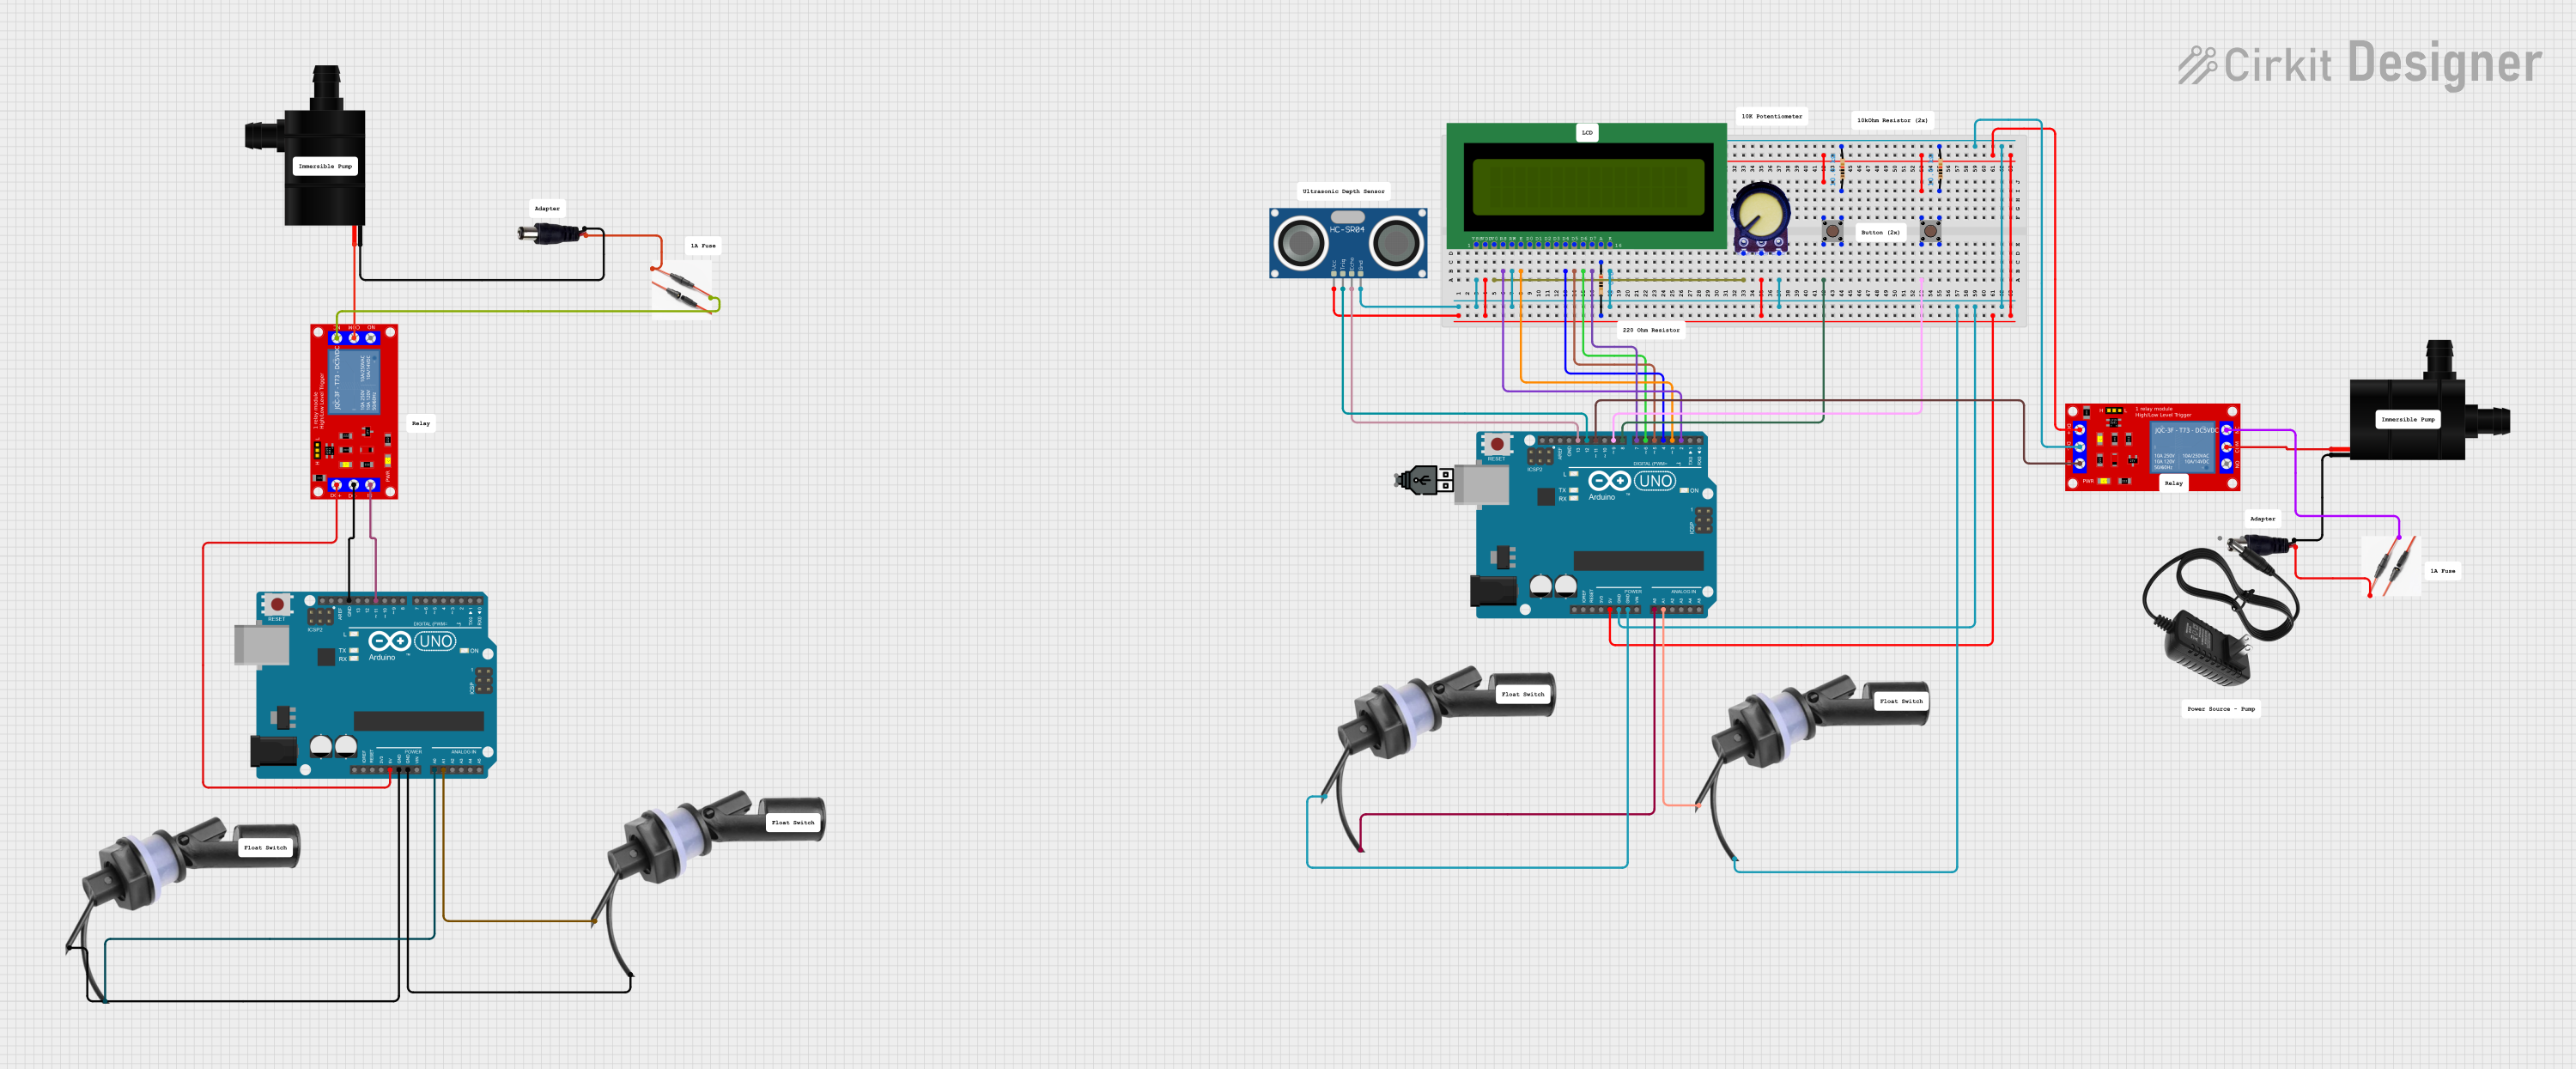
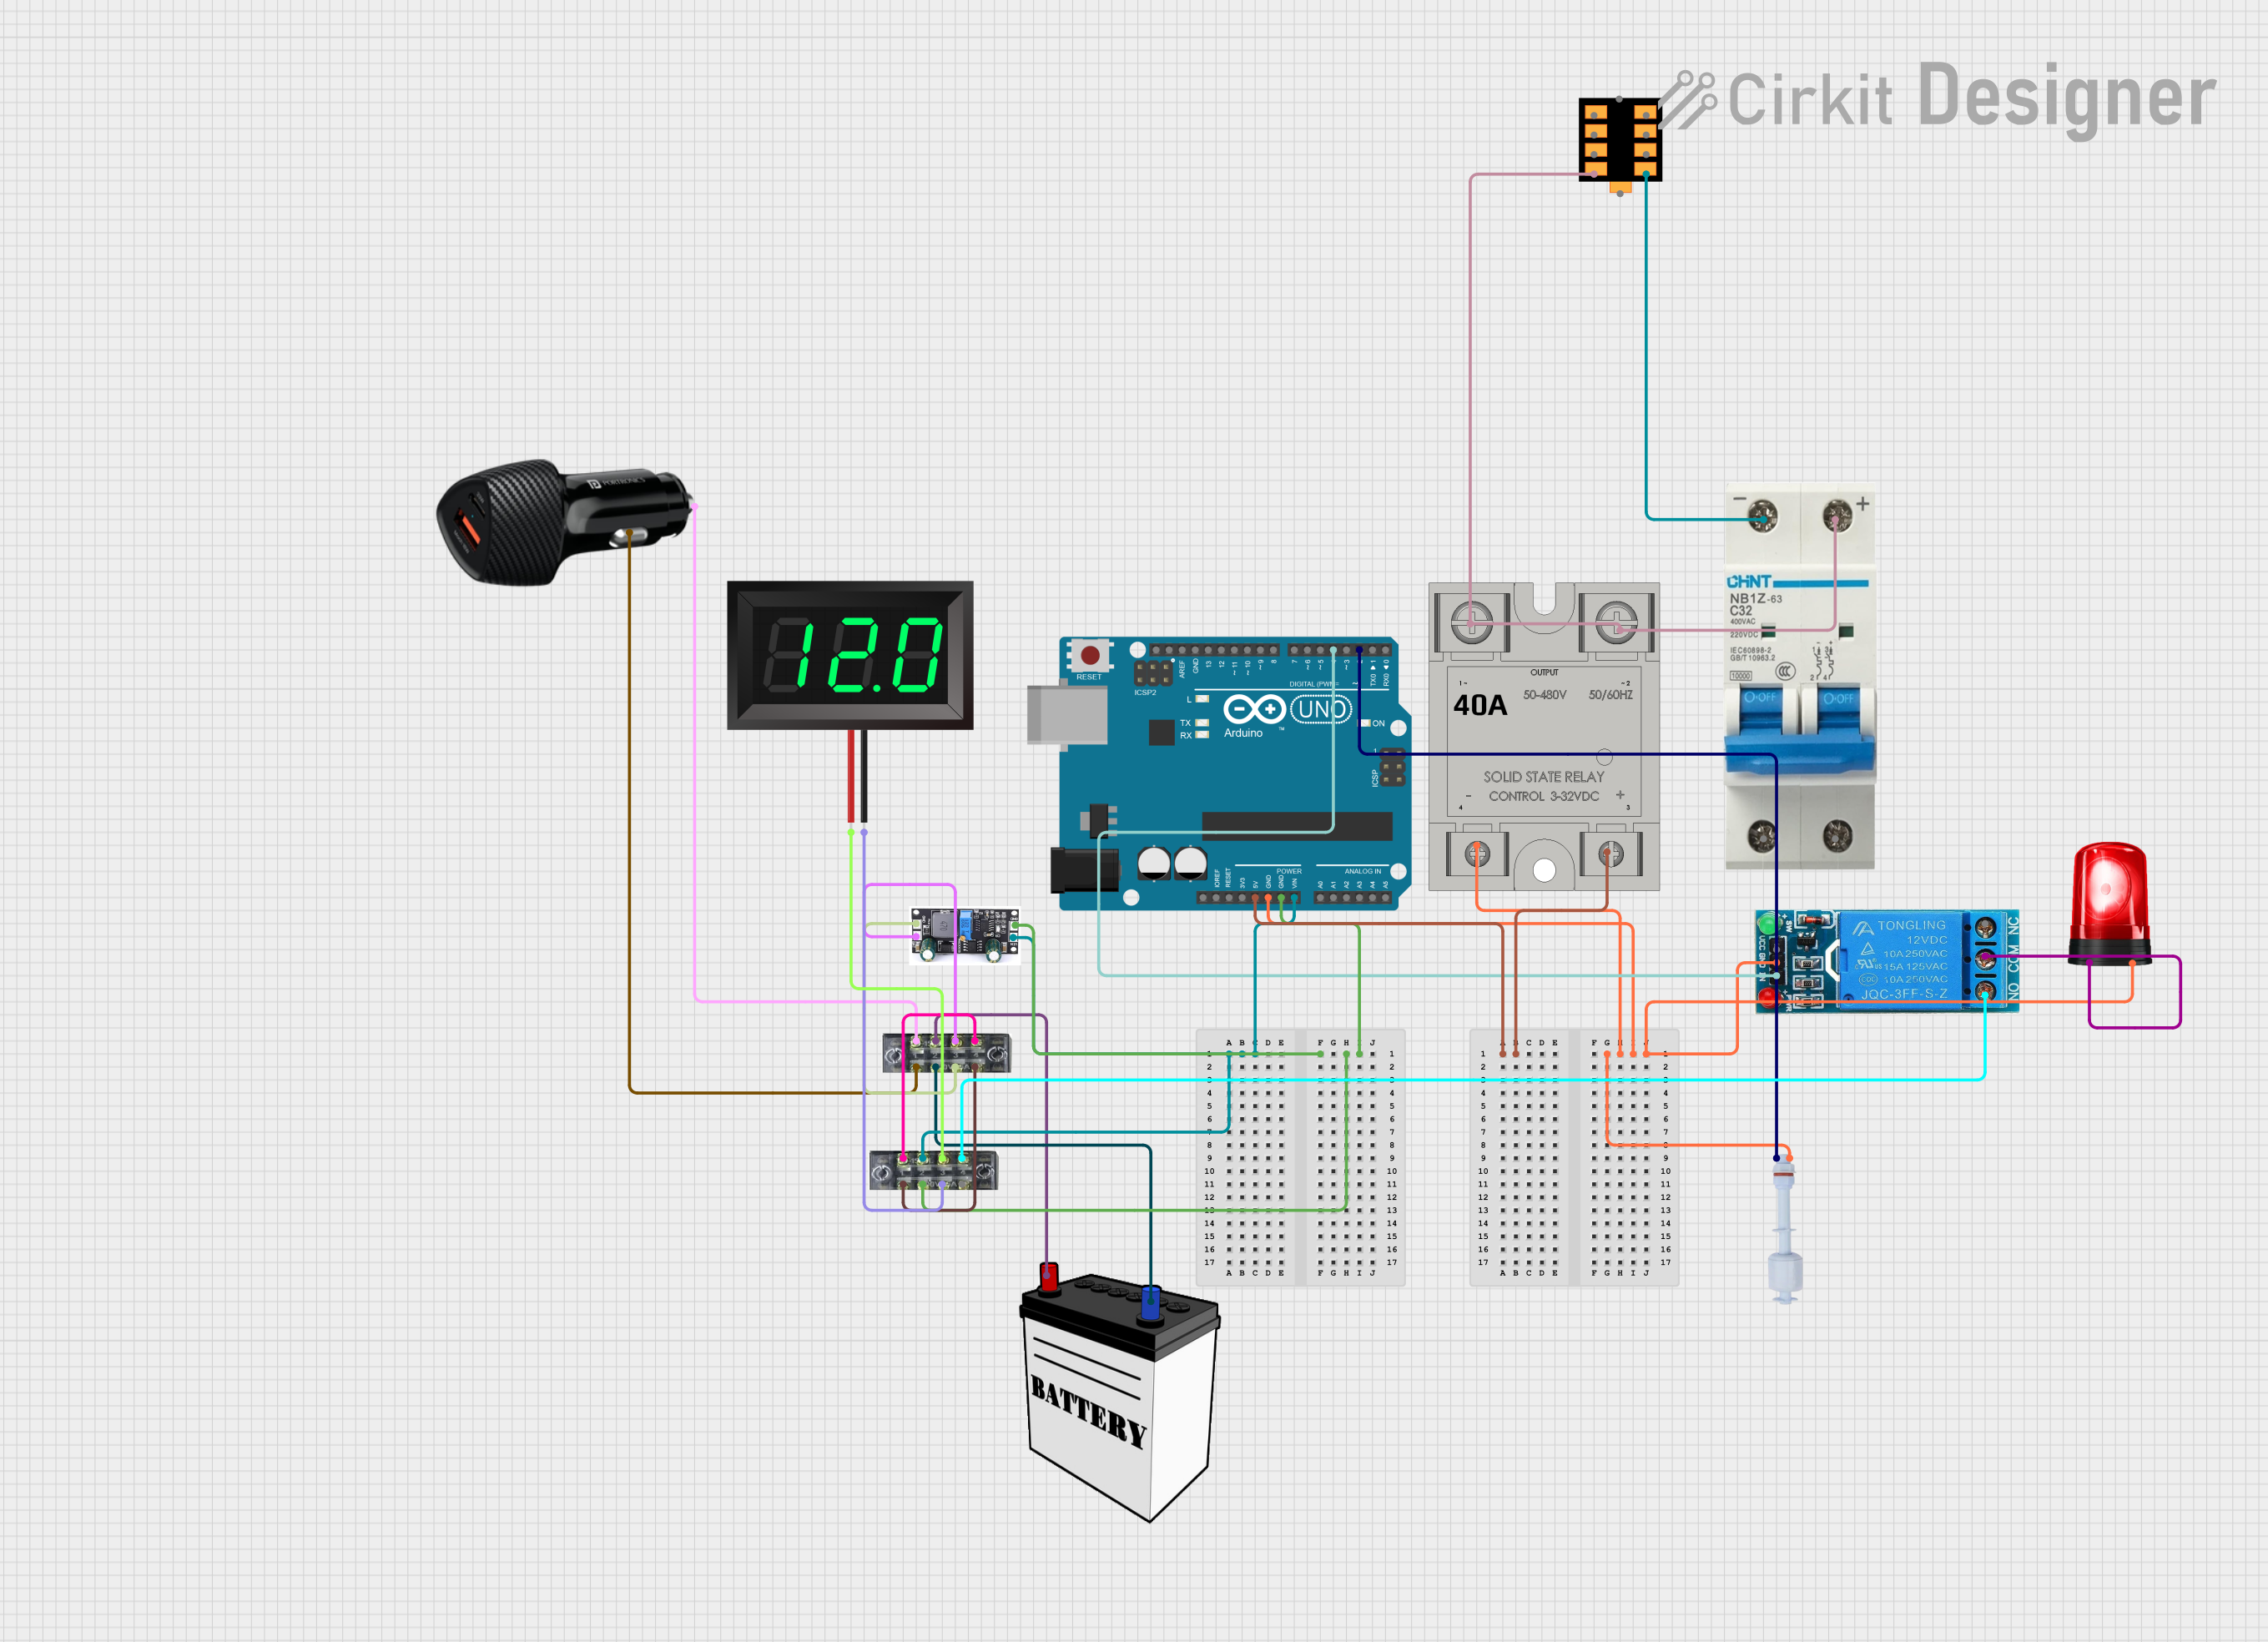
Explore Projects Built with Water Level Float Switch Sensor
Common Applications and Use Cases
- Automatic water tank filling systems
- Sump pump control to prevent overflow or dry running
- Industrial liquid level monitoring
- Home automation for water level detection
- Agricultural irrigation systems
Technical Specifications
The Water Level Float Switch Sensor is available in various models, but the following specifications are typical for most standard sensors:
| Parameter | Value |
|---|---|
| Operating Voltage | 5V to 220V AC/DC |
| Maximum Current | 0.5A to 1A (depending on model) |
| Contact Type | Normally Open (NO) or Normally Closed (NC) |
| Material | Polypropylene (PP) or Stainless Steel |
| Operating Temperature | -10°C to 80°C |
| Cable Length | 1m to 3m (varies by model) |
| Float Diameter | 25mm to 50mm |
| Liquid Compatibility | Water, oil, and other non-corrosive liquids |
Pin Configuration and Descriptions
The Water Level Float Switch Sensor typically has two wires for connection. The configuration is as follows:
| Wire Color | Function |
|---|---|
| Red/Black | Common wire for the switch |
| Blue/White | Switch output (NO or NC, depending on model) |
Note: The wire colors may vary depending on the manufacturer. Always refer to the datasheet for your specific model.
Usage Instructions
How to Use the Component in a Circuit
- Determine the Switch Type: Identify whether the sensor is Normally Open (NO) or Normally Closed (NC). In an NO configuration, the circuit is open when the float is in its default position, and it closes when the liquid level rises. In an NC configuration, the circuit is closed by default and opens when the liquid level rises.
- Connect the Wires:
- Connect one wire (common) to the power source or control circuit.
- Connect the other wire (output) to the load or input of the control system.
- Secure the Sensor: Mount the float switch in the desired position within the tank or reservoir. Ensure the float can move freely without obstruction.
- Test the Sensor: Gradually fill or empty the tank to verify the switch operation.
Important Considerations and Best Practices
- Orientation: Install the sensor in the correct orientation as specified by the manufacturer.
- Liquid Compatibility: Ensure the sensor material is compatible with the liquid being monitored.
- Voltage and Current Ratings: Do not exceed the specified voltage and current ratings to avoid damage.
- Debouncing: If using the sensor with a microcontroller, implement software debouncing to handle switch bounce.
- Safety: For high-voltage applications, ensure proper insulation and safety precautions.
Example: Connecting to an Arduino UNO
The Water Level Float Switch Sensor can be easily interfaced with an Arduino UNO for monitoring and control. Below is an example circuit and code:
Circuit Diagram
- Connect one wire of the float switch to Arduino digital pin 2.
- Connect the other wire to the GND pin of the Arduino.
- Use a pull-up resistor (10kΩ) between the digital pin and the 5V pin.
Arduino Code
// Water Level Float Switch Sensor Example
// This code reads the state of the float switch and prints it to the Serial Monitor.

const int floatSwitchPin = 2; // Pin connected to the float switch
int floatSwitchState = 0;     // Variable to store the switch state

void setup() {
  pinMode(floatSwitchPin, INPUT_PULLUP); // Set pin as input with internal pull-up
  Serial.begin(9600);                   // Initialize serial communication
}

void loop() {
  floatSwitchState = digitalRead(floatSwitchPin); // Read the switch state

  if (floatSwitchState == LOW) {
    // Switch is closed (liquid level high)
    Serial.println("Liquid level is HIGH");
  } else {
    // Switch is open (liquid level low)
    Serial.println("Liquid level is LOW");
  }

  delay(500); // Wait for 500ms before reading again
}
Troubleshooting and FAQs
Common Issues and Solutions
Sensor Not Responding:
- Cause: Incorrect wiring or loose connections.
- Solution: Double-check the wiring and ensure all connections are secure.
False Triggering:
- Cause: Electrical noise or switch bounce.
- Solution: Use a pull-up or pull-down resistor and implement software debouncing.
Float Stuck:
- Cause: Debris or obstruction in the tank.
- Solution: Clean the tank and ensure the float can move freely.
Incorrect Readings:
- Cause: Sensor orientation or liquid compatibility issue.
- Solution: Verify the installation orientation and ensure the sensor material is suitable for the liquid.
FAQs
Q: Can the sensor be used with corrosive liquids?
A: Only if the sensor material (e.g., stainless steel) is compatible with the liquid. Check the datasheet for compatibility.
Q: How do I know if my sensor is NO or NC?
A: Test the sensor with a multimeter or refer to the product documentation.
Q: Can I extend the sensor cable?
A: Yes, but ensure proper insulation and avoid excessive cable length to minimize signal loss.
Q: Is the sensor waterproof?
A: Yes, the sensor is designed for immersion in liquids, but ensure the cable entry point is sealed properly.
This documentation provides a comprehensive guide to understanding, using, and troubleshooting the Water Level Float Switch Sensor.