How to Use SmartSolar MPPT: Examples, Pinouts, and Specs
Introduction
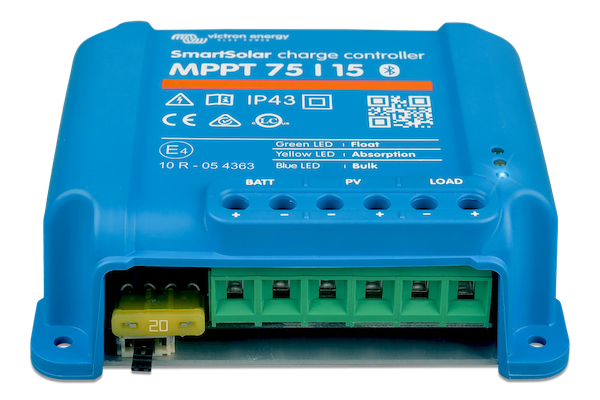
The SmartSolar MPPT series by Victron Energy is a high-performance solar charge controller designed to maximize the energy harvest from solar panels. By employing advanced Maximum Power Point Tracking (MPPT) technology, it dynamically adjusts the electrical operating point of the solar modules to ensure optimal power output under varying conditions such as shading, temperature, and sunlight intensity.
These controllers are available in multiple models, including 75/10, 75/15, 100/15, and 100/20, which cater to different system requirements. The SmartSolar MPPT is ideal for off-grid solar systems, RVs, boats, and remote installations where efficient energy management is critical.
Explore Projects Built with SmartSolar MPPT

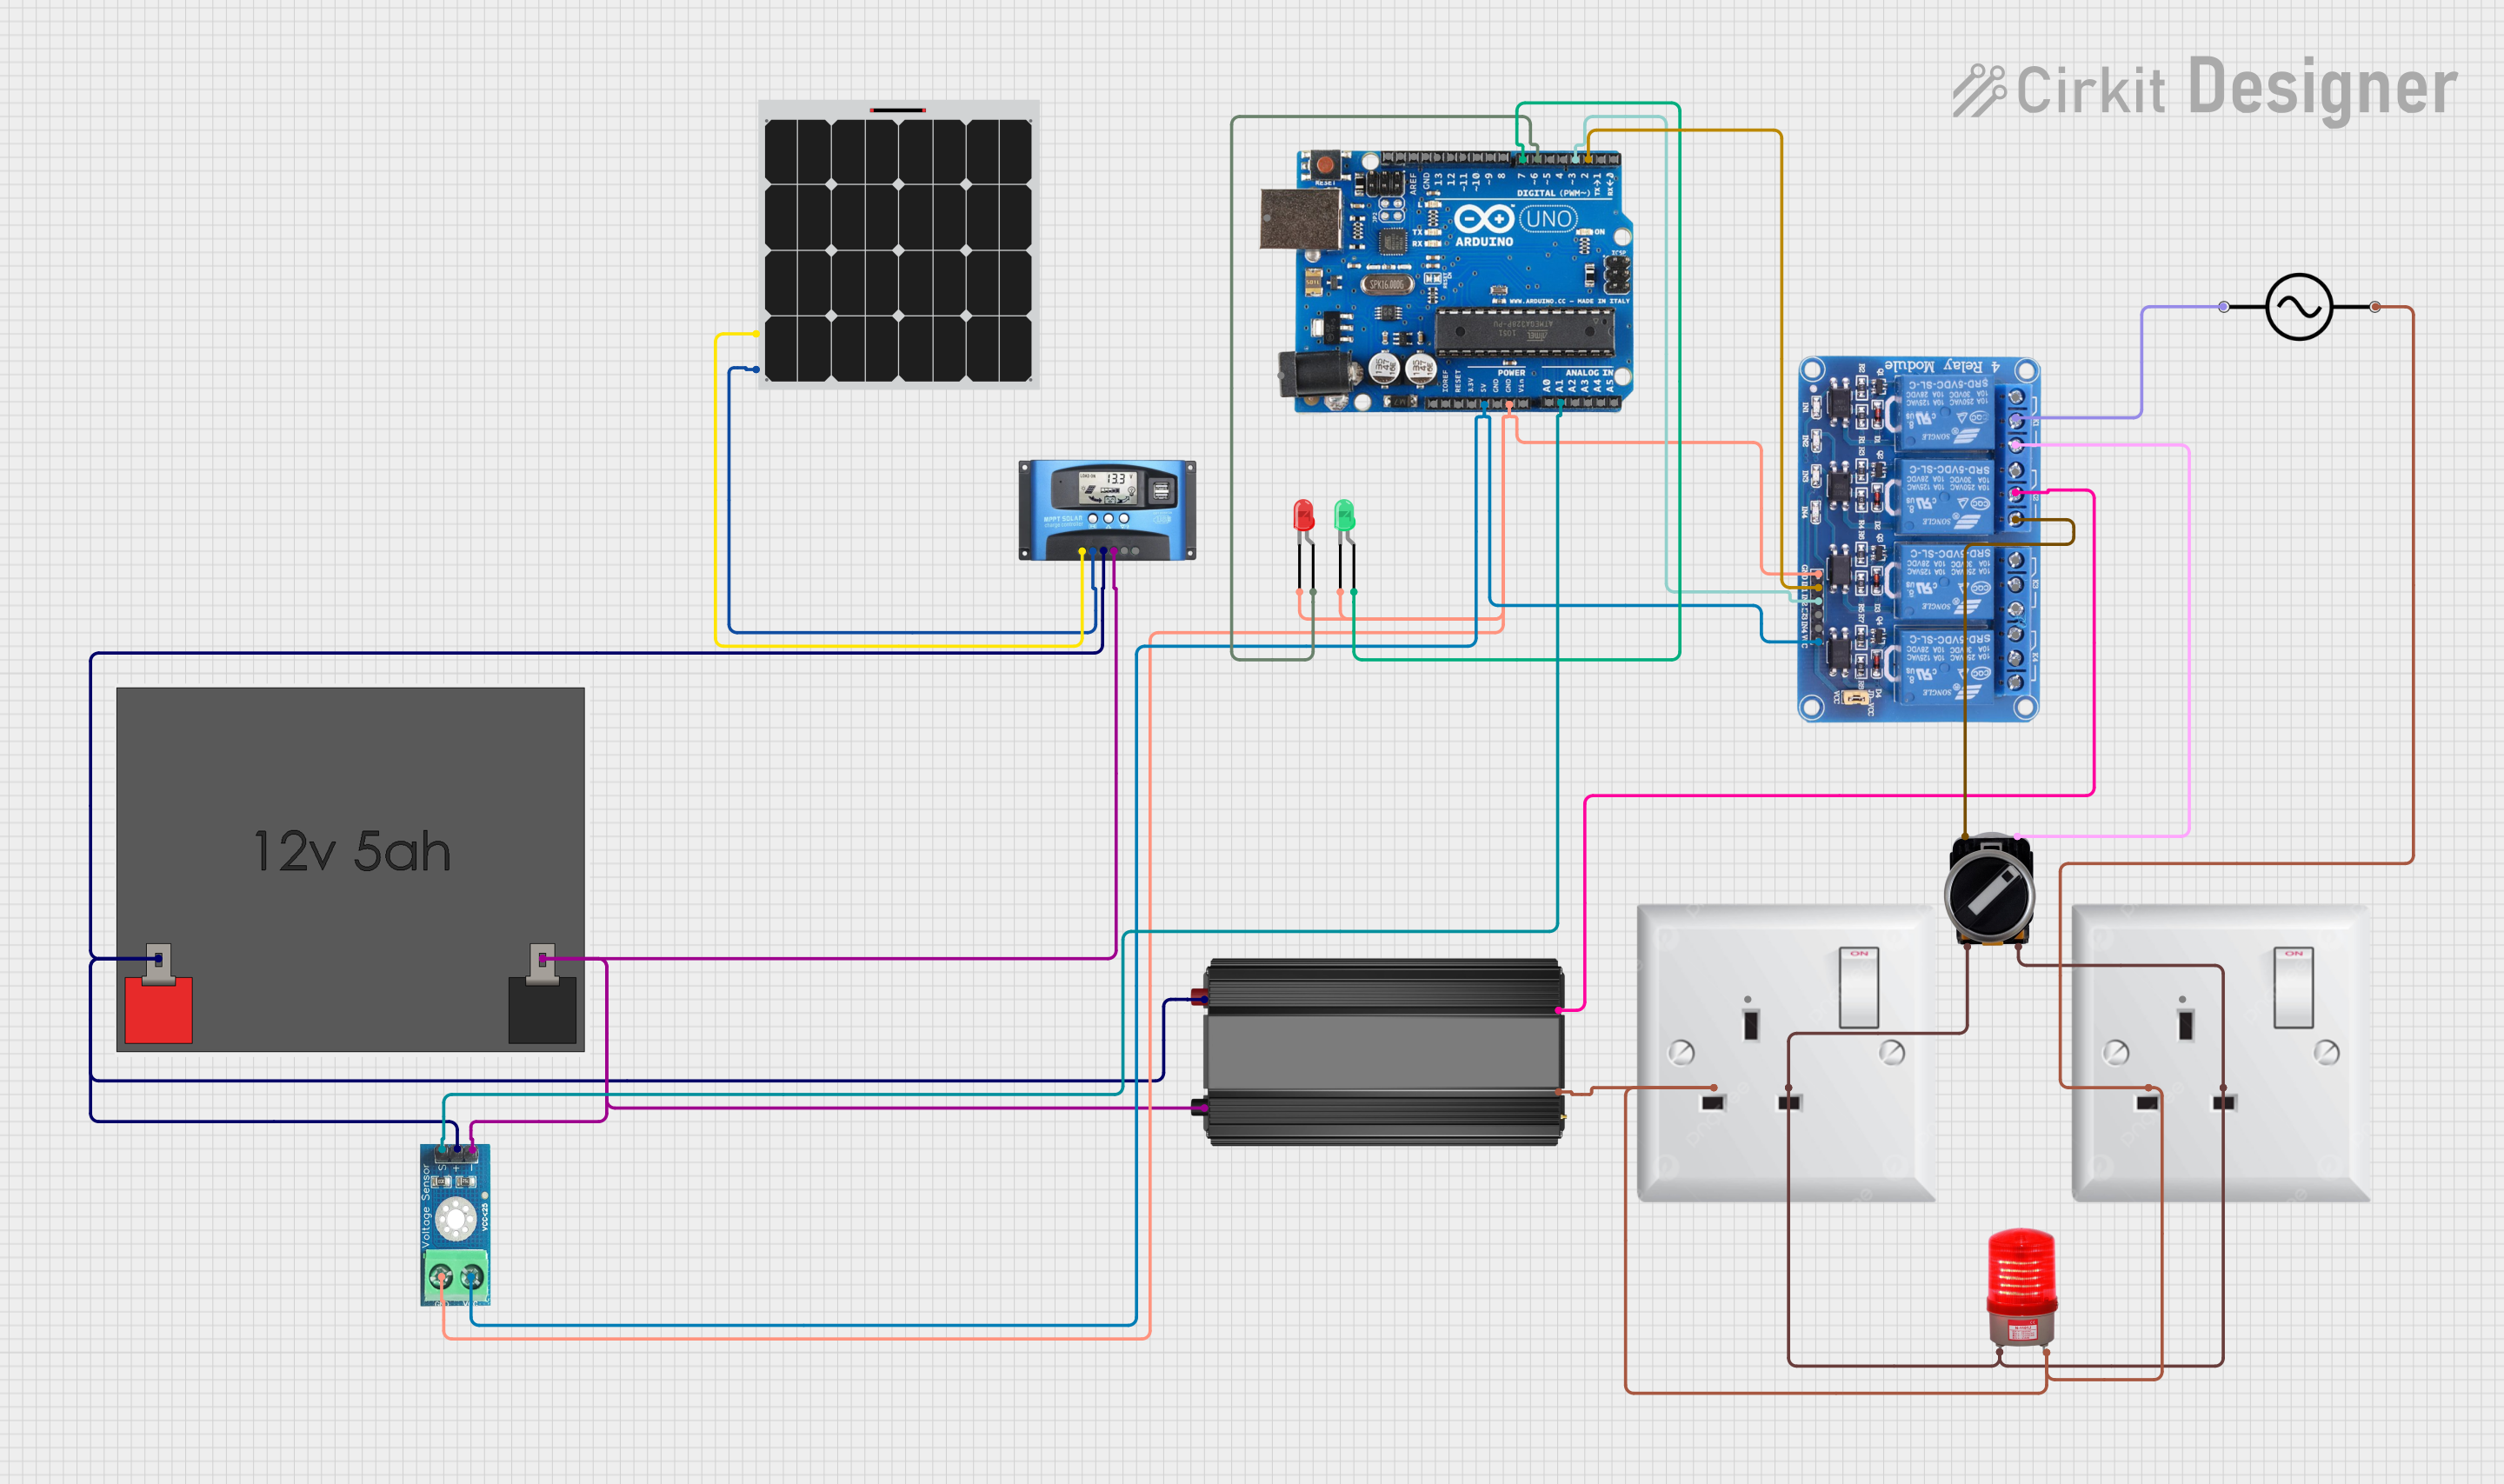


Explore Projects Built with SmartSolar MPPT
Common Applications
- Off-grid solar power systems
- Recreational vehicles (RVs) and caravans
- Marine applications (boats and yachts)
- Remote monitoring and IoT-based solar systems
- Backup power systems with battery storage
Technical Specifications
General Specifications
| Parameter | 75/10 | 75/15 | 100/15 | 100/20 |
|---|---|---|---|---|
| Maximum PV Open Circuit Voltage (Voc) | 75V | 75V | 100V | 100V |
| Maximum Charge Current | 10A | 15A | 15A | 20A |
| Battery Voltage Range | 12V/24V Auto Select | 12V/24V Auto Select | 12V/24V Auto Select | 12V/24V Auto Select |
| Maximum PV Input Power (12V) | 145W | 220W | 220W | 290W |
| Maximum PV Input Power (24V) | 290W | 440W | 440W | 580W |
| Efficiency | Up to 98% | Up to 98% | Up to 98% | Up to 98% |
| Operating Temperature Range | -30°C to +60°C | -30°C to +60°C | -30°C to +60°C | -30°C to +60°C |
Pin Configuration and Descriptions
The SmartSolar MPPT features the following key connections:
| Pin/Terminal | Description |
|---|---|
| PV+ | Positive terminal for solar panel input |
| PV- | Negative terminal for solar panel input |
| BAT+ | Positive terminal for battery connection |
| BAT- | Negative terminal for battery connection |
| LOAD+ | Positive terminal for DC load output (optional, for low-power DC loads) |
| LOAD- | Negative terminal for DC load output (optional, for low-power DC loads) |
| VE.Direct | Communication port for monitoring and configuration via Victron tools |
| Remote On/Off | Terminal for remote control of the charge controller (optional) |
Usage Instructions
How to Use the SmartSolar MPPT in a Circuit
Connect the Solar Panels:
- Ensure the solar panel's open-circuit voltage (Voc) does not exceed the maximum input voltage of the MPPT model.
- Connect the positive terminal of the solar panel to the PV+ input and the negative terminal to the PV- input.
Connect the Battery:
- Connect the positive terminal of the battery to the BAT+ input and the negative terminal to the BAT- input.
- The SmartSolar MPPT will automatically detect the battery voltage (12V or 24V).
Optional Load Connection:
- For low-power DC loads, connect the load's positive terminal to LOAD+ and the negative terminal to LOAD-.
Monitor and Configure:
- Use the VE.Direct port to connect the MPPT to a Victron Energy monitoring device or a computer for configuration and real-time monitoring.
- Alternatively, use the VictronConnect app via Bluetooth (if supported) for wireless configuration.
Power On:
- Once all connections are secure, the MPPT will automatically start operating and optimize the power output from the solar panels.
Important Considerations and Best Practices
- Battery Protection: Ensure the battery is compatible with the MPPT's voltage range and capacity.
- Cable Sizing: Use appropriately sized cables to minimize voltage drops and ensure safe operation.
- Fusing: Install fuses or circuit breakers on both the solar panel and battery connections for safety.
- Shading: Avoid shading on the solar panels, as it can significantly reduce power output.
- Firmware Updates: Regularly update the MPPT firmware using the VictronConnect app to access the latest features and improvements.
Arduino UNO Integration Example
The SmartSolar MPPT can be monitored using an Arduino UNO via the VE.Direct port. Below is an example code snippet to read data from the MPPT:
#include <SoftwareSerial.h>

// Define VE.Direct pins for Arduino
#define RX_PIN 10  // Arduino pin connected to VE.Direct TX
#define TX_PIN 11  // Arduino pin connected to VE.Direct RX

SoftwareSerial veDirect(RX_PIN, TX_PIN); // Initialize software serial

void setup() {
  Serial.begin(9600); // Start serial communication with PC
  veDirect.begin(19200); // Start communication with MPPT
  Serial.println("SmartSolar MPPT Monitoring Started");
}

void loop() {
  if (veDirect.available()) {
    char c = veDirect.read(); // Read data from MPPT
    Serial.print(c); // Print data to Serial Monitor
  }
}
Note: Ensure the VE.Direct cable is properly connected to the Arduino UNO. Use a level shifter if required to match voltage levels.
Troubleshooting and FAQs
Common Issues and Solutions
| Issue | Possible Cause | Solution |
|---|---|---|
| MPPT not powering on | Incorrect battery connection | Verify battery polarity and connections. |
| Low or no power output | Shading on solar panels | Remove shading or reposition panels. |
| Overvoltage error | Solar panel Voc exceeds MPPT limit | Use panels with appropriate voltage rating. |
| Bluetooth not connecting | Outdated firmware or app version | Update firmware and VictronConnect app. |
| Load output not working | Load exceeds MPPT's output capacity | Reduce load or use an external controller. |
FAQs
Can I use the SmartSolar MPPT with lithium batteries?
- Yes, the MPPT supports lithium batteries. Ensure the battery's charge profile is configured correctly.
What happens if the solar panel voltage exceeds the MPPT's limit?
- The MPPT will shut down to protect itself. Always ensure the panel's Voc is within the specified range.
Can I monitor the MPPT remotely?
- Yes, you can use the VictronConnect app or integrate the MPPT with a Victron GX device for remote monitoring.
Is the MPPT waterproof?
- The SmartSolar MPPT is not fully waterproof. Install it in a dry, well-ventilated location.
How do I reset the MPPT?
- Disconnect the battery and solar panel connections, wait for a few minutes, and reconnect them.
This concludes the documentation for the SmartSolar MPPT series by Victron Energy. For further assistance, refer to the official user manual or contact Victron Energy support.