Cirkit Designer Logo
Cirkit Designer
Your all-in-one circuit design IDE
Home / 
Component Documentation

How to Use Adafruit Standard LCD 16x2 white on blue: Examples, Pinouts, and Specs

Image of Adafruit Standard LCD 16x2 white on blue
Cirkit Designer LogoDesign with Adafruit Standard LCD 16x2 white on blue in Cirkit Designer

Introduction

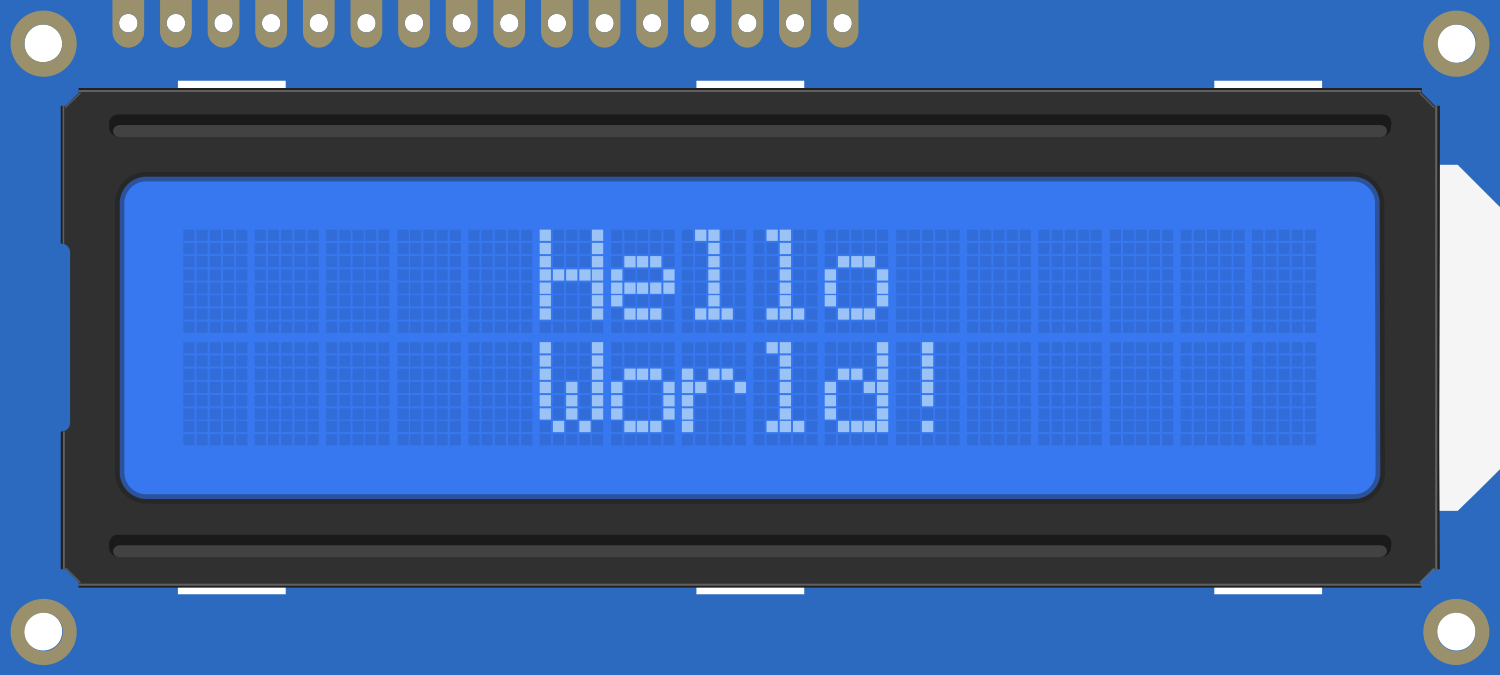
The Adafruit Standard LCD 16x2 is a versatile and widely-used alphanumeric display module that provides a simple way to integrate a user interface into a wide range of electronic projects. With its 16 characters per line and 2 lines, it is capable of displaying a total of 32 characters at a time. The white backlight and blue text on a black background offer high contrast and readability. This display is commonly used in DIY electronics, hobby projects, and even in commercial applications for displaying text messages, sensor data, and user interface elements.

Explore Projects Built with Adafruit Standard LCD 16x2 white on blue

Use Cirkit Designer to design, explore, and prototype these projects online. Some projects support real-time simulation. Click "Open Project" to start designing instantly!
Arduino UNO Controlled I2C LCD Display Message Center
Image of LCD I2C: A project utilizing Adafruit Standard LCD 16x2 white on blue in a practical application
This circuit connects an Arduino UNO to a 16x4 I2C LCD display for the purpose of displaying text. The Arduino is programmed to initialize the display, turn on its backlight, and print 'Hello, World!' on the screen. The I2C communication protocol is used, with the Arduino's A4 and A5 pins serving as SDA and SCL lines, respectively, and power is supplied to the display via the Arduino's 5V output.
Cirkit Designer LogoOpen Project in Cirkit Designer
Arduino UNO and 16x2 I2C LCD Display Interface for Data Visualization
Image of lcd: A project utilizing Adafruit Standard LCD 16x2 white on blue in a practical application
This circuit consists of an Arduino UNO microcontroller connected to a 16x2 I2C LCD display. The Arduino UNO provides power and I2C communication to the LCD, allowing it to display information controlled by the Arduino.
Cirkit Designer LogoOpen Project in Cirkit Designer
Arduino Nano Controlled LCD Interface with Pushbutton Inputs
Image of MacroDisplay: A project utilizing Adafruit Standard LCD 16x2 white on blue in a practical application
This circuit features a Nano 3.0 ATmega328P microcontroller connected to a 16x2 I2C LCD display for output. Two pushbuttons, each with a 10k Ohm pull-down resistor, are connected to digital pins D2 and D3 of the microcontroller for input. The LCD and pushbuttons are powered by the 5V output from the microcontroller, and all components share a common ground.
Cirkit Designer LogoOpen Project in Cirkit Designer
A-Star 32U4 Mini and I2C LCD Screen Battery-Powered Display
Image of lcd disolay: A project utilizing Adafruit Standard LCD 16x2 white on blue in a practical application
This circuit features an A-Star 32U4 Mini microcontroller connected to a 16x2 I2C LCD screen. The microcontroller provides power and ground to the LCD, and communicates with it via the I2C protocol using the A4 (SDA) and A5 (SCL) pins.
Cirkit Designer LogoOpen Project in Cirkit Designer

Explore Projects Built with Adafruit Standard LCD 16x2 white on blue

Use Cirkit Designer to design, explore, and prototype these projects online. Some projects support real-time simulation. Click "Open Project" to start designing instantly!
Image of LCD I2C: A project utilizing Adafruit Standard LCD 16x2 white on blue in a practical application
Arduino UNO Controlled I2C LCD Display Message Center
This circuit connects an Arduino UNO to a 16x4 I2C LCD display for the purpose of displaying text. The Arduino is programmed to initialize the display, turn on its backlight, and print 'Hello, World!' on the screen. The I2C communication protocol is used, with the Arduino's A4 and A5 pins serving as SDA and SCL lines, respectively, and power is supplied to the display via the Arduino's 5V output.
Cirkit Designer LogoOpen Project in Cirkit Designer
Image of lcd: A project utilizing Adafruit Standard LCD 16x2 white on blue in a practical application
Arduino UNO and 16x2 I2C LCD Display Interface for Data Visualization
This circuit consists of an Arduino UNO microcontroller connected to a 16x2 I2C LCD display. The Arduino UNO provides power and I2C communication to the LCD, allowing it to display information controlled by the Arduino.
Cirkit Designer LogoOpen Project in Cirkit Designer
Image of MacroDisplay: A project utilizing Adafruit Standard LCD 16x2 white on blue in a practical application
Arduino Nano Controlled LCD Interface with Pushbutton Inputs
This circuit features a Nano 3.0 ATmega328P microcontroller connected to a 16x2 I2C LCD display for output. Two pushbuttons, each with a 10k Ohm pull-down resistor, are connected to digital pins D2 and D3 of the microcontroller for input. The LCD and pushbuttons are powered by the 5V output from the microcontroller, and all components share a common ground.
Cirkit Designer LogoOpen Project in Cirkit Designer
Image of lcd disolay: A project utilizing Adafruit Standard LCD 16x2 white on blue in a practical application
A-Star 32U4 Mini and I2C LCD Screen Battery-Powered Display
This circuit features an A-Star 32U4 Mini microcontroller connected to a 16x2 I2C LCD screen. The microcontroller provides power and ground to the LCD, and communicates with it via the I2C protocol using the A4 (SDA) and A5 (SCL) pins.
Cirkit Designer LogoOpen Project in Cirkit Designer

Common Applications

  • DIY electronics projects
  • User interfaces for devices
  • Display for sensor readings
  • Menus for system configuration
  • Clocks and timers

Technical Specifications

Key Technical Details

  • Display Type: Alphanumeric LCD
  • Number of Characters: 16 characters x 2 lines
  • Backlight: White LED
  • Text Color: Blue
  • Operating Voltage: 5V
  • Interface: Parallel interface (4-bit or 8-bit)

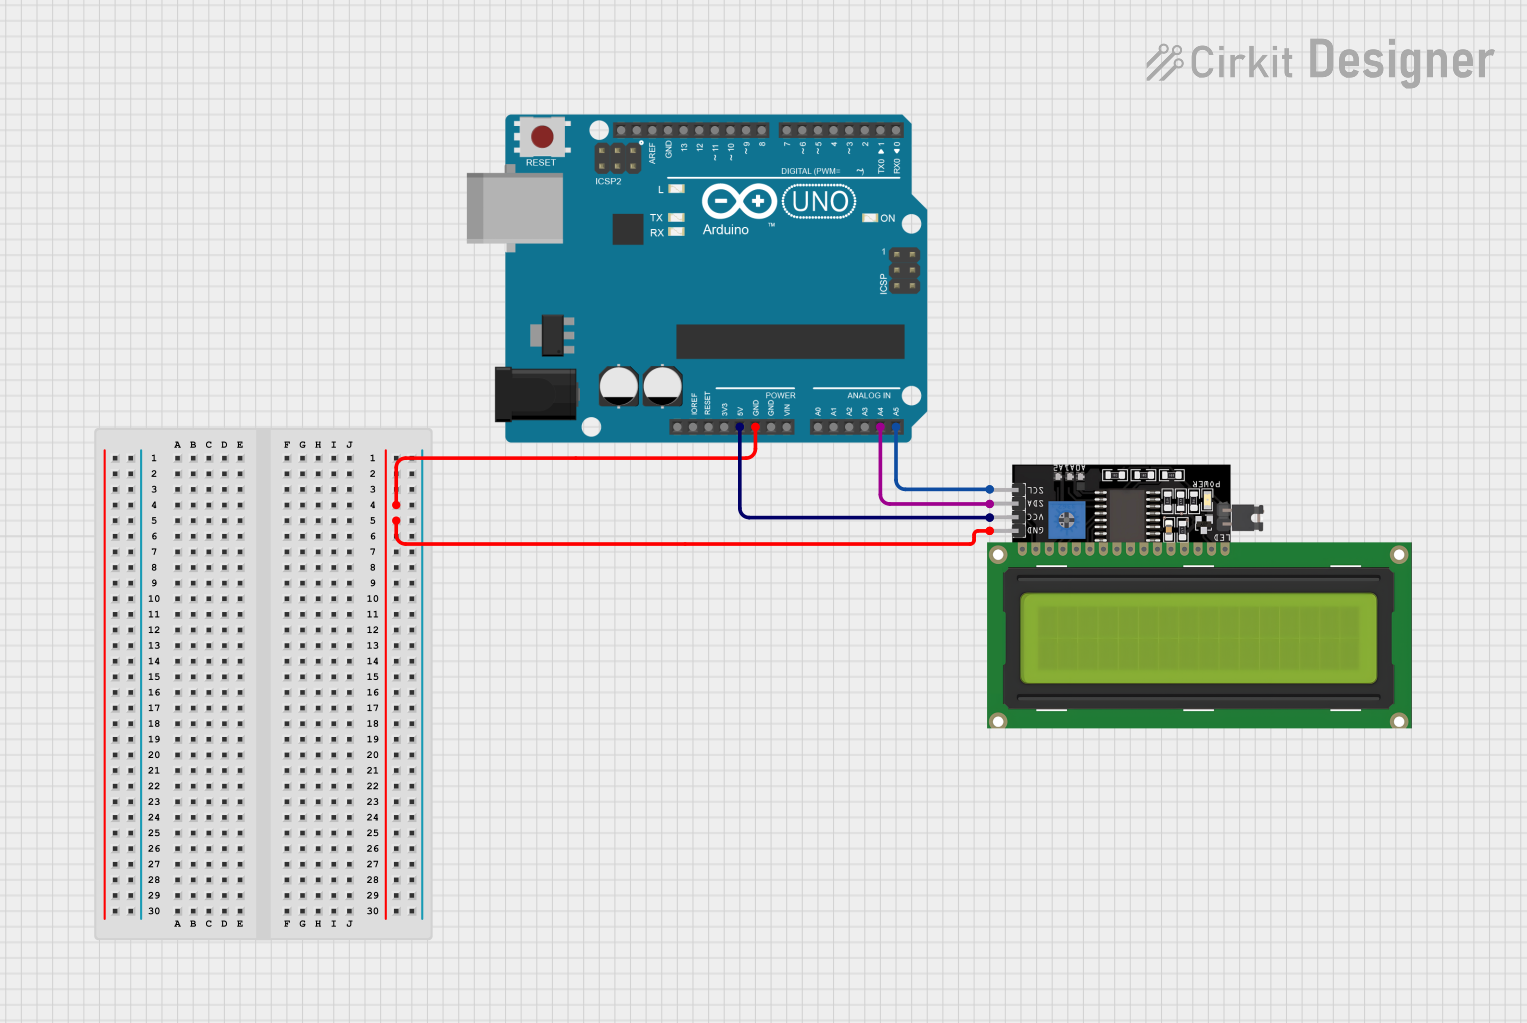
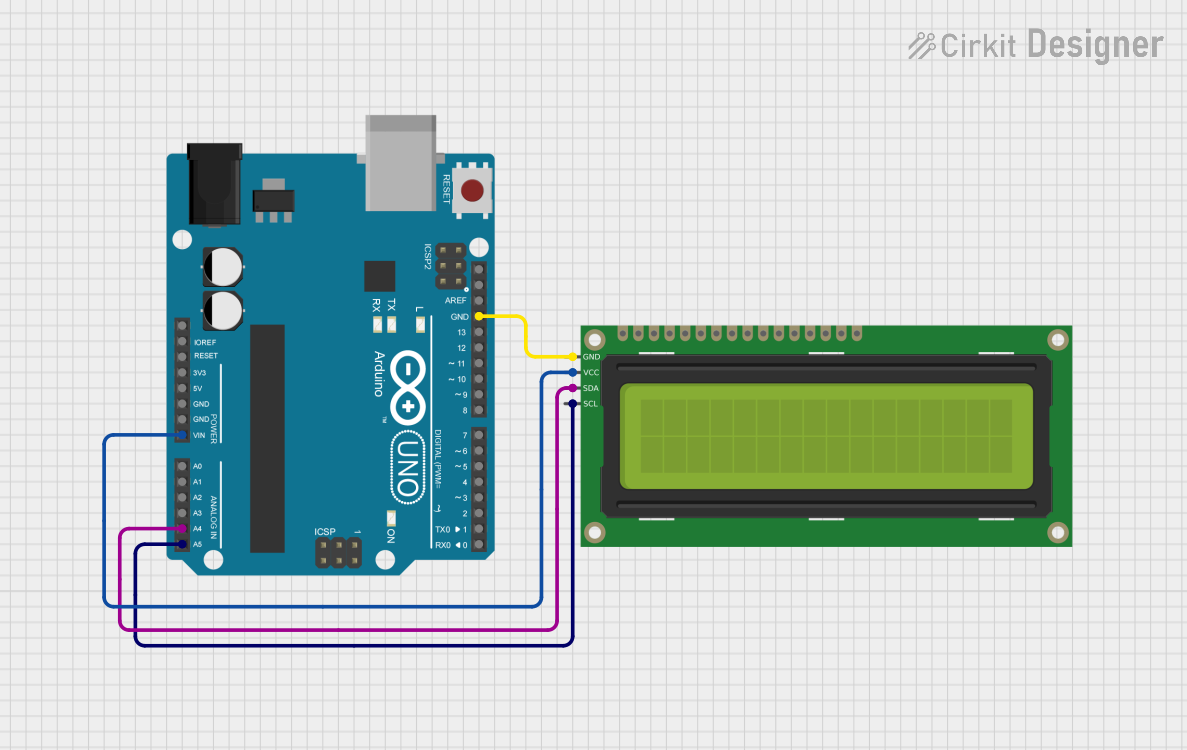
Pin Configuration and Descriptions

Pin Number Name Description
1 GND Ground connection
2 VCC Power supply (5V)
3 V0 Contrast adjustment
4 RS Register select signal
5 R/W Read/Write signal
6 E Enable signal
7-14 D0-D7 Data bus lines
15 A Anode for backlight (+5V)
16 K Cathode for backlight (GND)

Usage Instructions

Connecting to a Circuit

  1. Connect pins 1 (GND) and 2 (VCC) to the ground and power supply (5V) respectively.
  2. Connect pin 3 (V0) to a potentiometer for contrast adjustment.
  3. Connect pins 4 (RS), 5 (R/W), and 6 (E) to digital pins on your microcontroller for control signals.
  4. Connect pins 7-14 (D0-D7) to digital pins on your microcontroller if using an 8-bit interface, or pins 11-14 (D4-D7) for a 4-bit interface.
  5. Connect pins 15 (A) and 16 (K) to the power supply and ground respectively for the backlight.

Important Considerations and Best Practices

  • Always ensure that the power supply is 5V; higher voltages can damage the display.
  • Use a current-limiting resistor or a proper current source for the backlight to prevent damage.
  • Adjust the contrast potentiometer for clear visibility of the text.
  • When using a 4-bit interface, make sure to send the higher nibble first.

Example Arduino UNO Code

#include <LiquidCrystal.h>

// Initialize the library with the numbers of the interface pins
LiquidCrystal lcd(12, 11, 5, 4, 3, 2);

void setup() {
  // Set up the LCD's number of columns and rows:
  lcd.begin(16, 2);
  // Print a message to the LCD.
  lcd.print("Hello, World!");
}

void loop() {
  // Set the cursor to column 0, line 1
  // (note: line 1 is the second row, since counting begins with 0):
  lcd.setCursor(0, 1);
  // Print the number of seconds since reset:
  lcd.print(millis() / 1000);
}

Troubleshooting and FAQs

Common Issues

  • Display not turning on: Check the power supply connections and the backlight wiring.
  • Characters not visible or faint: Adjust the contrast potentiometer.
  • Garbled text: Ensure that the data lines are connected properly and the correct interface mode (4-bit or 8-bit) is selected in the code.

Solutions and Tips for Troubleshooting

  • Double-check all wiring connections.
  • Make sure the contrast is properly adjusted.
  • Verify that the Arduino library is correctly installed and included.
  • Reset the Arduino and the LCD module to clear any residual states from previous programs.

FAQs

Q: Can I use this display with a 3.3V system? A: The display is designed for 5V. Using it with 3.3V may result in dim or invisible text. Use a level shifter or logic level converter if necessary.

Q: How do I control the backlight? A: The backlight can be turned on by connecting pin 15 (A) to 5V and pin 16 (K) to GND. To control the brightness, use a PWM signal or a variable resistor.

Q: What is the maximum operating temperature for the LCD? A: The typical operating temperature range for this LCD is from 0°C to 50°C. Check the manufacturer's datasheet for exact specifications.

Q: Can I display custom characters? A: Yes, the Adafruit Standard LCD 16x2 supports custom characters. You can create and display custom characters using the createChar() function in the LiquidCrystal library.