How to Use Arduino UNO R4 Minima: Examples, Pinouts, and Specs

Introduction
The Arduino UNO R4 Minima is a compact and versatile microcontroller board developed by Arduino. It is based on the Renesas RA4M1 microcontroller, offering enhanced performance and features compared to its predecessors. Designed for easy prototyping and development, the UNO R4 Minima is ideal for a wide range of applications, including IoT devices, robotics, home automation, and educational projects. Its compatibility with the Arduino IDE and extensive library support makes it beginner-friendly while still catering to advanced users.
Explore Projects Built with Arduino UNO R4 Minima
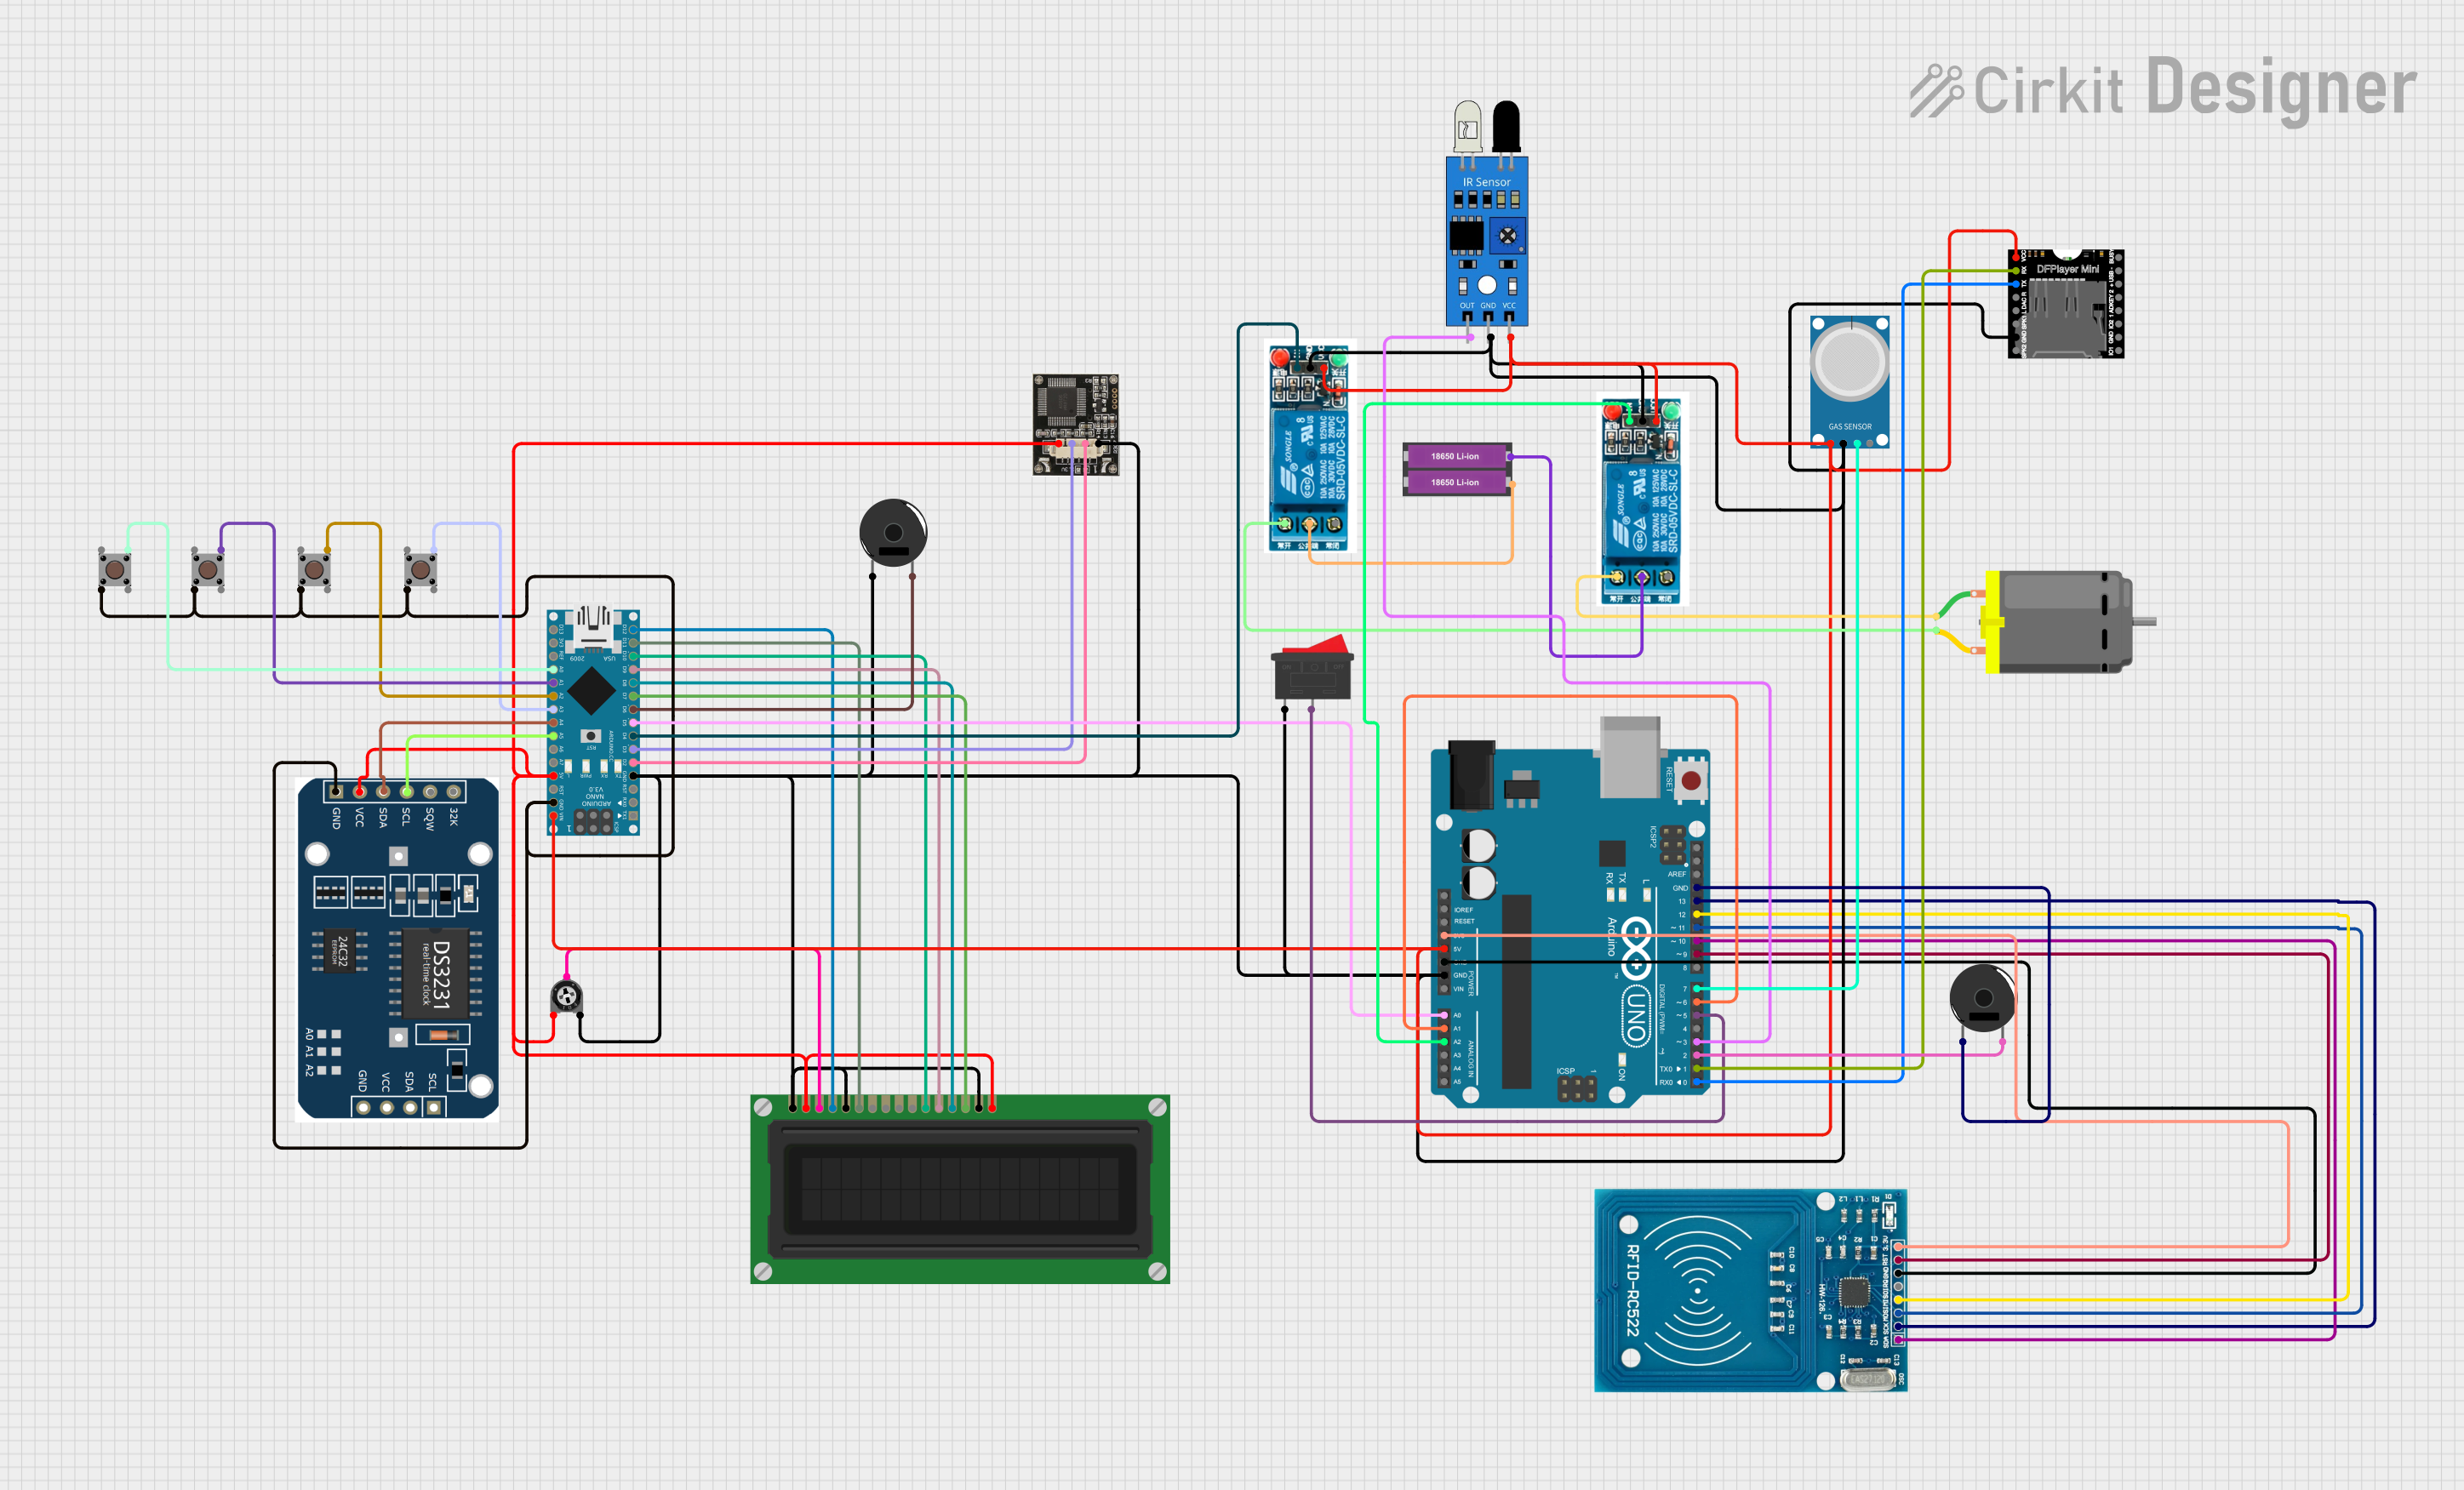
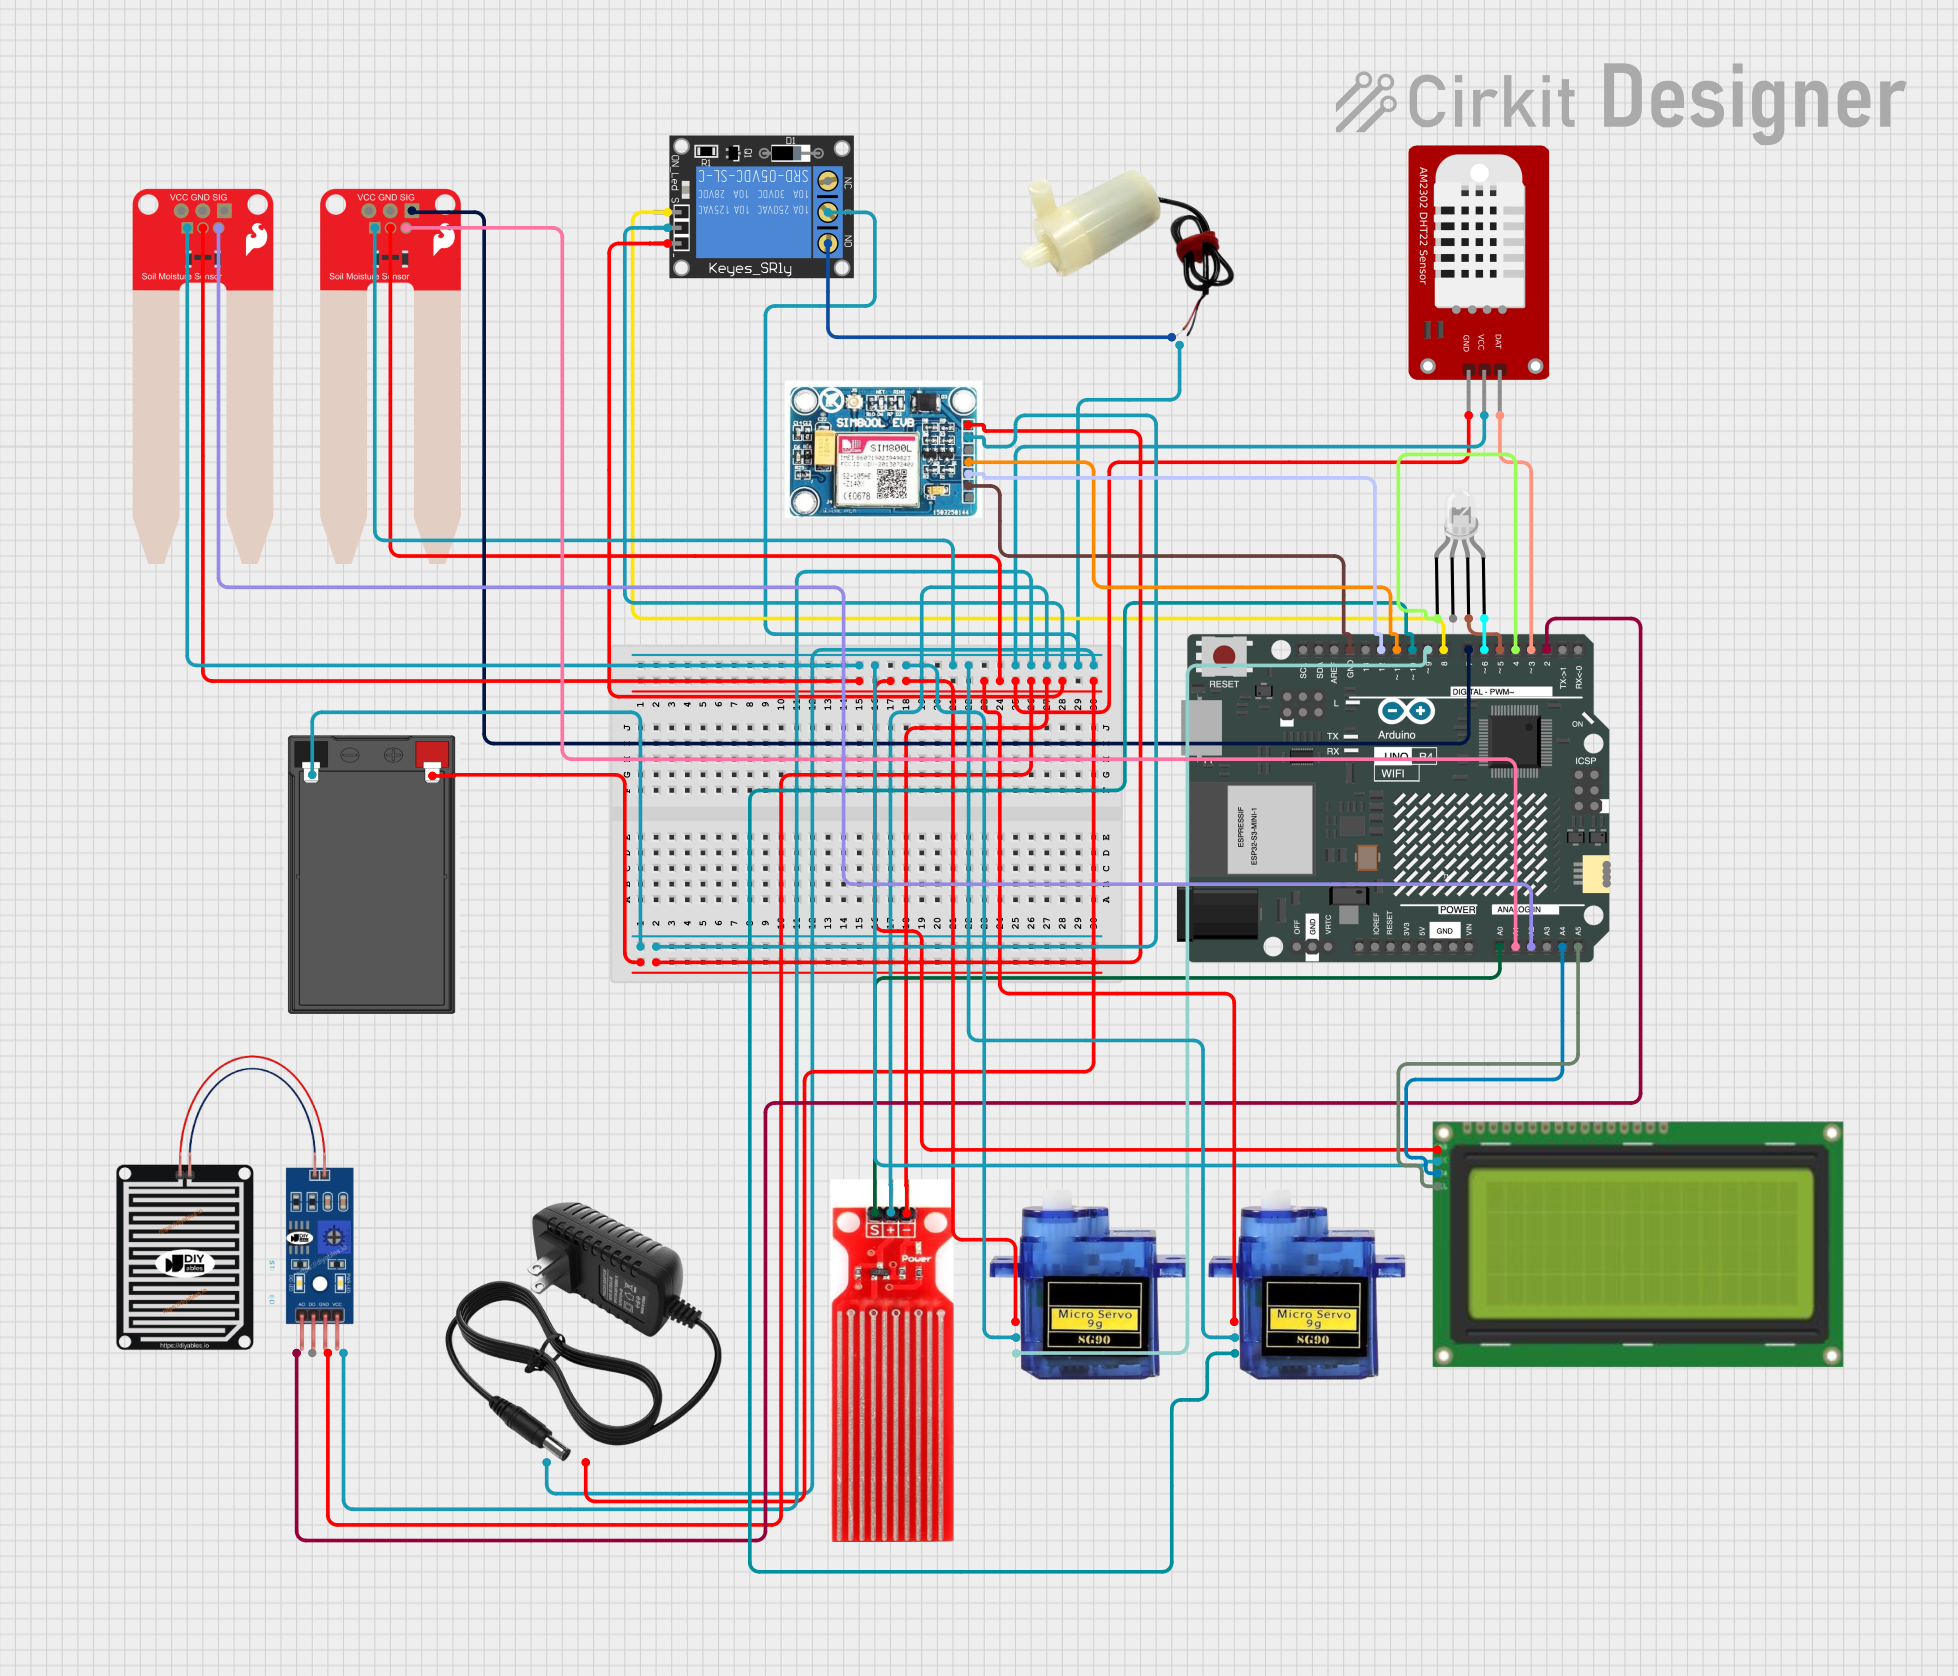
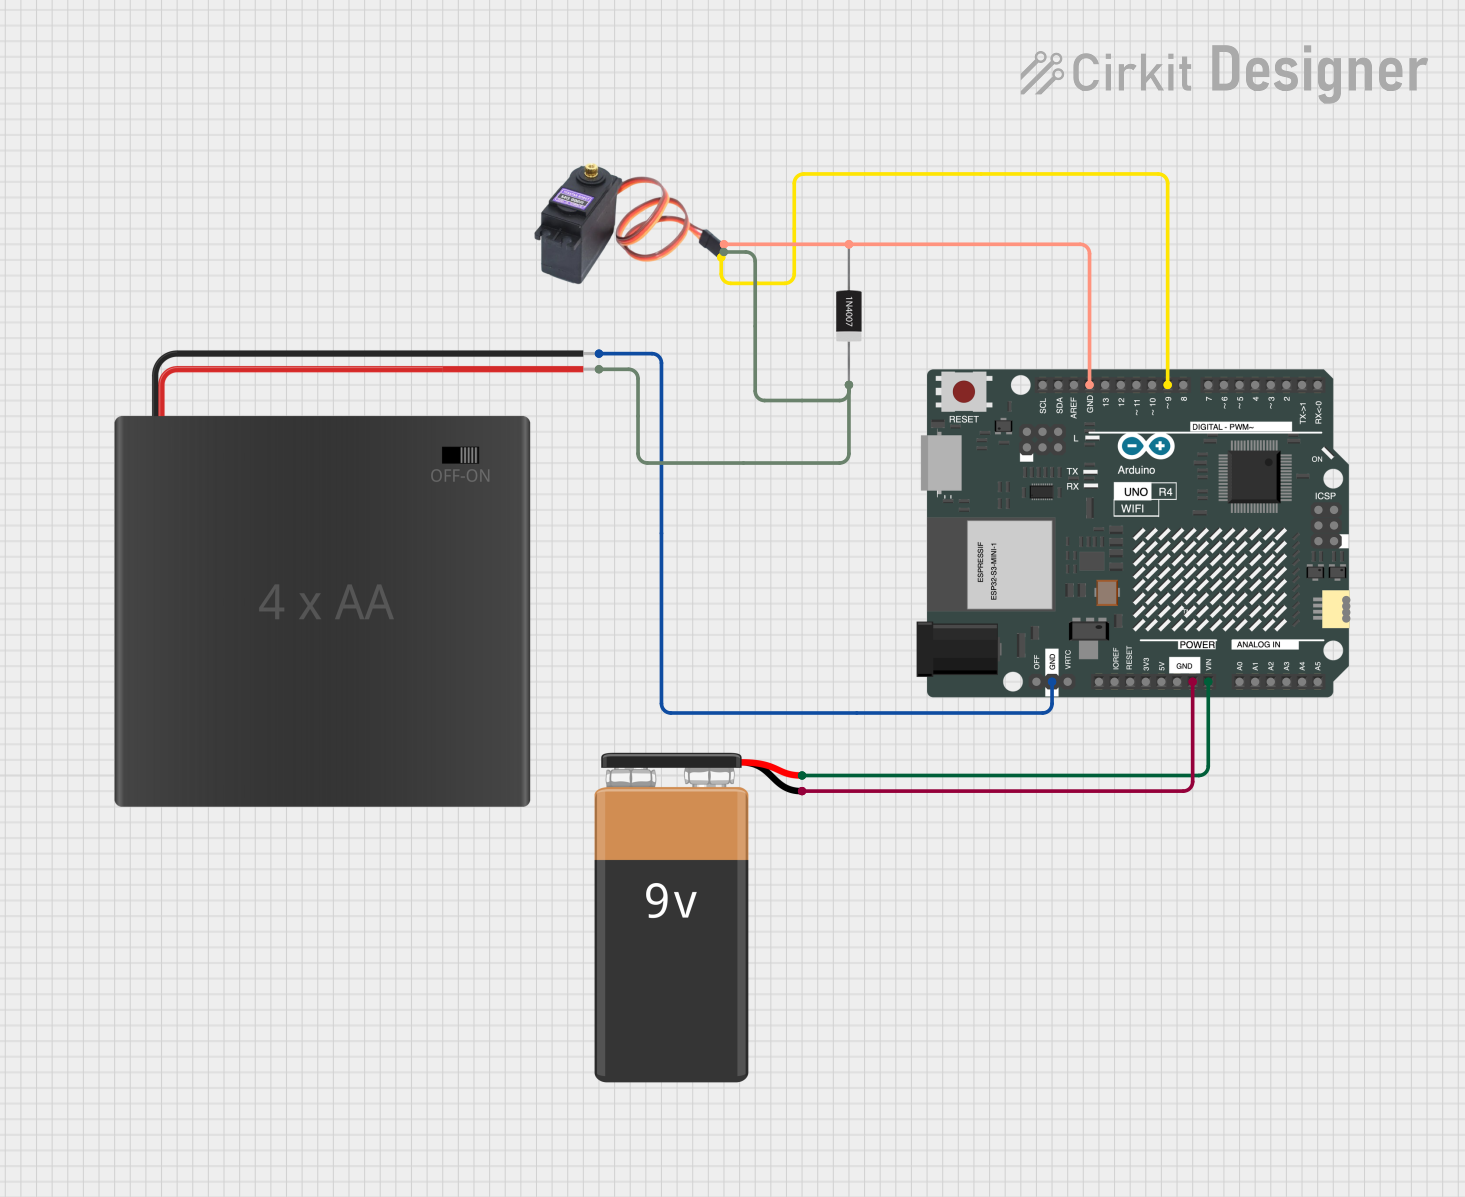
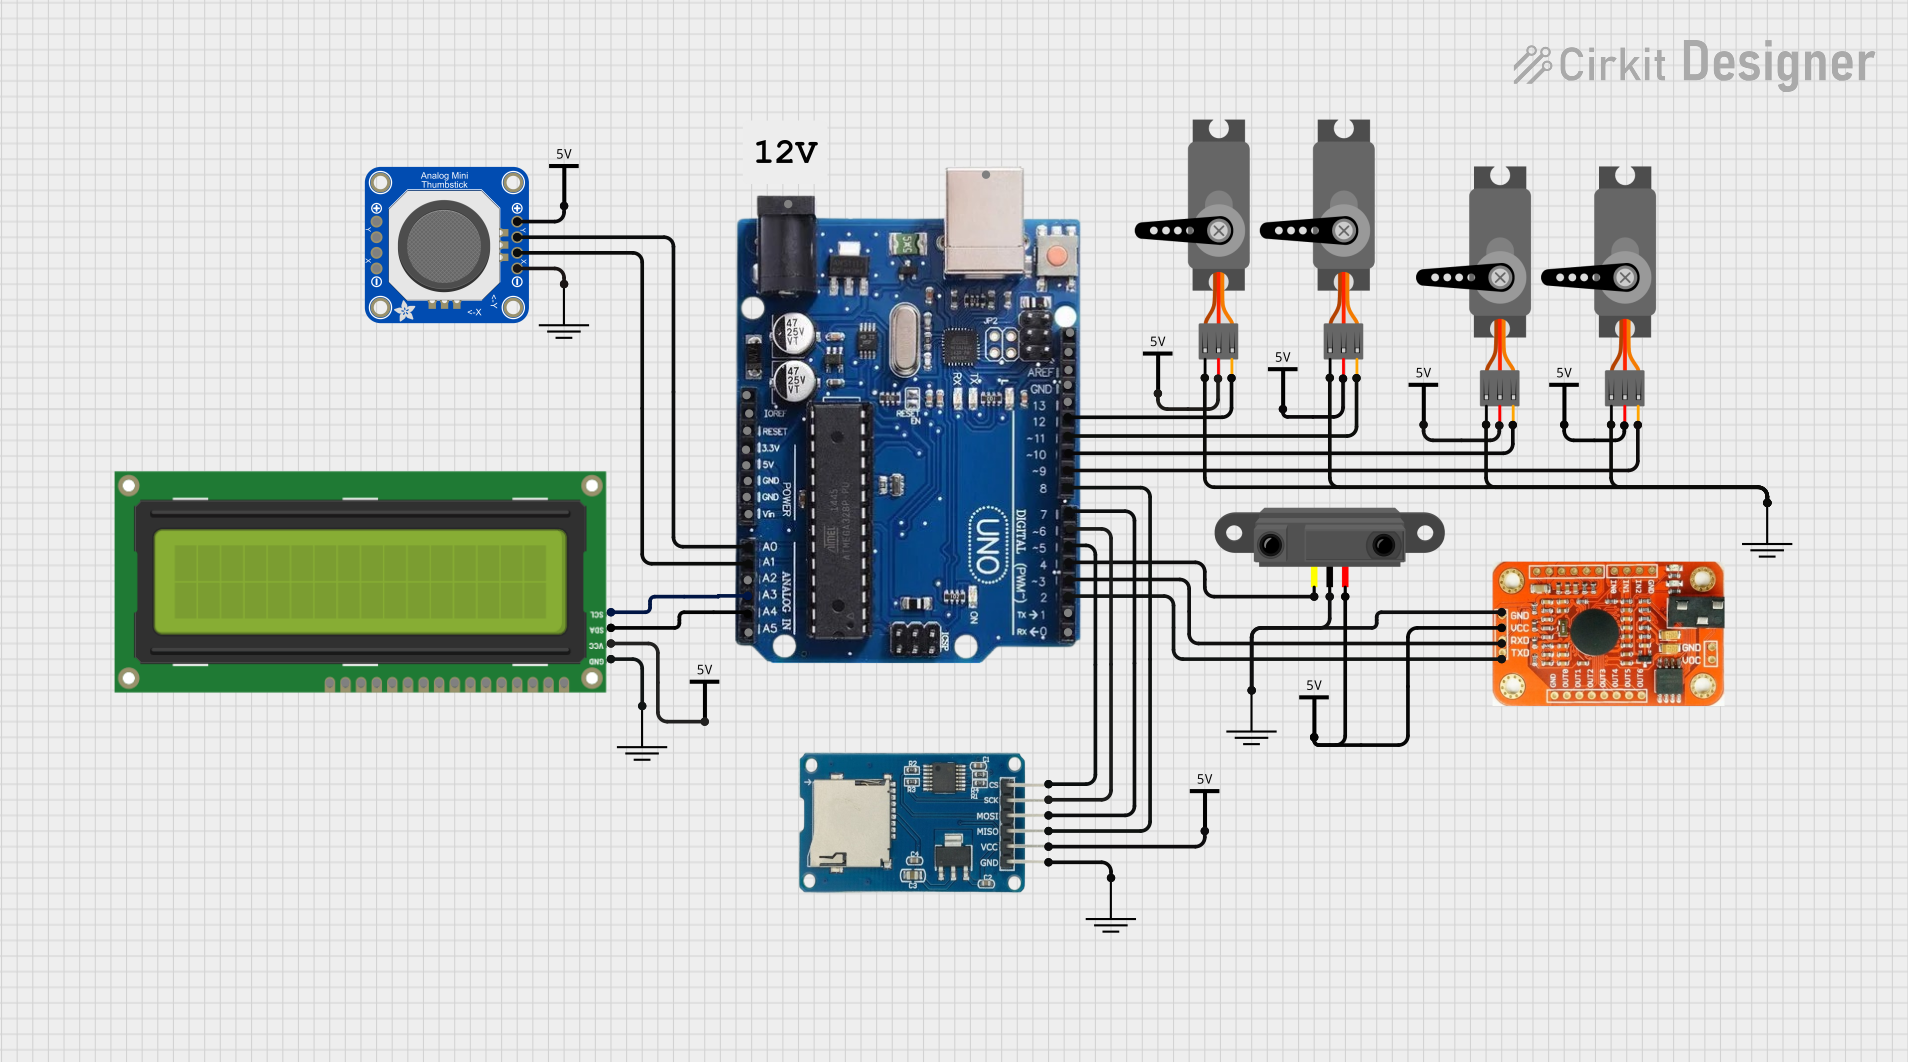
Explore Projects Built with Arduino UNO R4 Minima
Common Applications and Use Cases
- IoT Projects: Build connected devices with Wi-Fi or Bluetooth modules.
- Robotics: Control motors, servos, and sensors for robotic systems.
- Home Automation: Create smart home devices like temperature controllers or lighting systems.
- Educational Tools: Teach programming and electronics in classrooms or workshops.
- Prototyping: Rapidly develop and test electronic circuits and systems.
Technical Specifications
Key Technical Details
| Specification | Details |
|---|---|
| Microcontroller | Renesas RA4M1 (Arm Cortex-M4, 48 MHz) |
| Operating Voltage | 5V |
| Input Voltage (VIN) | 6-24V |
| Digital I/O Pins | 14 (6 PWM outputs) |
| Analog Input Pins | 6 |
| Flash Memory | 256 KB |
| SRAM | 32 KB |
| Clock Speed | 48 MHz |
| USB Interface | USB-C (for programming and power supply) |
| Current per I/O Pin | 8 mA |
| Dimensions | 68.6 mm x 53.4 mm |
| Weight | 25 g |
Pin Configuration and Descriptions
| Pin | Type | Description |
|---|---|---|
| VIN | Power Input | External power input (6-24V). |
| 5V | Power Output | Regulated 5V output for powering external components. |
| GND | Ground | Ground connection. |
| Digital 0-13 | Digital I/O | General-purpose digital input/output pins. |
| PWM Pins | PWM Output | Pins 3, 5, 6, 9, 10, and 11 support PWM output. |
| Analog 0-5 | Analog Input | Analog input pins for reading sensor data (0-5V). |
| AREF | Analog Reference | Reference voltage for analog inputs. |
| RESET | Reset | Resets the microcontroller. |
| USB-C | USB Interface | Used for programming and power supply. |
Usage Instructions
How to Use the Arduino UNO R4 Minima in a Circuit
Powering the Board:
- Connect the board to your computer using a USB-C cable for programming and power.
- Alternatively, supply external power via the VIN pin (6-24V) or the DC barrel jack.
Programming the Board:
- Install the Arduino IDE from the official Arduino website.
- Select "Arduino UNO R4 Minima" as the board in the Tools menu.
- Write your code and upload it to the board via the USB-C connection.
Connecting Components:
- Use the digital I/O pins for controlling LEDs, relays, or other digital devices.
- Use the analog input pins to read sensor data (e.g., temperature, light intensity).
- Connect external modules (e.g., Wi-Fi, Bluetooth) via the I2C or SPI interfaces.
Important Considerations and Best Practices
- Voltage Levels: Ensure that connected components operate at 5V to avoid damaging the board.
- Current Limits: Do not exceed 8 mA per I/O pin or 200 mA total for all pins.
- Static Protection: Handle the board with care to avoid static discharge, which can damage the microcontroller.
- Libraries: Use Arduino libraries to simplify interfacing with sensors and modules.
Example Code: Blinking an LED
The following example demonstrates how to blink an LED connected to digital pin 13.
// This code blinks an LED connected to pin 13 on the Arduino UNO R4 Minima.
// The LED will turn on for 1 second and off for 1 second in a loop.

void setup() {
  pinMode(13, OUTPUT); // Set pin 13 as an output pin
}

void loop() {
  digitalWrite(13, HIGH); // Turn the LED on
  delay(1000);            // Wait for 1 second
  digitalWrite(13, LOW);  // Turn the LED off
  delay(1000);            // Wait for 1 second
}
Troubleshooting and FAQs
Common Issues and Solutions
The board is not detected by the computer:
- Ensure the USB-C cable is properly connected and supports data transfer.
- Check if the correct board and port are selected in the Arduino IDE.
Code upload fails:
- Verify that the board is in bootloader mode by pressing the reset button.
- Ensure no other application is using the COM port.
Components not working as expected:
- Double-check wiring and connections.
- Ensure the components are compatible with 5V logic levels.
The board overheats:
- Check for short circuits in your circuit.
- Ensure the total current draw does not exceed the board's limits.
FAQs
Can I use 3.3V sensors with the UNO R4 Minima?
- Yes, but you will need a level shifter to safely interface 3.3V sensors with the 5V logic of the board.
Is the UNO R4 Minima compatible with shields designed for the UNO R3?
- Yes, the UNO R4 Minima maintains the same form factor and pinout as the UNO R3.
What is the maximum current the board can supply?
- The 5V pin can supply up to 500 mA when powered via USB, or up to 1A when powered via VIN.
Can I use the Arduino UNO R4 Minima for battery-powered projects?
- Yes, you can power the board using a battery connected to the VIN pin, as long as the voltage is between 6-24V.
This documentation provides a comprehensive guide to using the Arduino UNO R4 Minima, ensuring users can maximize its potential for their projects.