How to Use VARIABLE VOLTAGE DIMMER: Examples, Pinouts, and Specs
Introduction
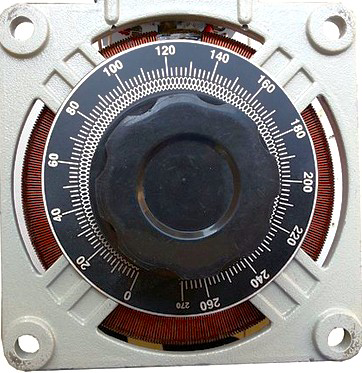
A Variable Voltage Dimmer is an electronic device designed to adjust the voltage supplied to a load, enabling control over the amount of electrical power delivered. This functionality allows users to regulate the brightness of lights, the speed of motors, or other similar applications. By varying the voltage, the dimmer provides a simple and efficient way to manage power consumption and enhance user control over connected devices.
Explore Projects Built with VARIABLE VOLTAGE DIMMER

Explore Projects Built with VARIABLE VOLTAGE DIMMER
Common Applications and Use Cases
- Lighting Control: Adjusting the brightness of incandescent or dimmable LED lights.
- Motor Speed Regulation: Controlling the speed of AC or DC motors in fans, drills, or other appliances.
- Heater Power Adjustment: Modulating the heat output of resistive heating elements.
- Home Automation: Integrating into smart home systems for dynamic control of lighting or appliances.
Technical Specifications
Below are the key technical details for a typical Variable Voltage Dimmer:
| Parameter | Value |
|---|---|
| Input Voltage Range | 110V AC to 240V AC (varies by model) |
| Output Voltage Range | 0V to Input Voltage (adjustable) |
| Maximum Load Power | 200W to 2000W (model-dependent) |
| Control Method | Rotary knob or digital interface |
| Frequency Range | 50Hz to 60Hz |
| Efficiency | >90% |
| Operating Temperature | -10°C to 50°C |
| Dimensions | Varies by model |
Pin Configuration and Descriptions
For a Variable Voltage Dimmer with a basic 3-pin configuration:
| Pin | Name | Description |
|---|---|---|
| 1 | Input (Live) | Connects to the live wire of the AC power source. |
| 2 | Output (Load) | Connects to the live wire of the load (e.g., light bulb, motor). |
| 3 | Neutral | Connects to the neutral wire of the AC power source and the load. |
For advanced models with additional control pins (e.g., for microcontroller integration):
| Pin | Name | Description |
|---|---|---|
| 4 | PWM Input | Accepts a PWM signal for digital control of the output voltage. |
| 5 | Ground (GND) | Common ground for the control circuit. |
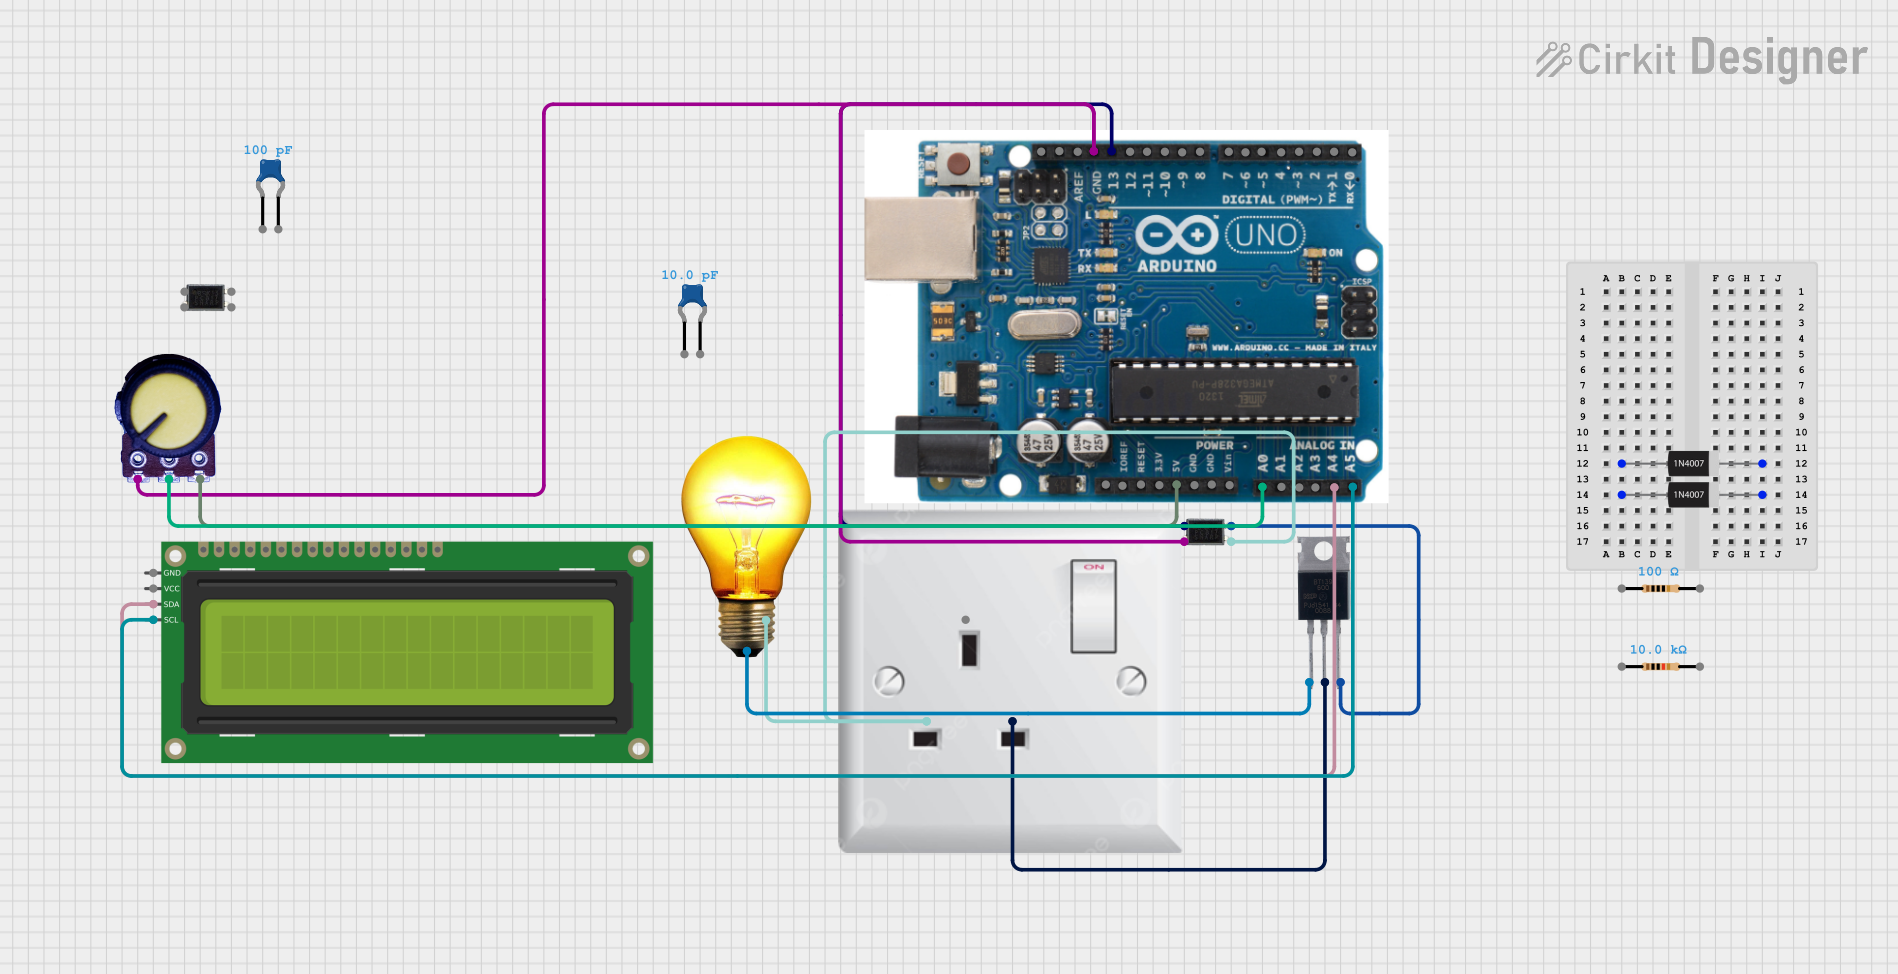
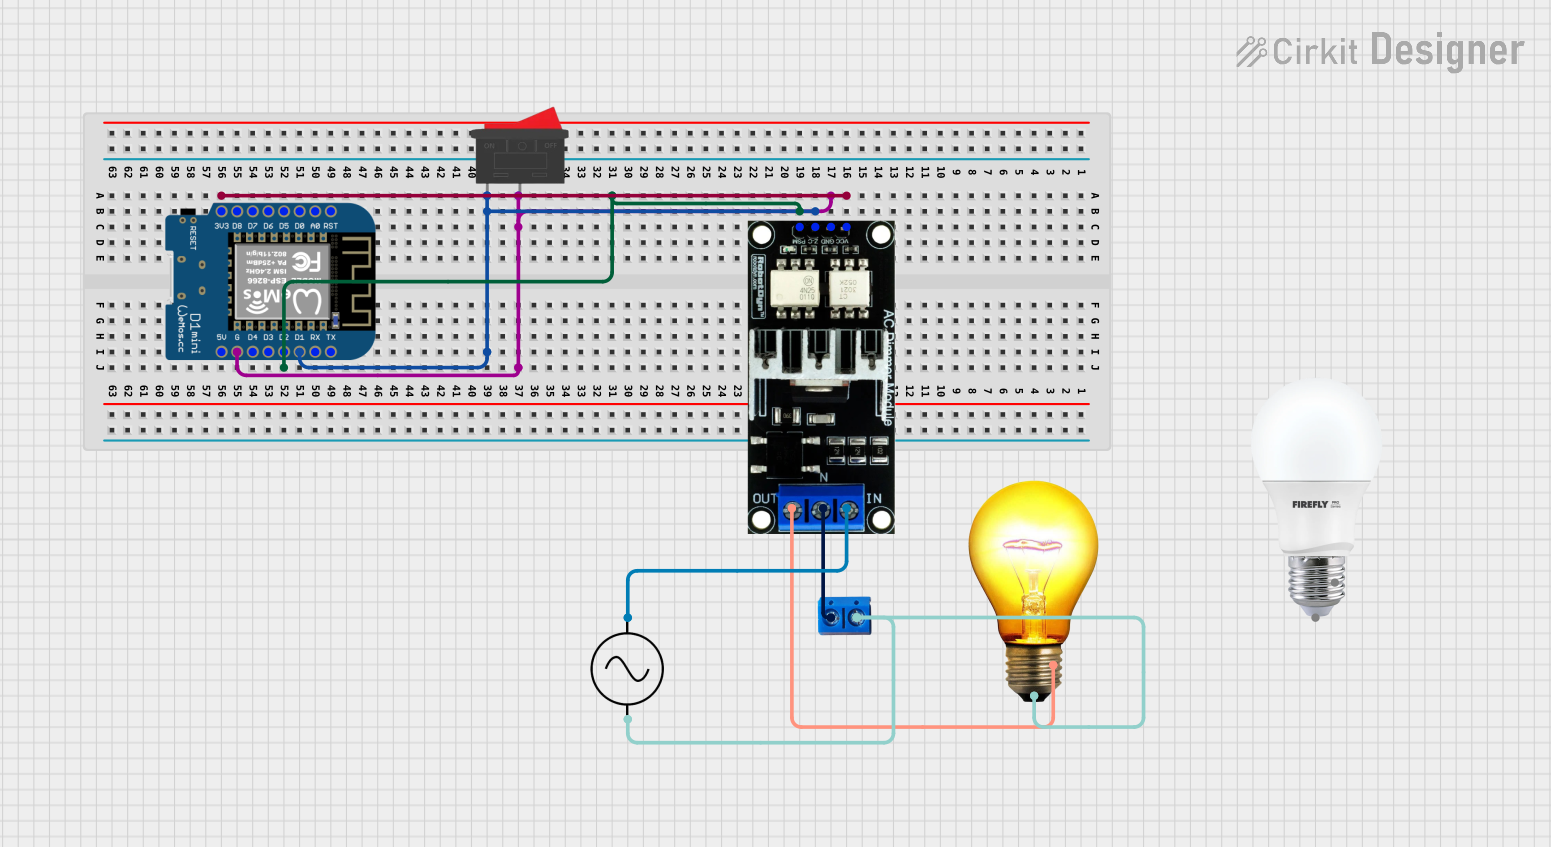
Usage Instructions
How to Use the Component in a Circuit
- Safety First: Ensure the power source is disconnected before wiring the dimmer.
- Wiring:
- Connect the Input (Live) pin to the live wire of the AC power source.
- Connect the Neutral pin to the neutral wire of both the power source and the load.
- Connect the Output (Load) pin to the live wire of the load (e.g., light or motor).
- Adjusting Voltage:
- For rotary knob dimmers, turn the knob to increase or decrease the output voltage.
- For digital dimmers, use the control interface or send a PWM signal (if supported).
- Power On: After verifying the connections, power on the circuit and adjust the dimmer as needed.
Important Considerations and Best Practices
- Load Compatibility: Ensure the connected load (e.g., light or motor) is compatible with the dimmer's output voltage and power rating.
- Heat Dissipation: High-power dimmers may generate heat. Use proper ventilation or heat sinks to prevent overheating.
- Avoid Overloading: Do not exceed the maximum load power rating of the dimmer to prevent damage.
- AC vs. DC Loads: Verify whether the dimmer is designed for AC or DC loads, as using the wrong type can cause malfunction or damage.
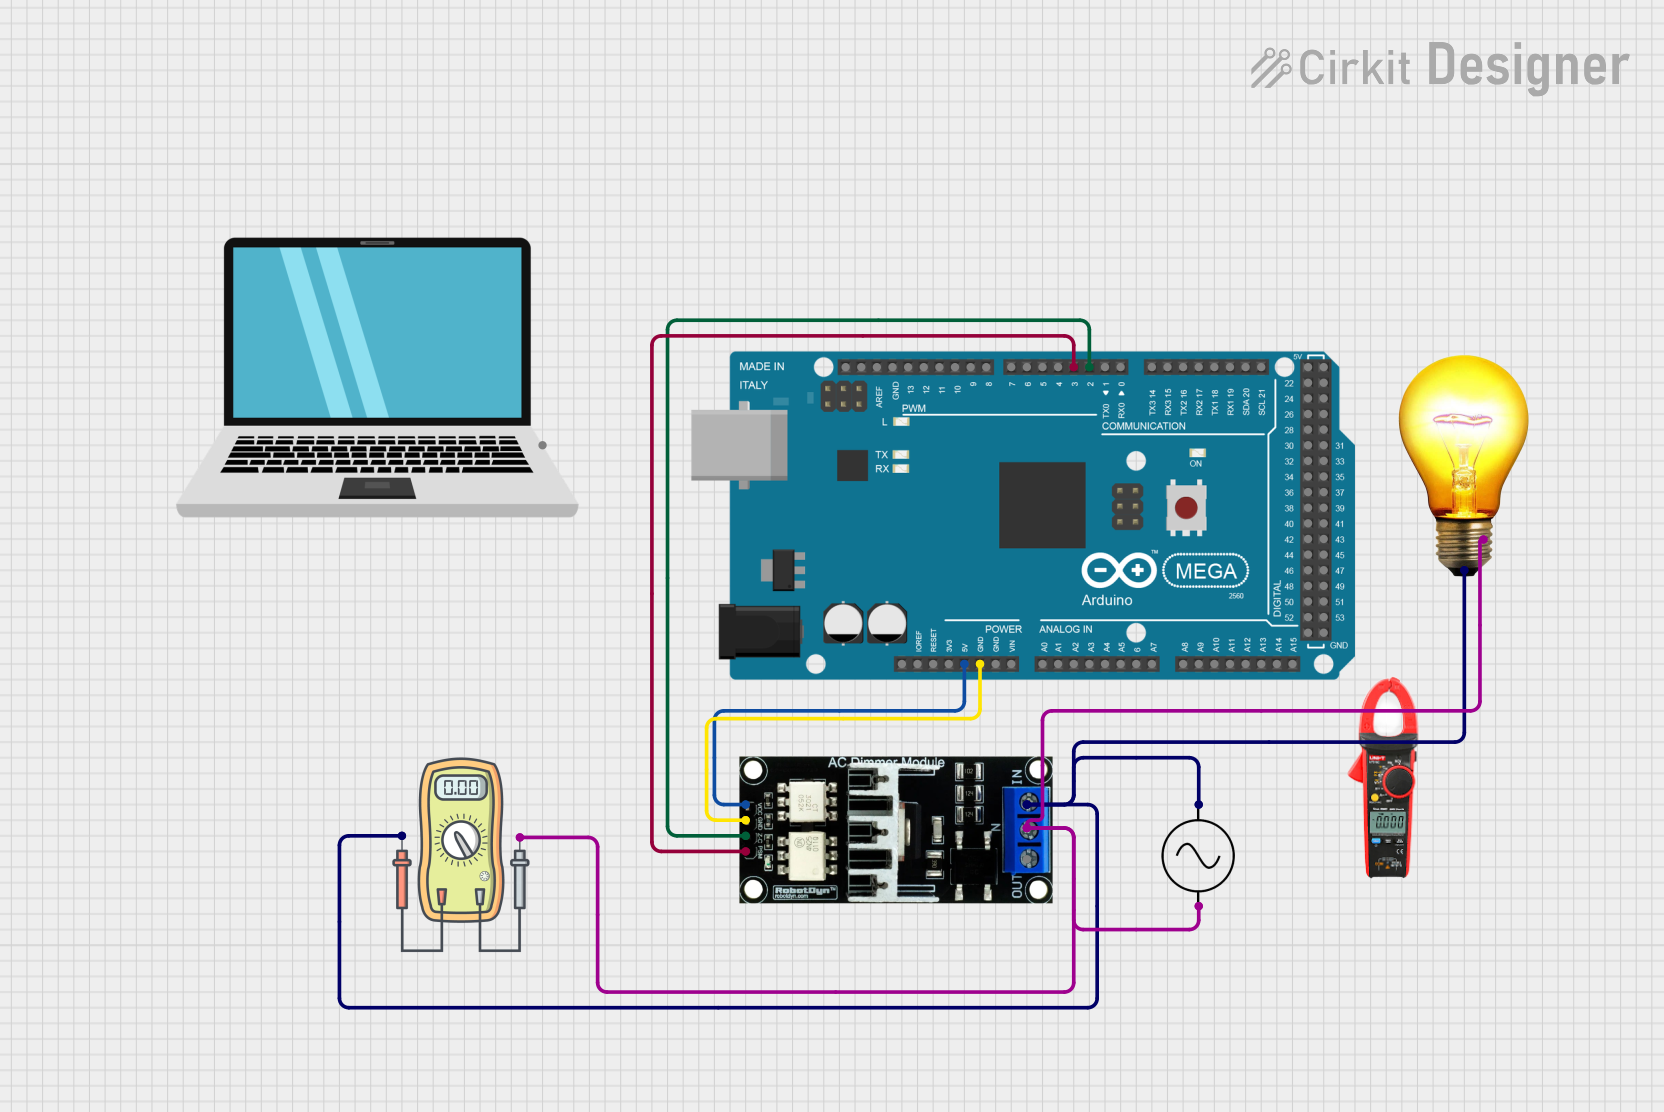
Example: Using a Variable Voltage Dimmer with Arduino UNO
For dimmers with a PWM input pin, you can control the output voltage using an Arduino UNO. Below is an example code snippet:
// Example: Controlling a Variable Voltage Dimmer with Arduino UNO
// This code generates a PWM signal to adjust the dimmer's output voltage.

const int pwmPin = 9; // PWM output pin connected to the dimmer's PWM input

void setup() {
  pinMode(pwmPin, OUTPUT); // Set the PWM pin as an output
}

void loop() {
  for (int dutyCycle = 0; dutyCycle <= 255; dutyCycle++) {
    analogWrite(pwmPin, dutyCycle); // Gradually increase the PWM duty cycle
    delay(10); // Wait 10ms for smooth dimming
  }
  for (int dutyCycle = 255; dutyCycle >= 0; dutyCycle--) {
    analogWrite(pwmPin, dutyCycle); // Gradually decrease the PWM duty cycle
    delay(10); // Wait 10ms for smooth dimming
  }
}
Note: Ensure the dimmer supports PWM control and that the PWM frequency is compatible with the dimmer's specifications.
Troubleshooting and FAQs
Common Issues and Solutions
Dimmer Not Working:
- Cause: Incorrect wiring.
- Solution: Double-check the wiring connections, ensuring the live and neutral wires are properly connected.
Load Flickering:
- Cause: Incompatible load (e.g., non-dimmable LED).
- Solution: Use a load that is compatible with the dimmer, such as dimmable LEDs or incandescent bulbs.
Overheating:
- Cause: Exceeding the maximum load power rating.
- Solution: Reduce the load or use a higher-rated dimmer.
No Response to PWM Signal:
- Cause: Incorrect PWM frequency or wiring.
- Solution: Verify the PWM frequency matches the dimmer's requirements and check the connections.
FAQs
Q: Can I use this dimmer with a ceiling fan?
- A: Yes, as long as the fan's power rating is within the dimmer's maximum load capacity.
Q: Is this dimmer compatible with LED lights?
- A: Only if the LED lights are labeled as "dimmable." Non-dimmable LEDs may flicker or not work properly.
Q: Can I control the dimmer remotely?
- A: Some advanced dimmers support remote control via PWM or smart home integration. Check the model's specifications.
Q: What happens if I exceed the maximum load?
- A: Exceeding the load can cause overheating, damage to the dimmer, or even electrical hazards. Always stay within the rated capacity.