How to Use turbidity sensor: Examples, Pinouts, and Specs
Introduction
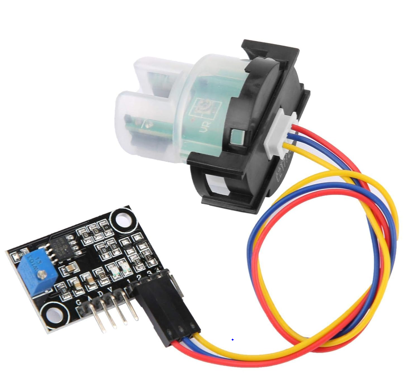
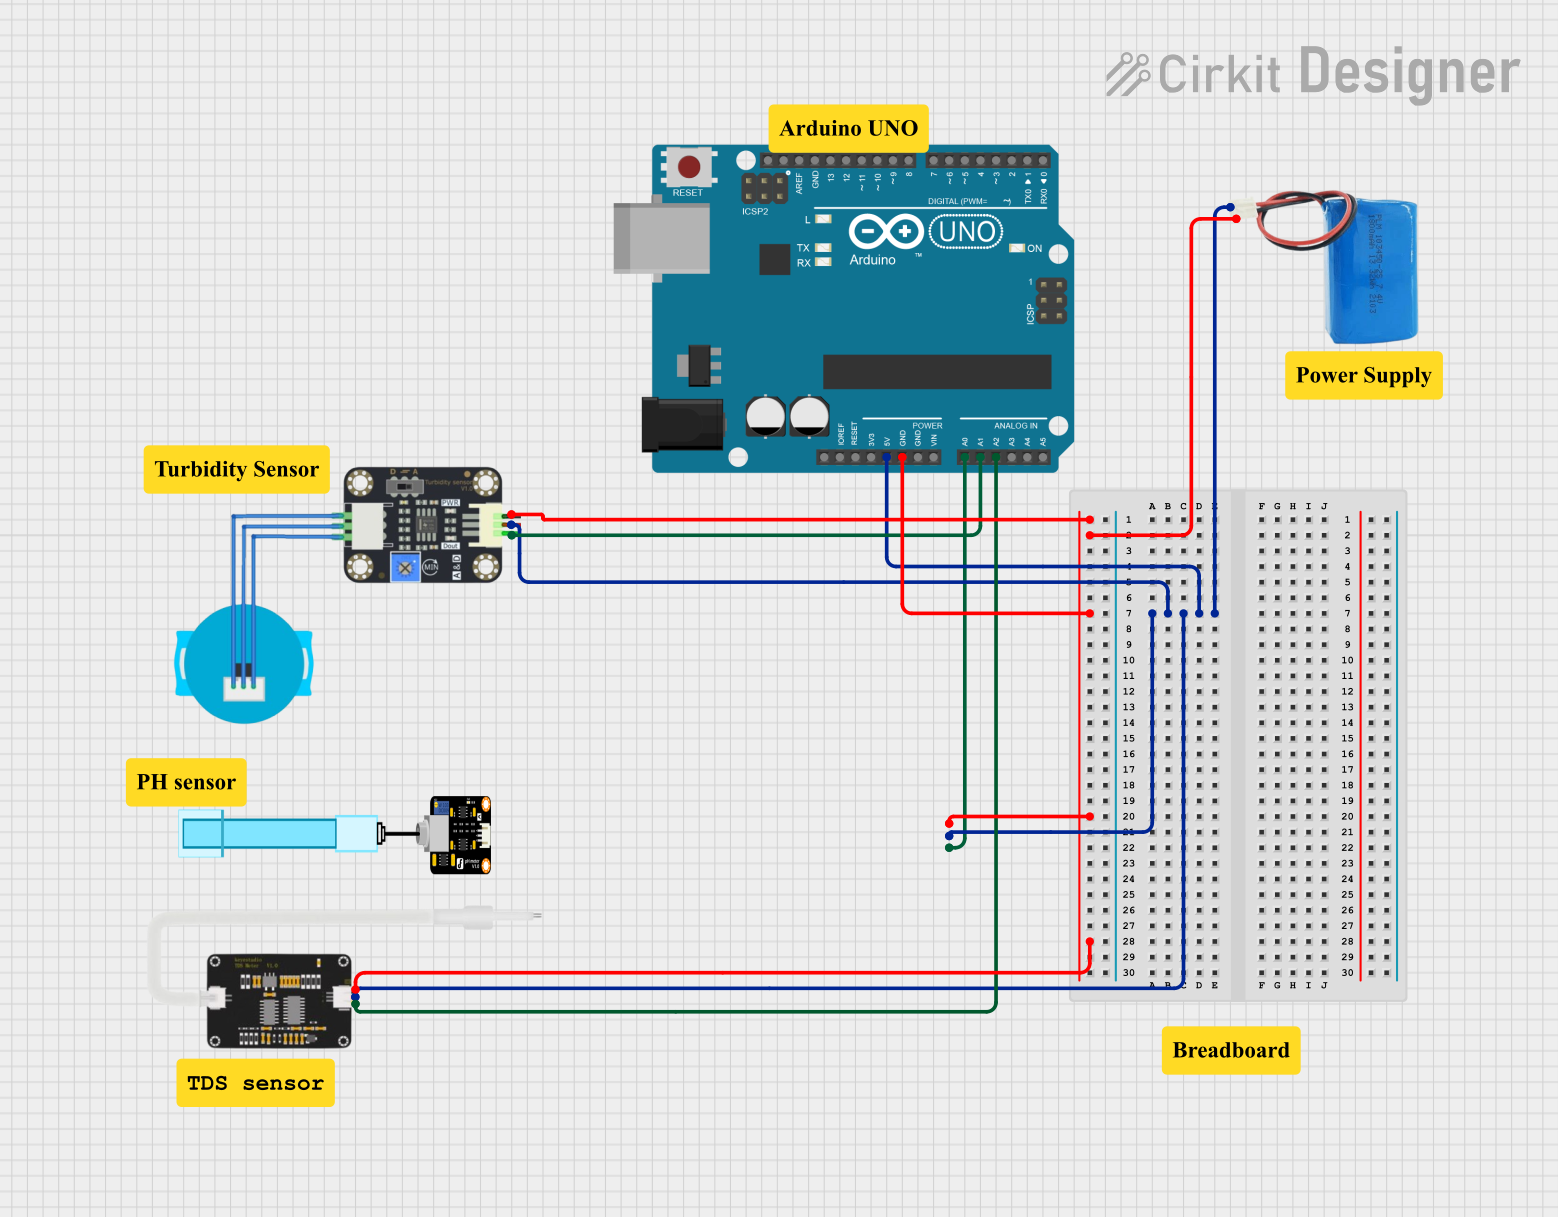
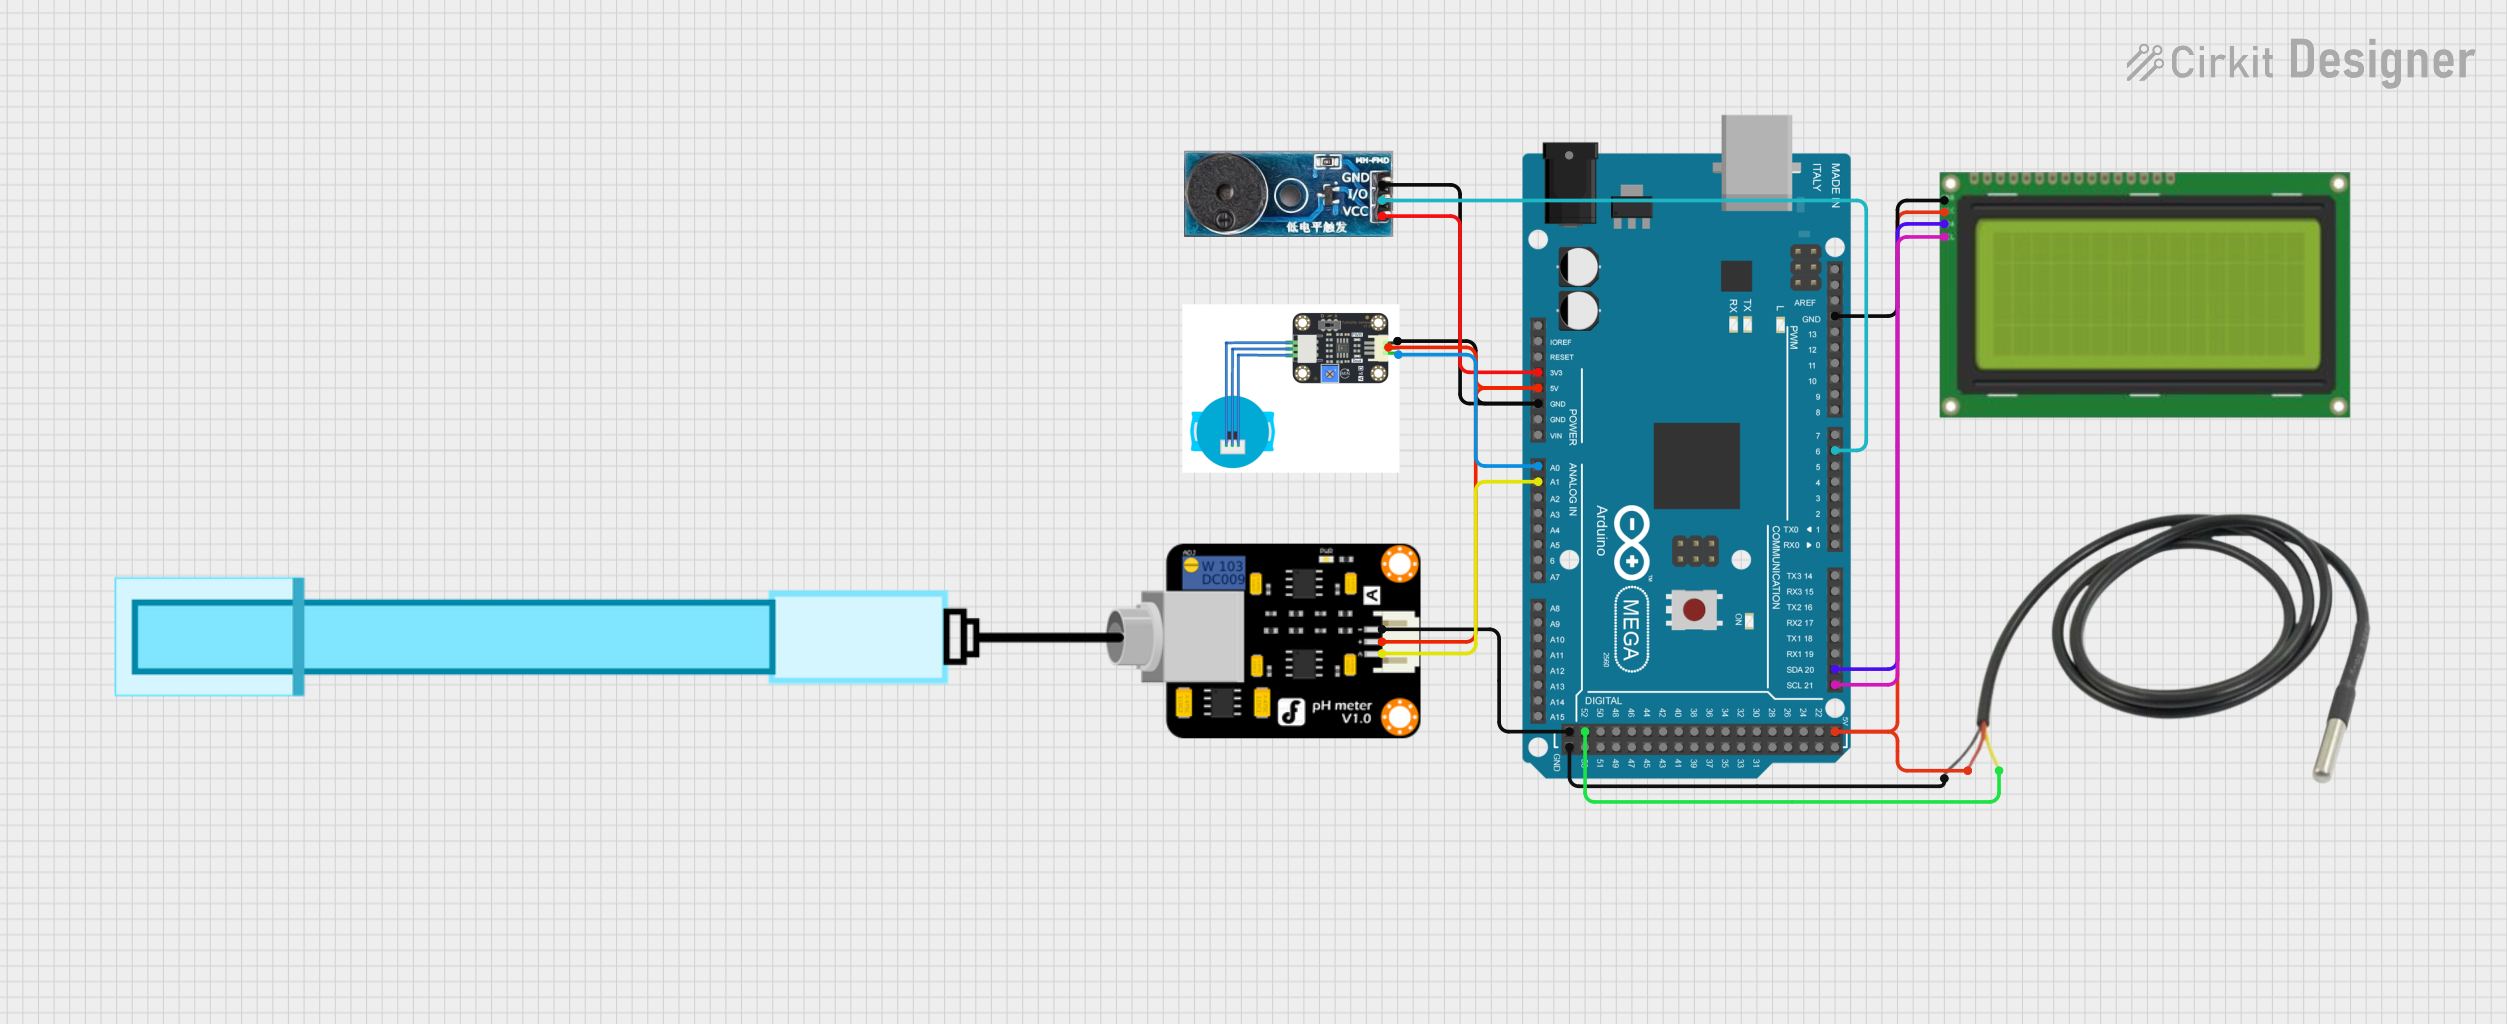
The Moza NN\ Turbidity Sensor is a device designed to measure the cloudiness or haziness of a liquid, typically water, caused by suspended particles. It operates by emitting light into the liquid and detecting the amount of light scattered by the particles. The sensor provides an analog or digital output that corresponds to the turbidity level, making it an essential tool for water quality monitoring.
Explore Projects Built with turbidity sensor
Explore Projects Built with turbidity sensor
Common Applications and Use Cases
- Water treatment plants for monitoring water clarity.
- Aquariums and fish farming to ensure optimal water conditions.
- Environmental monitoring of rivers, lakes, and reservoirs.
- Industrial processes requiring liquid quality control.
- Educational projects and DIY experiments involving water quality.
Technical Specifications
The following table outlines the key technical details of the Moza NN\ Turbidity Sensor:
| Parameter | Value |
|---|---|
| Operating Voltage | 5V DC |
| Operating Current | 30 mA (typical) |
| Output Type | Analog (0-4.5V) and Digital (TTL) |
| Measurement Range | 0 to 1000 NTU (Nephelometric Turbidity Units) |
| Response Time | < 500 ms |
| Operating Temperature | -10°C to 70°C |
| Storage Temperature | -20°C to 80°C |
| Dimensions | 30 mm x 20 mm x 15 mm |
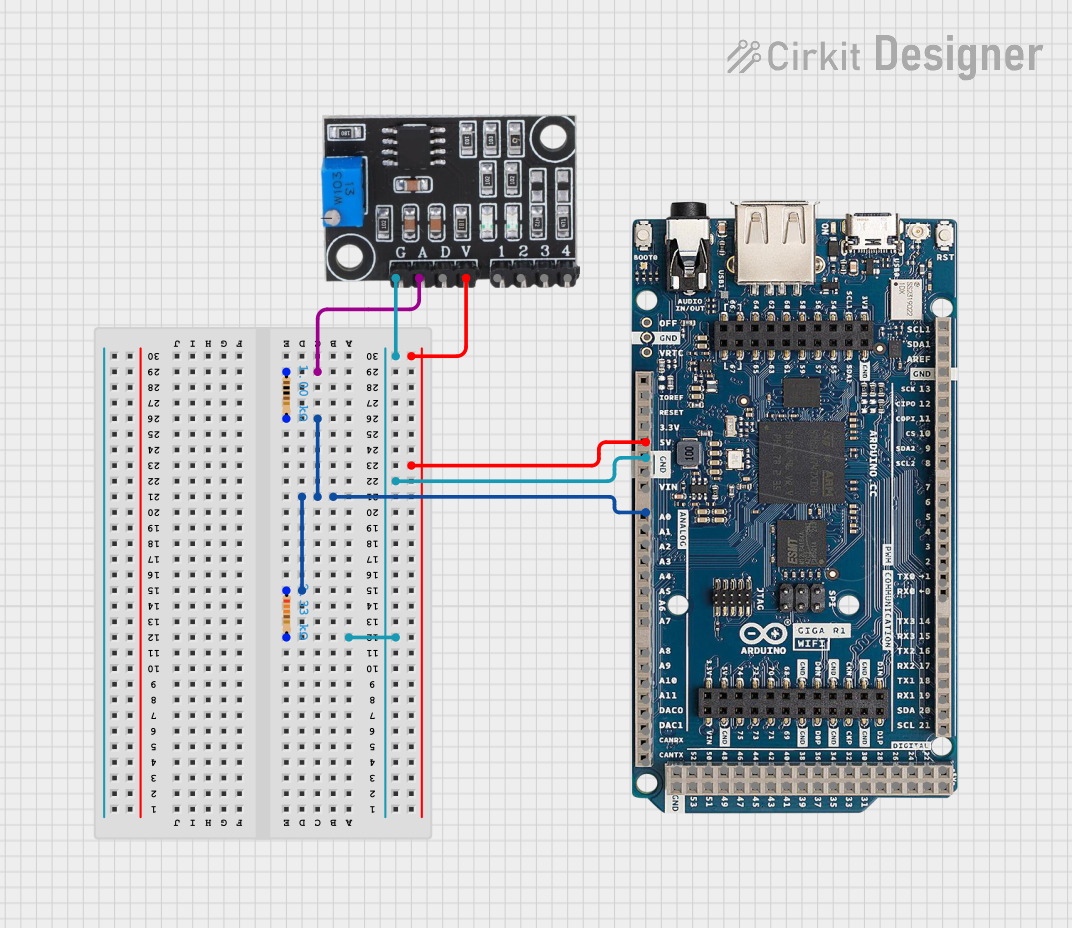
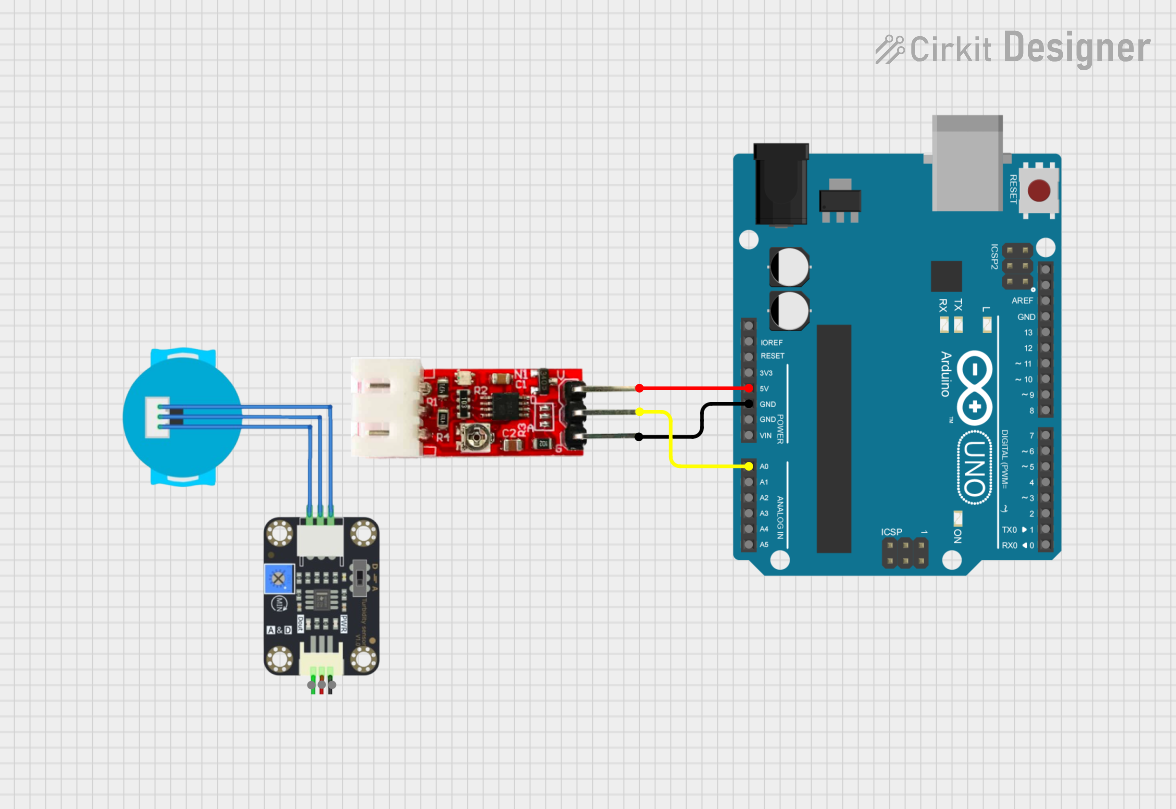
Pin Configuration and Descriptions
The Moza NN\ Turbidity Sensor has a 4-pin interface. The pin configuration is as follows:
| Pin | Name | Description |
|---|---|---|
| 1 | VCC | Power supply input (5V DC). |
| 2 | GND | Ground connection. |
| 3 | AOUT | Analog output signal proportional to turbidity level. |
| 4 | DOUT | Digital output signal (high/low based on threshold). |
Usage Instructions
How to Use the Component in a Circuit
- Power the Sensor: Connect the VCC pin to a 5V DC power source and the GND pin to ground.
- Read the Output:
- For analog readings, connect the AOUT pin to an analog input pin of a microcontroller (e.g., Arduino).
- For digital readings, connect the DOUT pin to a digital input pin of a microcontroller. Adjust the onboard potentiometer to set the desired turbidity threshold.
- Place the Sensor: Submerge the sensor probe into the liquid to be measured. Ensure the probe is fully immersed and free from air bubbles for accurate readings.
Important Considerations and Best Practices
- Calibration: For precise measurements, calibrate the sensor using a known turbidity standard.
- Avoid Air Bubbles: Air bubbles can scatter light and lead to inaccurate readings. Ensure the liquid is free of bubbles.
- Cleaning: Regularly clean the sensor probe to prevent fouling or buildup of particles that may affect accuracy.
- Temperature Effects: While the sensor operates over a wide temperature range, extreme temperatures may slightly affect readings. Use in stable temperature conditions for best results.
- Power Supply: Use a stable 5V DC power source to avoid noise in the output signal.
Example Code for Arduino UNO
The following code demonstrates how to interface the Moza NN\ Turbidity Sensor with an Arduino UNO to read analog turbidity values:
// Define the analog pin connected to the AOUT pin of the turbidity sensor
const int turbidityPin = A0;

void setup() {
  // Initialize serial communication for debugging
  Serial.begin(9600);
}

void loop() {
  // Read the analog value from the turbidity sensor
  int sensorValue = analogRead(turbidityPin);

  // Convert the analog value to a voltage (assuming 5V reference)
  float voltage = sensorValue * (5.0 / 1023.0);

  // Print the raw sensor value and voltage to the Serial Monitor
  Serial.print("Sensor Value: ");
  Serial.print(sensorValue);
  Serial.print(" | Voltage: ");
  Serial.println(voltage);

  // Add a short delay before the next reading
  delay(500);
}
Troubleshooting and FAQs
Common Issues and Solutions
No Output Signal:
- Ensure the sensor is properly powered (5V DC to VCC and GND connected).
- Check all connections for loose wires or poor soldering.
Inaccurate Readings:
- Clean the sensor probe to remove any dirt or fouling.
- Calibrate the sensor using a known turbidity standard.
- Ensure the liquid is free of air bubbles.
Fluctuating Output:
- Use a stable power supply to minimize noise.
- Place the sensor in a stable position to avoid movement or vibrations.
Digital Output Not Triggering:
- Adjust the onboard potentiometer to set the correct threshold for the DOUT signal.
- Verify the digital input pin configuration on the microcontroller.
FAQs
Q: Can the sensor be used with liquids other than water?
A: Yes, the sensor can measure turbidity in other liquids, but calibration may be required for accurate results.
Q: How often should the sensor be cleaned?
A: Cleaning frequency depends on the application. For clean water, cleaning once a month may suffice. For dirty or industrial water, clean the sensor more frequently.
Q: Can the sensor be used in saltwater?
A: Yes, the sensor can be used in saltwater, but regular cleaning is recommended to prevent salt buildup.
Q: What is the maximum cable length for the sensor?
A: The maximum cable length depends on the application and noise tolerance. For most cases, keep the cable length under 1 meter to avoid signal degradation.
Q: Is the sensor waterproof?
A: The sensor probe is waterproof and designed for submersion, but the main module should be kept dry and protected from water exposure.