How to Use Lattepanda 3 Delta: Examples, Pinouts, and Specs
Introduction
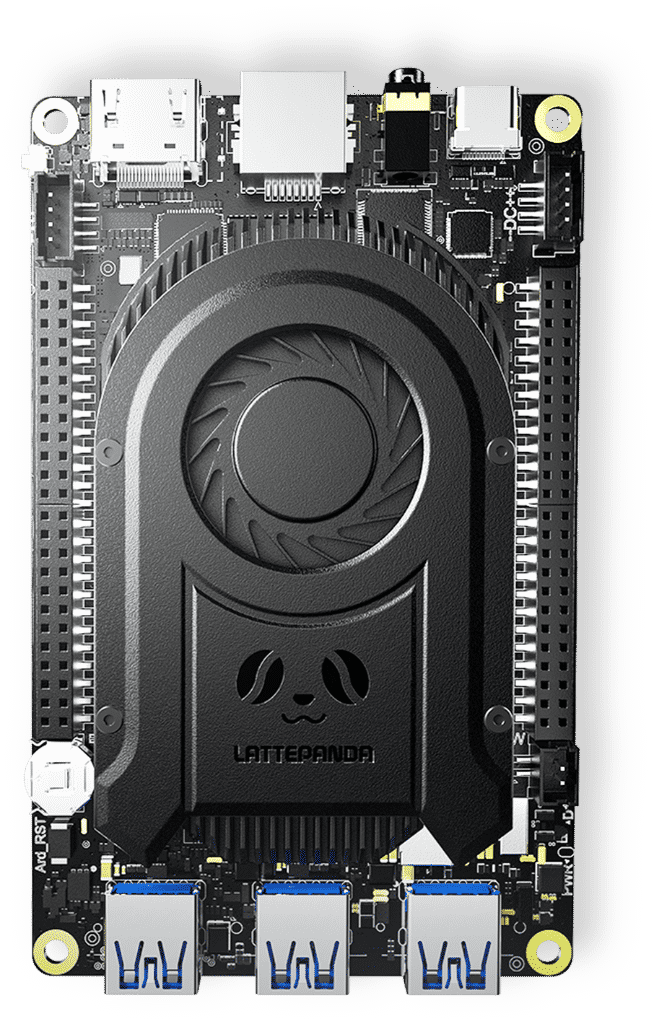
The LattePanda 3 Delta is a compact single-board computer that combines the power of an Intel processor with the versatility of an Arduino co-processor. This unique combination makes it an ideal choice for a wide range of applications, including Internet of Things (IoT) projects, robotics, and various DIY electronics projects. With its robust processing capabilities and extensive I/O options, the LattePanda 3 Delta is designed to meet the needs of both hobbyists and professionals.
Explore Projects Built with Lattepanda 3 Delta
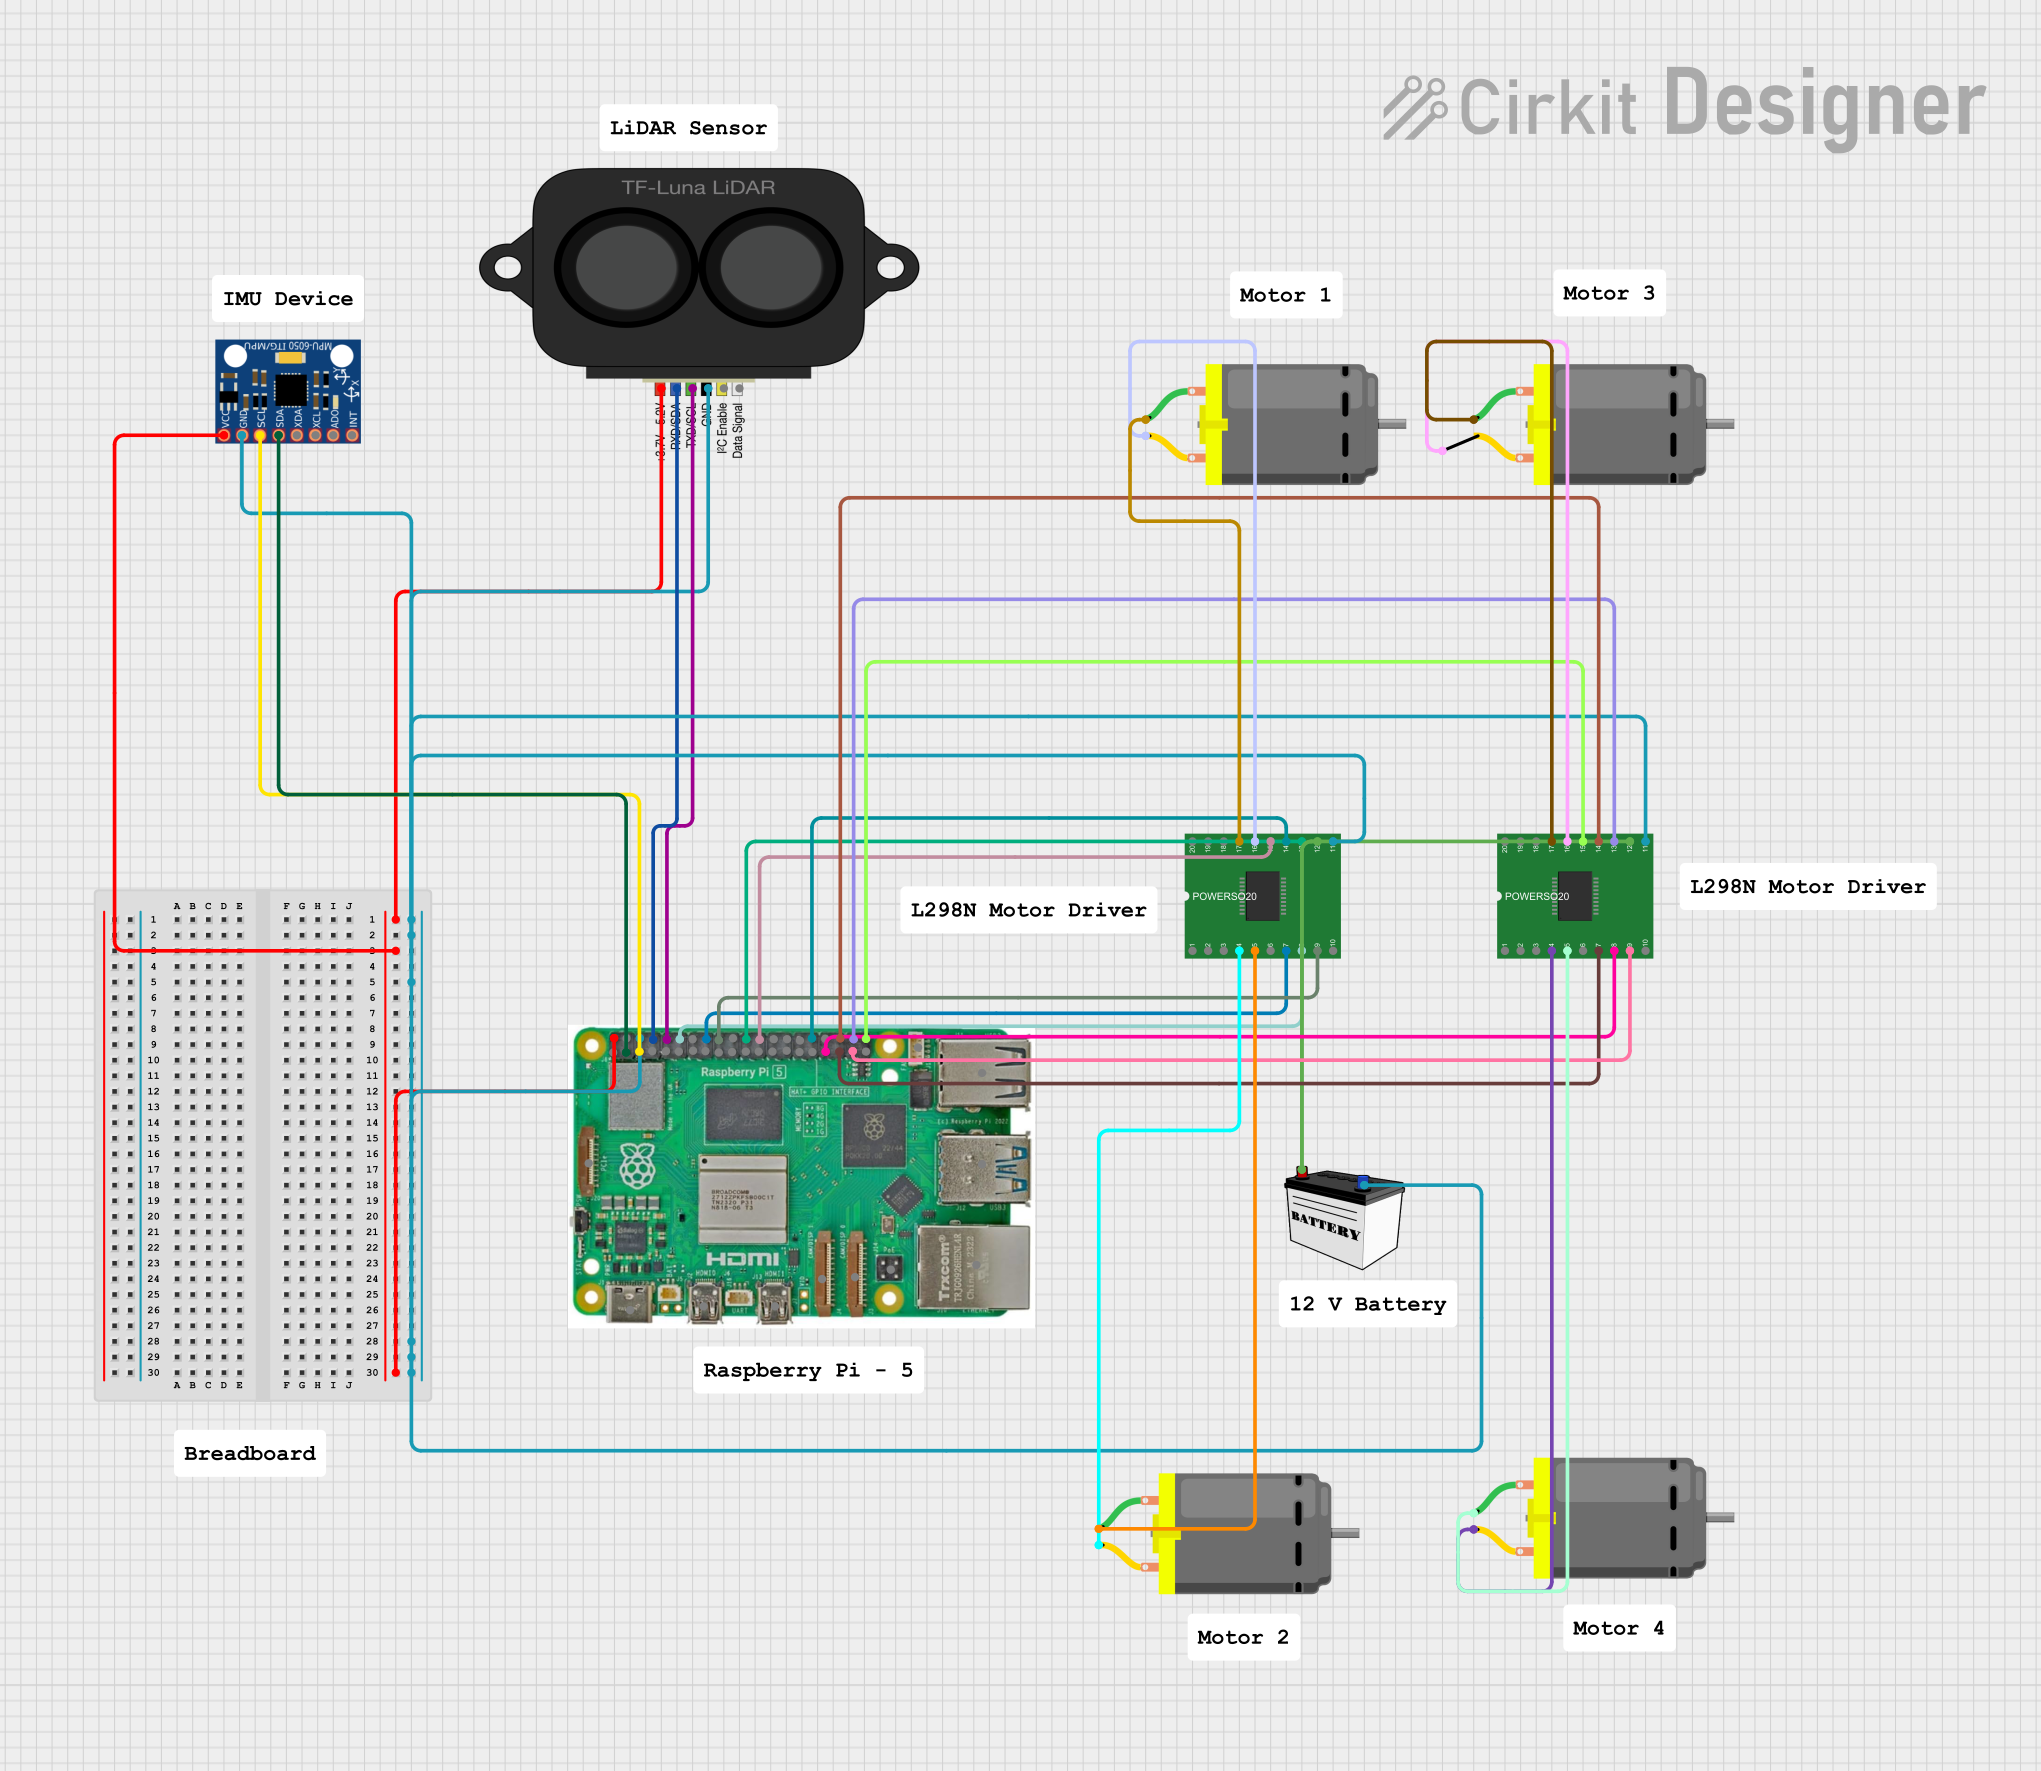

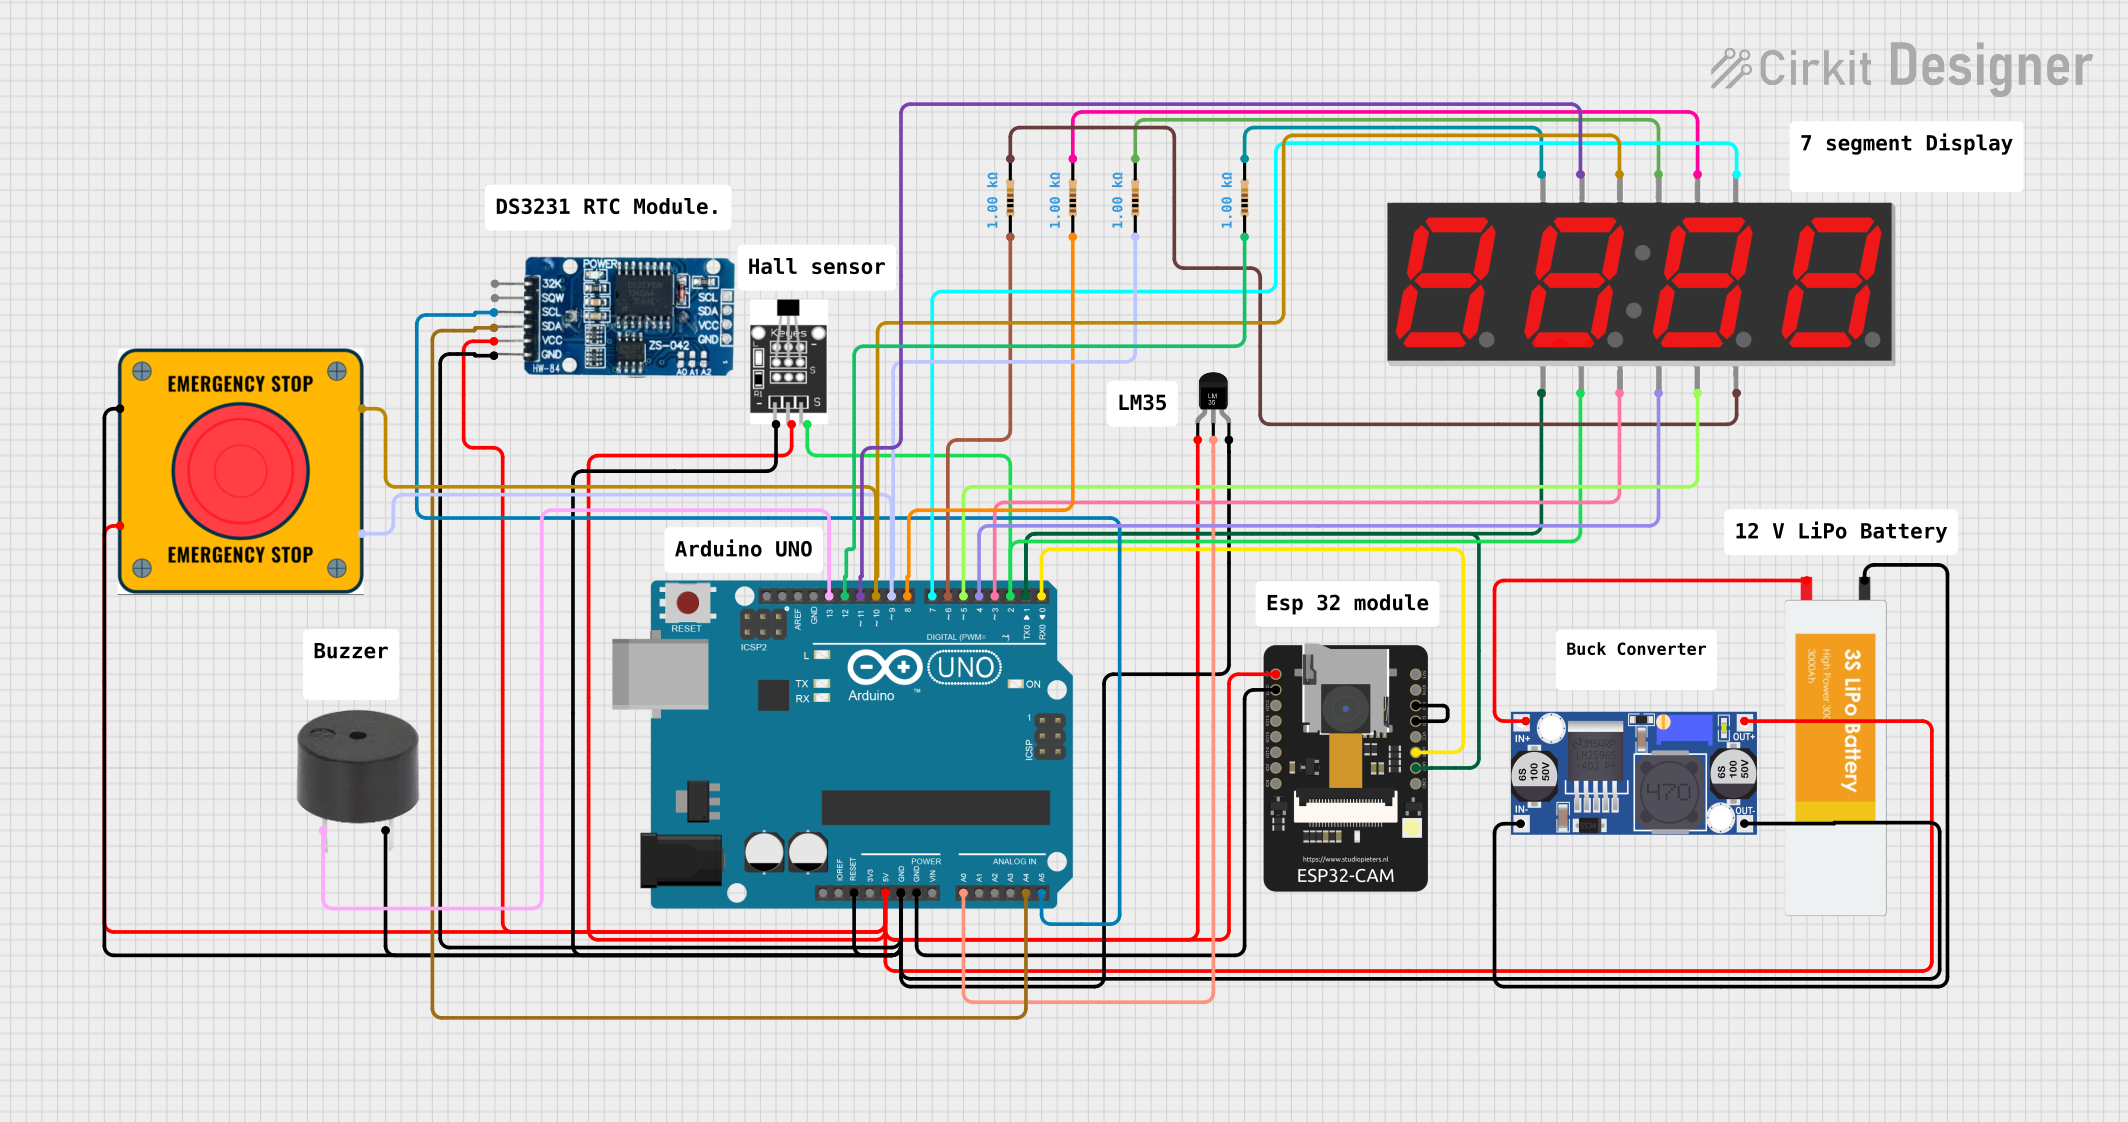
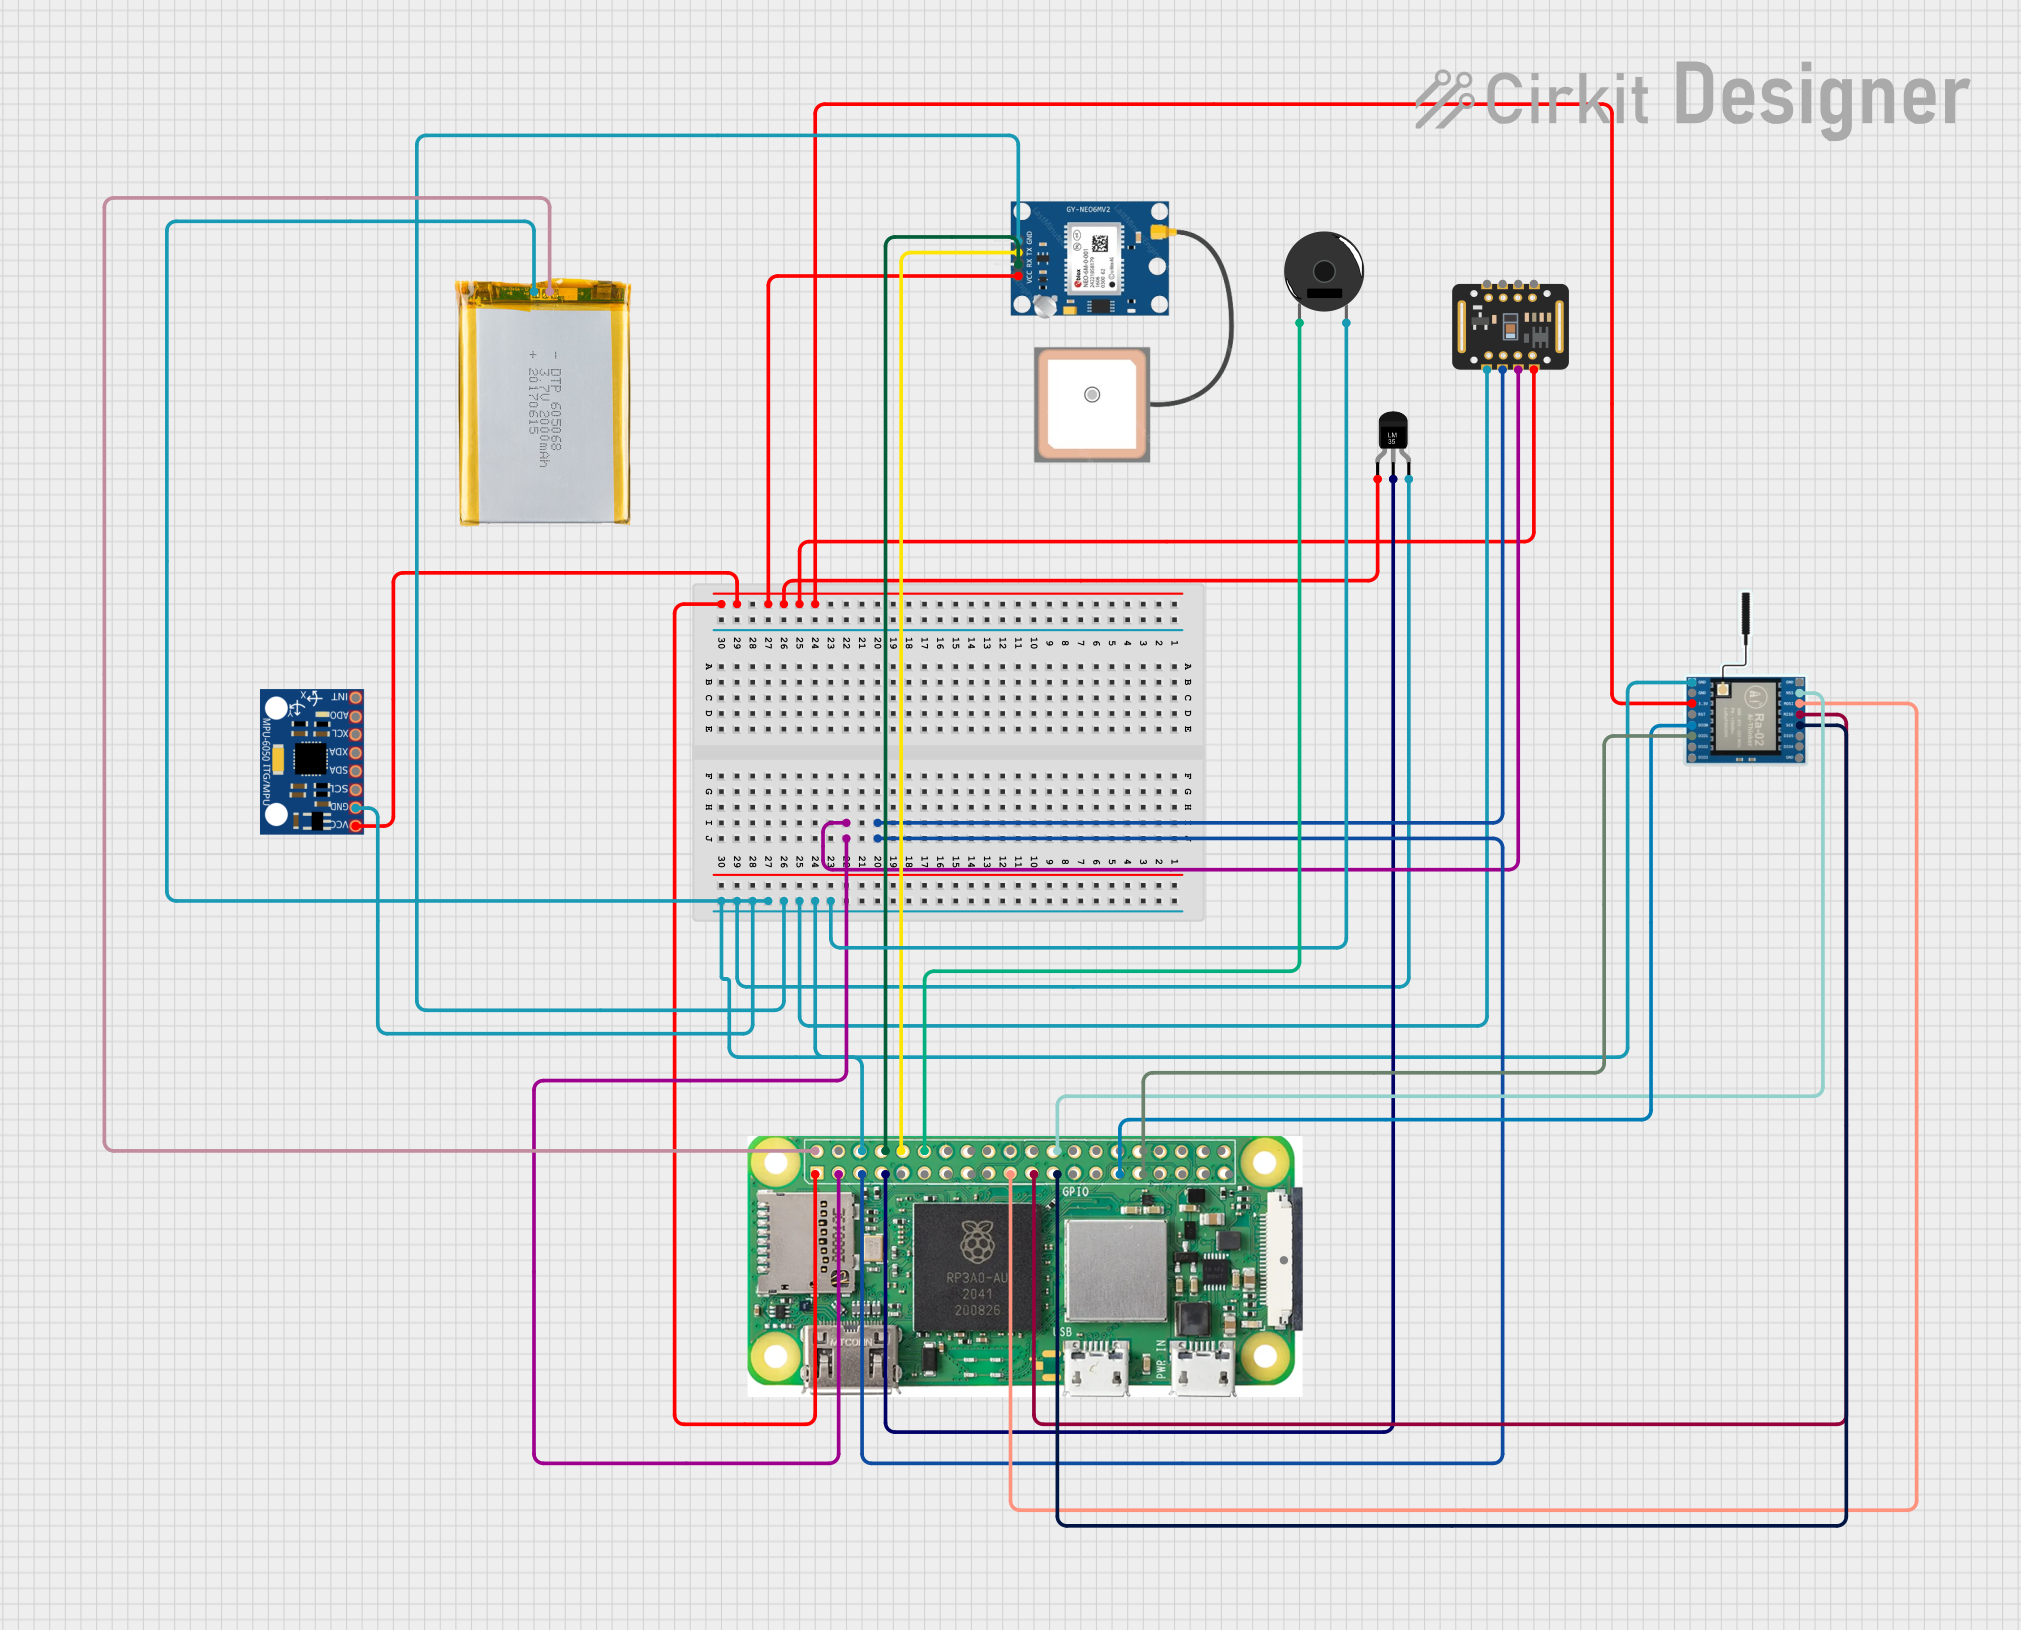
Explore Projects Built with Lattepanda 3 Delta
Technical Specifications
Key Technical Details
| Specification | Details |
|---|---|
| Processor | Intel Celeron N5105 Quad-Core |
| Co-Processor | ATmega32u4 (Arduino Leonardo compatible) |
| RAM | 8GB LPDDR4 |
| Storage | 64GB eMMC |
| Operating System | Windows 10, Linux |
| Power Supply | 5V/4A DC |
| Dimensions | 115mm x 78mm x 14mm |
| Weight | 92g |
Pin Configuration and Descriptions
Intel Processor GPIO Pins
| Pin Number | Pin Name | Description |
|---|---|---|
| 1 | 3.3V | 3.3V Power Output |
| 2 | 5V | 5V Power Output |
| 3 | GND | Ground |
| 4 | GPIO0 | General Purpose I/O |
| 5 | GPIO1 | General Purpose I/O |
| 6 | TX | UART Transmit |
| 7 | RX | UART Receive |
| 8 | I2C_SCL | I2C Clock |
| 9 | I2C_SDA | I2C Data |
| 10 | SPI_MOSI | SPI Master Out Slave In |
| 11 | SPI_MISO | SPI Master In Slave Out |
| 12 | SPI_SCK | SPI Clock |
| 13 | SPI_SS | SPI Slave Select |
Arduino Co-Processor Pins
| Pin Number | Pin Name | Description |
|---|---|---|
| 1 | D0 | Digital I/O |
| 2 | D1 | Digital I/O |
| 3 | D2 | Digital I/O |
| 4 | D3 | Digital I/O (PWM) |
| 5 | D4 | Digital I/O |
| 6 | D5 | Digital I/O (PWM) |
| 7 | D6 | Digital I/O (PWM) |
| 8 | D7 | Digital I/O |
| 9 | D8 | Digital I/O |
| 10 | D9 | Digital I/O (PWM) |
| 11 | D10 | Digital I/O (PWM) |
| 12 | D11 | Digital I/O (PWM) |
| 13 | D12 | Digital I/O |
| 14 | D13 | Digital I/O (LED) |
| 15 | A0 | Analog Input |
| 16 | A1 | Analog Input |
| 17 | A2 | Analog Input |
| 18 | A3 | Analog Input |
| 19 | A4 | Analog Input |
| 20 | A5 | Analog Input |
Usage Instructions
How to Use the Component in a Circuit
- Power Supply: Connect a 5V/4A DC power supply to the power input of the LattePanda 3 Delta.
- Connecting Peripherals: Use the GPIO pins to connect sensors, actuators, and other peripherals. Ensure that the voltage levels are compatible with the LattePanda 3 Delta.
- Programming the Arduino Co-Processor: Use the Arduino IDE to write and upload sketches to the ATmega32u4 co-processor. Connect the LattePanda 3 Delta to your computer via USB and select the appropriate board and port in the Arduino IDE.
- Running Applications: Install your desired operating system (Windows 10 or Linux) on the LattePanda 3 Delta. You can then run applications and scripts directly on the Intel processor.
Important Considerations and Best Practices
- Heat Management: The LattePanda 3 Delta can generate significant heat during operation. Use a heat sink or cooling fan to prevent overheating.
- Power Supply: Ensure that your power supply can provide a stable 5V/4A output to avoid power-related issues.
- Static Discharge: Handle the board with care to avoid damage from static electricity. Use anti-static wrist straps and mats when working with the board.
- Software Updates: Regularly check for firmware and software updates to ensure optimal performance and security.
Troubleshooting and FAQs
Common Issues Users Might Face
Board Not Powering On
- Solution: Check the power supply connection and ensure it is providing 5V/4A. Verify that the power supply is functioning correctly.
Arduino Co-Processor Not Recognized
- Solution: Ensure that the USB cable is properly connected. Check the device manager on your computer to see if the ATmega32u4 is listed. If not, try reinstalling the Arduino drivers.
Overheating
- Solution: Use a heat sink or cooling fan to manage the temperature. Ensure that the board is in a well-ventilated area.
Peripheral Not Working
- Solution: Verify the connections and ensure that the peripheral is compatible with the LattePanda 3 Delta. Check the voltage levels and pin configurations.
Solutions and Tips for Troubleshooting
- Check Connections: Ensure that all connections are secure and correctly oriented.
- Use Diagnostic Tools: Utilize diagnostic tools and software to identify issues with the board or peripherals.
- Consult Documentation: Refer to the official LattePanda documentation and community forums for additional support and troubleshooting tips.
Example Code for Arduino Co-Processor
Here is an example code to blink an LED connected to the Arduino co-processor:
// Blink an LED connected to digital pin 13

void setup() {
  // Initialize digital pin 13 as an output.
  pinMode(13, OUTPUT);
}

void loop() {
  // Turn the LED on (HIGH is the voltage level)
  digitalWrite(13, HIGH);
  delay(1000); // Wait for a second

  // Turn the LED off by making the voltage LOW
  digitalWrite(13, LOW);
  delay(1000); // Wait for a second
}
This code will blink an LED connected to digital pin 13 on the Arduino co-processor every second.
By following this documentation, users can effectively utilize the LattePanda 3 Delta in their projects, ensuring optimal performance and reliability.