How to Use Arduino MKR ENV Shield rev2: Examples, Pinouts, and Specs
Introduction
The Arduino MKR ENV Shield rev2 is a versatile sensor shield designed for the Arduino MKR series. It provides a range of environmental sensing capabilities, including temperature, humidity, barometric pressure, light intensity, and air quality measurements. This shield is ideal for Internet of Things (IoT) applications, weather monitoring systems, smart agriculture, and environmental data logging projects. Its compact design and compatibility with the MKR series make it a powerful tool for prototyping and deploying environmental sensing solutions.
Explore Projects Built with Arduino MKR ENV Shield rev2

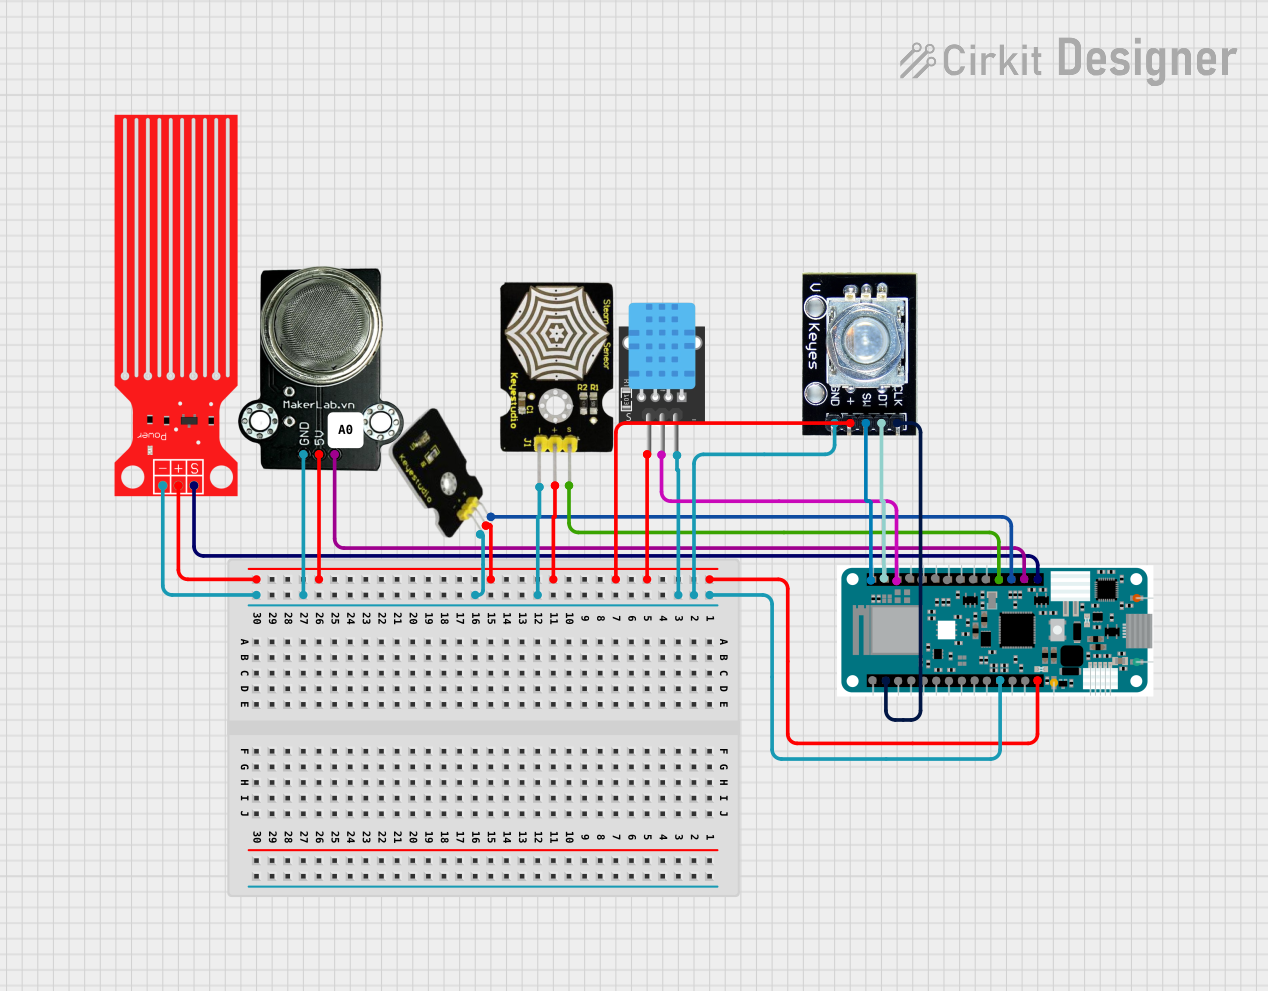
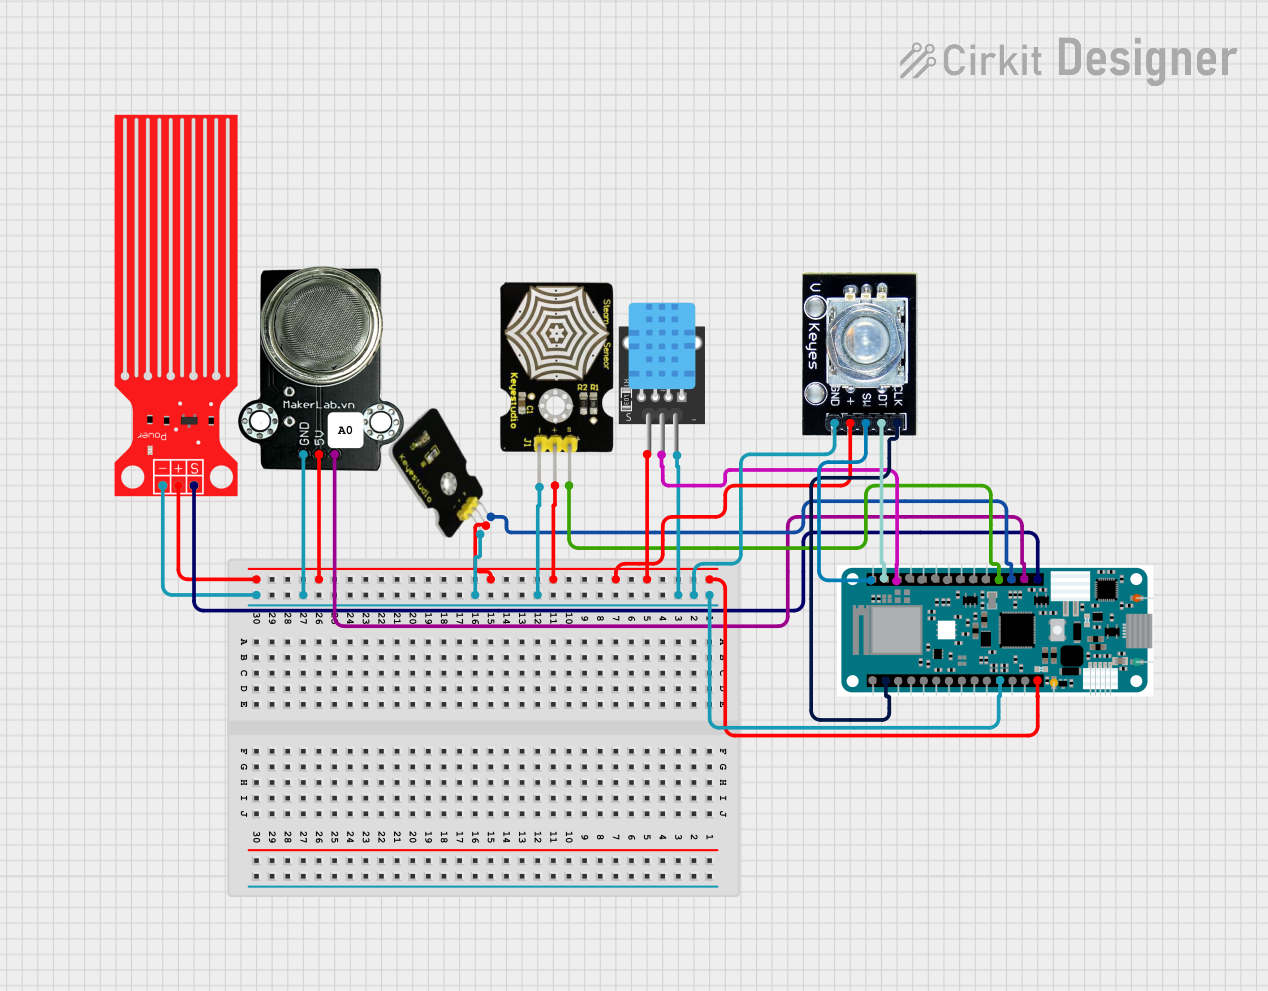
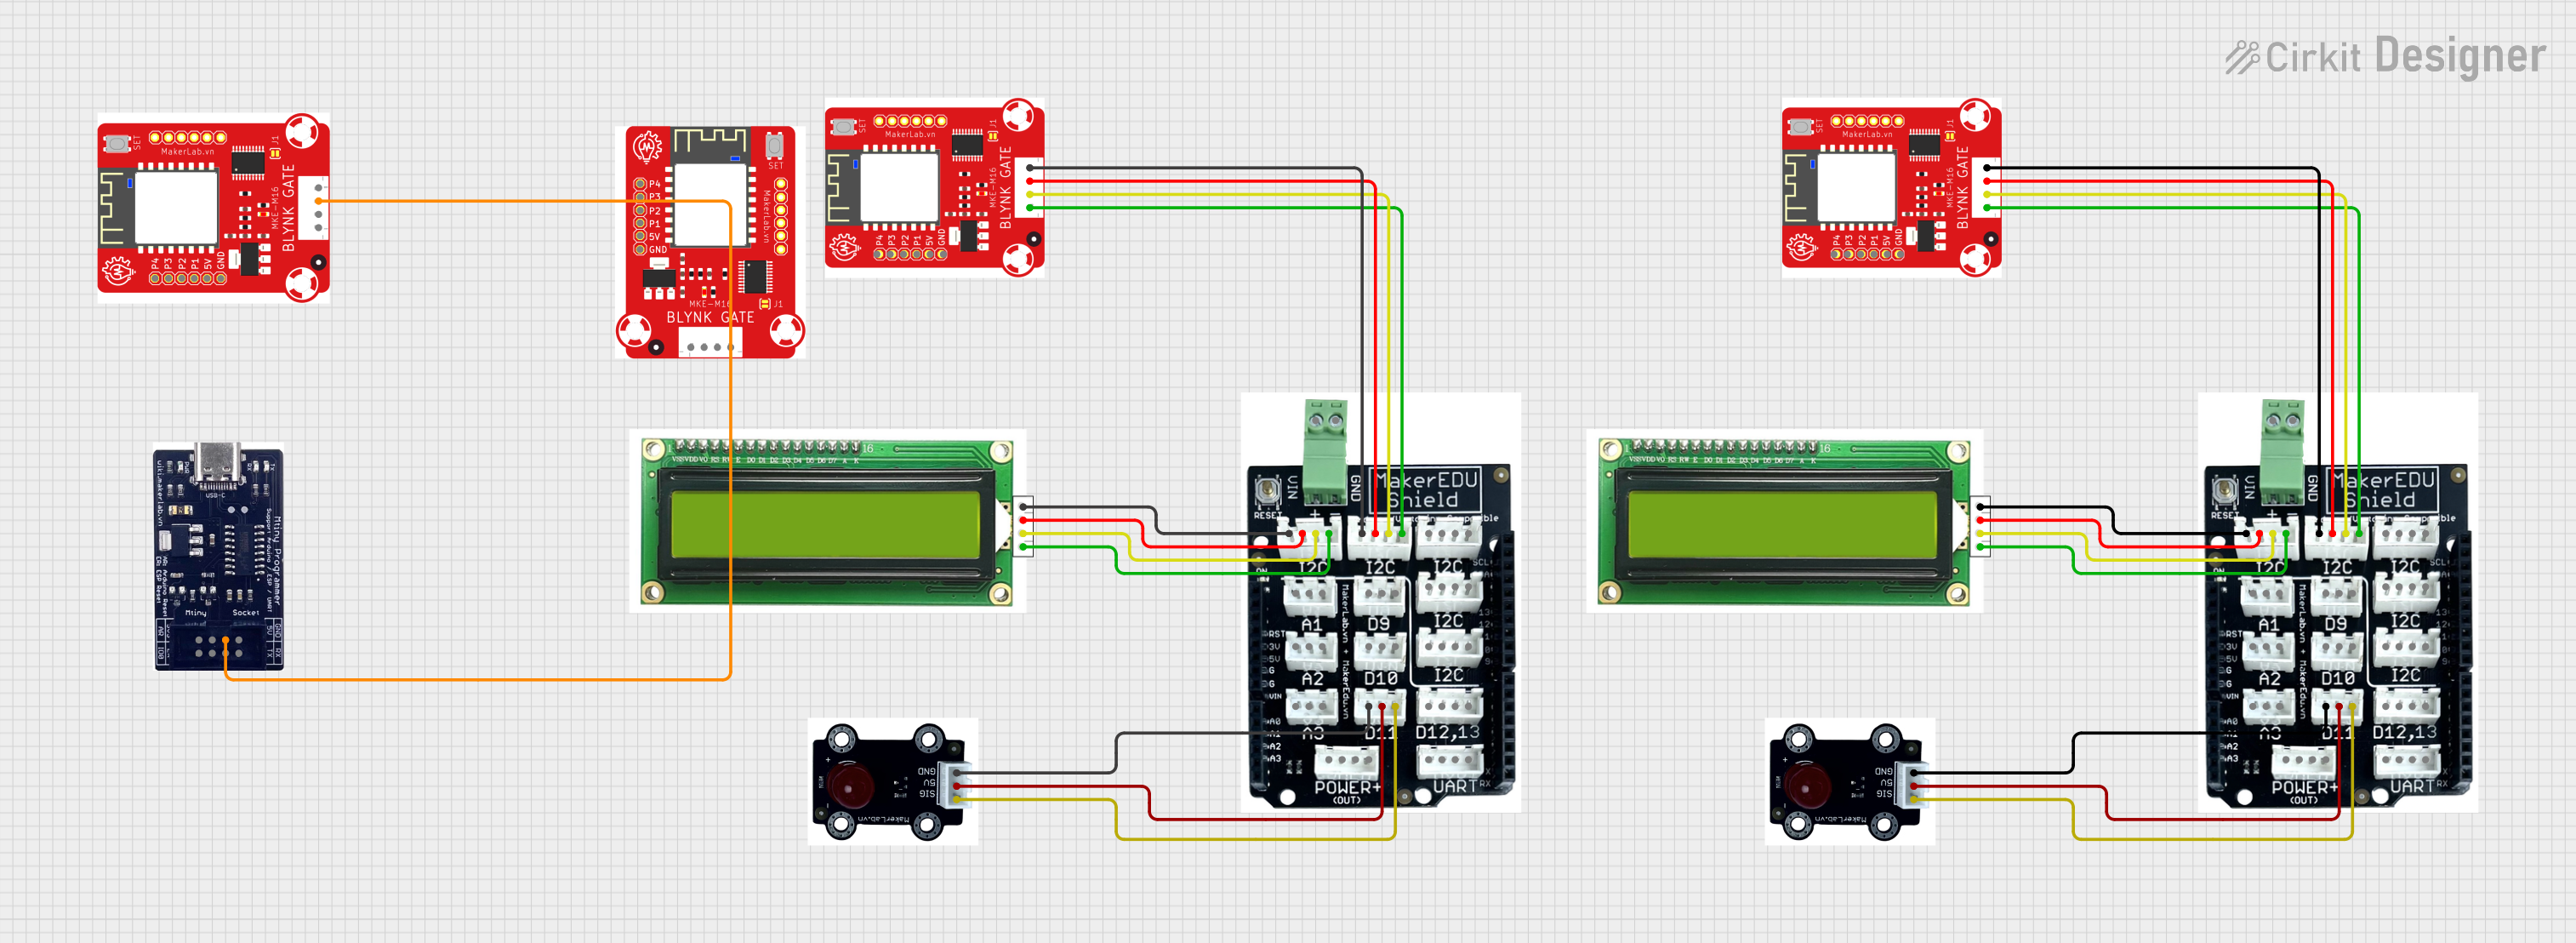
Explore Projects Built with Arduino MKR ENV Shield rev2
Technical Specifications
The Arduino MKR ENV Shield rev2 integrates multiple sensors to measure various environmental parameters. Below are the key technical details:
Key Features
- Temperature Sensor: Measures ambient temperature with high accuracy.
- Humidity Sensor: Monitors relative humidity in the environment.
- Barometric Pressure Sensor: Captures atmospheric pressure data.
- Light Sensor: Measures light intensity in lux.
- Air Quality Sensor: Detects volatile organic compounds (VOCs) for air quality analysis.
- Compatible Boards: Designed for the Arduino MKR series (e.g., MKR WiFi 1010, MKR Zero).
Electrical Characteristics
| Parameter | Value |
|---|---|
| Operating Voltage | 3.3V |
| Communication Protocol | I2C |
| Current Consumption | ~5mA (varies with usage) |
| Operating Temperature | -40°C to 85°C |
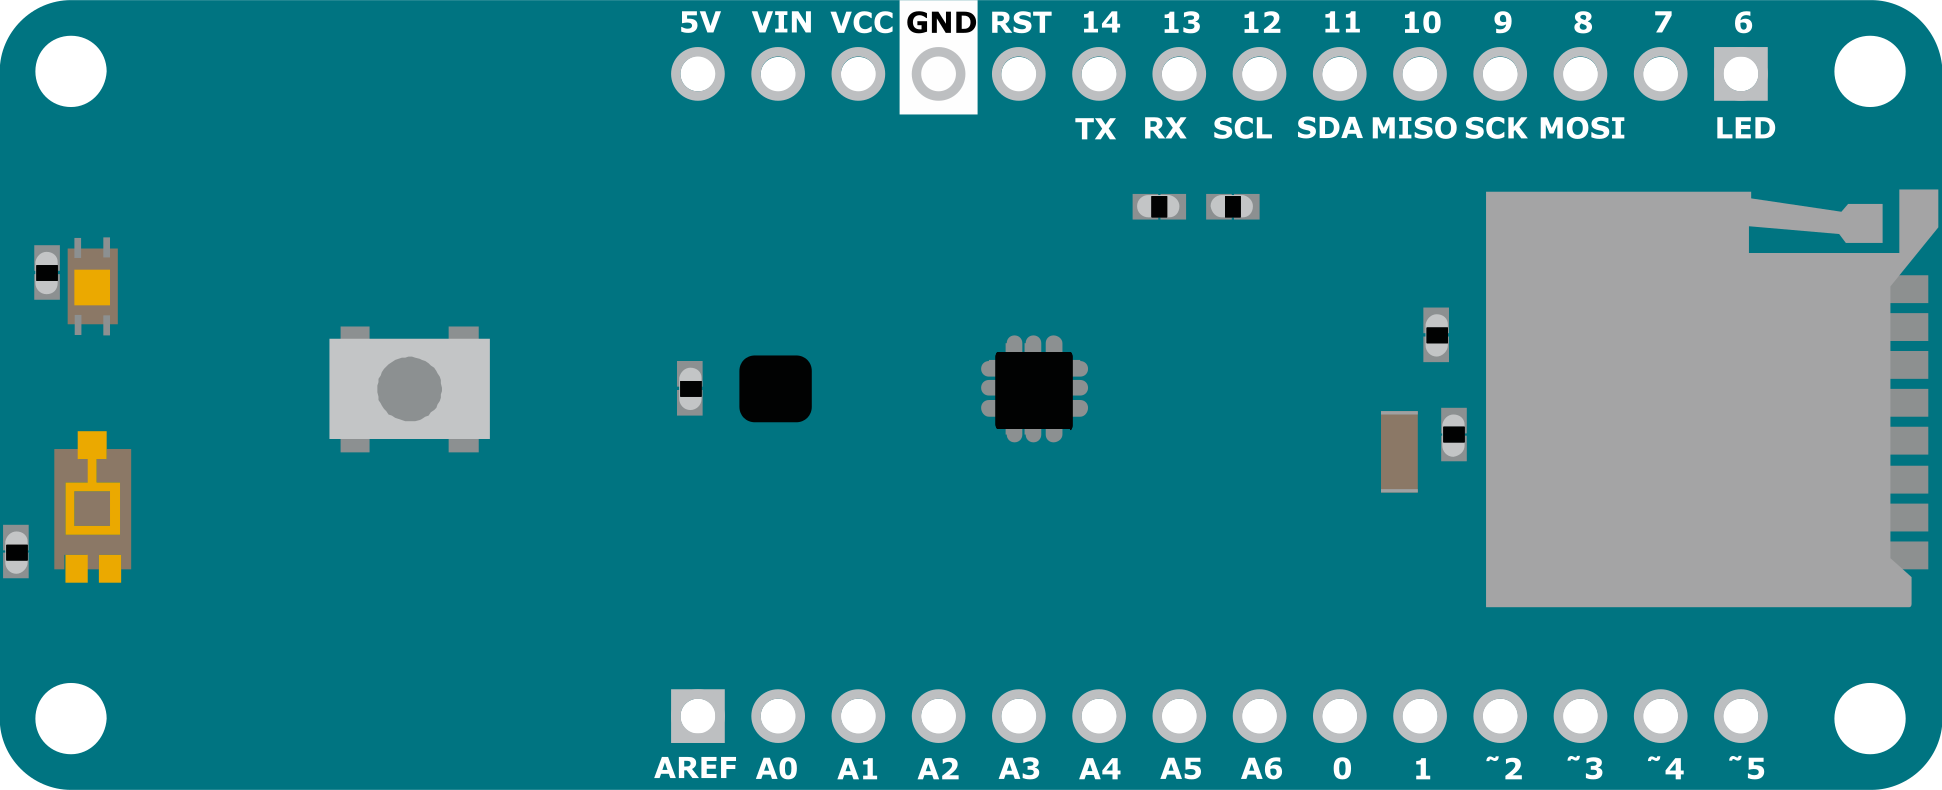
Pin Configuration
The MKR ENV Shield rev2 connects directly to the MKR series boards via the standard MKR pinout. Below is a description of the key pins used:
| Pin Name | Function | Description |
|---|---|---|
| SDA | I2C Data Line | Used for communication with onboard sensors. |
| SCL | I2C Clock Line | Provides the clock signal for I2C communication. |
| 3.3V | Power Supply | Supplies power to the shield. |
| GND | Ground | Common ground connection. |
Usage Instructions
How to Use the Component in a Circuit
- Attach the Shield: Plug the MKR ENV Shield rev2 directly onto an Arduino MKR series board. Ensure the pins are aligned correctly.
- Power the Board: Connect the Arduino MKR board to your computer or an external power source via USB or a battery.
- Install Required Libraries:
- Open the Arduino IDE.
- Go to Tools > Manage Libraries.
- Search for and install the
Arduino_MKRENVlibrary.
- Write and Upload Code:
- Use the example code provided below to read sensor data.
- Upload the code to your MKR board using the Arduino IDE.
Example Code
The following code demonstrates how to read data from the MKR ENV Shield rev2:
#include <Arduino_MKRENV.h> // Include the MKR ENV library

void setup() {
  Serial.begin(9600); // Initialize serial communication at 9600 baud
  while (!Serial);    // Wait for the serial monitor to open

  if (!ENV.begin()) { // Initialize the ENV Shield
    Serial.println("Failed to initialize MKR ENV Shield!");
    while (1);        // Halt execution if initialization fails
  }
  Serial.println("MKR ENV Shield initialized successfully.");
}

void loop() {
  // Read sensor data
  float temperature = ENV.readTemperature(); // Read temperature in °C
  float humidity = ENV.readHumidity();       // Read relative humidity in %
  float pressure = ENV.readPressure();       // Read barometric pressure in hPa
  float light = ENV.readIlluminance();       // Read light intensity in lux

  // Print sensor data to the serial monitor
  Serial.print("Temperature: ");
  Serial.print(temperature);
  Serial.println(" °C");

  Serial.print("Humidity: ");
  Serial.print(humidity);
  Serial.println(" %");

  Serial.print("Pressure: ");
  Serial.print(pressure);
  Serial.println(" hPa");

  Serial.print("Light: ");
  Serial.print(light);
  Serial.println(" lux");

  delay(2000); // Wait for 2 seconds before the next reading
}
Important Considerations and Best Practices
- Power Supply: Ensure the MKR board is powered with a stable 3.3V source to avoid inaccurate readings.
- I2C Address Conflicts: If using additional I2C devices, ensure there are no address conflicts.
- Environmental Placement: Place the shield in an open environment for accurate readings. Avoid placing it near heat sources or in direct sunlight unless measuring those specific conditions.
Troubleshooting and FAQs
Common Issues and Solutions
"Failed to initialize MKR ENV Shield!" Error:
- Ensure the shield is properly connected to the MKR board.
- Verify that the
Arduino_MKRENVlibrary is installed correctly. - Check the I2C connections and ensure no other devices are interfering.
Inaccurate Sensor Readings:
- Ensure the shield is placed in a stable environment without sudden temperature or humidity changes.
- Avoid touching the sensors directly, as this can affect readings.
No Data in Serial Monitor:
- Confirm that the correct COM port is selected in the Arduino IDE.
- Ensure the baud rate in the Serial Monitor matches the
Serial.begin()value in the code.
FAQs
Q: Can I use the MKR ENV Shield with non-MKR boards?
A: The shield is designed for the MKR series, but it may work with other boards that support 3.3V logic and I2C communication. However, physical compatibility may require additional wiring.
Q: How do I calibrate the sensors?
A: The sensors on the MKR ENV Shield are factory-calibrated and do not require user calibration. For specific applications, you can apply software-based offsets if needed.
Q: Can I use the shield outdoors?
A: The shield is not weatherproof. If using it outdoors, ensure it is protected from moisture and extreme conditions.
Q: What is the maximum distance for I2C communication?
A: I2C communication is typically reliable up to 1 meter. For longer distances, consider using I2C extenders or alternative communication protocols.