How to Use BME680: Examples, Pinouts, and Specs
Introduction
The BME680 is a multi-sensor device designed to measure temperature, humidity, barometric pressure, and gas (air quality) levels. Manufactured by Bosch Sensortec, this compact and highly accurate sensor is ideal for environmental monitoring and Internet of Things (IoT) applications. Its ability to provide multiple environmental parameters in a single package makes it a popular choice for smart home devices, weather stations, air quality monitors, and wearable technology.
Explore Projects Built with BME680
Explore Projects Built with BME680
Common Applications
- Indoor air quality monitoring
- Weather stations
- Smart home automation
- IoT devices and environmental sensing
- Wearable health and fitness devices
Technical Specifications
The BME680 combines multiple sensors into a single package, offering high precision and low power consumption. Below are its key technical specifications:
| Parameter | Value |
|---|---|
| Supply Voltage | 1.7V to 3.6V |
| Operating Current | 2.1 µA (sleep mode), 0.09 mA (humidity/temperature), 12 mA (gas sensor) |
| Temperature Range | -40°C to +85°C |
| Humidity Range | 0% to 100% relative humidity |
| Pressure Range | 300 hPa to 1100 hPa |
| Gas Sensor Range | 0 to 500 ppm (volatile organic compounds - VOCs) |
| Interface | I2C and SPI |
| Dimensions | 3.0 mm x 3.0 mm x 0.93 mm |
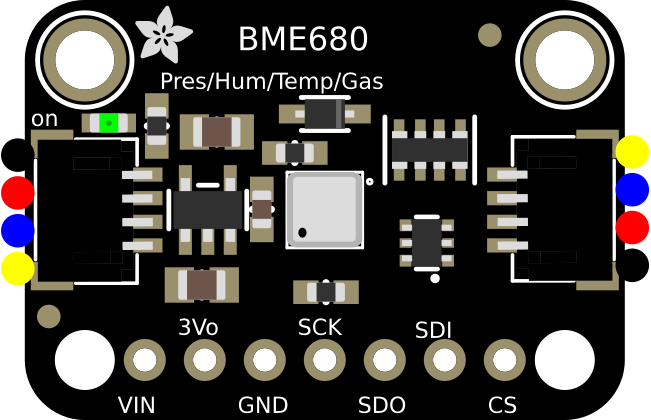
Pin Configuration and Descriptions
The BME680 is typically available in a 8-pin LGA package. Below is the pin configuration:
| Pin | Name | Description |
|---|---|---|
| 1 | VDD | Power supply (1.7V to 3.6V) |
| 2 | GND | Ground |
| 3 | SCL/SPC | I2C clock line / SPI clock |
| 4 | SDA/SDI | I2C data line / SPI data input |
| 5 | CS | Chip select (used for SPI, active low) |
| 6 | SDO | SPI data output (used in SPI mode) |
| 7 | VDDIO | I/O voltage level (1.2V to 3.6V) |
| 8 | NC | Not connected (leave floating or connect to GND for stability) |
Usage Instructions
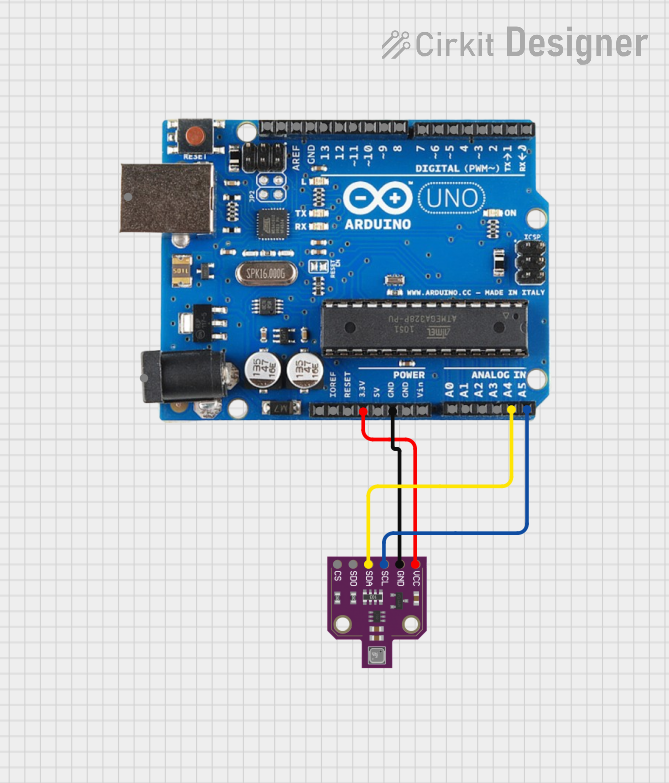
The BME680 can be used in a variety of circuits, typically interfacing with microcontrollers like the Arduino UNO via I2C or SPI. Below are the steps to use the BME680 in a circuit:
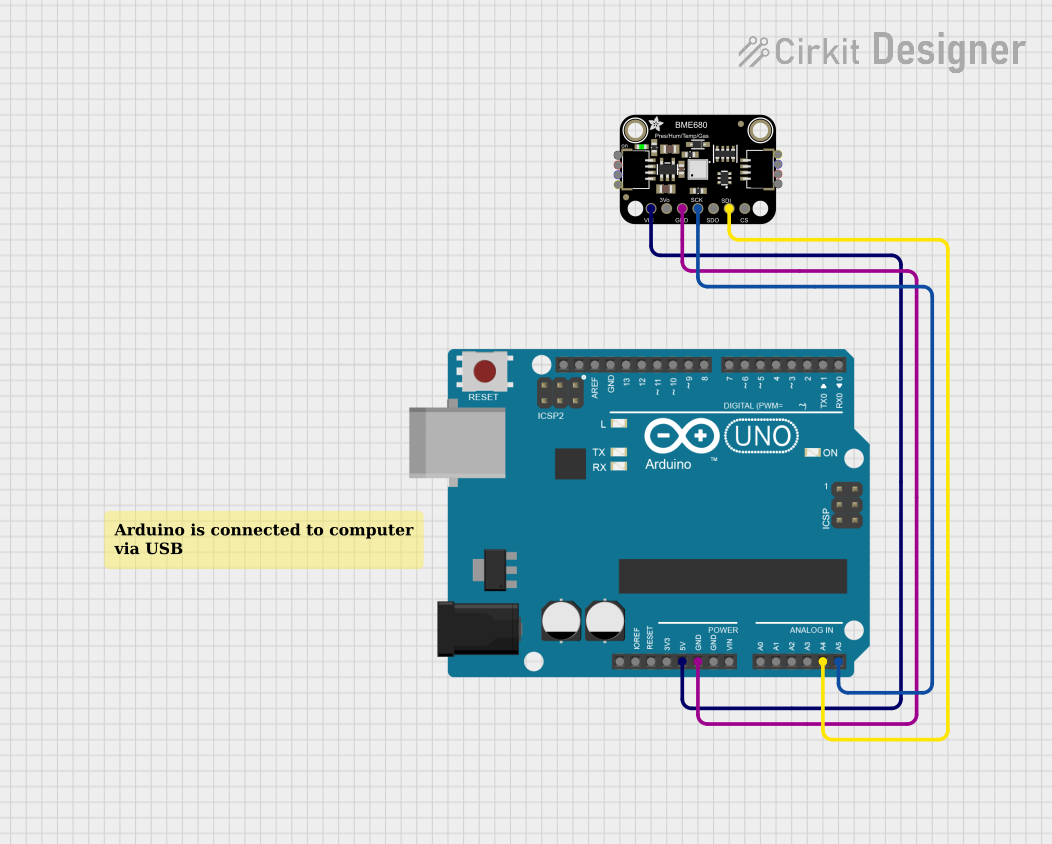
Connecting the BME680 to an Arduino UNO (I2C Mode)
Wiring:
- Connect the BME680's
VDDpin to the Arduino's3.3Vpin. - Connect the
GNDpin to the Arduino'sGND. - Connect the
SCLpin to the Arduino'sA5(I2C clock line). - Connect the
SDApin to the Arduino'sA4(I2C data line). - Leave the
CSandSDOpins unconnected (not used in I2C mode).
- Connect the BME680's
Install Required Libraries:
- Install the Adafruit BME680 library via the Arduino Library Manager.
- Install the Adafruit Sensor library (dependency for the BME680 library).
Example Code: Below is an example Arduino sketch to read temperature, humidity, pressure, and gas data from the BME680:
#include <Wire.h>
#include <Adafruit_Sensor.h>
#include "Adafruit_BME680.h"

// Create an instance of the BME680 sensor
Adafruit_BME680 bme;

void setup() {
  Serial.begin(9600);
  while (!Serial); // Wait for serial monitor to open

  // Initialize the BME680 sensor
  if (!bme.begin()) {
    Serial.println("Could not find a valid BME680 sensor, check wiring!");
    while (1);
  }

  // Set up sensor settings
  bme.setTemperatureOversampling(BME680_OS_8X);
  bme.setHumidityOversampling(BME680_OS_2X);
  bme.setPressureOversampling(BME680_OS_4X);
  bme.setIIRFilterSize(BME680_FILTER_SIZE_3);
  bme.setGasHeater(320, 150); // 320°C for 150 ms
}

void loop() {
  // Perform a measurement
  if (!bme.performReading()) {
    Serial.println("Failed to perform reading!");
    return;
  }

  // Print sensor data to the serial monitor
  Serial.print("Temperature = ");
  Serial.print(bme.temperature);
  Serial.println(" °C");

  Serial.print("Humidity = ");
  Serial.print(bme.humidity);
  Serial.println(" %");

  Serial.print("Pressure = ");
  Serial.print(bme.pressure / 100.0);
  Serial.println(" hPa");

  Serial.print("Gas = ");
  Serial.print(bme.gas_resistance / 1000.0);
  Serial.println(" kOhms");

  Serial.println();
  delay(2000); // Wait 2 seconds before the next reading
}
Important Considerations
- Power Supply: Ensure the BME680 is powered with a stable voltage within its operating range (1.7V to 3.6V). For Arduino UNO, use the
3.3Vpin. - I2C Pull-Up Resistors: If not already present on the breakout board, add 4.7kΩ pull-up resistors to the
SCLandSDAlines. - Gas Sensor Warm-Up: The gas sensor requires a warm-up period (typically 5-10 minutes) for accurate readings.
- Altitude Calculation: Use the pressure readings to calculate altitude if needed, using the barometric formula.
Troubleshooting and FAQs
Common Issues
Sensor Not Detected:
- Cause: Incorrect wiring or I2C address mismatch.
- Solution: Double-check the wiring and ensure the correct I2C address (default is
0x76or0x77).
Inaccurate Readings:
- Cause: Insufficient warm-up time for the gas sensor or environmental interference.
- Solution: Allow the sensor to warm up for at least 5 minutes. Avoid placing the sensor near heat sources or in direct sunlight.
Failed to Perform Reading:
- Cause: Communication issue between the microcontroller and the sensor.
- Solution: Verify the connections and ensure the correct library is installed.
FAQs
Can the BME680 measure CO2 levels?
- No, the BME680 measures volatile organic compounds (VOCs) and provides an air quality index, but it does not directly measure CO2.
What is the typical lifespan of the BME680?
- The sensor is designed for long-term use, with a typical lifespan of over 10 years under normal operating conditions.
Can I use the BME680 with a 5V microcontroller?
- Yes, but you must use a logic level shifter to convert the 5V signals to 3.3V for the BME680.
By following this documentation, you can effectively integrate the BME680 into your projects for accurate environmental sensing.