How to Use Adafruit MIDI FeatherWing Kit (3.5mm Jacks): Examples, Pinouts, and Specs

 Design with Adafruit MIDI FeatherWing Kit (3.5mm Jacks) in Cirkit Designer
Introduction
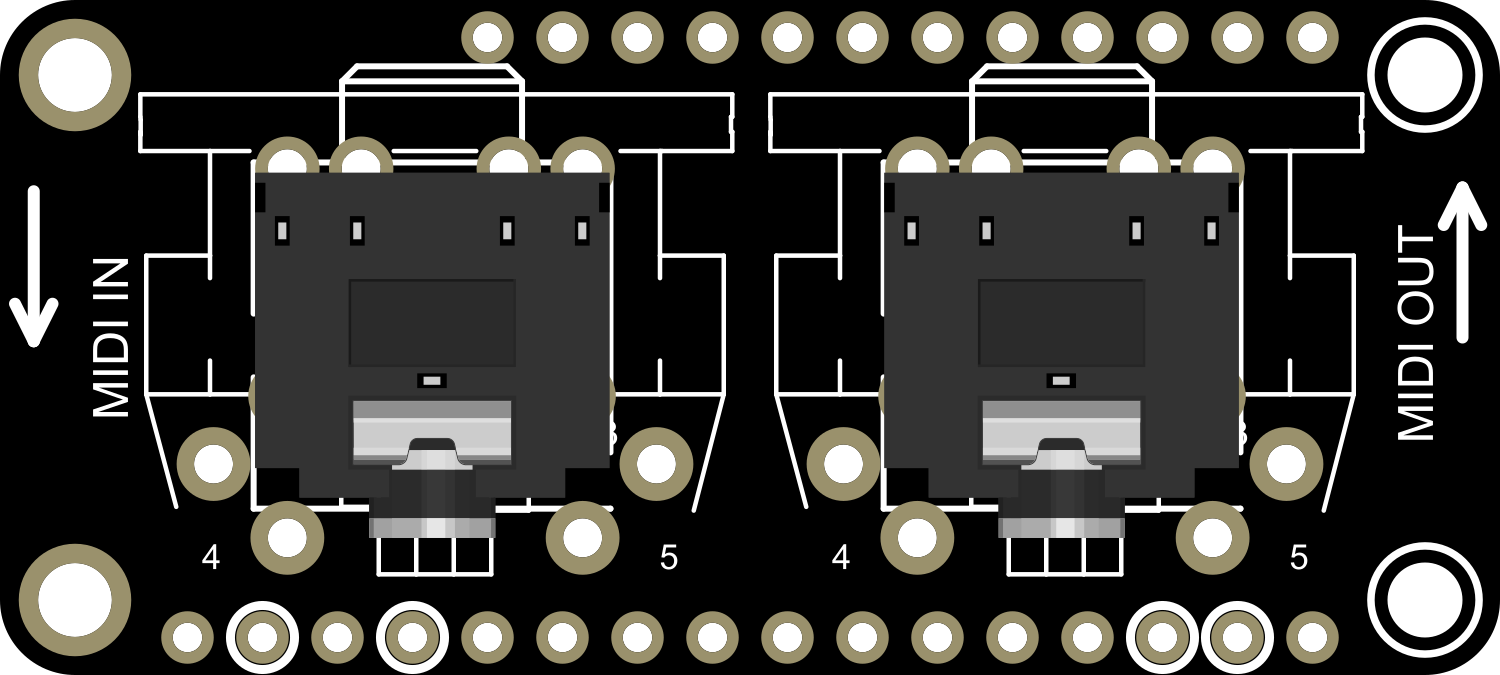
The Adafruit MIDI FeatherWing Kit is an add-on board designed for the Adafruit Feather series of development boards. It provides MIDI input and output capabilities through 3.5mm TRS jack connectors. This component is ideal for musicians, hobbyists, and developers looking to integrate MIDI control into their projects. Common applications include musical instrument interfaces, MIDI controllers, and interactive art installations.
Explore Projects Built with Adafruit MIDI FeatherWing Kit (3.5mm Jacks)

 Open Project in Cirkit Designer
 Open Project in Cirkit Designer
 Open Project in Cirkit Designer
 Open Project in Cirkit Designer
Explore Projects Built with Adafruit MIDI FeatherWing Kit (3.5mm Jacks)

 Open Project in Cirkit Designer
 Open Project in Cirkit Designer
 Open Project in Cirkit Designer
 Open Project in Cirkit Designer
Technical Specifications
Key Technical Details
- Operating Voltage: 3.3V or 5V (depending on the Feather board used)
- Current Consumption: Typically low, but depends on usage
- MIDI Standard: Conforms to MIDI 1.0 specification
- Connectors: 2 x 3.5mm TRS jacks for MIDI In and MIDI Out
Pin Configuration and Descriptions
| Pin Number | Name | Description |
|---|---|---|
| 1 | RX | MIDI Input - receives MIDI data from external devices |
| 2 | TX | MIDI Output - transmits MIDI data to external devices |
| 3 | GND | Ground connection |
| 4 | VIN | Voltage input - connected to the Feather board's supply |
| 5 | 3Vo | 3.3V output from the Feather board (if available) |
Usage Instructions
Integration with a Circuit
- Mounting: Attach the MIDI FeatherWing to your Adafruit Feather board using headers.
- Wiring: Connect the 3.5mm TRS jacks to your MIDI devices using appropriate MIDI cables.
- Power: Ensure that the Feather board is powered correctly, either via USB or an external power supply.
Important Considerations and Best Practices
- Voltage Levels: Ensure that the voltage levels match between the Feather board and the MIDI FeatherWing.
- MIDI Cables: Use standard MIDI cables with 3.5mm TRS connectors for compatibility.
- Software Libraries: Utilize Adafruit's MIDI library for easy integration with software.
- Isolation: Consider using opto-isolators for MIDI input to protect against voltage spikes.
Example Code for Arduino UNO
#include <MIDI.h>

MIDI_CREATE_DEFAULT_INSTANCE();

void setup() {
  MIDI.begin(MIDI_CHANNEL_OMNI); // Listen to all MIDI channels
  Serial.begin(31250); // Set the serial port to MIDI baud rate
}

void loop() {
  // Check if there are any incoming MIDI messages
  if (MIDI.read()) {
    // Handle incoming MIDI messages
    unsigned int type = MIDI.getType();
    unsigned int channel = MIDI.getChannel();
    unsigned int data1 = MIDI.getData1();
    unsigned int data2 = MIDI.getData2();

    // Example: Print received Note On messages to the Serial Monitor
    if (type == midi::NoteOn) {
      Serial.print("Note On: ");
      Serial.print(data1); // Note number
      Serial.print(" Velocity: ");
      Serial.println(data2); // Note velocity
    }
  }
}
Troubleshooting and FAQs
Common Issues
- No MIDI Signal: Check connections and ensure that the MIDI cables are fully inserted into the jacks.
- Incorrect Baud Rate: Verify that the serial port is set to the MIDI baud rate of 31250.
- Power Issues: Ensure that the Feather board is powered and the MIDI FeatherWing is properly seated.
Solutions and Tips
- LED Indicators: Use the onboard LEDs to diagnose signal transmission and reception.
- Serial Monitor: Use the Arduino IDE's Serial Monitor to debug and monitor MIDI data.
- Firmware Updates: Keep the Feather board's firmware up to date for optimal performance.
FAQs
Q: Can I use the MIDI FeatherWing with other microcontrollers? A: Yes, as long as they are compatible with the Adafruit Feather form factor and can operate at the correct logic levels.
Q: How do I connect traditional 5-pin DIN MIDI connectors? A: You will need a TRS to 5-pin DIN MIDI adapter cable, ensuring the pinout matches the MIDI standard.
Q: Is it possible to power the MIDI FeatherWing separately from the Feather board? A: No, the MIDI FeatherWing is designed to be powered directly from the Feather board.
For further assistance, consult the Adafruit support forums or the product's official documentation.