Cirkit Designer Logo
Cirkit Designer
Your all-in-one circuit design IDE
Home / 
Component Documentation

How to Use Grove Flame Sensor: Examples, Pinouts, and Specs

Image of Grove Flame Sensor
Cirkit Designer LogoDesign with Grove Flame Sensor in Cirkit Designer

Introduction

The Grove Flame Sensor is a compact and reliable module designed to detect the presence of flames or fire by measuring the infrared (IR) radiation emitted by flames. It is highly sensitive to IR wavelengths in the range of 760 nm to 1100 nm, making it ideal for fire detection systems. This sensor is commonly used in safety applications, robotics, and home automation systems to detect and respond to fire hazards.

Explore Projects Built with Grove Flame Sensor

Use Cirkit Designer to design, explore, and prototype these projects online. Some projects support real-time simulation. Click "Open Project" to start designing instantly!
Arduino UNO Based Multi-Flame Sensor Detection System
Image of flame sensor: A project utilizing Grove Flame Sensor in a practical application
This circuit is designed to monitor for the presence of flames using three flame sensors connected to an Arduino UNO. Each flame sensor's analog output is connected to a separate analog input on the Arduino, allowing the microcontroller to read the intensity of the flame detected by each sensor. The 5V and GND pins of the Arduino provide power to the flame sensors.
Cirkit Designer LogoOpen Project in Cirkit Designer
Arduino Mega 2560-Based Fire and Gas Detection System with Automated Water Pump
Image of Measure Temperature a: A project utilizing Grove Flame Sensor in a practical application
This circuit is a sensor-based monitoring and control system using an Arduino Mega 2560. It integrates a flame sensor, gas sensor, temperature sensor, and various output devices such as an LED, buzzer, servo motor, and water pump, controlled via a relay. The system is designed to detect environmental conditions and respond accordingly, potentially for safety or automation purposes.
Cirkit Designer LogoOpen Project in Cirkit Designer
Arduino UNO Based Gas and Flame Detection System with I2C LCD Feedback and Alert Buzzer
Image of SCHEMATIC DIAGRAM PROJECT 2: A project utilizing Grove Flame Sensor in a practical application
This circuit features an Arduino UNO microcontroller connected to a heat flame sensor and an MQ-2 gas sensor for detecting flames and gases, respectively. The Arduino is also interfaced with an I2C LCD 16x2 screen for displaying sensor readings or status messages. Additionally, there is a buzzer connected to the Arduino, which can be used for audible alerts or alarms based on sensor inputs.
Cirkit Designer LogoOpen Project in Cirkit Designer
ESP32-Based Smart Fire and Gas Detection System with GSM and OLED Display
Image of outline robotics: A project utilizing Grove Flame Sensor in a practical application
This circuit is a multi-sensor monitoring system using an ESP32 microcontroller. It integrates various sensors including flame sensors, gas sensors (MQ-2 and MQ-7), a temperature and humidity sensor, and an OLED display for real-time data visualization. Additionally, it includes a relay module for controlling external devices and a GSM module for remote communication.
Cirkit Designer LogoOpen Project in Cirkit Designer

Explore Projects Built with Grove Flame Sensor

Use Cirkit Designer to design, explore, and prototype these projects online. Some projects support real-time simulation. Click "Open Project" to start designing instantly!
Image of flame sensor: A project utilizing Grove Flame Sensor in a practical application
Arduino UNO Based Multi-Flame Sensor Detection System
This circuit is designed to monitor for the presence of flames using three flame sensors connected to an Arduino UNO. Each flame sensor's analog output is connected to a separate analog input on the Arduino, allowing the microcontroller to read the intensity of the flame detected by each sensor. The 5V and GND pins of the Arduino provide power to the flame sensors.
Cirkit Designer LogoOpen Project in Cirkit Designer
Image of Measure Temperature a: A project utilizing Grove Flame Sensor in a practical application
Arduino Mega 2560-Based Fire and Gas Detection System with Automated Water Pump
This circuit is a sensor-based monitoring and control system using an Arduino Mega 2560. It integrates a flame sensor, gas sensor, temperature sensor, and various output devices such as an LED, buzzer, servo motor, and water pump, controlled via a relay. The system is designed to detect environmental conditions and respond accordingly, potentially for safety or automation purposes.
Cirkit Designer LogoOpen Project in Cirkit Designer
Image of SCHEMATIC DIAGRAM PROJECT 2: A project utilizing Grove Flame Sensor in a practical application
Arduino UNO Based Gas and Flame Detection System with I2C LCD Feedback and Alert Buzzer
This circuit features an Arduino UNO microcontroller connected to a heat flame sensor and an MQ-2 gas sensor for detecting flames and gases, respectively. The Arduino is also interfaced with an I2C LCD 16x2 screen for displaying sensor readings or status messages. Additionally, there is a buzzer connected to the Arduino, which can be used for audible alerts or alarms based on sensor inputs.
Cirkit Designer LogoOpen Project in Cirkit Designer
Image of outline robotics: A project utilizing Grove Flame Sensor in a practical application
ESP32-Based Smart Fire and Gas Detection System with GSM and OLED Display
This circuit is a multi-sensor monitoring system using an ESP32 microcontroller. It integrates various sensors including flame sensors, gas sensors (MQ-2 and MQ-7), a temperature and humidity sensor, and an OLED display for real-time data visualization. Additionally, it includes a relay module for controlling external devices and a GSM module for remote communication.
Cirkit Designer LogoOpen Project in Cirkit Designer

Common Applications and Use Cases

  • Fire detection and alarm systems
  • Safety monitoring in industrial environments
  • Robotics for flame tracking
  • Smart home automation for fire safety
  • Educational projects and prototyping

Technical Specifications

The Grove Flame Sensor is designed for ease of use and integration into various projects. Below are its key technical details:

Key Technical Details

  • Operating Voltage: 3.3V to 5V
  • Current Consumption: ≤ 20 mA
  • Detection Range: Up to 1 meter (depending on flame size)
  • Detection Angle: 60 degrees
  • Output Type: Digital and Analog
  • Wavelength Sensitivity: 760 nm to 1100 nm (infrared spectrum)
  • Operating Temperature: -25°C to 85°C
  • Dimensions: 20mm x 20mm

Pin Configuration and Descriptions

The Grove Flame Sensor has a 4-pin interface. Below is the pinout description:

Pin Name Description
1 VCC Power supply pin. Connect to 3.3V or 5V.
2 GND Ground pin. Connect to the ground of the circuit.
3 DOUT Digital output pin. Outputs HIGH (1) when a flame is detected, LOW (0) otherwise.
4 AOUT Analog output pin. Outputs a voltage proportional to the intensity of the flame.

Usage Instructions

The Grove Flame Sensor is easy to use and can be connected to microcontrollers like the Arduino UNO. Follow the steps below to integrate it into your project:

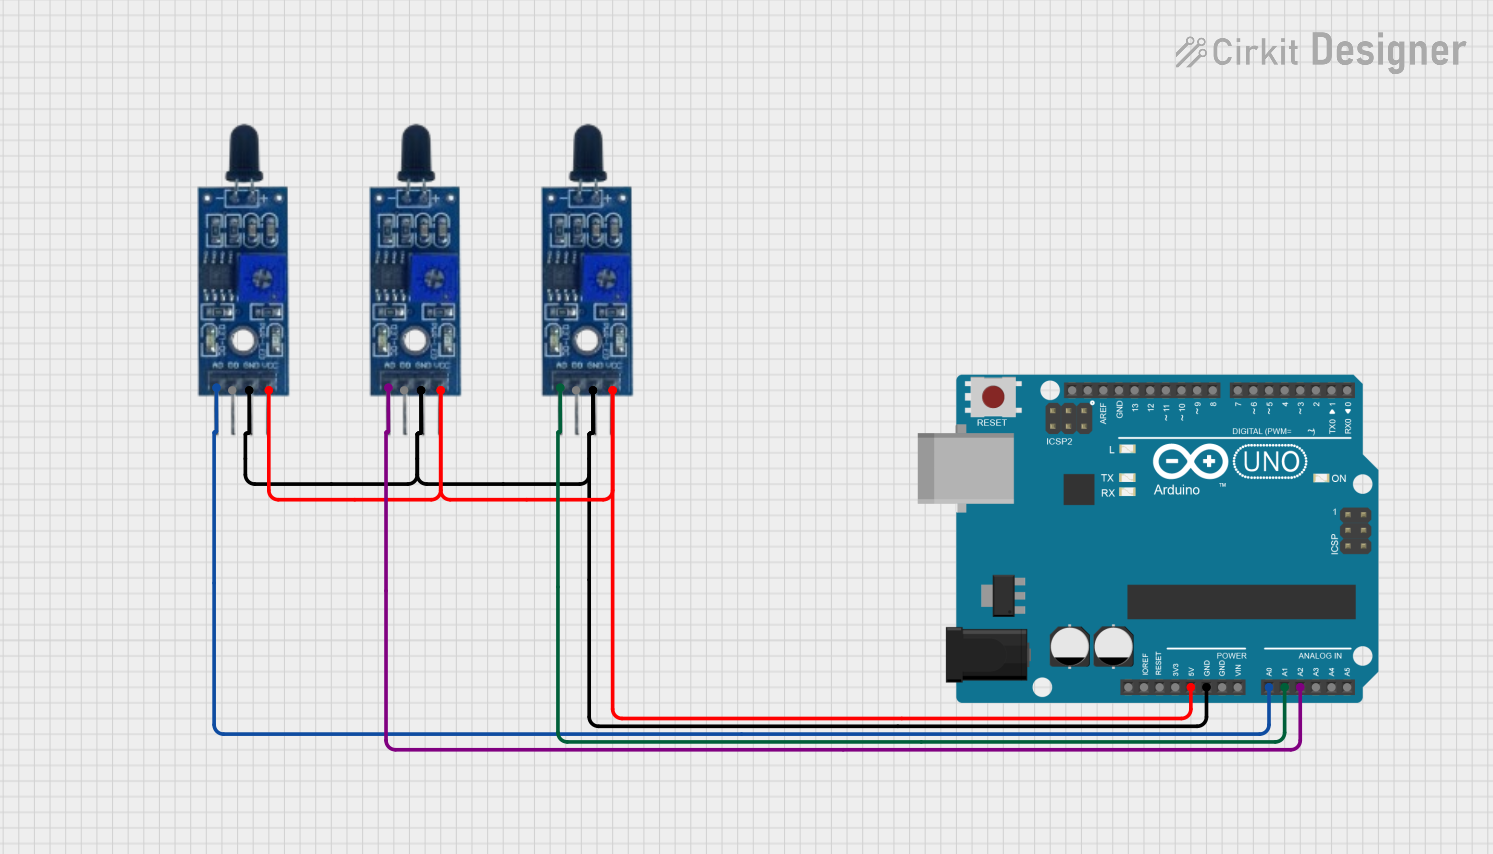
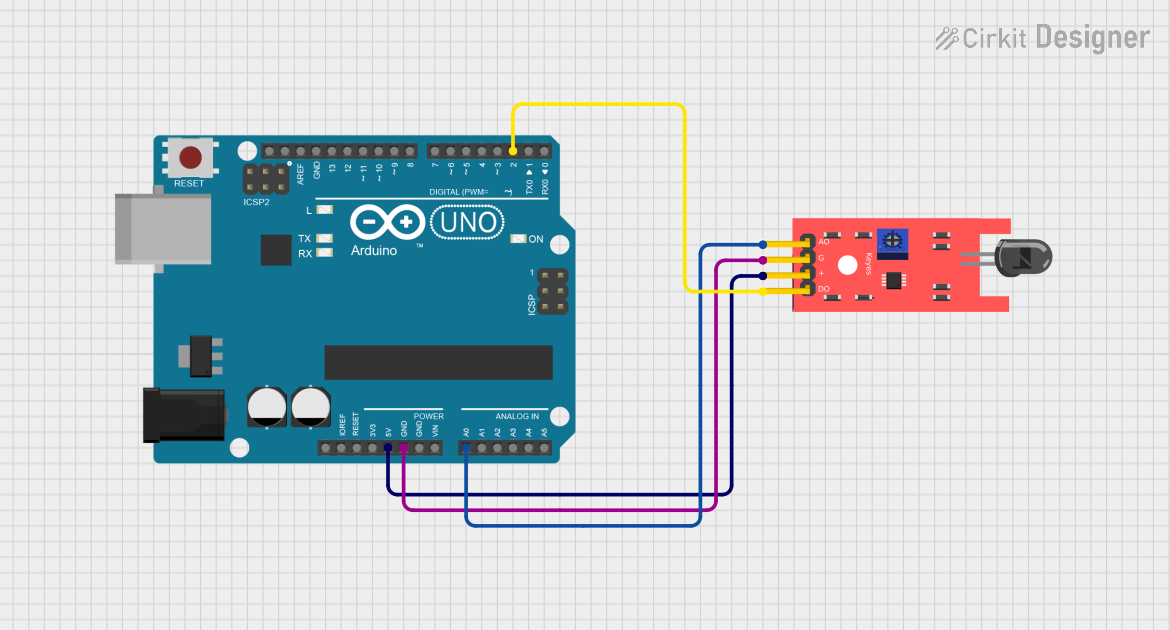
Connecting the Sensor

  1. Power the Sensor: Connect the VCC pin to the 5V pin on the Arduino UNO and the GND pin to the Arduino's GND.
  2. Digital Output: Connect the DOUT pin to a digital input pin on the Arduino (e.g., D2).
  3. Analog Output (Optional): Connect the AOUT pin to an analog input pin on the Arduino (e.g., A0) if you want to measure flame intensity.

Sample Arduino Code

The following code demonstrates how to use the Grove Flame Sensor with an Arduino UNO. It reads both the digital and analog outputs and prints the results to the Serial Monitor.

// Grove Flame Sensor Example Code
// Connect DOUT to digital pin 2 and AOUT to analog pin A0 on the Arduino UNO.

const int digitalPin = 2; // Digital output pin from the sensor
const int analogPin = A0; // Analog output pin from the sensor

void setup() {
  pinMode(digitalPin, INPUT); // Set digital pin as input
  Serial.begin(9600);         // Initialize serial communication at 9600 baud
}

void loop() {
  int flameDetected = digitalRead(digitalPin); // Read digital output
  int flameIntensity = analogRead(analogPin); // Read analog output

  // Print the digital output status
  if (flameDetected == HIGH) {
    Serial.println("Flame detected!");
  } else {
    Serial.println("No flame detected.");
  }

  // Print the analog output value (flame intensity)
  Serial.print("Flame Intensity: ");
  Serial.println(flameIntensity);

  delay(500); // Wait for 500ms before the next reading
}

Important Considerations and Best Practices

  • Avoid Direct Sunlight: The sensor may give false readings in direct sunlight due to high IR interference.
  • Distance and Angle: Ensure the sensor is positioned within its detection range (up to 1 meter) and angle (60 degrees) for accurate results.
  • Power Supply: Use a stable power source to avoid fluctuations in sensor readings.
  • Flame Size: The sensor's detection range may vary depending on the size and intensity of the flame.

Troubleshooting and FAQs

Common Issues and Solutions

  1. No Flame Detected Even When Present:

    • Ensure the sensor is within the detection range and angle.
    • Check the wiring and ensure the VCC and GND connections are secure.
    • Verify that the flame emits IR radiation within the sensor's sensitivity range.
  2. False Flame Detection:

    • Avoid placing the sensor in areas with strong IR sources, such as sunlight or incandescent bulbs.
    • Use shielding or filters to reduce interference from ambient light.
  3. Unstable Readings:

    • Ensure a stable power supply to the sensor.
    • Add a capacitor (e.g., 0.1 µF) across the VCC and GND pins to filter noise.

FAQs

Q1: Can the sensor detect flames through glass?
A1: No, the sensor cannot detect flames through glass as glass blocks most IR radiation.

Q2: What is the difference between the digital and analog outputs?
A2: The digital output provides a simple HIGH/LOW signal indicating the presence of a flame, while the analog output gives a proportional voltage representing the flame's intensity.

Q3: Can I use this sensor with a 3.3V microcontroller?
A3: Yes, the sensor operates at both 3.3V and 5V, making it compatible with 3.3V microcontrollers like the ESP32 or Raspberry Pi Pico.

Q4: How do I increase the detection range?
A4: The detection range is hardware-limited, but you can improve sensitivity by ensuring the sensor is aligned directly with the flame and minimizing ambient IR interference.