How to Use จอ 7-inch capacitive touch screen 1024x600 ips lcd display พร้อม case: Examples, Pinouts, and Specs
Introduction
The 7-inch capacitive touch screen LCD display is a high-quality display module with a resolution of 1024x600 pixels. It features IPS (In-Plane Switching) technology, which ensures wide viewing angles and vibrant, accurate color reproduction. This display is equipped with a capacitive touch panel for smooth and responsive touch input, making it ideal for interactive applications. Additionally, the included protective case enhances durability and makes it suitable for various environments.
Explore Projects Built with จอ 7-inch capacitive touch screen 1024x600 ips lcd display พร้อม case


Explore Projects Built with จอ 7-inch capacitive touch screen 1024x600 ips lcd display พร้อม case
Common Applications and Use Cases
- DIY projects and prototyping
- Embedded systems and IoT devices
- Raspberry Pi and Arduino-based projects
- Industrial control panels
- Educational tools and interactive displays
- Media players and digital signage
Technical Specifications
Key Technical Details
| Parameter | Specification |
|---|---|
| Display Type | 7-inch IPS LCD |
| Resolution | 1024x600 pixels |
| Touch Panel | Capacitive |
| Viewing Angle | 178° (horizontal and vertical) |
| Interface | HDMI for display, USB for touch |
| Power Supply | 5V DC (via USB or external source) |
| Dimensions (with case) | 181mm x 120mm x 20mm |
| Weight | ~350g |
Pin Configuration and Descriptions
HDMI Interface
| Pin Name | Description |
|---|---|
| TMDS | Transmits video and audio data |
| GND | Ground |
| +5V | Power supply for HDMI |
USB Interface (for Touch Input)
| Pin Name | Description |
|---|---|
| VCC | 5V power input |
| D+ | USB data line (positive) |
| D- | USB data line (negative) |
| GND | Ground |
Usage Instructions
How to Use the Component in a Circuit
Connect the Display:
- Use an HDMI cable to connect the display to your video source (e.g., Raspberry Pi, PC, or other HDMI-enabled devices).
- Plug the USB cable into the display and connect it to your device to enable touch functionality.
Power the Display:
- The display can be powered via the USB connection or an external 5V DC power source.
Install Drivers (if required):
- For most modern operating systems, the touch functionality is plug-and-play. However, for some devices, you may need to install additional drivers.
Adjust Display Settings:
- Configure the resolution to 1024x600 in your device's display settings for optimal performance.
Important Considerations and Best Practices
- Ensure the HDMI and USB cables are securely connected to avoid signal loss or touch input issues.
- Use a stable 5V power source to prevent flickering or display instability.
- Avoid exposing the screen to direct sunlight or extreme temperatures to maintain its longevity.
- Clean the screen with a soft, lint-free cloth to prevent scratches.
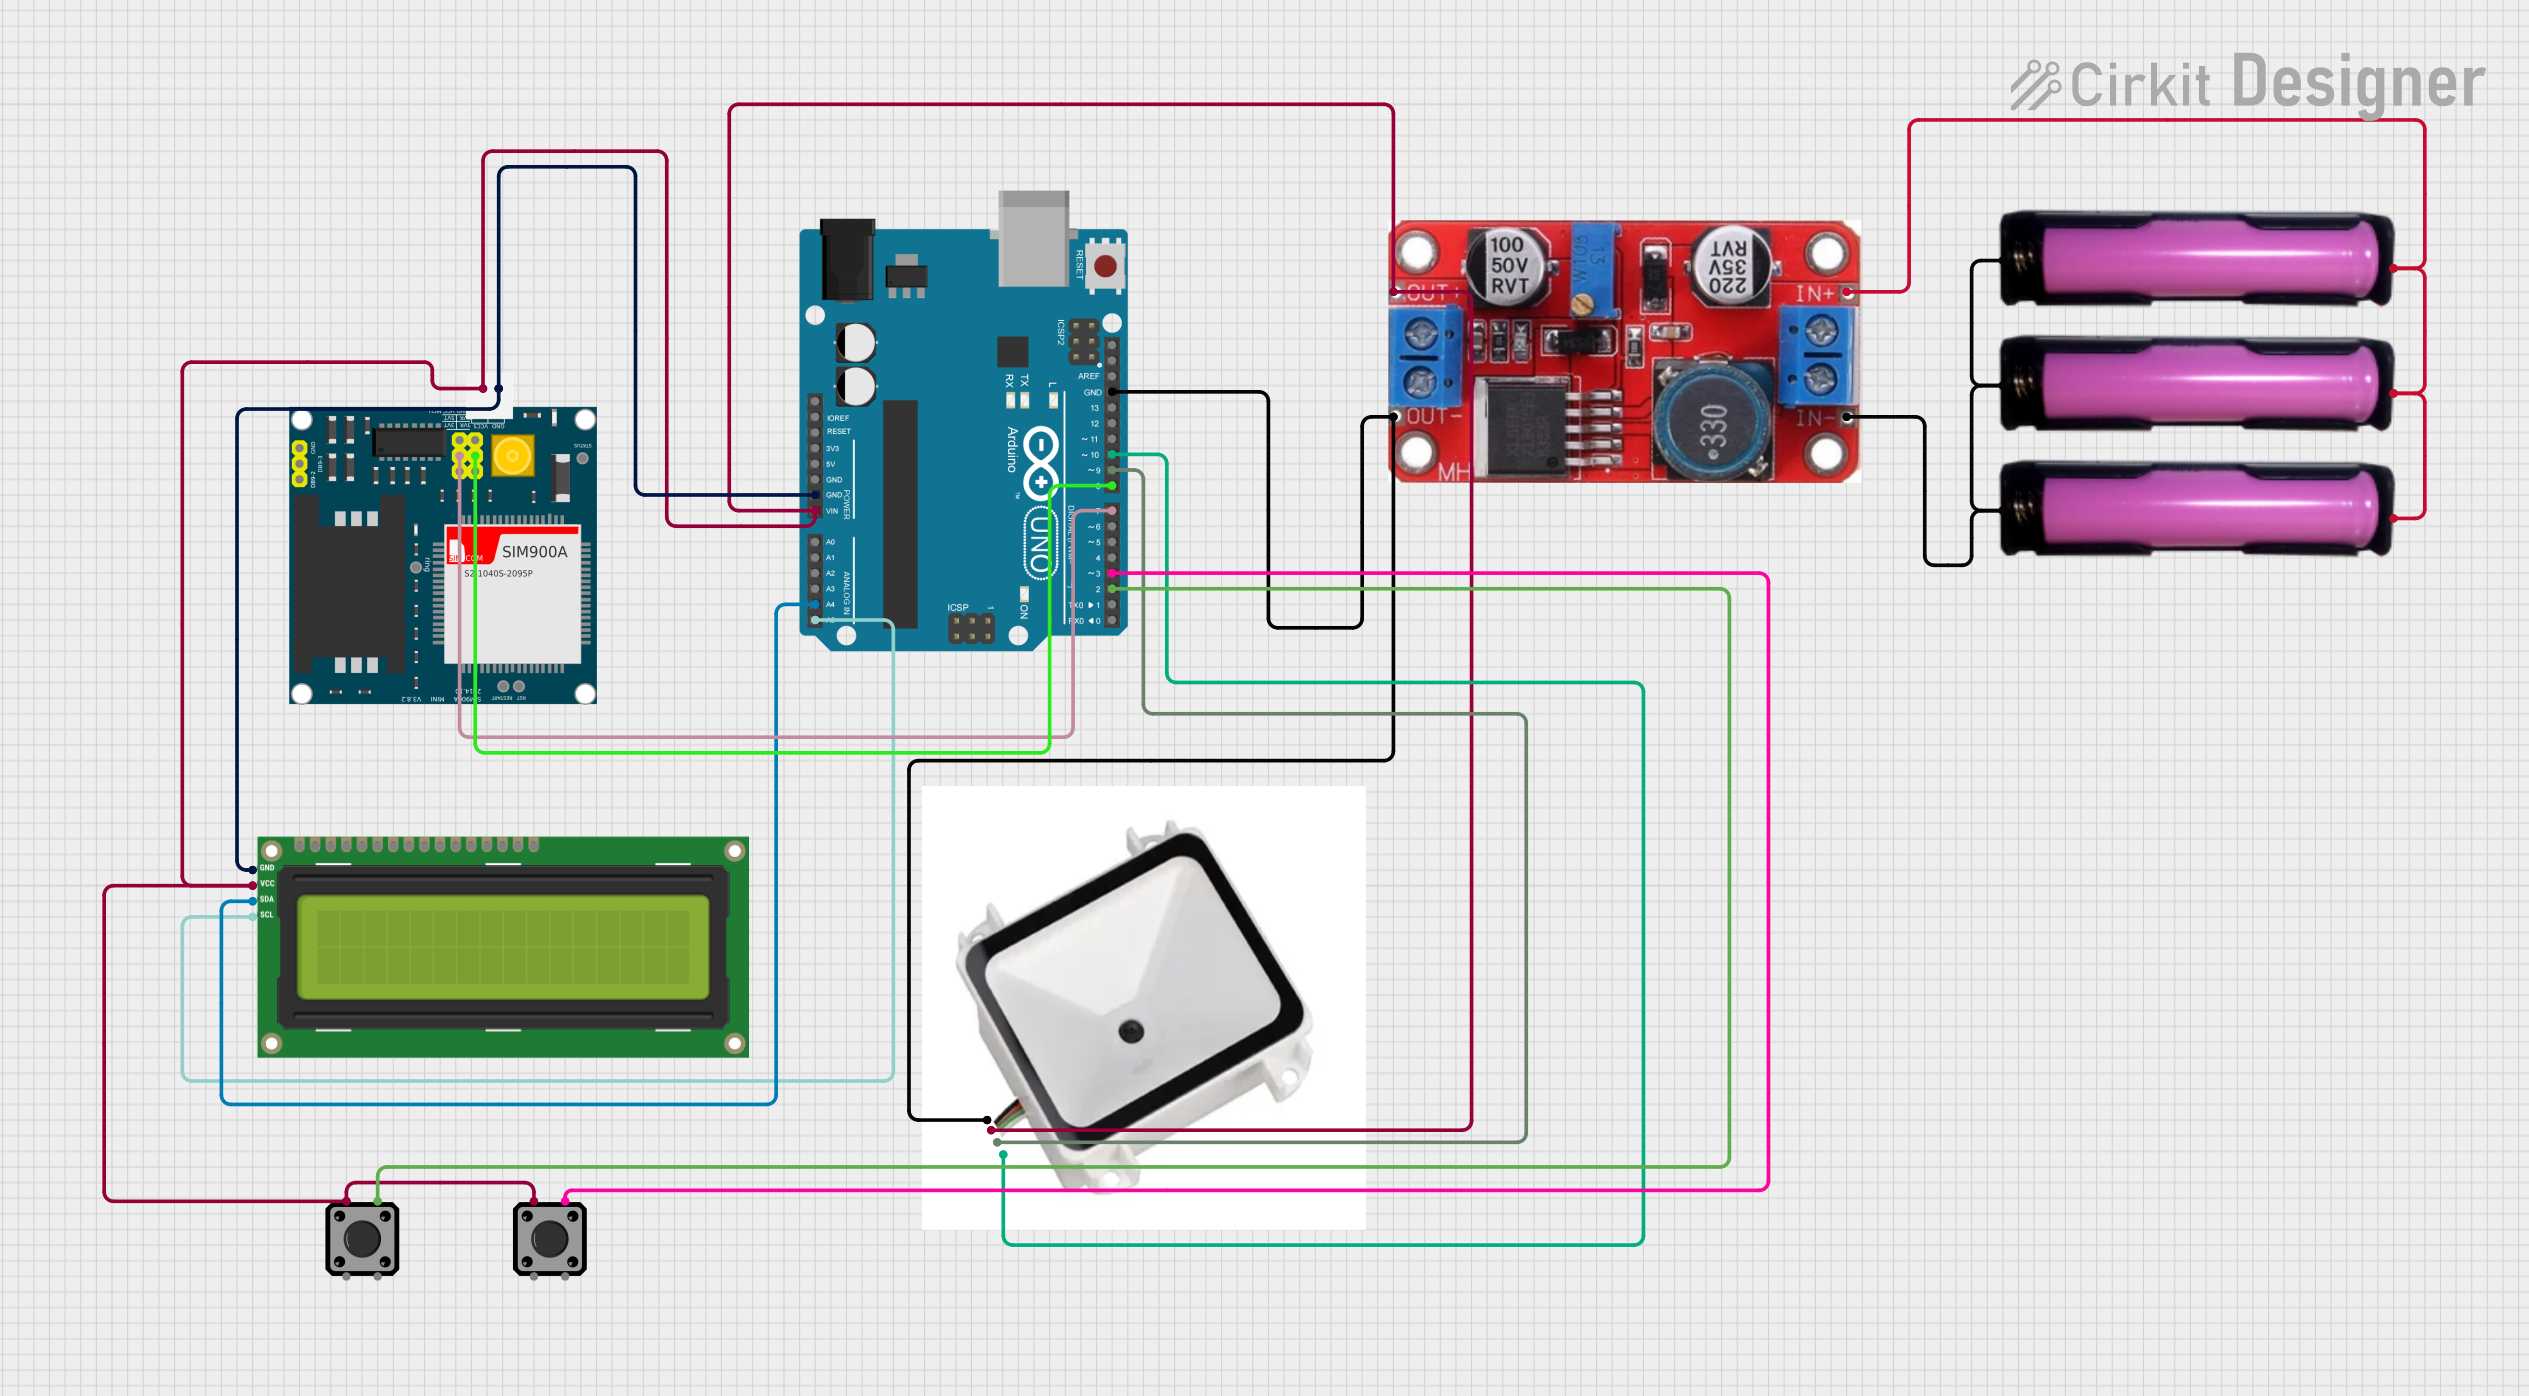
Example: Connecting to an Arduino UNO
While the display is primarily designed for HDMI devices, you can use it with an Arduino UNO for touch-based projects by interfacing the touch panel via USB and using an external HDMI source for the display. Below is an example of Arduino code to read touch input via USB (requires a USB host shield):
#include <USBHost.h>

// Initialize USB host object
USBHost usb;

// Function to initialize the USB host
void setup() {
  Serial.begin(9600); // Start serial communication
  if (usb.begin()) {
    Serial.println("USB Host initialized successfully.");
  } else {
    Serial.println("Failed to initialize USB Host.");
  }
}

void loop() {
  usb.Task(); // Process USB events
  // Add code here to handle touch input if a compatible library is used
}
Note: The above code is a basic example. For full touch functionality, you may need a compatible USB touch library and additional setup.
Troubleshooting and FAQs
Common Issues and Solutions
No Display Output:
- Ensure the HDMI cable is properly connected.
- Verify that the video source is set to output at 1024x600 resolution.
- Check the power supply and ensure the display is receiving 5V.
Touch Input Not Working:
- Confirm that the USB cable is securely connected to both the display and the device.
- Check if the device requires additional drivers for touch functionality.
- Test the USB port with another device to rule out hardware issues.
Flickering or Unstable Display:
- Use a stable and sufficient power source (5V, 2A recommended).
- Avoid using long or low-quality HDMI cables that may cause signal degradation.
Screen Not Responding to Touch:
- Ensure the screen is clean and free of debris.
- Restart the device and reconnect the USB cable.
FAQs
Q: Can this display be used with a Raspberry Pi?
A: Yes, the display is fully compatible with Raspberry Pi models that support HDMI output. Simply connect the HDMI and USB cables, and configure the resolution to 1024x600.
Q: Does the case provide access to all ports?
A: Yes, the included case is designed to provide easy access to the HDMI, USB, and power ports.
Q: Is the touch functionality multi-touch?
A: Yes, the capacitive touch panel supports multi-touch input for enhanced interactivity.
Q: Can I power the display using a power bank?
A: Yes, as long as the power bank provides a stable 5V output, it can be used to power the display.
Q: Is the display compatible with Windows, macOS, and Linux?
A: Yes, the display and touch functionality are compatible with all major operating systems. For some Linux distributions, additional configuration may be required.