How to Use Servo Motor 92G: Examples, Pinouts, and Specs
Introduction
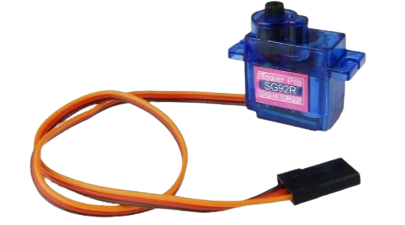
The Servo Motor 92G, manufactured by demoArduino (Part ID: Servo zup zup), is a compact and lightweight servo motor designed for precise control of angular position. It is widely used in robotics, remote-controlled devices, and automation systems due to its reliability and ease of use. This servo motor is ideal for applications requiring accurate positioning, such as robotic arms, pan-tilt camera mounts, and model vehicles.
Explore Projects Built with Servo Motor 92G

Explore Projects Built with Servo Motor 92G
Technical Specifications
The Servo Motor 92G offers excellent performance in a small form factor. Below are its key technical details:
Key Specifications
| Parameter | Value |
|---|---|
| Operating Voltage | 4.8V to 6.0V |
| Stall Torque | 2.5 kg.cm (at 4.8V) |
| Operating Speed | 0.12 sec/60° (at 4.8V) |
| Weight | 9.2 grams |
| Dimensions | 22.5 x 11.5 x 24 mm |
| Control Signal | PWM (Pulse Width Modulation) |
| PWM Pulse Range | 500 µs to 2500 µs |
| Angle Range | 0° to 180° |
| Connector Type | 3-pin female header |
Pin Configuration
The Servo Motor 92G has a 3-pin connector for easy interfacing. The pinout is as follows:
| Pin Number | Wire Color | Function | Description |
|---|---|---|---|
| 1 | Brown | Ground (GND) | Connect to the ground of the power supply or microcontroller. |
| 2 | Red | Power (VCC) | Connect to a 4.8V to 6.0V power source. |
| 3 | Orange | Signal (PWM) | Receives the PWM signal for position control. |
Usage Instructions
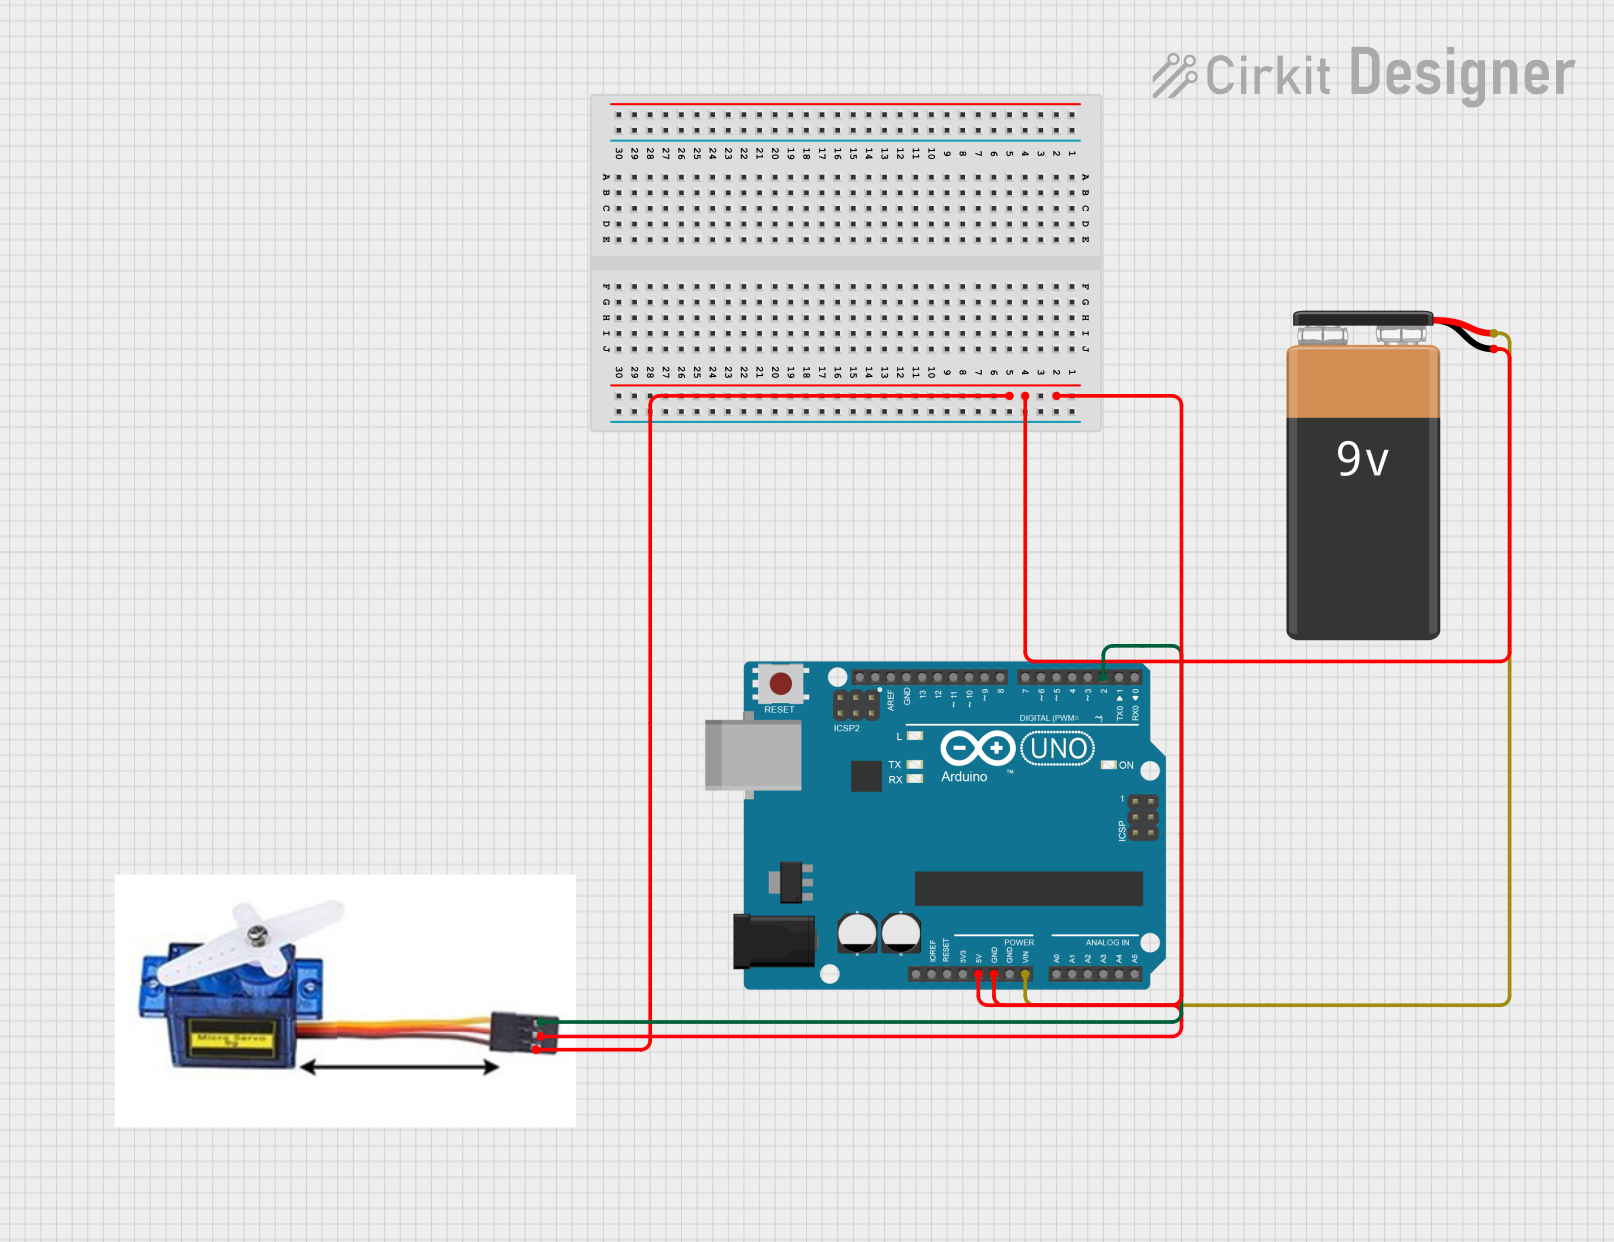
How to Use the Servo Motor 92G in a Circuit
- Power Connection: Connect the red wire to a 5V power source and the brown wire to ground.
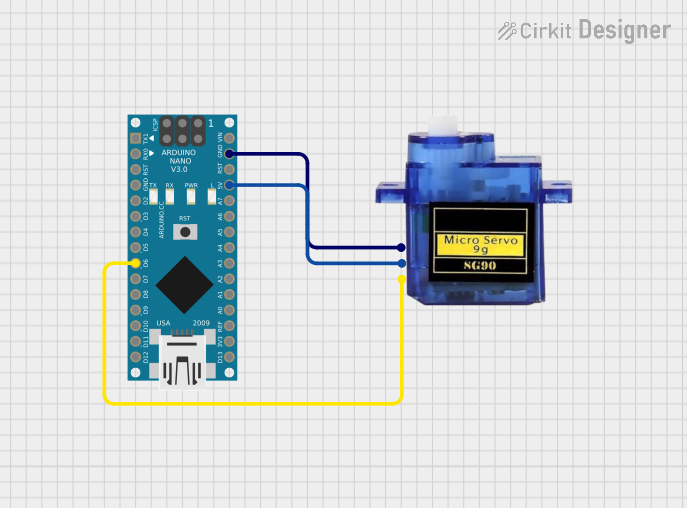
- Signal Connection: Connect the orange wire to a PWM-capable pin on your microcontroller (e.g., Arduino UNO).
- PWM Signal: Use a PWM signal with a pulse width between 500 µs and 2500 µs to control the servo's position. A 500 µs pulse corresponds to 0°, while a 2500 µs pulse corresponds to 180°.
Important Considerations
- Power Supply: Ensure the power supply can provide sufficient current (at least 1A) to avoid voltage drops.
- PWM Frequency: Use a PWM frequency of 50 Hz (20 ms period) for optimal performance.
- Avoid Overloading: Do not exceed the torque rating to prevent damage to the motor.
- Mounting: Secure the servo motor properly to avoid vibrations or misalignment during operation.
Example Code for Arduino UNO
Below is an example code snippet to control the Servo Motor 92G using an Arduino UNO:
#include <Servo.h> // Include the Servo library

Servo myServo; // Create a Servo object to control the motor

void setup() {
  myServo.attach(9); // Attach the servo to pin 9 on the Arduino
}

void loop() {
  myServo.write(0); // Move the servo to 0 degrees
  delay(1000); // Wait for 1 second

  myServo.write(90); // Move the servo to 90 degrees
  delay(1000); // Wait for 1 second

  myServo.write(180); // Move the servo to 180 degrees
  delay(1000); // Wait for 1 second
}
Code Explanation:
- The
Servolibrary simplifies the control of servo motors. - The
attach()function links the servo to a specific PWM pin. - The
write()function sets the servo's position in degrees (0° to 180°).
Troubleshooting and FAQs
Common Issues and Solutions
Servo Not Moving:
- Cause: Incorrect wiring or insufficient power supply.
- Solution: Double-check the connections and ensure the power supply meets the voltage and current requirements.
Jittery Movement:
- Cause: Noise in the PWM signal or unstable power supply.
- Solution: Use a decoupling capacitor (e.g., 100 µF) across the power lines and ensure a clean PWM signal.
Overheating:
- Cause: Prolonged operation under high torque or incorrect PWM signal.
- Solution: Avoid overloading the servo and ensure the PWM signal is within the specified range.
Limited Range of Motion:
- Cause: Incorrect PWM pulse width or mechanical obstruction.
- Solution: Verify the PWM pulse width and ensure there are no physical obstructions.
FAQs
Q1: Can I power the Servo Motor 92G directly from the Arduino UNO?
A1: While it is possible, it is not recommended as the Arduino's 5V pin may not provide sufficient current. Use an external power supply for reliable operation.
Q2: What happens if I send a PWM signal outside the specified range?
A2: The servo may behave unpredictably or get damaged. Always ensure the PWM pulse width is between 500 µs and 2500 µs.
Q3: Can I use the Servo Motor 92G for continuous rotation?
A3: No, the Servo Motor 92G is designed for positional control (0° to 180°) and not for continuous rotation.
By following this documentation, you can effectively integrate and operate the Servo Motor 92G in your projects.