How to Use USB Buck: Examples, Pinouts, and Specs
Introduction
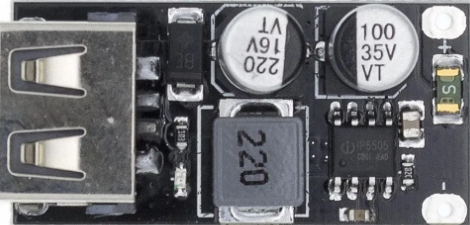
A USB Buck converter is a type of DC-DC converter designed to step down voltage from a higher level to a lower level while maintaining high efficiency. It is commonly used to power devices from USB sources, such as charging low-voltage batteries, powering microcontrollers, or driving small electronic modules. Its compact size and high efficiency make it ideal for portable and embedded applications.
Explore Projects Built with USB Buck


Explore Projects Built with USB Buck
Common Applications and Use Cases
- Powering microcontrollers (e.g., Arduino, ESP32) from USB power sources
- Charging low-voltage batteries (e.g., Li-ion, NiMH)
- Supplying power to sensors, LEDs, and other low-power devices
- Voltage regulation in portable electronics
- USB-powered DIY electronics projects
Technical Specifications
Below are the key technical details for a typical USB Buck converter:
| Parameter | Value |
|---|---|
| Input Voltage Range | 4.5V to 24V |
| Output Voltage Range | 0.8V to 12V (adjustable) |
| Output Current | Up to 3A (depending on model) |
| Efficiency | Up to 95% |
| Switching Frequency | 150 kHz to 1 MHz |
| USB Input Compatibility | USB 2.0, USB 3.0 |
| Protection Features | Overcurrent, Overtemperature, |
| and Short-Circuit Protection |
Pin Configuration and Descriptions
The USB Buck converter typically has the following pin configuration:
| Pin Name | Description |
|---|---|
| VIN | Input voltage pin. Connect to the USB power source (e.g., 5V from USB port). |
| GND | Ground pin. Connect to the ground of the circuit. |
| VOUT | Output voltage pin. Provides the regulated, stepped-down voltage. |
| ADJ (optional) | Adjustment pin. Used to set the output voltage (if adjustable). |
| EN (optional) | Enable pin. Used to turn the converter on or off (logic high to enable). |
Usage Instructions
How to Use the USB Buck Converter in a Circuit
Connect the Input Voltage (VIN):
- Connect the VIN pin to a USB power source (e.g., a USB port or USB power bank).
- Ensure the input voltage is within the specified range (e.g., 4.5V to 24V).
Connect the Ground (GND):
- Connect the GND pin to the ground of your circuit.
Set the Output Voltage (if adjustable):
- If the USB Buck converter has an adjustable output, use the ADJ pin or onboard potentiometer to set the desired output voltage.
- Use a multimeter to verify the output voltage before connecting your load.
Connect the Load:
- Connect the VOUT pin to the device or circuit you want to power.
- Ensure the load does not exceed the maximum output current rating of the converter.
Enable the Converter (if applicable):
- If the converter has an EN (enable) pin, ensure it is set to logic high to activate the converter.
Important Considerations and Best Practices
Heat Dissipation:
Ensure proper ventilation or heat sinking if the converter operates at high currents, as it may generate heat.Input Voltage Range:
Do not exceed the maximum input voltage rating to avoid damaging the converter.Output Voltage Accuracy:
Use a multimeter to verify the output voltage, especially when powering sensitive devices.Load Compatibility:
Ensure the connected load does not draw more current than the converter's maximum output current rating.
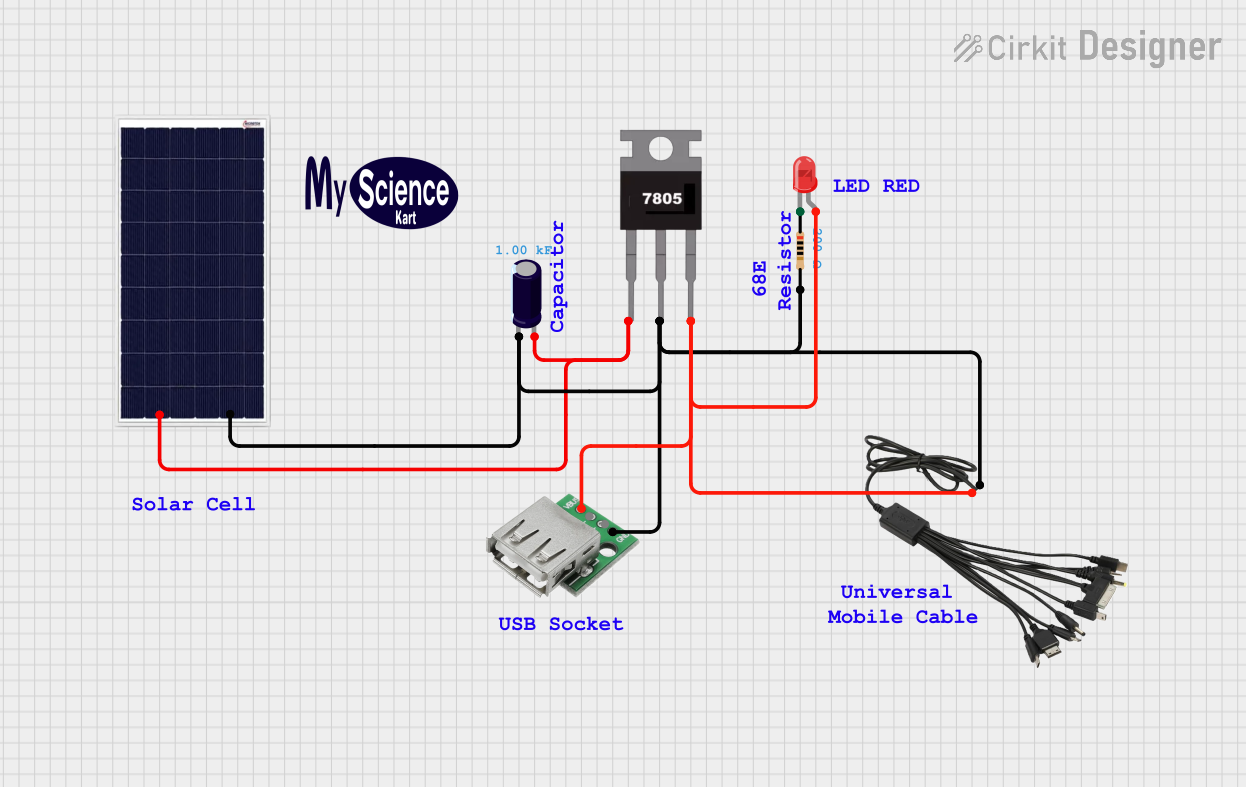
Example: Using a USB Buck Converter with Arduino UNO
Below is an example of how to use a USB Buck converter to power an Arduino UNO from a USB power source:
- Connect the USB Buck converter's VIN pin to the USB power source (e.g., 5V from a USB port).
- Connect the GND pin to the ground of the circuit.
- Set the output voltage of the USB Buck converter to 5V using the ADJ pin or potentiometer.
- Connect the VOUT pin to the Arduino UNO's 5V pin.
- Connect the GND pin of the USB Buck converter to the Arduino UNO's GND pin.
Here is a simple Arduino sketch to test the setup:
// This sketch blinks the onboard LED of the Arduino UNO
// Ensure the USB Buck converter is providing a stable 5V to the Arduino

void setup() {
  pinMode(LED_BUILTIN, OUTPUT); // Set the onboard LED pin as output
}

void loop() {
  digitalWrite(LED_BUILTIN, HIGH); // Turn the LED on
  delay(1000);                     // Wait for 1 second
  digitalWrite(LED_BUILTIN, LOW);  // Turn the LED off
  delay(1000);                     // Wait for 1 second
}
Troubleshooting and FAQs
Common Issues and Solutions
No Output Voltage:
- Cause: The input voltage is too low or not connected properly.
Solution: Verify the input voltage is within the specified range and check the connections. - Cause: The EN pin is not enabled (if applicable).
Solution: Ensure the EN pin is set to logic high.
- Cause: The input voltage is too low or not connected properly.
Overheating:
- Cause: The load is drawing more current than the converter's maximum rating.
Solution: Reduce the load or use a higher-rated converter. - Cause: Poor ventilation or heat dissipation.
Solution: Improve airflow or add a heatsink.
- Cause: The load is drawing more current than the converter's maximum rating.
Output Voltage Fluctuations:
- Cause: Insufficient input voltage or unstable power source.
Solution: Use a stable USB power source and ensure proper connections. - Cause: Incorrect adjustment of the output voltage.
Solution: Re-adjust the output voltage using the ADJ pin or potentiometer.
- Cause: Insufficient input voltage or unstable power source.
Short Circuit Protection Triggered:
- Cause: A short circuit occurred on the output.
Solution: Disconnect the load, check for shorts, and reconnect after resolving the issue.
- Cause: A short circuit occurred on the output.
FAQs
Q: Can I use a USB Buck converter to charge a Li-ion battery?
A: Yes, but ensure the output voltage is set to the appropriate charging voltage for the battery (e.g., 4.2V for a single Li-ion cell) and use a current-limiting circuit if required.
Q: Can I use the USB Buck converter with a USB-C power source?
A: Yes, as long as the input voltage is within the converter's range. Use a USB-C to USB-A adapter if needed.
Q: What happens if I exceed the maximum input voltage?
A: Exceeding the input voltage can damage the converter. Always ensure the input voltage is within the specified range.
Q: Is the USB Buck converter bidirectional?
A: No, it is a step-down (buck) converter and cannot step up or reverse the voltage.