How to Use MPPT Solar Charge Controller: Examples, Pinouts, and Specs
Introduction
A Maximum Power Point Tracking (MPPT) Solar Charge Controller optimizes the power output from solar panels by adjusting the electrical operating point of the modules. It efficiently converts the voltage and current from the solar panels to charge batteries, ensuring maximum energy harvest and improved charging efficiency.
Explore Projects Built with MPPT Solar Charge Controller

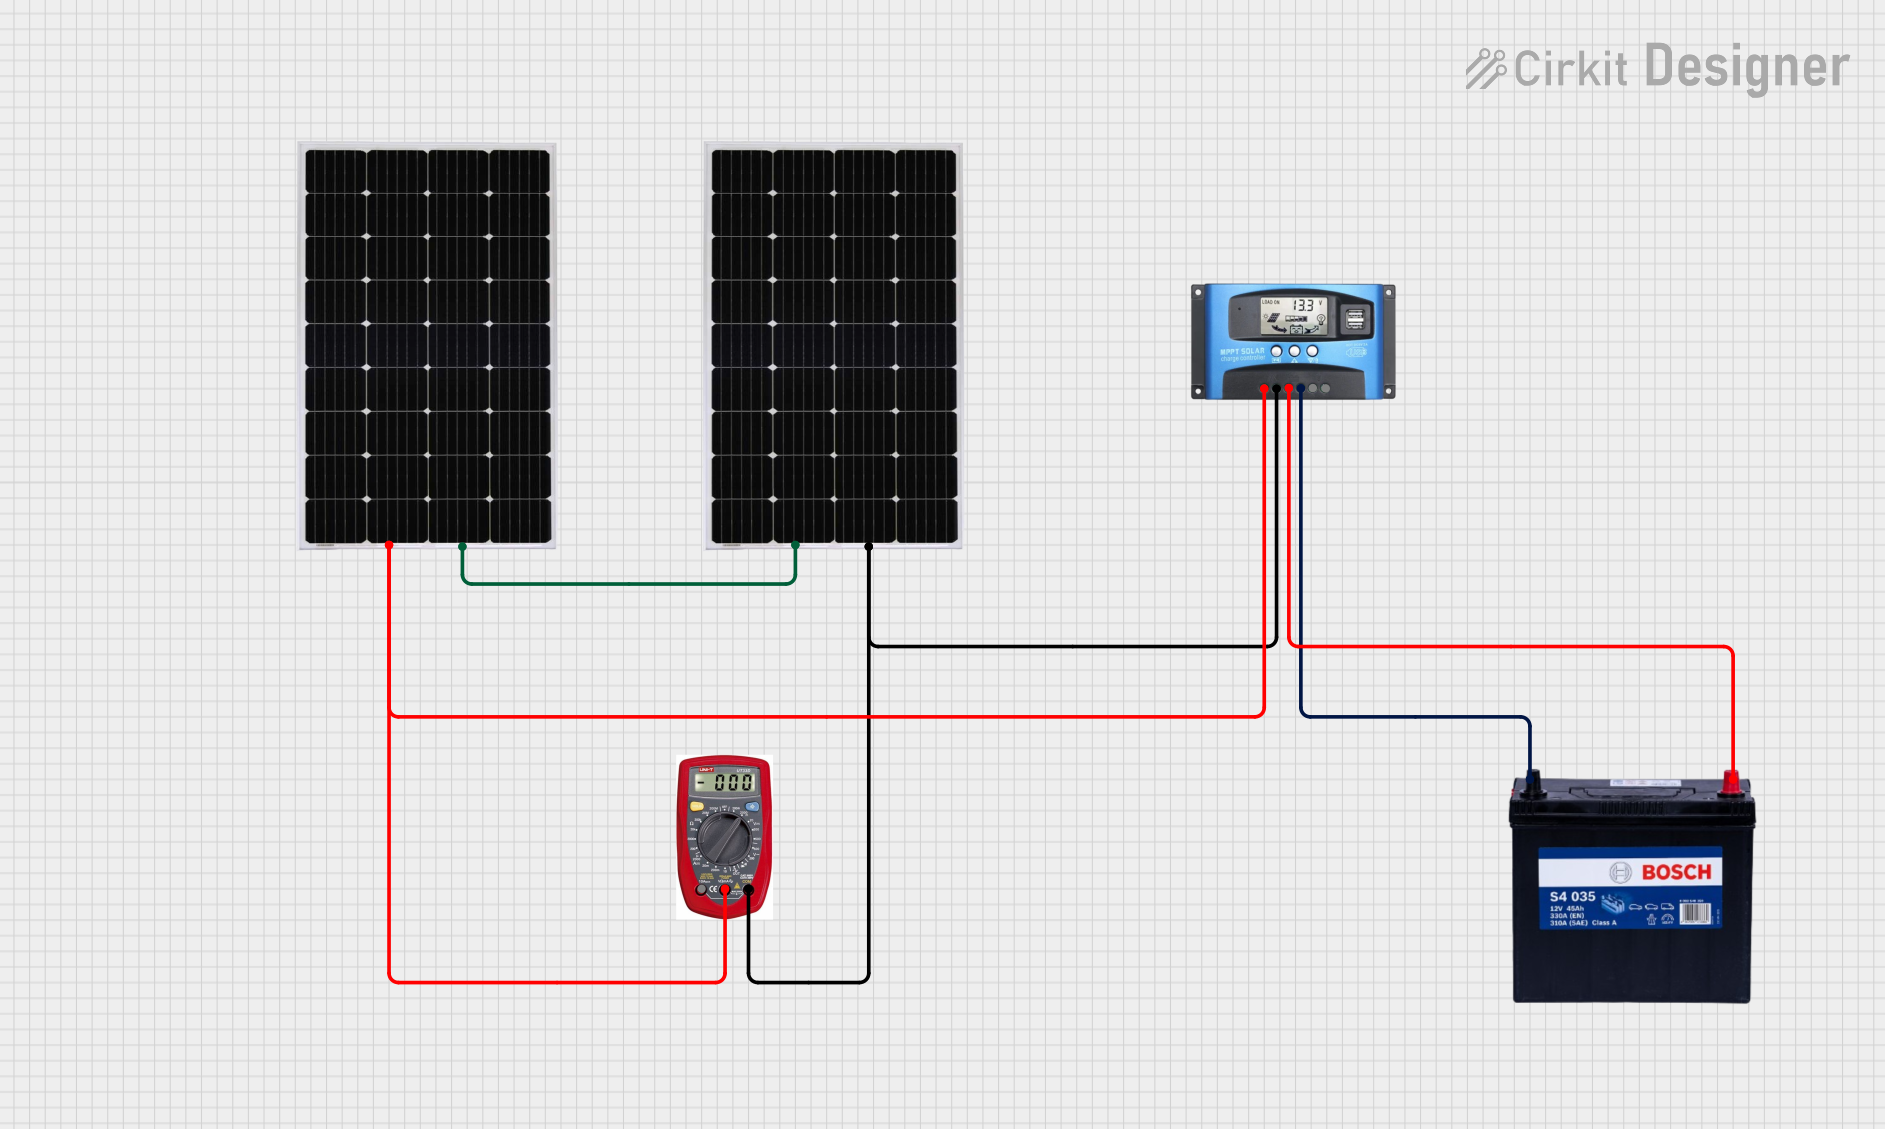

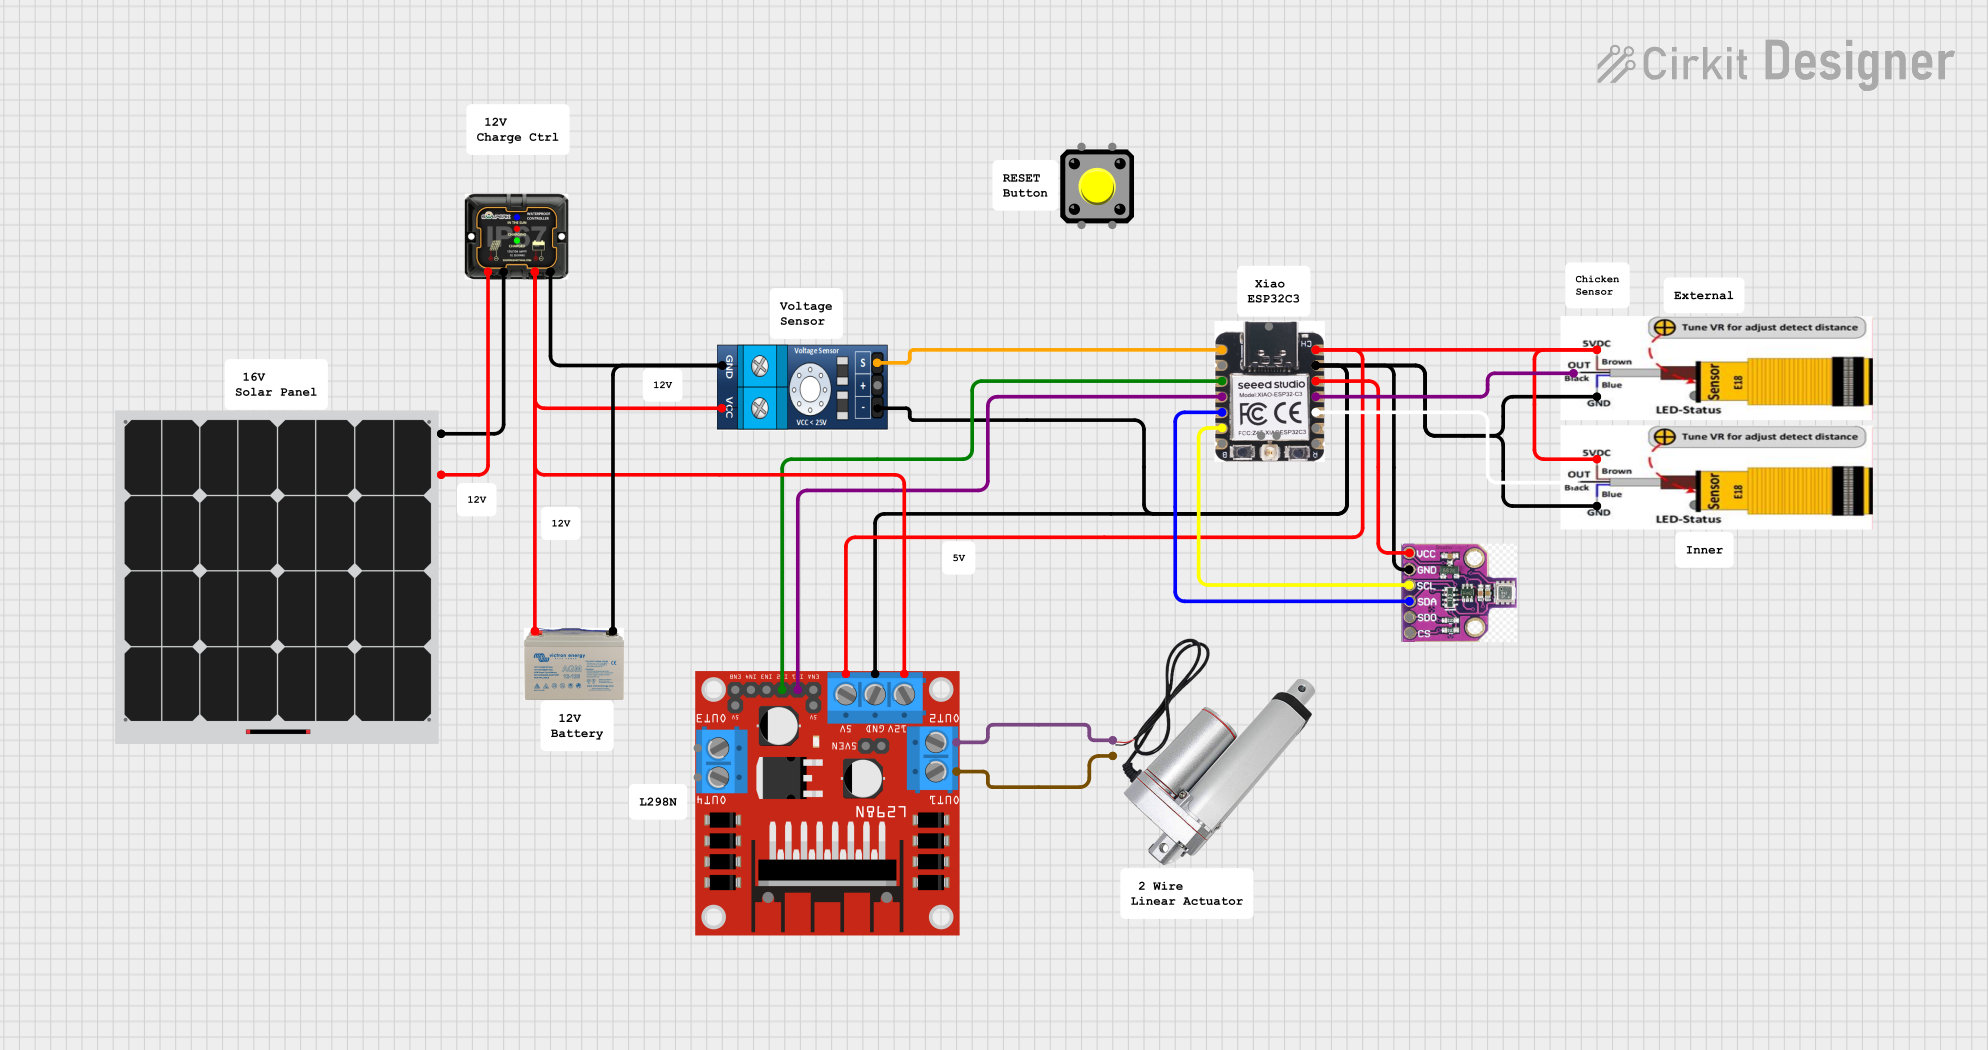
Explore Projects Built with MPPT Solar Charge Controller
Common Applications and Use Cases
- Solar-powered off-grid systems
- Residential and commercial solar installations
- Solar-powered lighting systems
- RVs, boats, and portable solar setups
- Industrial solar energy systems
Technical Specifications
Below are the key technical details for a typical MPPT Solar Charge Controller. Specifications may vary depending on the model and manufacturer.
General Specifications
| Parameter | Value |
|---|---|
| Input Voltage Range | 12V to 150V (varies by model) |
| Output Voltage Range | 12V, 24V, 48V (auto or manual) |
| Maximum Input Current | 10A to 60A (varies by model) |
| Efficiency | Up to 98% |
| Maximum Power Point Tracking Efficiency | 99% |
| Operating Temperature Range | -20°C to 60°C |
| Communication Interfaces | RS485, CAN, Bluetooth (optional) |
Pin Configuration and Descriptions
| Pin/Terminal Name | Description |
|---|---|
| PV+ | Positive terminal for solar panel input |
| PV- | Negative terminal for solar panel input |
| BAT+ | Positive terminal for battery connection |
| BAT- | Negative terminal for battery connection |
| LOAD+ | Positive terminal for DC load output |
| LOAD- | Negative terminal for DC load output |
| COM Port | Communication port for monitoring |
Usage Instructions
How to Use the MPPT Solar Charge Controller in a Circuit
Connect the Solar Panel:
- Connect the positive terminal of the solar panel to the
PV+pin and the negative terminal to thePV-pin. - Ensure the solar panel's voltage and current are within the controller's input range.
- Connect the positive terminal of the solar panel to the
Connect the Battery:
- Connect the positive terminal of the battery to the
BAT+pin and the negative terminal to theBAT-pin. - Ensure the battery type (e.g., lead-acid, lithium-ion) is compatible with the controller.
- Connect the positive terminal of the battery to the
Connect the Load (Optional):
- If you want to power a DC load directly, connect the load's positive terminal to the
LOAD+pin and the negative terminal to theLOAD-pin.
- If you want to power a DC load directly, connect the load's positive terminal to the
Power On:
- Once all connections are secure, the controller will automatically detect the battery voltage and begin charging.
Monitor and Adjust Settings:
- Use the built-in display or communication interface (e.g., RS485 or Bluetooth) to monitor performance and adjust settings like battery type, charging mode, and load control.
Important Considerations and Best Practices
- Match Voltage Levels: Ensure the solar panel's voltage is higher than the battery's voltage for proper MPPT operation.
- Avoid Reverse Polarity: Double-check all connections to prevent damage to the controller.
- Use Proper Wire Gauges: Use wires with appropriate thickness to handle the current without overheating.
- Install in a Ventilated Area: Place the controller in a cool, dry, and well-ventilated location to prevent overheating.
- Enable Overcurrent Protection: Use fuses or circuit breakers on the input and output lines for safety.
Arduino UNO Integration Example
You can monitor the MPPT Solar Charge Controller's data using an Arduino UNO and an RS485 module. Below is an example code snippet to read data from the controller.
#include <ModbusMaster.h>

// Create an instance of the ModbusMaster library
ModbusMaster node;

// Define the RS485 communication pins
#define RE_PIN 2  // Receiver Enable pin
#define DE_PIN 3  // Driver Enable pin

void preTransmission() {
  digitalWrite(RE_PIN, HIGH); // Enable transmission mode
  digitalWrite(DE_PIN, HIGH);
}

void postTransmission() {
  digitalWrite(RE_PIN, LOW);  // Enable reception mode
  digitalWrite(DE_PIN, LOW);
}

void setup() {
  Serial.begin(9600);         // Initialize serial communication
  pinMode(RE_PIN, OUTPUT);    // Set RE_PIN as output
  pinMode(DE_PIN, OUTPUT);    // Set DE_PIN as output
  digitalWrite(RE_PIN, LOW);  // Default to reception mode
  digitalWrite(DE_PIN, LOW);

  node.begin(1, Serial);      // Set Modbus slave ID to 1
  node.preTransmission(preTransmission);
  node.postTransmission(postTransmission);
}

void loop() {
  uint8_t result;
  uint16_t data[2];

  // Read input registers starting at address 0x3100
  result = node.readInputRegisters(0x3100, 2);

  if (result == node.ku8MBSuccess) {
    data[0] = node.getResponseBuffer(0); // Voltage
    data[1] = node.getResponseBuffer(1); // Current

    Serial.print("Voltage: ");
    Serial.print(data[0] / 100.0); // Convert to volts
    Serial.println(" V");

    Serial.print("Current: ");
    Serial.print(data[1] / 100.0); // Convert to amps
    Serial.println(" A");
  } else {
    Serial.println("Failed to read data");
  }

  delay(1000); // Wait 1 second before the next read
}
Troubleshooting and FAQs
Common Issues and Solutions
Controller Not Powering On:
- Check the battery connection. The controller typically requires a battery to power on.
- Verify that the battery voltage is within the supported range.
No Charging from Solar Panel:
- Ensure the solar panel is receiving sufficient sunlight.
- Check the panel's voltage and current to confirm they are within the controller's input range.
- Inspect the wiring for loose or incorrect connections.
Overheating:
- Ensure the controller is installed in a well-ventilated area.
- Check for excessive current draw from the load.
Incorrect Battery Charging:
- Verify that the correct battery type is selected in the controller settings.
- Check for firmware updates from the manufacturer.
FAQs
Q: Can I use the MPPT controller without a battery?
A: No, most MPPT controllers require a battery to function properly. The battery acts as a buffer for the solar panel's energy.
Q: How do I know if the MPPT is working?
A: Use the display or monitoring interface to check the input and output power. The controller should adjust the input voltage to maximize power output.
Q: Can I connect multiple solar panels to the MPPT controller?
A: Yes, you can connect multiple panels in series or parallel, but ensure the combined voltage and current are within the controller's input range.