How to Use cảm biến âm thanh: Examples, Pinouts, and Specs

Introduction
The Cảm Biến Âm Thanh (Sound Sensor) is a versatile electronic component designed to detect sound levels and convert them into electrical signals. Manufactured by Q with the part ID Q, this sensor is widely used in applications such as sound level monitoring, voice recognition, and audio-based automation systems. Its ability to sense sound makes it an essential component in projects requiring audio input or environmental sound detection.
Explore Projects Built with cảm biến âm thanh
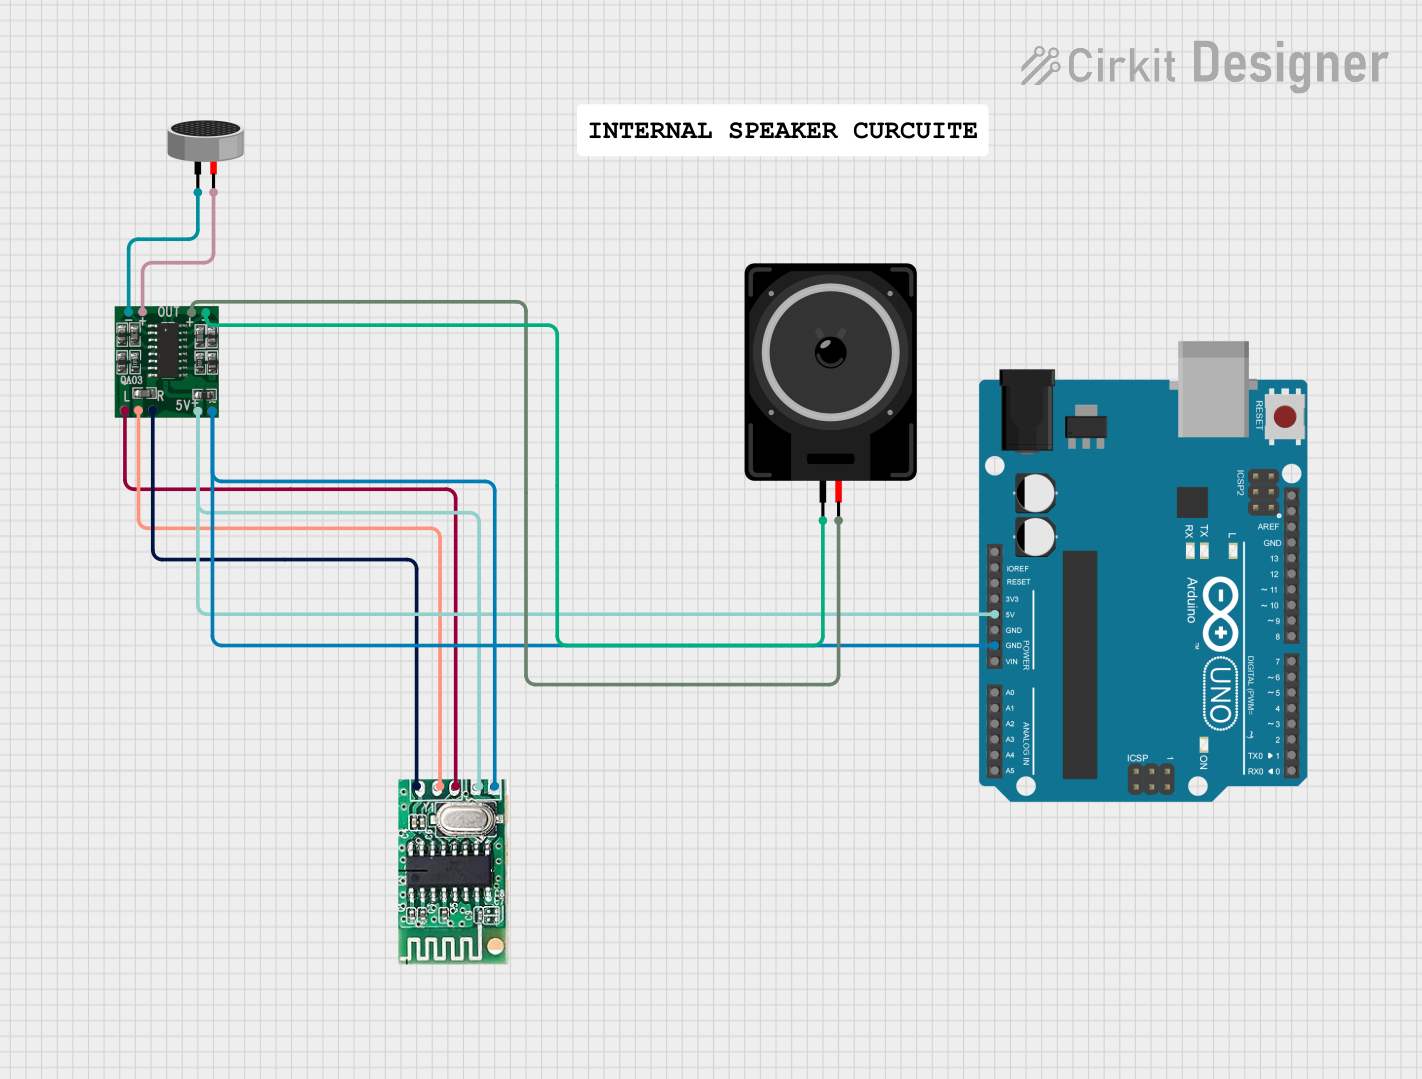
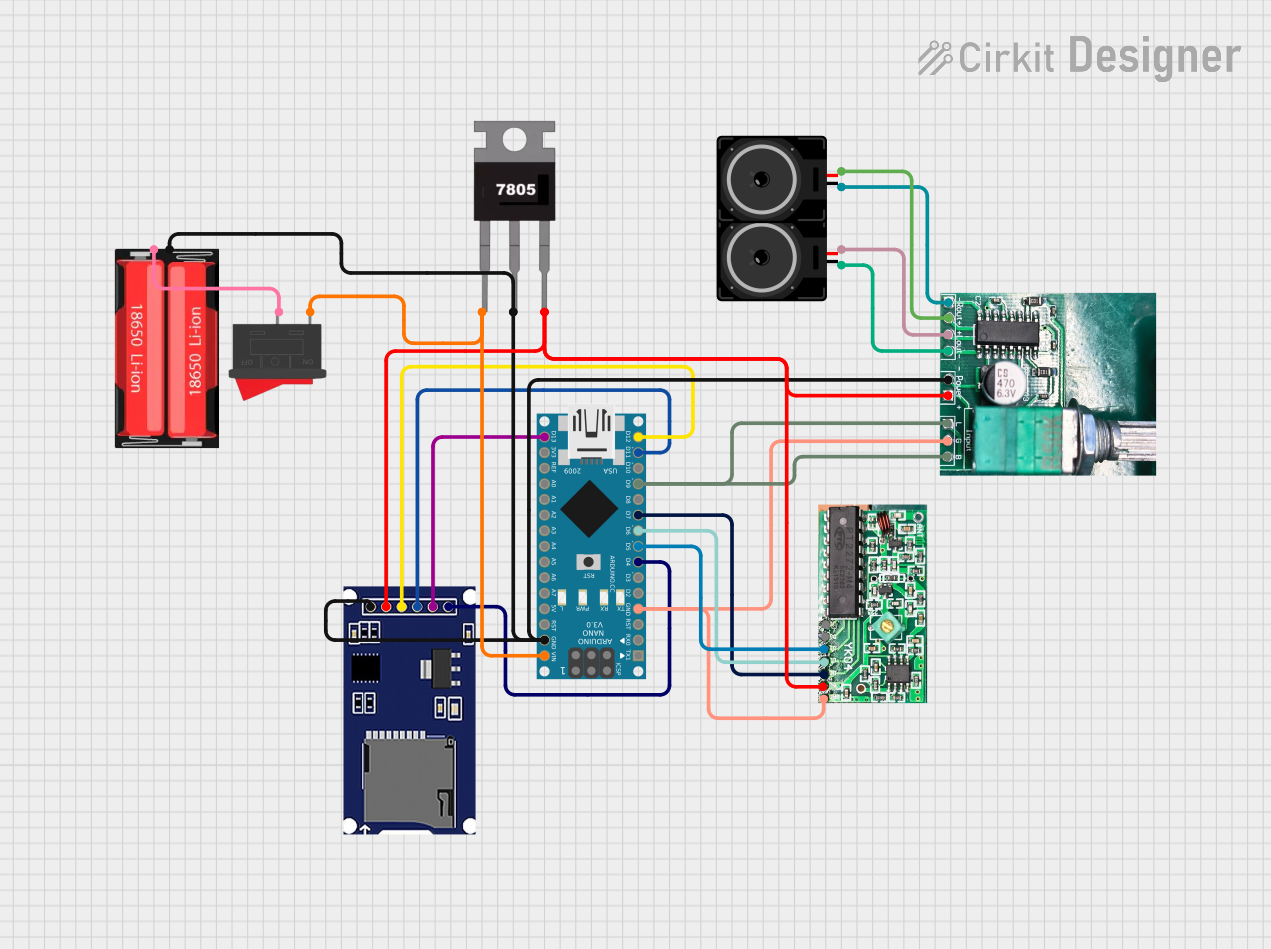
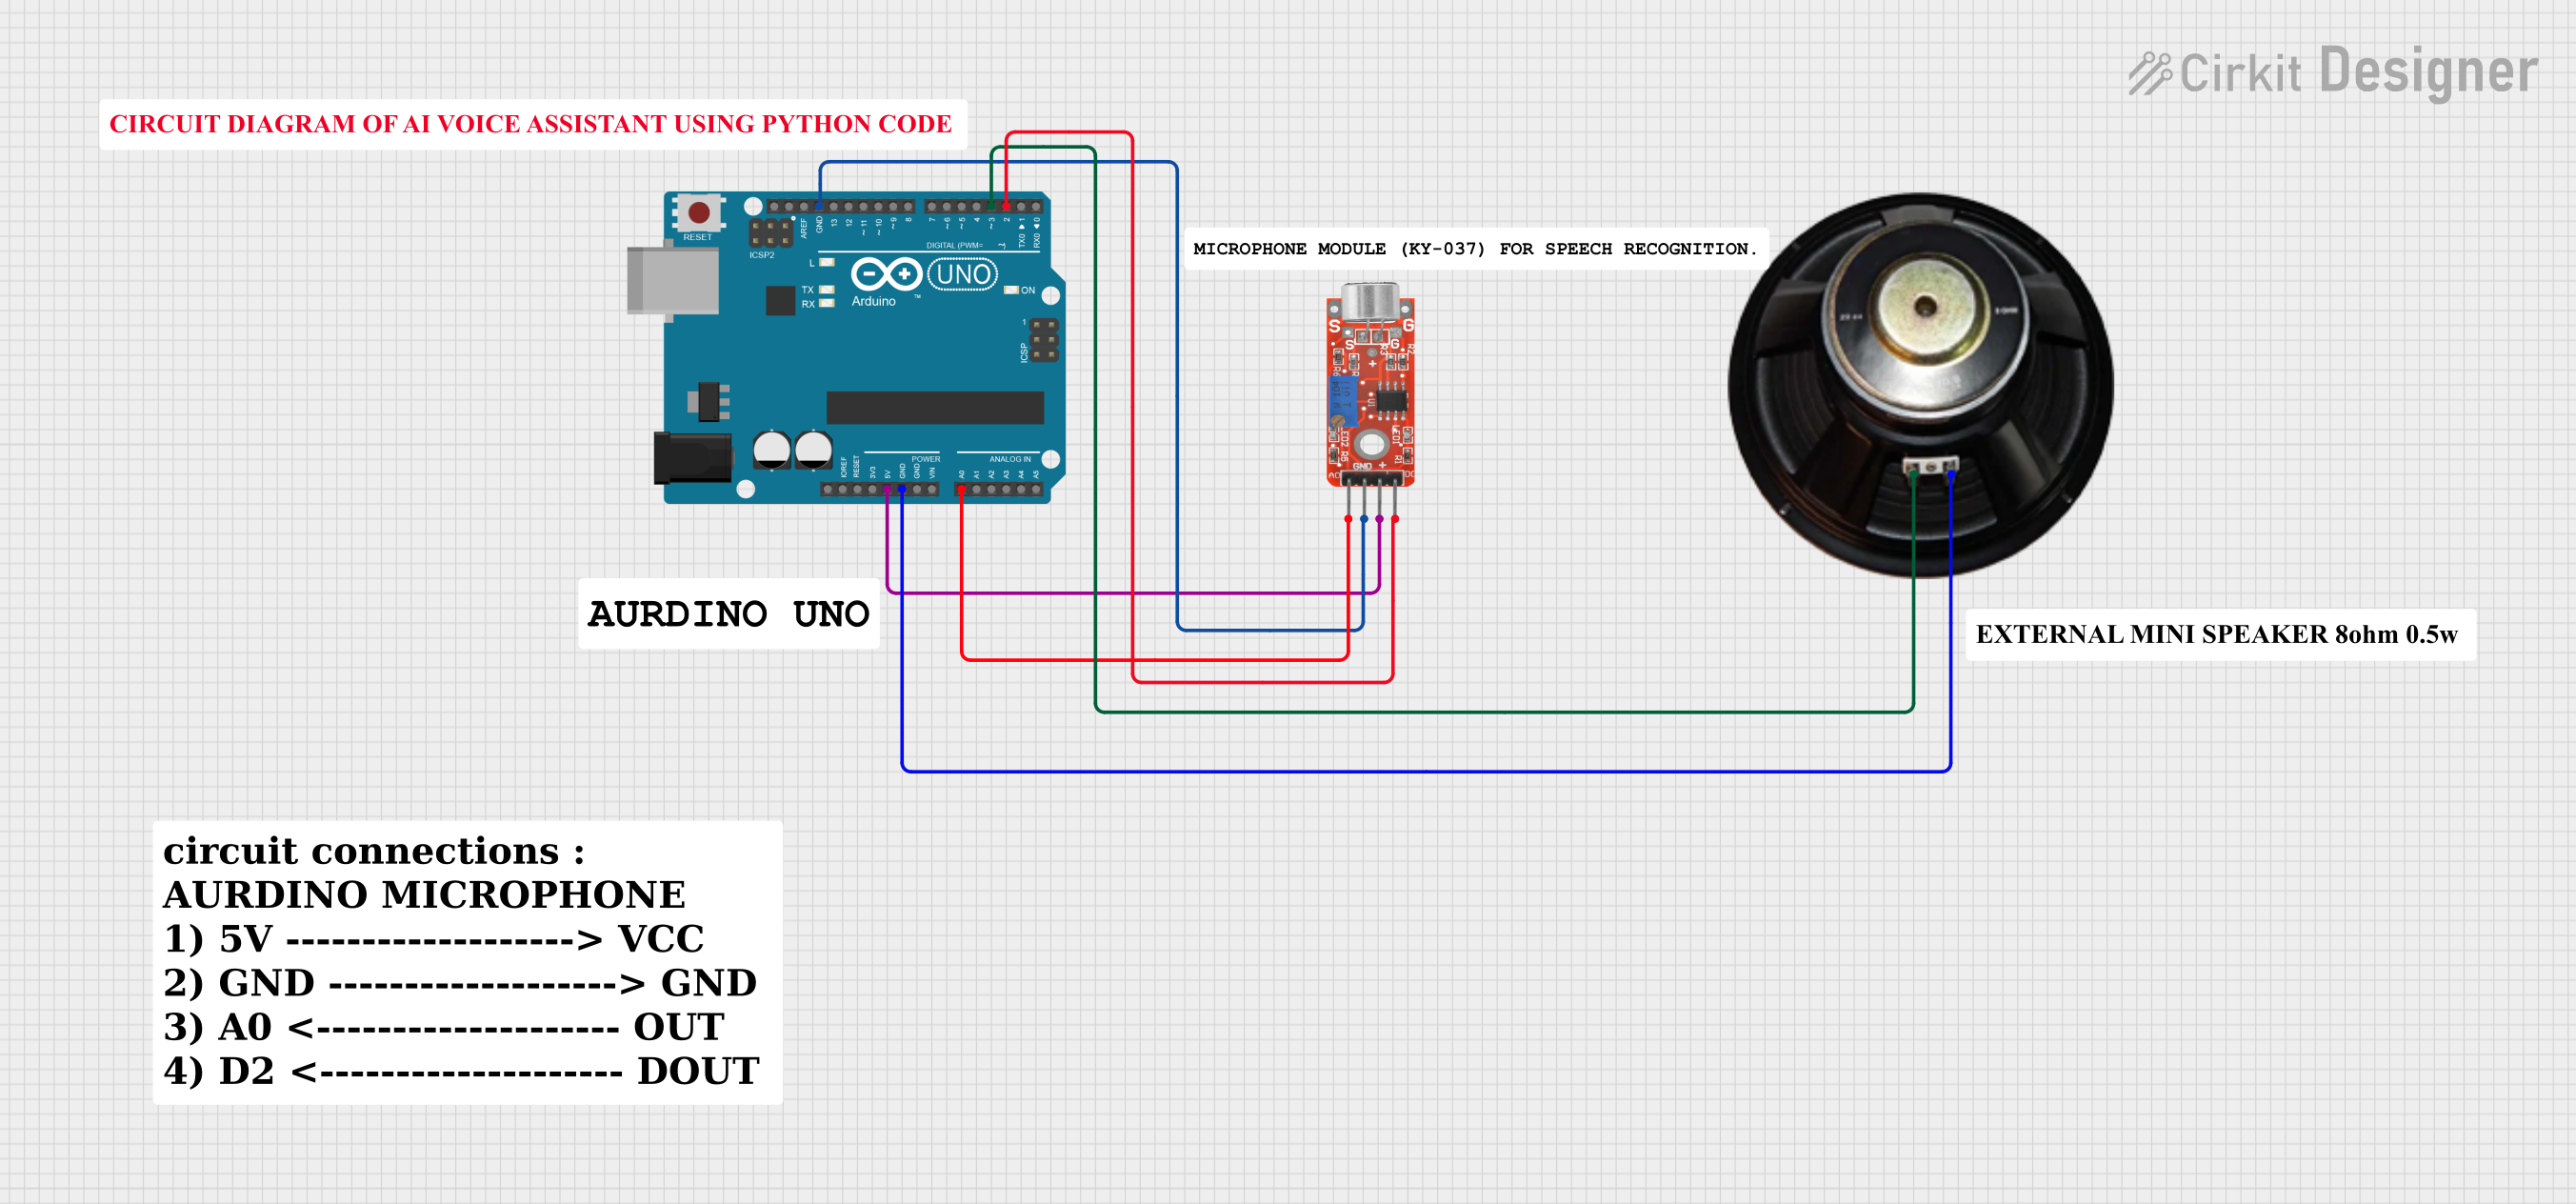
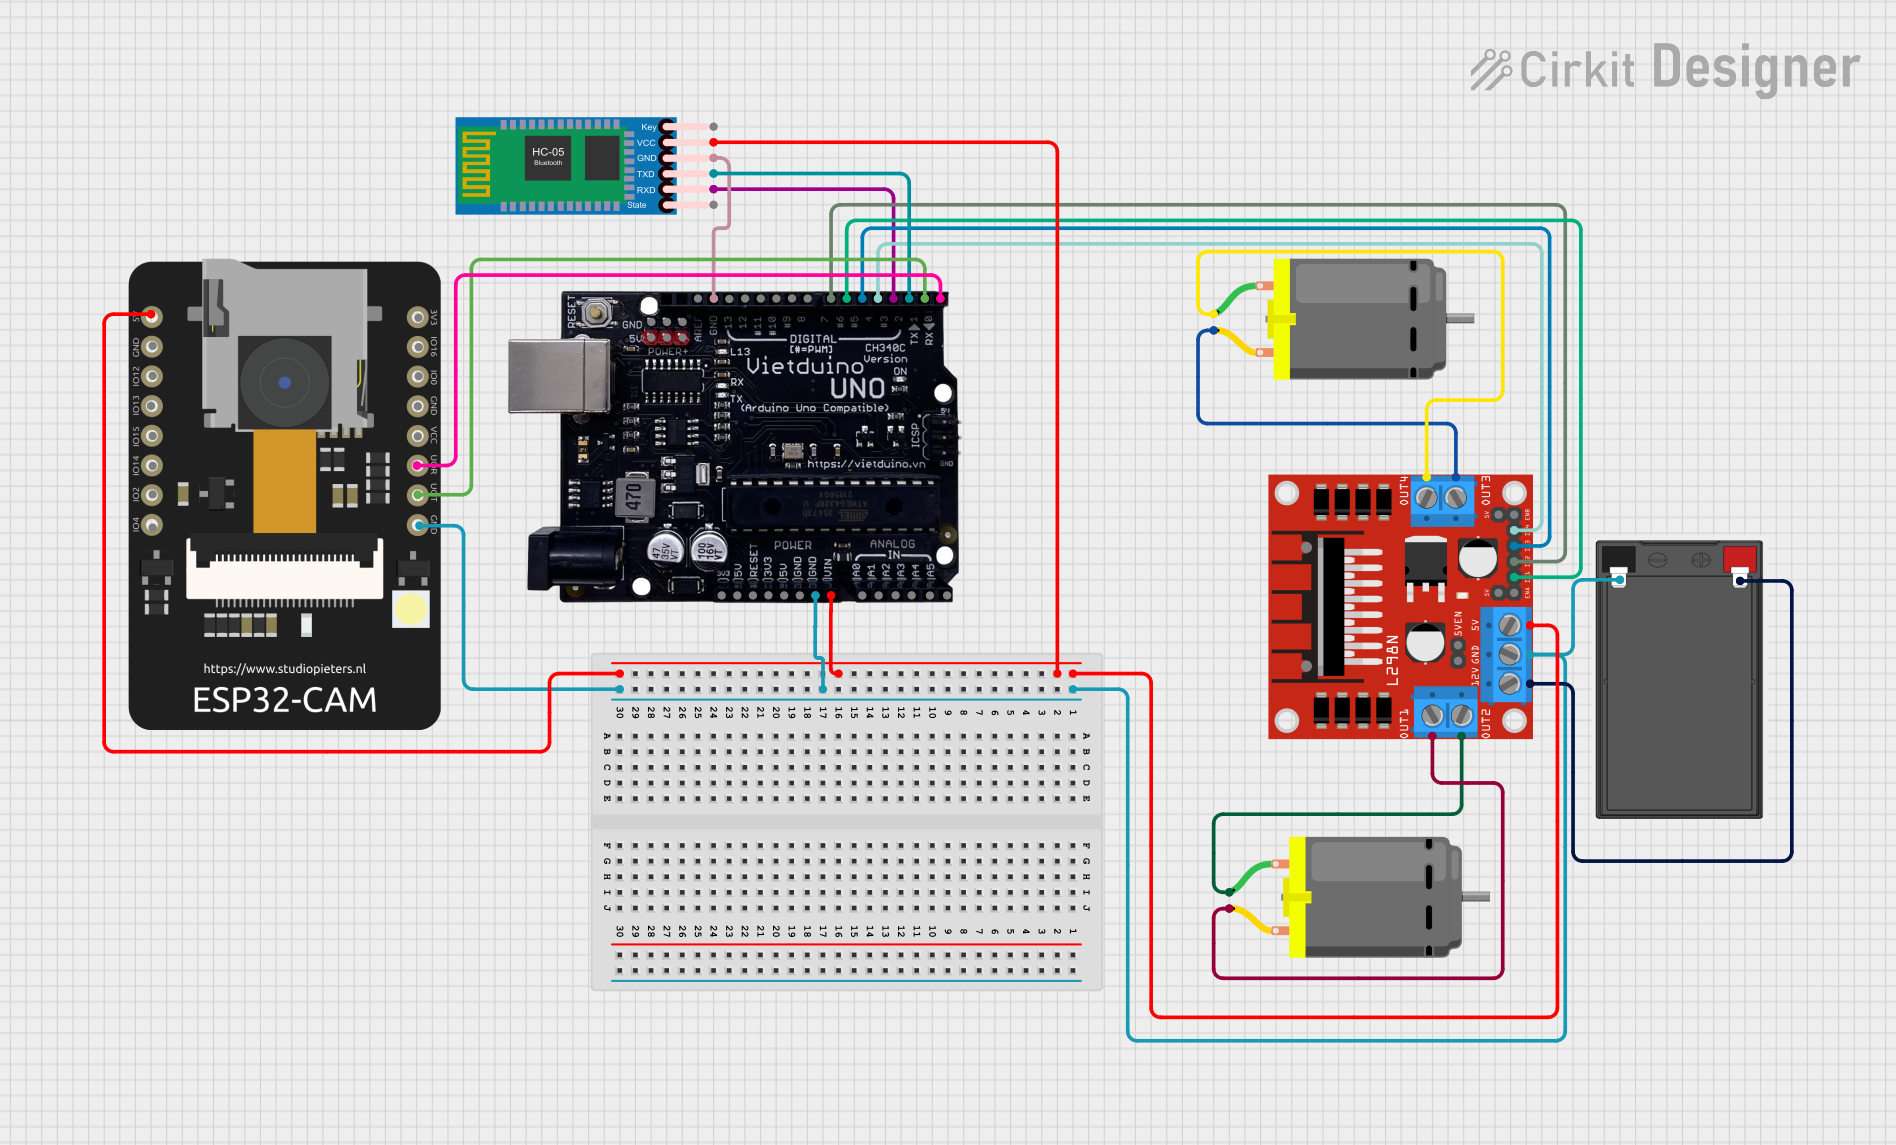
Explore Projects Built with cảm biến âm thanh
Common Applications and Use Cases
- Sound Level Monitoring: Measure ambient noise levels in a given environment.
- Voice Recognition Systems: Capture sound for voice-activated devices.
- Security Systems: Detect unusual sound patterns for alarms.
- Interactive Projects: Enable sound-triggered actions in robotics or IoT devices.
Technical Specifications
The following table outlines the key technical details of the Cảm Biến Âm Thanh:
| Parameter | Value |
|---|---|
| Operating Voltage | 3.3V - 5V |
| Output Type | Analog and Digital |
| Sensitivity Adjustment | Potentiometer (onboard) |
| Frequency Range | 100 Hz - 10 kHz |
| Dimensions | 32mm x 15mm x 8mm |
| Operating Temperature | -20°C to 70°C |
Pin Configuration and Descriptions
The Cảm Biến Âm Thanh typically has a 3-pin interface. The pinout is described in the table below:
| Pin | Name | Description |
|---|---|---|
| 1 | VCC | Power supply pin. Connect to 3.3V or 5V. |
| 2 | GND | Ground pin. Connect to the ground of the circuit. |
| 3 | OUT | Output pin. Provides an analog signal proportional to sound intensity or a |
| digital HIGH/LOW signal based on the threshold set by the potentiometer. |
Usage Instructions
How to Use the Component in a Circuit
- Power the Sensor: Connect the VCC pin to a 3.3V or 5V power source and the GND pin to the ground.
- Connect the Output:
- For analog output, connect the OUT pin to an analog input pin of your microcontroller.
- For digital output, connect the OUT pin to a digital input pin. Adjust the onboard potentiometer to set the sound threshold.
- Read the Signal:
- In analog mode, the output voltage varies with sound intensity.
- In digital mode, the output is HIGH when the sound exceeds the threshold and LOW otherwise.
Important Considerations and Best Practices
- Power Supply: Ensure a stable power supply to avoid noise in the output signal.
- Placement: Place the sensor away from high-frequency noise sources to improve accuracy.
- Threshold Adjustment: Use the onboard potentiometer to fine-tune the sensitivity for your application.
- Signal Filtering: For analog output, consider adding a capacitor to filter out high-frequency noise.
Example: Connecting to an Arduino UNO
Below is an example of how to use the Cảm Biến Âm Thanh with an Arduino UNO to read sound levels:
// Example code for using the Cảm Biến Âm Thanh with Arduino UNO

const int soundSensorPin = A0; // Analog pin connected to the sensor's OUT pin
const int threshold = 500;     // Threshold for sound detection (adjust as needed)

void setup() {
  Serial.begin(9600);          // Initialize serial communication
  pinMode(soundSensorPin, INPUT); // Set the sensor pin as input
}

void loop() {
  int soundLevel = analogRead(soundSensorPin); // Read the analog value from the sensor

  // Print the sound level to the Serial Monitor
  Serial.print("Sound Level: ");
  Serial.println(soundLevel);

  // Check if the sound level exceeds the threshold
  if (soundLevel > threshold) {
    Serial.println("Sound detected!");
  }

  delay(100); // Small delay to avoid flooding the Serial Monitor
}
Troubleshooting and FAQs
Common Issues and Solutions
No Output Signal:
- Cause: Incorrect wiring or insufficient power supply.
- Solution: Double-check the connections and ensure the power supply is stable.
Inconsistent Readings:
- Cause: Electrical noise or improper placement.
- Solution: Use a capacitor to filter noise and place the sensor away from noise sources.
Digital Output Always HIGH or LOW:
- Cause: Threshold not set correctly.
- Solution: Adjust the potentiometer to set an appropriate threshold.
Low Sensitivity:
- Cause: Potentiometer not adjusted or sensor damaged.
- Solution: Rotate the potentiometer to increase sensitivity or replace the sensor.
FAQs
Q: Can this sensor detect specific sounds like speech?
A: The Cảm Biến Âm Thanh is designed to detect sound intensity, not specific sound patterns. For speech recognition, additional processing is required.
Q: Can I use this sensor outdoors?
A: Yes, but ensure it is protected from moisture and extreme environmental conditions.
Q: What is the difference between analog and digital output?
A: Analog output provides a continuous voltage proportional to sound intensity, while digital output provides a HIGH/LOW signal based on the set threshold.
This concludes the documentation for the Cảm Biến Âm Thanh. For further assistance, refer to the manufacturer's datasheet or contact technical support.