How to Use 2.9" Tri-Color E-Ink: Examples, Pinouts, and Specs
Introduction
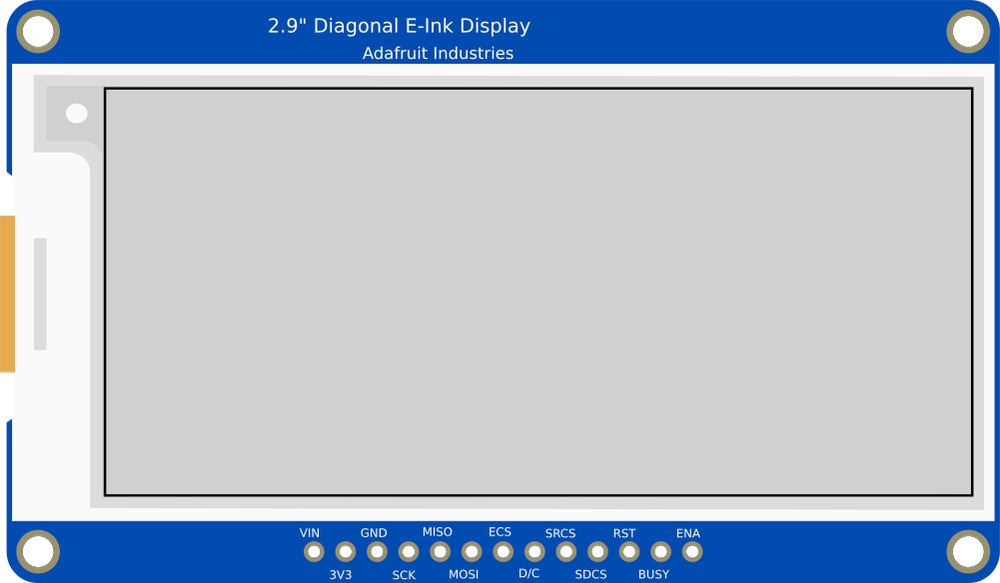
The Adafruit 2.9" Tri-Color E-Ink display is a versatile electronic paper display (EPD) that uses microcapsule technology to render images in black, white, and red. Unlike traditional displays, this E-Ink module is bistable, meaning it consumes power only when updating the display, making it an excellent choice for low-power applications. Its high contrast and readability in direct sunlight make it ideal for use in e-readers, digital signage, price tags, and low-power IoT devices.
This display is manufactured by Adafruit Industries and is designed to be easily integrated into projects using microcontrollers like the Arduino or Raspberry Pi.
Explore Projects Built with 2.9" Tri-Color E-Ink
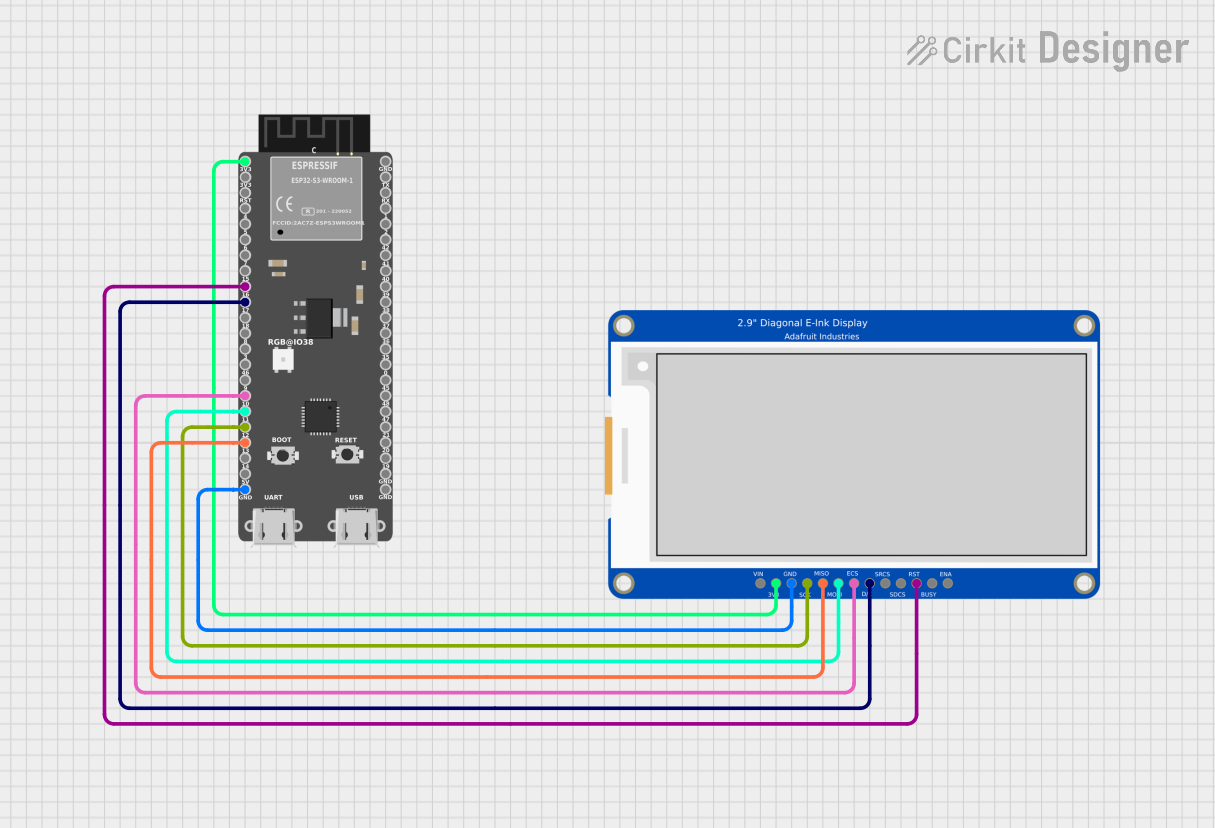
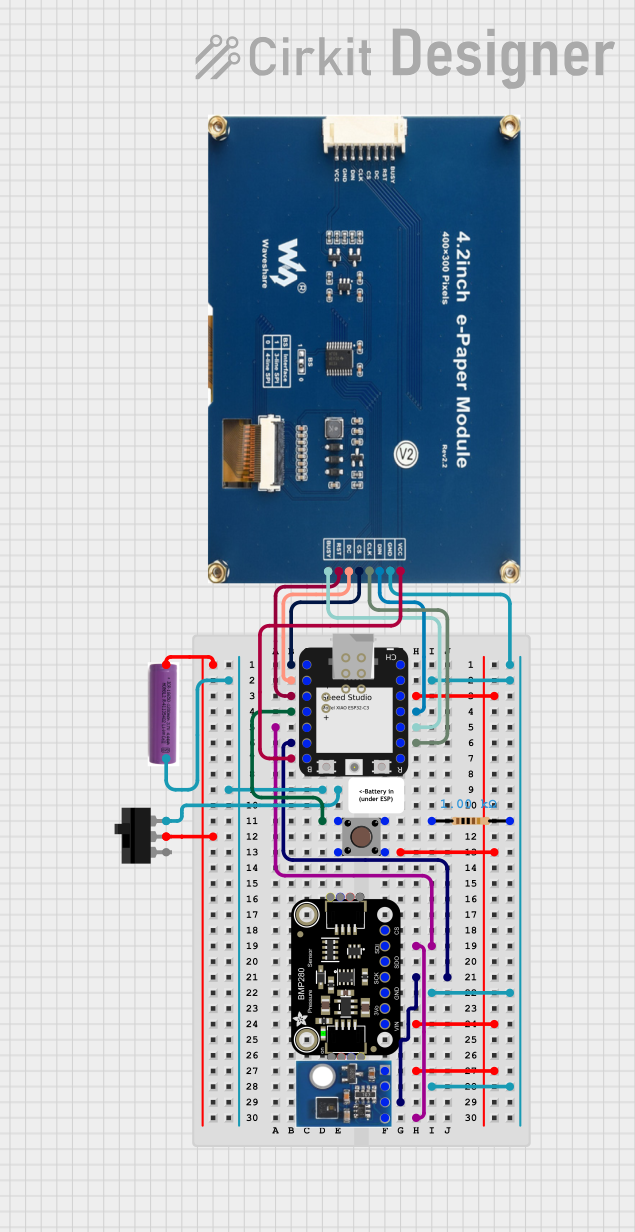

Explore Projects Built with 2.9" Tri-Color E-Ink
Technical Specifications
Below are the key technical details for the Adafruit 2.9" Tri-Color E-Ink display:
General Specifications
| Parameter | Value |
|---|---|
| Manufacturer | Adafruit Industries |
| Part ID | Adafruit 2.9" Tri-Color E-Ink |
| Display Size | 2.9 inches (diagonal) |
| Resolution | 296 x 128 pixels |
| Colors | Black, White, Red |
| Display Technology | E-Ink (microcapsule-based) |
| Interface | SPI (Serial Peripheral Interface) |
| Power Consumption | ~20mA during update, negligible when idle |
| Operating Voltage | 3.3V logic |
| Refresh Time | ~15 seconds (full refresh) |
| Dimensions | 79mm x 36.7mm x 1.18mm |
Pin Configuration
The display module uses an SPI interface and has the following pinout:
| Pin Name | Description | Notes |
|---|---|---|
| VCC | Power Supply (3.3V) | Connect to 3.3V power source |
| GND | Ground | Connect to ground |
| DIN | SPI Data Input (MOSI) | Connect to microcontroller MOSI |
| CLK | SPI Clock | Connect to microcontroller SCK |
| CS | Chip Select | Active low, connect to GPIO pin |
| DC | Data/Command Control | High for data, low for commands |
| RST | Reset | Active low, connect to GPIO pin |
| BUSY | Busy Signal | High when updating, low when idle |
Usage Instructions
Connecting the Display
To use the Adafruit 2.9" Tri-Color E-Ink display, follow these steps:
- Power the Display: Connect the
VCCpin to a 3.3V power source and theGNDpin to ground. - SPI Communication: Connect the
DIN,CLK, andCSpins to the corresponding SPI pins on your microcontroller. - Control Pins: Connect the
DC,RST, andBUSYpins to GPIO pins on your microcontroller. These pins are used for sending commands, resetting the display, and monitoring its status.
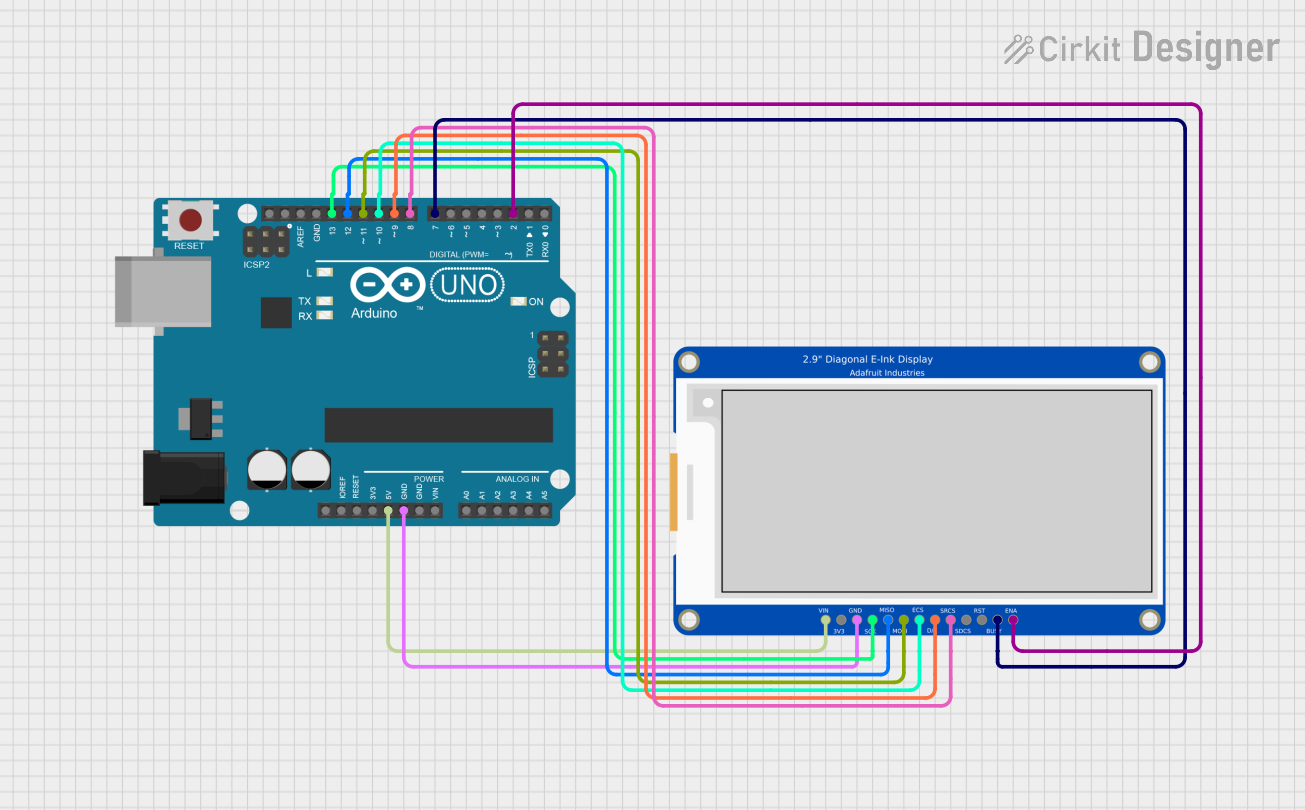
Example Arduino UNO Wiring
| E-Ink Pin | Arduino UNO Pin |
|---|---|
| VCC | 3.3V |
| GND | GND |
| DIN | D11 (MOSI) |
| CLK | D13 (SCK) |
| CS | D10 |
| DC | D9 |
| RST | D8 |
| BUSY | D7 |
Example Arduino Code
Below is an example Arduino sketch to display an image or text on the E-Ink display using the Adafruit GFX and EPD libraries:
#include <Adafruit_GFX.h>       // Core graphics library
#include <Adafruit_EPD.h>       // E-Ink display library

// Pin definitions
#define EPD_CS   10  // Chip Select
#define EPD_DC   9   // Data/Command
#define SRAM_CS  -1  // Not used
#define EPD_RESET 8  // Reset
#define EPD_BUSY  7  // Busy

// Create an instance of the display
Adafruit_IL0373 display(296, 128, EPD_DC, EPD_RESET, EPD_CS, SRAM_CS, EPD_BUSY);

void setup() {
  // Initialize serial communication for debugging
  Serial.begin(115200);
  Serial.println("Initializing E-Ink Display...");

  // Initialize the display
  display.begin();

  // Clear the display
  display.clearBuffer();

  // Draw text on the display
  display.setTextSize(2);  // Set text size
  display.setTextColor(EPD_BLACK);  // Set text color
  display.setCursor(10, 10);  // Set cursor position
  display.print("Hello, E-Ink!");

  // Draw a red rectangle
  display.fillRect(10, 50, 100, 30, EPD_RED);

  // Update the display
  display.display();
  Serial.println("Display updated!");
}

void loop() {
  // Nothing to do here
}
Important Considerations
- Refresh Time: The display requires approximately 15 seconds for a full refresh. Avoid frequent updates to conserve power and prevent ghosting.
- Power Supply: Ensure a stable 3.3V power source. Using higher voltages may damage the display.
- SPI Speed: Use a moderate SPI clock speed (e.g., 4 MHz) to ensure reliable communication.
- Handling: Avoid pressing directly on the display surface to prevent damage.
Troubleshooting and FAQs
Common Issues
Display Not Updating
- Cause: Incorrect wiring or pin configuration.
- Solution: Double-check all connections and ensure the pin definitions in your code match your wiring.
Ghosting or Artifacts
- Cause: Incomplete or frequent refreshes.
- Solution: Perform a full refresh periodically to clear the display.
Busy Pin Stuck High
- Cause: The display is not properly initialized.
- Solution: Ensure the
RSTpin is connected and the reset sequence is executed correctly in your code.
No Output on Display
- Cause: Incorrect power supply or SPI communication issues.
- Solution: Verify the power supply voltage and check the SPI connections.
FAQs
Q: Can I use this display with a 5V microcontroller?
A: Yes, but you must use a level shifter to convert the 5V logic signals to 3.3V, as the display operates at 3.3V logic.
Q: How do I display images?
A: Convert your image to a monochrome bitmap (black, white, and red) and use the Adafruit EPD library to load and display it.
Q: Can I leave the display powered off after updating?
A: Yes, the display is bistable and retains its content without power.
Q: What is the lifespan of the display?
A: The display supports thousands of updates, but frequent updates may reduce its lifespan. Use it for static or infrequently changing content for best results.