
How to Use Adafruit USB Type C Vertical Breakout - Downstream Connection: Examples, Pinouts, and Specs
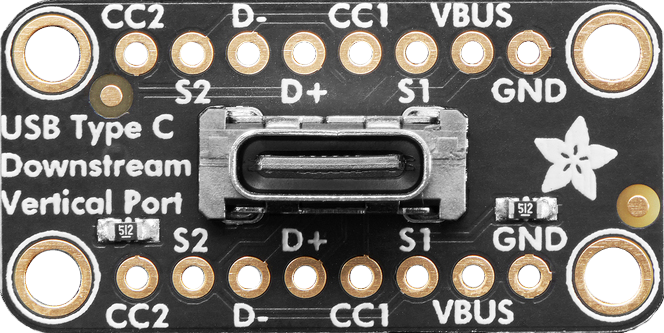
 Design with Adafruit USB Type C Vertical Breakout - Downstream Connection in Cirkit Designer
Introduction
The Adafruit USB Type C Vertical Breakout - Downstream Connection (Manufacturer Part ID: 5993) is a compact and versatile breakout board designed to provide a vertical USB Type C connection. This breakout simplifies the integration of USB Type C connectivity into your projects, enabling downstream connections to devices such as microcontrollers, sensors, or other USB-enabled peripherals. Its small form factor and robust design make it ideal for prototyping, testing, and custom hardware development.
Explore Projects Built with Adafruit USB Type C Vertical Breakout - Downstream Connection
 Open Project in Cirkit Designer
 Open Project in Cirkit Designer
 Open Project in Cirkit Designer
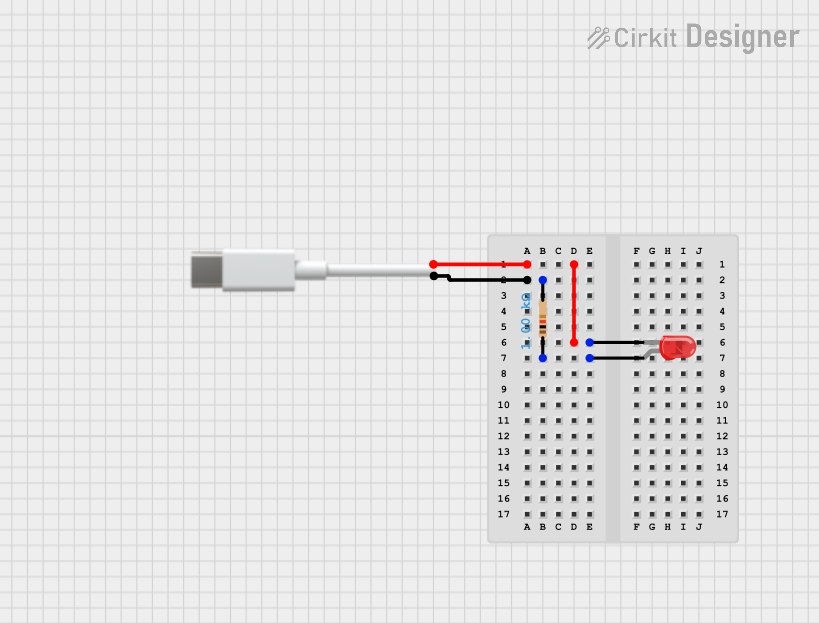 Open Project in Cirkit Designer
Explore Projects Built with Adafruit USB Type C Vertical Breakout - Downstream Connection
Open Project in Cirkit DesignerOpen Project in Cirkit DesignerOpen Project in Cirkit DesignerOpen Project in Cirkit DesignerCommon Applications and Use Cases
- Adding USB Type C connectivity to custom electronics projects.
- Prototyping USB-powered devices or peripherals.
- Testing USB Type C connections in hardware development.
- Integrating USB Type C into IoT devices or embedded systems.
Technical Specifications
The following table outlines the key technical details of the Adafruit USB Type C Vertical Breakout:
| Specification | Details |
|---|---|
| Manufacturer | Adafruit |
| Part ID | 5993 |
| Connector Type | USB Type C (Vertical Orientation) |
| Connection Type | Downstream |
| Voltage Rating | 5V (USB standard) |
| Current Rating | Up to 3A (depending on the connected device and power source) |
| PCB Dimensions | 15mm x 15mm |
| Mounting Style | Through-hole |
| Pin Pitch | 2.54mm (standard breadboard-compatible spacing) |
Pin Configuration and Descriptions
The breakout board exposes the following pins for easy integration into your circuit:
| Pin Name | Description |
|---|---|
| VBUS | 5V power supply from the USB Type C connection. |
| GND | Ground connection. |
| D+ | USB data positive line for communication. |
| D- | USB data negative line for communication. |
| CC1 | Configuration Channel 1 for USB Type C connection detection. |
| CC2 | Configuration Channel 2 for USB Type C connection detection. |
| SHIELD | Shield ground for additional noise protection. |
Usage Instructions
How to Use the Component in a Circuit
Soldering the Breakout Board:
- Solder the breakout board's through-hole pins to a PCB or directly to jumper wires for breadboard use.
- Ensure proper soldering to avoid loose connections.
Connecting to a Microcontroller or Device:
- Connect the VBUS pin to the 5V input of your circuit.
- Connect the GND pin to the ground of your circuit.
- Use the D+ and D- pins for USB data communication with your microcontroller or USB-enabled device.
- Optionally, connect CC1 and CC2 to detect the USB Type C connection status.
Powering Your Circuit:
- The breakout board can supply up to 3A of current, depending on the USB power source. Ensure your circuit does not exceed this limit.
Mounting:
- The breakout board's compact size allows it to be easily mounted on a breadboard or integrated into a custom PCB.
Important Considerations and Best Practices
- Voltage Compatibility: Ensure that your circuit operates at 5V, as this is the standard voltage provided by USB Type C.
- Current Limitations: Do not exceed the 3A current rating to avoid damaging the breakout board or connected devices.
- Data Lines: If using the breakout for data communication, ensure proper routing of the D+ and D- lines to minimize noise and interference.
- Shielding: Connect the SHIELD pin to ground for improved noise immunity in high-frequency environments.
Example: Connecting to an Arduino UNO
The following example demonstrates how to use the breakout board to power an Arduino UNO and enable USB communication.
Circuit Connections
| Breakout Pin | Arduino UNO Pin |
|---|---|
| VBUS | 5V |
| GND | GND |
| D+ | Digital Pin 2 |
| D- | Digital Pin 3 |
Arduino Code Example
// Example code for using the Adafruit USB Type C Vertical Breakout
// with an Arduino UNO for basic USB communication.

#include <SoftwareSerial.h>

// Define pins for USB data lines
#define USB_DPLUS 2  // D+ connected to digital pin 2
#define USB_DMINUS 3 // D- connected to digital pin 3

// Initialize SoftwareSerial for USB communication
SoftwareSerial usbSerial(USB_DPLUS, USB_DMINUS);

void setup() {
  // Start serial communication with the USB device
  usbSerial.begin(9600); // Set baud rate to 9600
  Serial.begin(9600);    // Start Serial Monitor for debugging

  Serial.println("USB Type C Breakout Example");
}

void loop() {
  // Check if data is available from the USB device
  if (usbSerial.available()) {
    char data = usbSerial.read(); // Read data from USB
    Serial.print("Received: ");
    Serial.println(data);         // Print received data to Serial Monitor
  }

  // Send data to the USB device
  usbSerial.println("Hello from Arduino!");
  delay(1000); // Wait 1 second before sending the next message
}
Troubleshooting and FAQs
Common Issues Users Might Face
No Power to the Circuit:
- Cause: Loose or incorrect connections to the VBUS and GND pins.
- Solution: Double-check the soldering and wiring of the power pins.
USB Communication Fails:
- Cause: Improper connection of the D+ and D- lines.
- Solution: Verify that the data lines are correctly connected and not swapped.
Overheating:
- Cause: Excessive current draw beyond the 3A limit.
- Solution: Ensure the connected devices do not exceed the current rating.
Noise or Interference:
- Cause: Unshielded connections or long data lines.
- Solution: Connect the SHIELD pin to ground and minimize the length of data lines.
Solutions and Tips for Troubleshooting
- Use a multimeter to verify voltage and continuity across the breakout board's pins.
- Test the breakout board with a known working USB Type C cable and power source.
- If using the breakout for data communication, ensure proper termination and impedance matching for the data lines.
By following this documentation, you can effectively integrate the Adafruit USB Type C Vertical Breakout into your projects and troubleshoot any issues that arise.