How to Use 12v Pneumatic solenoid valve: Examples, Pinouts, and Specs

Introduction
A 12V pneumatic solenoid valve is an electromechanically operated valve designed to control the flow of compressed air in pneumatic systems. It is widely used in various applications such as automation, fluid power control, and in industries like manufacturing, automotive, and robotics. When the solenoid is energized with a 12V DC supply, it generates a magnetic field that actuates the valve, either opening or closing it to allow or stop the flow of air.
Explore Projects Built with 12v Pneumatic solenoid valve
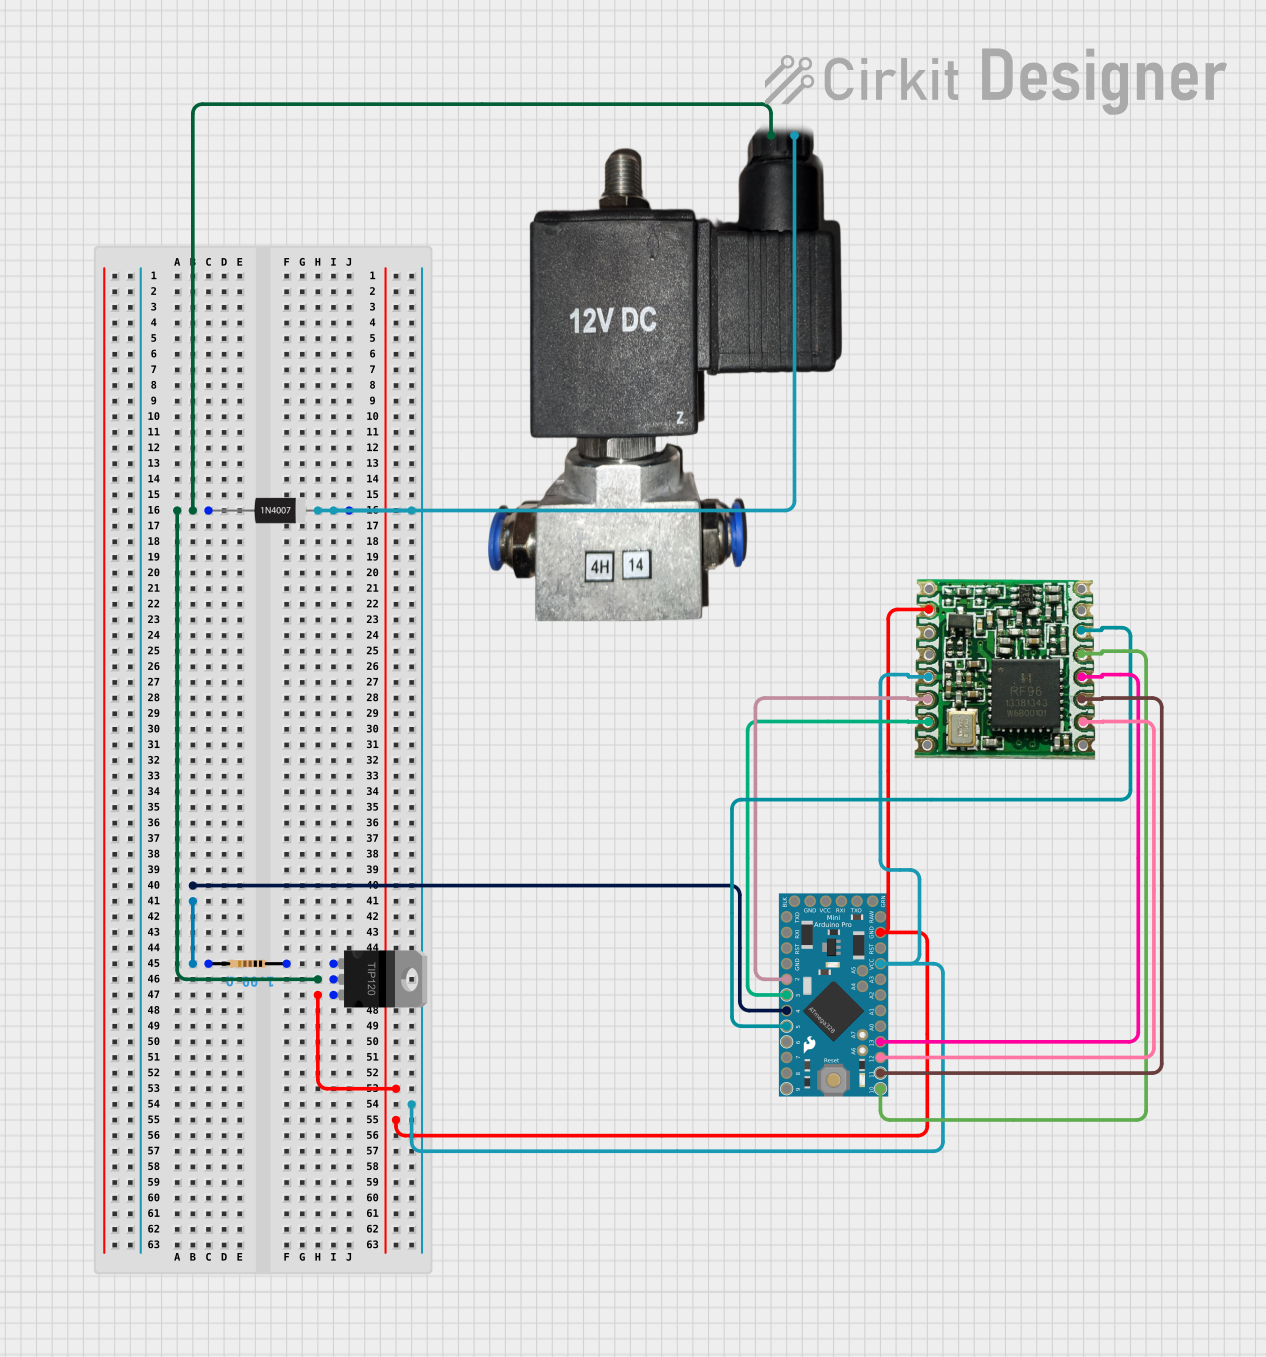
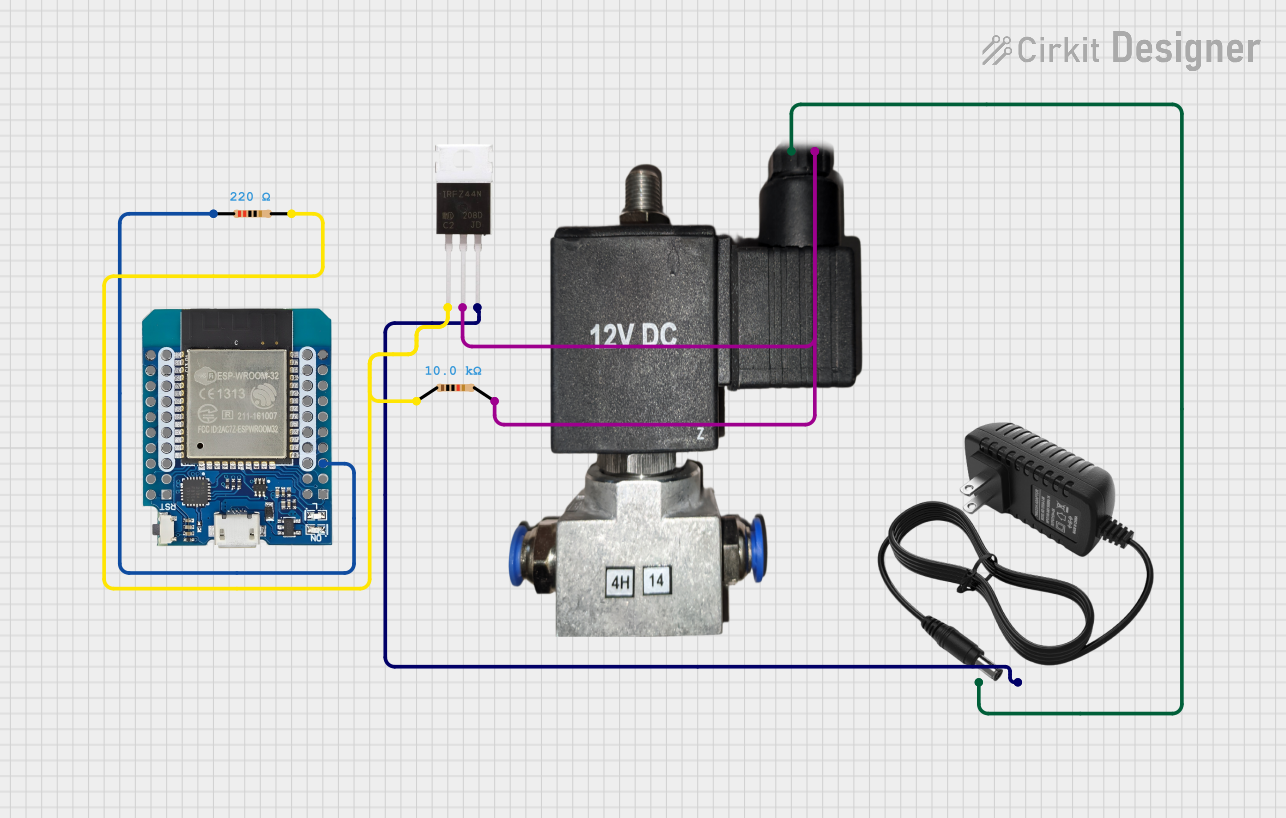
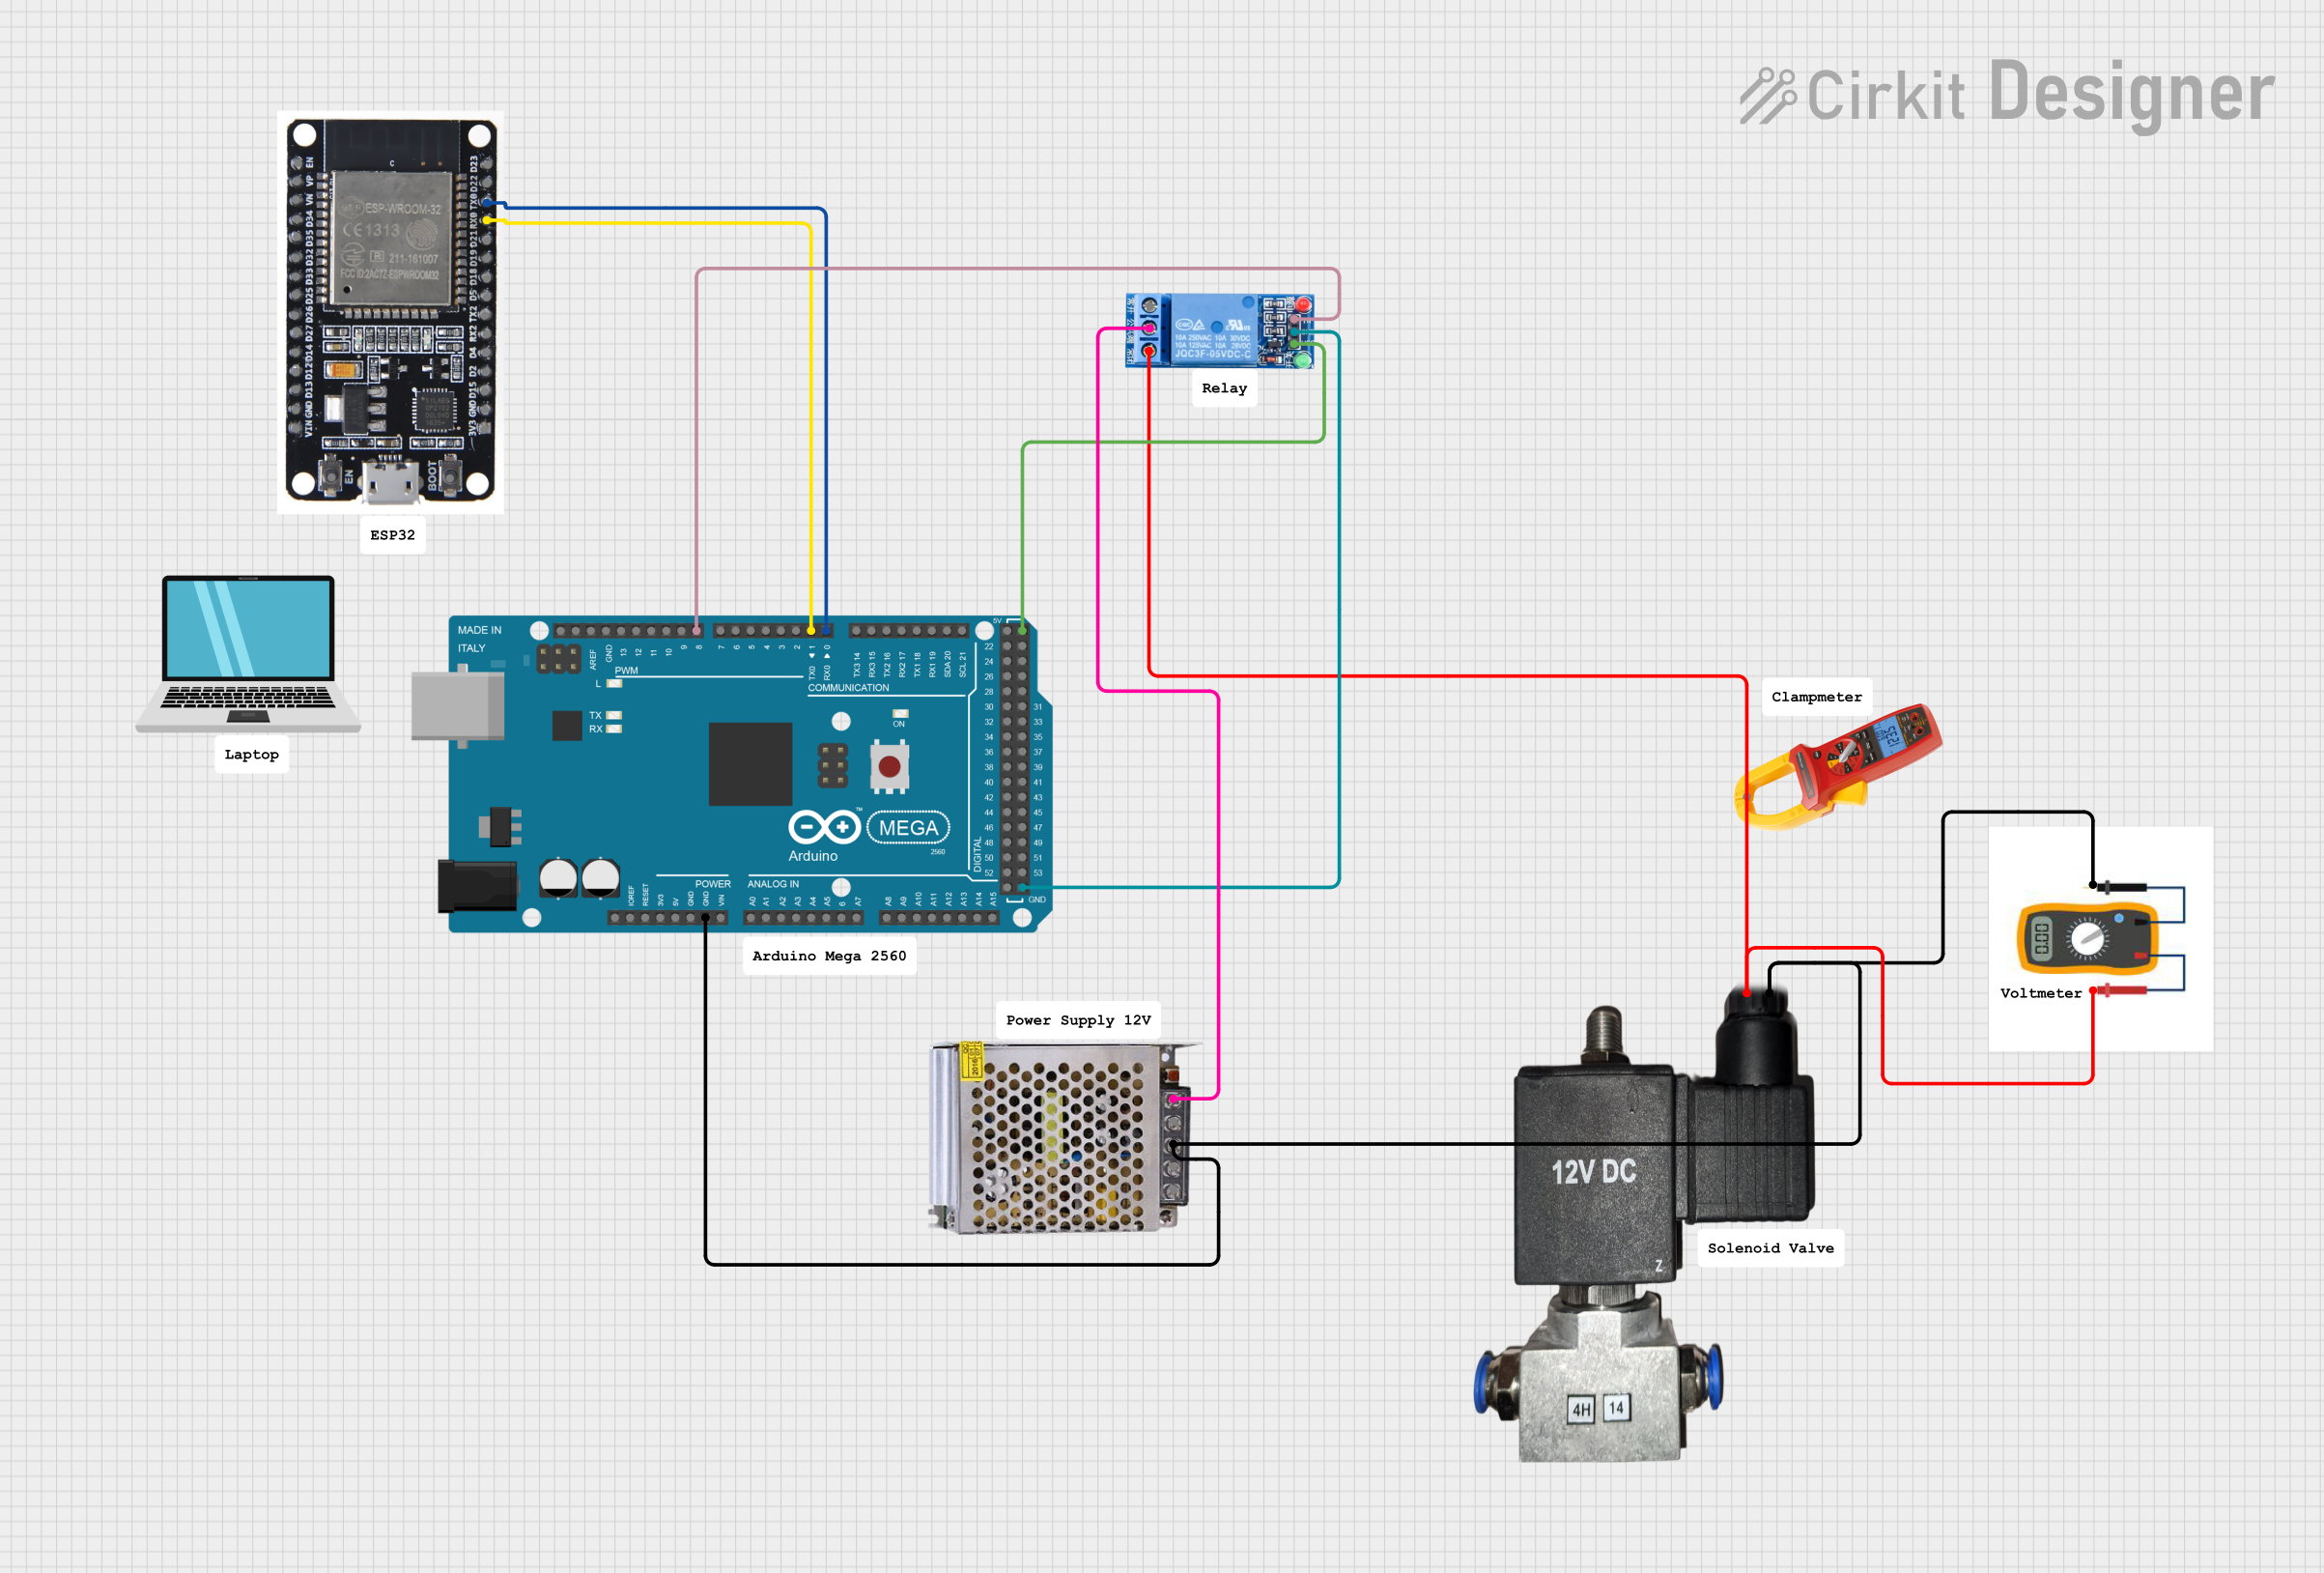

Explore Projects Built with 12v Pneumatic solenoid valve
Technical Specifications
Key Technical Details
- Operating Voltage: 12V DC
- Valve Type: 2-way normally closed (2/2 NC) or 3-way (3/2), depending on model
- Operating Pressure Range: Typically 0 to 8 bar (0 to 116 psi), varies by model
- Flow Rate: Depends on orifice size and pressure, expressed in Cv
- Response Time: Milliseconds range, varies by model
- Operating Temperature Range: Typically -5°C to 50°C (23°F to 122°F)
- Material: Body (Brass, Stainless Steel), Seal (NBR, Viton, depending on model)
Pin Configuration and Descriptions
| Pin No. | Description | Notes |
|---|---|---|
| 1 | Positive Supply (V+) | Connect to 12V DC power source |
| 2 | Ground (GND) | Connect to system ground |
Note: The actual pin configuration may vary depending on the specific model of the solenoid valve. Always refer to the manufacturer's datasheet for exact pinout information.
Usage Instructions
How to Use the Component in a Circuit
Power Supply Connection: Connect the positive terminal of a 12V DC power supply to the positive pin (V+) of the solenoid valve. Connect the ground terminal of the power supply to the ground pin (GND).
Control Signal: To control the solenoid valve with an Arduino UNO, use a transistor or relay module as an intermediary to handle the current requirements of the solenoid.
Safety Precautions: Ensure that the power supply voltage and current capabilities match the requirements of the solenoid valve. Do not exceed the rated pressure and temperature specifications.
Important Considerations and Best Practices
- Power Ratings: Do not exceed the electrical ratings of the valve to prevent damage.
- Inductive Kickback: Use a flyback diode across the solenoid coil to protect the control circuit from voltage spikes when the solenoid is de-energized.
- Mounting: Secure the valve to a stable surface to prevent movement and reduce vibration.
- Pneumatic Connections: Use appropriate fittings and sealant to prevent air leaks.
Example Arduino UNO Code
// Define the solenoid valve control pin
const int solenoidPin = 7;

void setup() {
  pinMode(solenoidPin, OUTPUT); // Set the solenoid pin as an output
}

void loop() {
  digitalWrite(solenoidPin, HIGH); // Energize the solenoid valve
  delay(1000);                     // Keep the valve open for 1 second
  digitalWrite(solenoidPin, LOW);  // De-energize the solenoid valve
  delay(1000);                     // Keep the valve closed for 1 second
}
Note: The above code assumes the use of a relay or transistor to switch the solenoid valve.
Troubleshooting and FAQs
Common Issues
- Valve Does Not Actuate: Check power supply connections and voltage, control signal, and for any obstructions in the valve.
- Valve Leaks Air: Ensure all pneumatic connections are secure and free of damage. Check the seal and diaphragm for wear or damage.
Solutions and Tips for Troubleshooting
- Check Electrical Connections: Loose or incorrect wiring can prevent the valve from operating. Verify all connections are secure and correct.
- Inspect for Physical Damage: Look for signs of wear, corrosion, or damage to the valve body and coil.
- Test Coil Continuity: Use a multimeter to check for continuity in the solenoid coil. A lack of continuity indicates a damaged coil.
FAQs
Q: Can I power the solenoid valve directly from an Arduino pin? A: No, Arduino pins cannot supply enough current for a solenoid valve. Use a relay or transistor.
Q: How do I know if the valve is normally open or normally closed? A: Refer to the manufacturer's datasheet. Normally closed (NC) valves are closed when de-energized, while normally open (NO) valves are open when de-energized.
Q: What is the purpose of the flyback diode? A: The flyback diode protects the control circuit from voltage spikes caused by the collapsing magnetic field when the solenoid is turned off.
Note: This documentation is for a generic 12V pneumatic solenoid valve and may not cover all models or variations. Always refer to the specific manufacturer's datasheet for detailed information on your component.