How to Use SOCKET: Examples, Pinouts, and Specs

Introduction
A socket is a device that provides a connection point for electrical components, allowing for easy insertion and removal of plugs or connectors. Sockets are widely used in electronics to facilitate modularity, ease of maintenance, and quick replacement of components. They are commonly found in applications such as power supplies, circuit boards, and communication systems.
Explore Projects Built with SOCKET

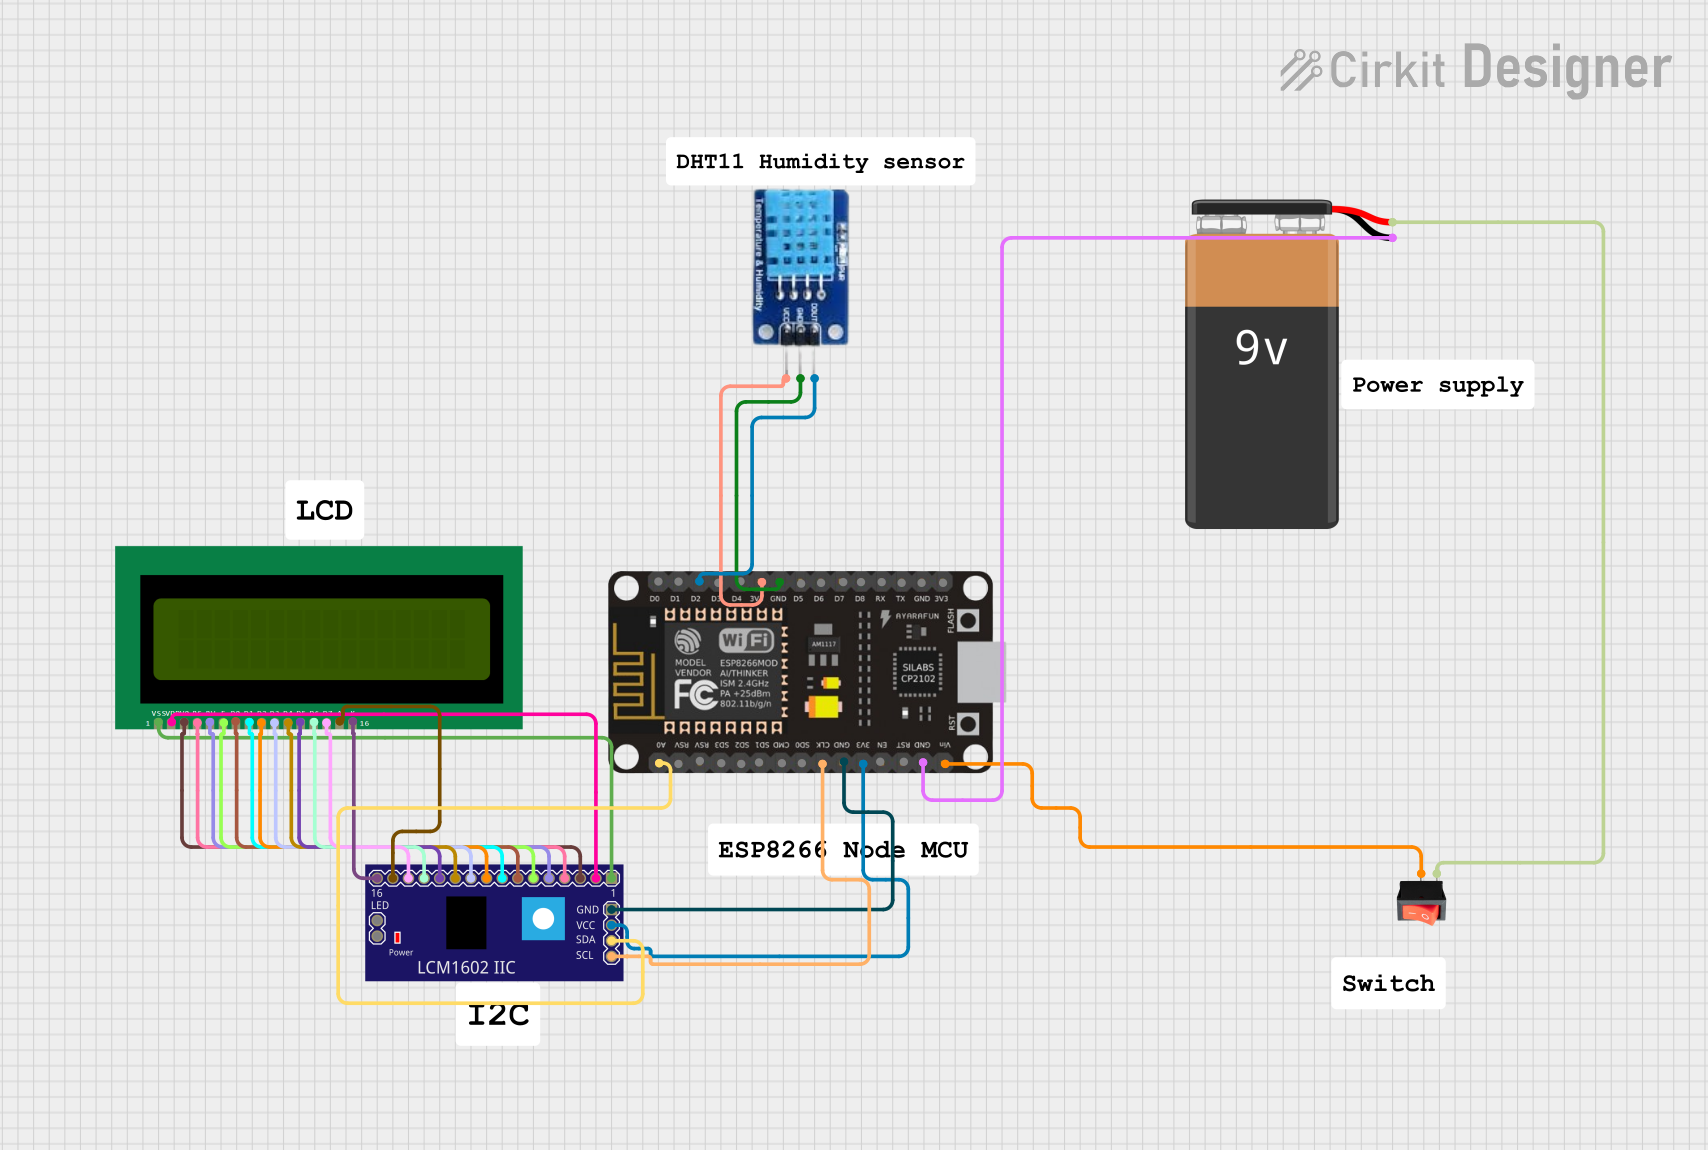

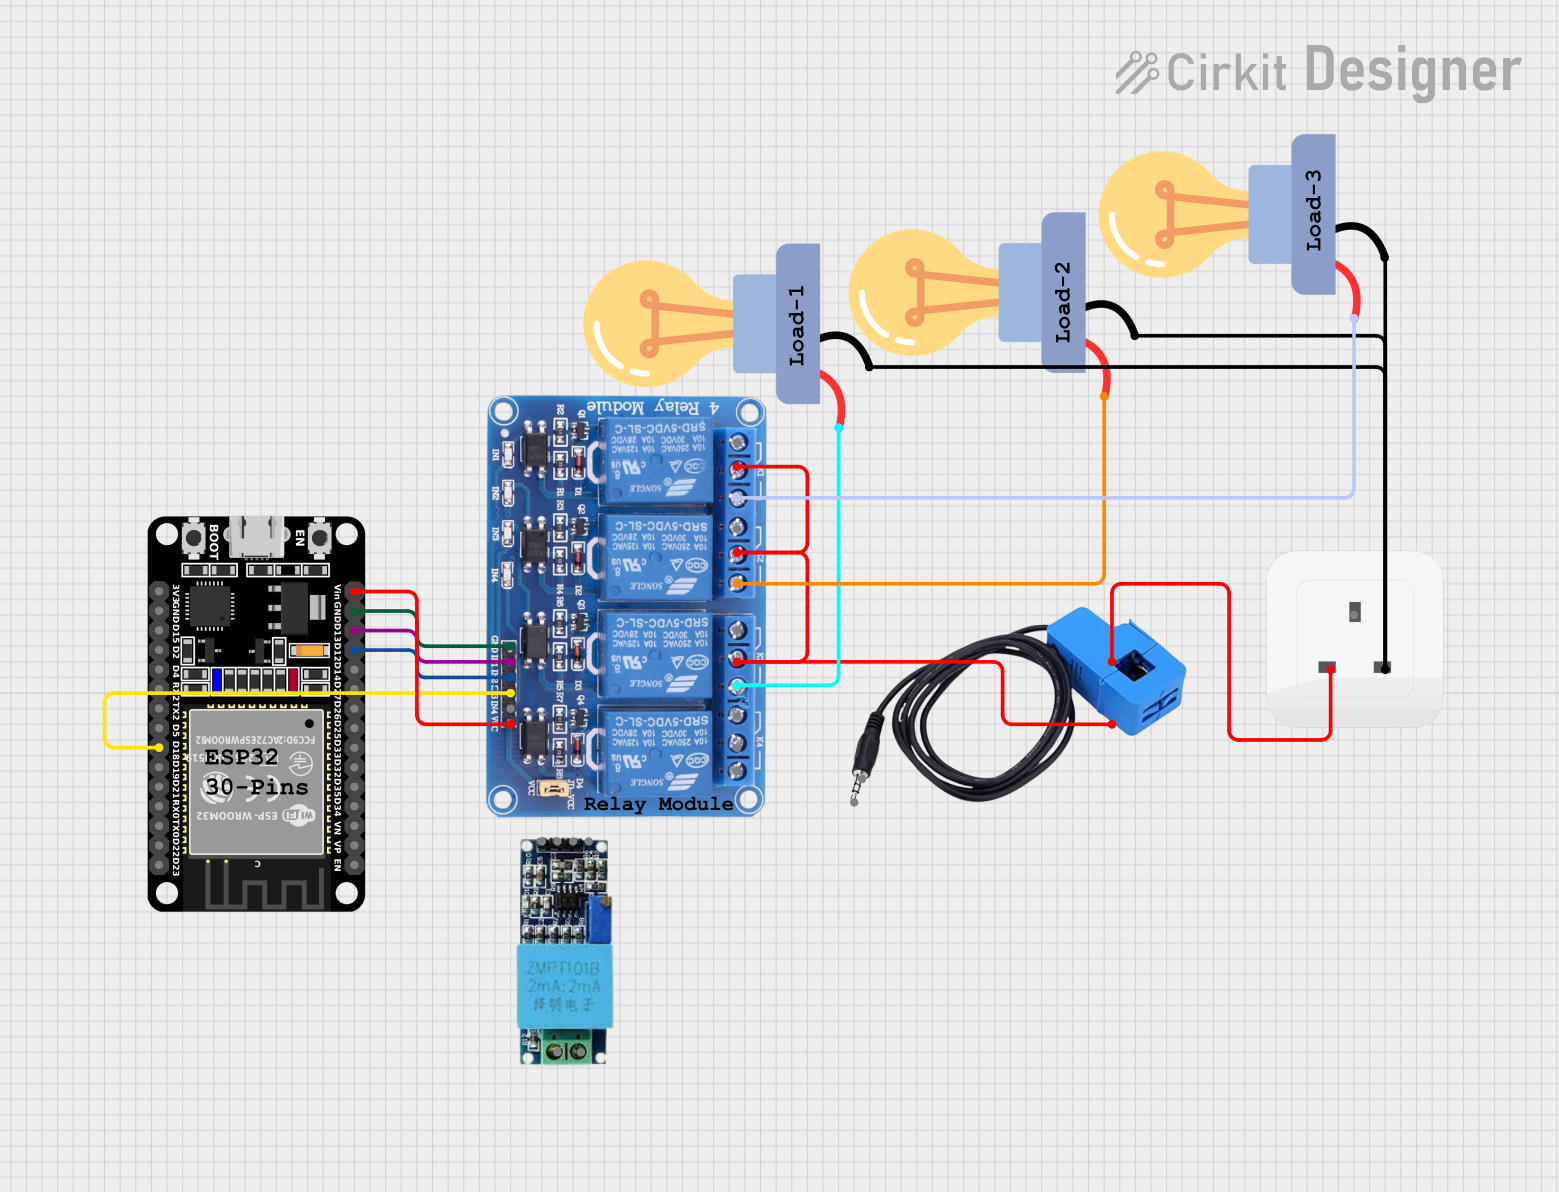
Explore Projects Built with SOCKET
Common Applications and Use Cases
- Power Distribution: Sockets are used to connect power plugs to supply electricity to devices.
- Integrated Circuits (ICs): IC sockets allow for easy replacement of chips without soldering.
- Communication Ports: Sockets are used for connecting cables in data transmission systems.
- Prototyping: Breadboard sockets enable quick and temporary connections for testing circuits.
Technical Specifications
Sockets come in various types and configurations depending on their intended use. Below are the general technical specifications for a standard socket:
General Specifications
- Voltage Rating: 5V to 250V (depending on the type of socket)
- Current Rating: 1A to 15A
- Material: High-grade plastic or ceramic for insulation, with metal contacts (e.g., brass or copper)
- Operating Temperature: -40°C to 85°C
- Durability: Rated for 10,000+ insertion/removal cycles
Pin Configuration and Descriptions
The pin configuration of a socket depends on its type. Below is an example of a DIP (Dual Inline Package) IC Socket:
| Pin Number | Description |
|---|---|
| 1 | IC Pin 1 connection |
| 2 | IC Pin 2 connection |
| ... | ... |
| N | IC Pin N connection |
For a power socket, the pin configuration is as follows:
| Pin Name | Description |
|---|---|
| Line (L) | Live wire connection |
| Neutral (N) | Neutral wire connection |
| Ground (G) | Ground wire connection |
Usage Instructions
How to Use the Component in a Circuit
- Select the Appropriate Socket: Choose a socket that matches the voltage, current, and pin configuration requirements of your application.
- Mount the Socket: For PCB-mounted sockets, solder the pins to the circuit board. For panel-mounted sockets, secure the socket to the panel using screws or clips.
- Insert the Plug or Component: Align the plug or component with the socket and gently insert it until it is fully seated.
- Test the Connection: Verify that the connection is secure and that the circuit functions as expected.
Important Considerations and Best Practices
- Match Ratings: Ensure the socket's voltage and current ratings meet or exceed the requirements of your application.
- Avoid Overheating: Do not exceed the socket's power rating to prevent overheating or damage.
- Secure Connections: Ensure that the plug or component is firmly seated in the socket to avoid loose connections.
- Use Proper Tools: For IC sockets, use an IC extractor tool to avoid damaging the socket or the IC during removal.
- Protect Against Moisture: Use sockets with appropriate IP ratings in environments exposed to moisture or dust.
Example: Using a Socket with an Arduino UNO
If you are using a socket to connect an external sensor or module to an Arduino UNO, follow these steps:
- Insert the sensor or module into the socket.
- Connect the socket's pins to the Arduino UNO as per the sensor/module's pinout.
- Upload the following sample code to test the connection:
// Example code to read data from a sensor connected via a socket
const int sensorPin = A0; // Define the analog pin connected to the socket

void setup() {
  Serial.begin(9600); // Initialize serial communication
  pinMode(sensorPin, INPUT); // Set the sensor pin as input
}

void loop() {
  int sensorValue = analogRead(sensorPin); // Read the sensor value
  Serial.print("Sensor Value: ");
  Serial.println(sensorValue); // Print the sensor value to the Serial Monitor
  delay(1000); // Wait for 1 second before reading again
}
Troubleshooting and FAQs
Common Issues Users Might Face
Loose Connections: The plug or component may not be securely seated in the socket.
- Solution: Ensure the plug or component is fully inserted and aligned with the socket.
Overheating: The socket becomes hot during operation.
- Solution: Check that the current and voltage ratings of the socket are not being exceeded.
Corrosion or Dirt: The socket's contacts may become corroded or dirty over time.
- Solution: Clean the contacts with a contact cleaner or replace the socket if necessary.
Intermittent Connections: The circuit works intermittently due to poor contact.
- Solution: Inspect the socket for bent or damaged pins and replace if needed.
FAQs
Q: Can I use a socket for high-frequency signals?
A: Yes, but ensure the socket is designed for high-frequency applications to minimize signal loss or interference.
Q: How do I choose the right socket for my IC?
A: Match the socket's pin count, pitch, and type (e.g., DIP, SIP) to the IC's specifications.
Q: Can I reuse a socket after removing a component?
A: Yes, sockets are designed for multiple insertion/removal cycles, but inspect for wear or damage before reuse.
Q: Are sockets waterproof?
A: Not all sockets are waterproof. Use sockets with appropriate IP ratings for outdoor or wet environments.